You signed in with another tab or window. Reload to refresh your session.You signed out in another tab or window. Reload to refresh your session.You switched accounts on another tab or window. Reload to refresh your session.Dismiss alert
Checking for`nodenv'in PATH: /usr/local/bin/nodenv
Checking fornodenv shimsin PATH: OK
Checking `nodenv install' support: /usr/local/bin/nodenv-install (node-build 3.0.22-4-g49c4cb9)Counting installed Node versions: none There aren't any Node versions installed under `~/.nodenv/versions'. You can install Node versions like so: nodenv install 2.2.4Auditing installed plugins: OK
Step 4: Install Node.js inside the React Workshop folder (myproject)
Now you're ready to install specific Node.js versions!
Insidemyproject folder, install Node.js version 14.5.0:
$ cd myproject/
$ nodenv install 14.5.0
$ nodenv local 14.5.0
Step 2: Download the nvm-setup.zip file for the most recent release.
Step 3: Once downloaded, open the zip file, then open the nvm-setup.exe file.
Step 4: The Setup-NVM-for-Windows installation wizard will walk you through the setup steps, including choosing the directory where both nvm-windows and Node.js will be installed.
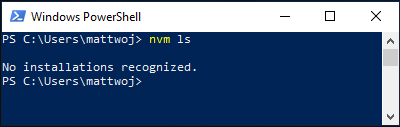
Step 5: After the installation is complete, open PowerShell & enter nvm ls
nvm ls lists out installed Node versions (should be none at this point)
Step 6: Install Node.js inside the React Workshop folder (myproject)
Now you're ready to install specific Node.js versions!
Inside myproject folder, install Node.js version 14.5.0:
$ cd .\Documents\myproject
$ nvm install 14.5.0
$ nvm use 14.5.0
When getting data from an API call, we usually need to use promises, right?
So let's try that in our frontend React App.
Sample Code for index.js
Here is an example that tries to output an API response in the frontend React App.
It calls Random User Generator API, waits for a response, and then creates a React element using the JSON data.
Let's see what happens!
importReactfrom'react';importReactDOMfrom'react-dom';// Call Random User Generator APIconstrestEndpoint='https://randomuser.me/api/';// Wait for response & tries to output it to ReactconstcallRestApi=async()=>{constresponse=awaitfetch(restEndpoint);constjsonResponse=awaitresponse.json();console.log(jsonResponse);// React.createElement( type, [properties], [...children]);returnReact.createElement('h1',null,JSON.stringify(jsonResponse));};ReactDOM.render(callRestApi(),document.querySelector('#root'));
Result - Error
The callRestApi() async function returns a promise object immediately as it waits for the Random User Generator API's response.
React doesn't "wait" for the REST API result, so it tries to create and render the element with the promise object immediately and failing.
It attempts to display the Random User Generator API response into a React element.
However, the following error will display instead:
Error: Objects are not valid as a React child (found: [object Promise]). If you meant to render a collection of children, use an array instead.
We will use useState & useEffect Hooks to handle the REST API calls in React.
What is useState & useEffect Hooks
useState hooks allow us to use special "state" variables that we can utilize to render into the React UI.
useEffect hooks allow us to run functions after the rendering has finished. We'll use this to run a REST API call and update the state variable, which will then cause React to re-render the UI.
// Get started by importing the React JavaScript library & HooksimportReact,{useState,useEffect}from'react';importReactDOMfrom'react-dom';// Call Random User Generator APIconstrestEndpoint="https://randomuser.me/api/";// Wait for response & return the API responseconstcallRestApi=async()=>{constresponse=awaitfetch(restEndpoint);constjsonResponse=awaitresponse.json();console.log(jsonResponse);returnJSON.stringify(jsonResponse);};constRenderResult=()=>{// Establish useState by giving it our initial state// const [state, setState] = useState(initialState);const[apiResponse,setApiResponse]=useState("*** now loading ***");// useEffect takes 2 arguments:// 1st = a function, called effect, that is executed when the React Component is rendered// 2nd = Array of dependencies to control when effect is to be executed after mounting the component; Empty array = only invoke effect onceuseEffect(()=>{callRestApi().then(result=>setApiResponse(result));},[]);return(// JSX includes html-like syntax<div><h1>React App</h1><p>{apiResponse}</p></div>);};// Where the magic happens!ReactDOM.render(<RenderResult/>,document.getElementById('root'));
Result - Success
Expected output:
Outputs the Random User API Call to the frontend React App.
Now that we are outputting Random User Generator API's response onto our frontend React App let's output more useful results!
Using Kintone's low-code Database platform, we can easily create & host a database that is accessible with REST APIs.
But can we just swap the request endpoint with Kintone's?
Sample Code for index.js
We will try a GET request to Kintone from our frontend React App.
If you want to run this code, be sure to input your Kintone specifications for subdomain, appID, and apiToken.
importReact,{useState,useEffect}from'react';importReactDOMfrom'react-dom';// Kintone API Setupconstsubdomain="";//Enter your Kintone Subdomain (ex: devevents)constappID="";//Enter your App's ID number (ex: 1)constapiToken="";//Enter your App's API TokenconstgetKintoneData=async()=>{constrequestEndpoint=`https://${subdomain}.kintone.com/k/v1/records.json?app=${appID}`;constfetchOptions={method: 'GET',headers: {'X-Cybozu-API-Token': apiToken}};constresponse=awaitfetch(requestEndpoint,fetchOptions);constjsonResponse=awaitresponse.json();console.log(jsonResponse);returnJSON.stringify(jsonResponse);};constRenderResult=()=>{const[apiResponse,setApiResponse]=useState("*** now loading ***");useEffect(()=>{getKintoneData().then(result=>setApiResponse(result));},[]);return(<div><h1>React App</h1><p>{apiResponse}</p></div>);};ReactDOM.render(<RenderResult/>,document.getElementById('root'));
Result - CORS Error
Cross-Origin Resource Sharing (CORS) Error occurs since we cannot access the resources that lie on Kintone's domain directly from our domain (frontend React App).
Express is a backend web application framework for Node.
We will use Express to create custom endpoints that our frontend React App can make calls to. When we make requests to these custom endpoints, the Express server will make REST API calls to our desired 3rd party service endpoint, receive the response, and then route the response back to our frontend React App.
Installing the Express Server
(1) From your terminal, go to your myproject folder
$ cd .../myproject
(2) Create backend folder
$ mkdir backend
$ cd backend
(3) Create your Express project
$ npm init
Hit enter to skip the questions
(4) Continue to install some dependencies
$ npm install express node-fetch cors
(5) Create a server.js file inside the backend folder
$ touch server.js
Starting the Express Server
(1) Configure the server.js file
(2) From your terminal, go to your backend folder
$ cd .../myproject/backend
(3) Start the Express Server
$ node server.js
Debugging
No response when starting the Express server?
Make sure you are inside the backend folder when starting the Express server
// Express Server Setupconstexpress=require('express');constcors=require('cors');constfetch=require('node-fetch');constPORT=5000;constapp=express();// Parse incoming requests with JSON payloadsapp.use(express.json());// Set Cross-Origin Resource Sharing (CORS) to frontend React Appapp.use(cors());constcorsOptions={origin: "http://localhost:3000"};// Kintone API Setupconstsubdomain="";//Enter your Kintone Subdomain (ex: devevents)constappID="";//Enter your App's ID number (ex: 1)constapiToken="";//Enter your App's API Token (ex: cJrAD9...)// Append a Query Parameters to the Request Endpointconstparameters="query=order by recordID asc";constmultipleRecordsEndpoint=`https://${subdomain}.kintone.com/k/v1/records.json?app=${appID}&${parameters}`// This runs if a GET request calls for localhost:5000/getDataapp.get('/getData',cors(corsOptions),async(req,res)=>{constfetchOptions={method: 'GET',headers: {'X-Cybozu-API-Token': apiToken}}constresponse=awaitfetch(multipleRecordsEndpoint,fetchOptions);constjsonResponse=awaitresponse.json();res.json(jsonResponse);});app.listen(PORT,()=>{console.log(`Example app listening at http://localhost:${PORT}`);});
frontend - index.js
Now that we got our Express server setup, time for configuring the frontend React App!
Expected Result:
Data from the Kintone App will be outputted as bullet points at http://localhost:3000/.
importReact,{useState,useEffect}from'react';importReactDOMfrom'react-dom';// Declare the GET endpoint defined in our Express serverconstgetRecordsEndpoint="http://localhost:5000/getData";constcallRestApi=async()=>{constresponse=awaitfetch(getRecordsEndpoint);constjsonResponse=awaitresponse.json();console.log(jsonResponse);// return JSON.stringify(jsonResponse);// Create an array of lists by looping through Kintone's responded array//record.title.value = value of the Title field//record.author.value = value of the author field// In React, assign a unique ID to each created list// Use record.recordID.value for keyconstarrayOfLists=jsonResponse.records.map(record=><likey={record.recordID.value}><b>{record.title.value}</b> written by {record.author.value}</li>)returnarrayOfLists;};functionRenderResult(){const[apiResponse,setApiResponse]=useState("*** now loading ***");useEffect(()=>{callRestApi().then(result=>setApiResponse(result));},[]);return(<div><h1>React App</h1><ul>{apiResponse}</ul></div>);};ReactDOM.render(<RenderResult/>,document.querySelector('#root'));
Result - Kintone Database App's data displayed as bullet points
Here is what it looks like when displaying our Manga DB App.
It lists out our favorite Japanese comics, ordered by recordID.
Now that we can retrieve & display the data from the Kintone Database App let's submit new data via our frontend React App!
We will do this by adding a POST request route on the Express server used when the user inputs via the form on the frontend React App.
To implement the POST request, we will be editing the following two files:
Note
Be sure to restart your Express server when updating server.js.
Control + C to end the Express server
node server.js to start it up again
backend - server.js
We will add another endpoint to make our POST requests.
Expected result:
When localhost:5000/getData endpoint is called, a GET request is sent to Kintone for data retrieval.
When localhost:5000/postData endpoint is called, a POST request is sent to Kintone to update the database with the submitted entry.
File Location: .../myproject/backend
// Express Server Setupconstexpress=require('express');constcors=require('cors');constfetch=require('node-fetch');constPORT=5000;constapp=express();// Parse incoming requests with JSON payloadsapp.use(express.json());// Set Cross-Origin Resource Sharing (CORS) to frontend React Appapp.use(cors());constcorsOptions={origin: "http://localhost:3000"};// Kintone API Setupconstsubdomain="";//Enter your Kintone Subdomain (ex: devevents)constappID="";//Enter your App's ID number (ex: 1)constapiToken="";//Enter your App's API Token (ex: cJrAD9...)// Append a Query Parameters to the Request Endpointconstparameters="query=order by recordID asc";// Call Kintone's GET Records APIconstmultipleRecordsEndpoint=`https://${subdomain}.kintone.com/k/v1/records.json?app=${appID}&${parameters}`// Call Kintone's GET Record APIconstsingleRecordEndpoint=`https://${subdomain}.kintone.com/k/v1/record.json?app=${appID}&${parameters}`;// This runs if a GET request calls for localhost:5000/getDataapp.get('/getData',cors(corsOptions),async(req,res)=>{constfetchOptions={method: 'GET',headers: {'X-Cybozu-API-Token': apiToken}}// const response = await fetch(requestEndpoint, fetchOptions);constresponse=awaitfetch(multipleRecordsEndpoint,fetchOptions);constjsonResponse=awaitresponse.json();res.json(jsonResponse);});// Add a New Route for a POST request using singleRecordEndpoint// This runs if a POST request calls for localhost:5000/postDataapp.post('/postData',cors(corsOptions),async(req,res)=>{constrequestBody={"app": appID,"record": {"title": {"value": req.body.title},"author": {"value": req.body.author}}};constoptions={method: 'POST',headers: {'X-Cybozu-API-Token': apiToken,'Content-Type': 'application/json',},body: JSON.stringify(requestBody)}constresponse=awaitfetch(singleRecordEndpoint,options);constjsonResponse=awaitresponse.json();res.json(jsonResponse);});app.listen(PORT,()=>{console.log(`Example app listening at http://localhost:${PORT}`);});
frontend - index.js
We will add a form for user input and function to make a POST request on our newly defined Express server's endpoint.
Expected result:
Display Kintone app data as a clean list
Form at the bottom to add user input
When an input is submitted, a POST request is sent out & the list is updated
importReact,{useState,useEffect}from'react';importReactDOMfrom'react-dom';// Declare the GET & POST endpoints defined in our Express serverconstgetRecordsEndpoint="http://localhost:5000/getData";constaddRecordEndpoint="http://localhost:5000/postData";constcallRestApi=async()=>{constresponse=awaitfetch(getRecordsEndpoint);//Update endpointconstjsonResponse=awaitresponse.json();console.log(jsonResponse);constarrayOfLists=jsonResponse.records.map(record=><likey={record.recordID.value}><b>{record.title.value}</b> written by {record.author.value}</li>)returnarrayOfLists;};// Make REST API Calls & take in the values stored in the state variables related to the input fieldsconstAddNewRecord=async(Title,Author)=>{constRecordBodyParameters={'title': Title,'author': Author}constoptions={method: 'POST',headers: {'Content-Type': 'application/json'},body: JSON.stringify(RecordBodyParameters)}constresponse=awaitfetch(addRecordEndpoint,options);constjsonResponse=awaitresponse.json();console.log(JSON.stringify(jsonResponse));returnjsonResponse;};functionRenderResult(){const[apiResponse,setApiResponse]=useState("*** now loading ***");// Create States for the Input Fieldsconst[titleValue,setTitleValue]=useState("");const[authorValue,setAuthorValue]=useState("");const[successCounter,setSuccessCounter]=useState(0);useEffect(()=>{callRestApi().then(result=>setApiResponse(result));},[successCounter]);// Define the onChange functionsfunctionHandleTitleChange(event){setTitleValue(event.target.value);}functionHandleAuthorChange(event){setAuthorValue(event.target.value);}// Define the Button Click functionfunctionButtonClick(){setApiResponse(apiResponse.concat(<likey="0">*** now loading ***</li>));AddNewRecord(titleValue,authorValue).then(response=>{setSuccessCounter(successCounter+1);});}// Append a form for user inputreturn(<div><h1>React App</h1><ul>{apiResponse}</ul><form><div><labelhtmlFor="title-input">Title:</label><inputtype="text"value={titleValue}id="title-input"onChange={HandleTitleChange}/></div><div><labelhtmlFor="author-input">Author:</label><inputtype="text"value={authorValue}id="author-input"onChange={HandleAuthorChange}/></div><buttontype="button"onClick={ButtonClick}>Add data</button></form></div>);};ReactDOM.render(<RenderResult/>,document.querySelector('#root'));
Result - Kintone Database App's data displayed as bullet points with a form to submit a new entry
 button on the upper right corner for all the code & slides you need for our workshop!
 https://youtu.be/4Kw-i_rX3tY
 https://youtu.be/Gzz8SbTuoFg