


Here's my attempt at putting together a guide for setting up your OpenMW build environment, starting with a clean install of Windows and ending with working Windows builds. I'm doing the guide for both 32 and 64-bit environments at the same time, since I'm doing builds for the two of them. You can choose to only do 32-bit or 64-bit yourself, just skip the build steps for the other architecture.
Note that though this guide is done on Windows 10 with Visual Studio 2013, the same steps will work on earlier Windows and Visual Studio versions.
Also note that I'm prioritizing the use of precompiled versions of libraries, to cut down on the time spent actually setting up the dependencies.
Building OpenMW for windows at the moment is only truly tested through Visual Studio, this guide will not help you if you want to set up a build using MinGW/Cygwin.
Luckily Micrsoft has released Visual Studio 2013 Community Edition, which is more than capable of building OpenMW. So if you don't have a Visual Studio installed, you can download and install the community edition.
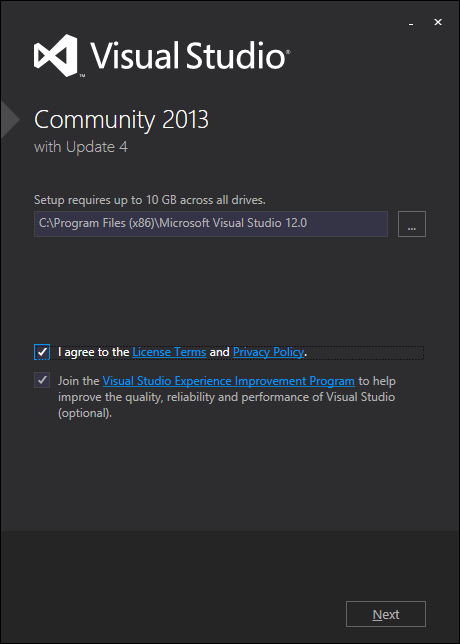

Note that the Visual Studio install will take a long time, and that because of the way the installer system in Windows works you won't be able to install any of the other software until it's done. Go and watch a movie, play some games, or sacrifice a virgin. Something to pass the time.
Also note that the community version of Visual Studio will need to be registered if you want to use it for longer than a month, this is still free to do though and just requires you to give an email and a password. Check under HELP, Register Product if you want to do this before the 30 days are up.
I'm going to say a few words about the NuGet based package manager Chocolatey here, it's a simple way of installing most of these tools without bothering with downloads and setups. Installing Chocolatey itself is done through a single command you can copy and paste into an Administrator Command Prompt.
Because of how much this tool helps, I'm going to add command snippets to all the following tools for how to install them through Chocolatey.
For instance, to install Chocolatey through itself. (Chocolatey: cinst chocolatey)
I'm also going to mention 7-zip, which is an open-source archiver for Windows that handles most of the common formats. (Chocolatey: cinst 7zip.install)
To set up the Ogre and OpenMW build environments, you're going to need CMake. CMake is what will generate the Visual Studio solution files for us.
You can get CMake from here, you want the latest stable release. (Chocolatey: cinst cmake)
Unless you're only going to be building code snapshots you will most likely also want to install some Git client. There are several choices here.
- You have GitHub for Windows which is a very simple graphical client that lets you clone and work with GitHub repos on Windows. This one is recommended for users who are new to Git.
(Chocolatey:
cinst githubforwindows) - There's also MSYSGit, which is an msys port of the git toolkit. Giving you the full POSIX experience through the bash-like Git shell. Good for experienced Git users.
(Chocolatey:
cinst git.install) - You could also use TortoiseGit, which is a simple client that integrates into the Windows right-click menu. Good if you're familiar with the Tortoise family of tools.
(Chocolatey:
cinst tortoisegit)
Note that OpenMW uses a direct git executable to figure out its version, if you want a proper version number you'll either have to use MSYSGit or GitHub for Windows. GitHub for Windows stores the git executable under *C:\Users<username>\AppData\Local\GitHub\PortableGit_\bin* though, so you will have to locate it manually for CMake in that case.
I'm going to give some quick examples of how to clone the OpenMW repo with all three of them here, if you want more detailed Git usage help then look through the manual for the software you chose:
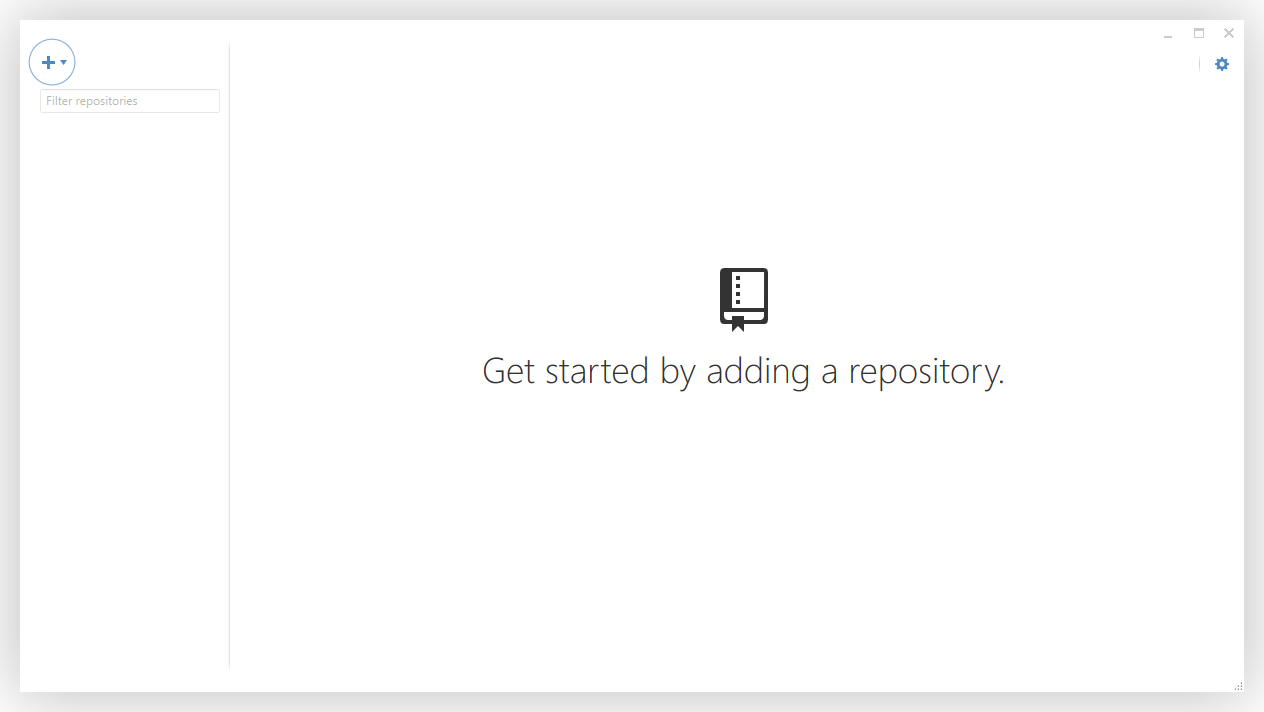
On first launch it will ask you if you want to log into your GitHub account, you can choose to skip this step though. You should probably setup your git credentials though, if you're planning on doing any development on OpenMW in the future. You can skip the local repository search when it reaches that step.
You should now have a UI that looks something like this:
You can clone OpenMW through the "Clone in Desktop" button on the repository page.
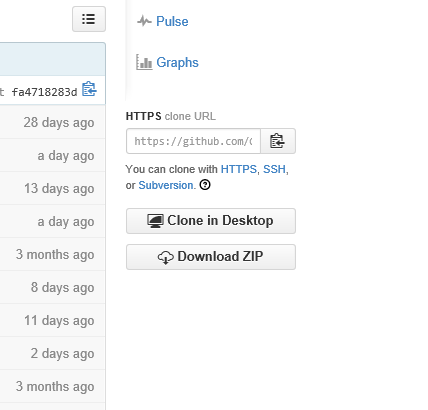
GitHub for Windows should now ask you where you want to clone the Repo, so choose the folder where you want the code to be stored.
Find your way to the folder where you want to clone OpenMW, you can find a 'Git Bash Here' in the right-click menu.
With the shell open and in the correct folder, use git clone git://github.com/OpenMW/openmw.git to clone the OpenMW repo.
The MSYSGit manual can be found through git --help
Browse to the folder where you want to clone OpenMW, right click and use the Git Clone option TortoiseGit will give you in the right-click menu.
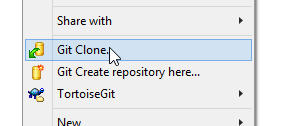
You want to clone the address git://github.com/OpenMW/openmw.git.
Now that you have a clone of the OpenMW repository around, you can also check to make sure you have all the code dependencies you're going to need. Note that since this guide is written for Visual Studio 2013 I'm going to be linking to the VS2013 versions of the dependencies, if you're using another version of Visual Studio then you of course want to use the dependency version that matches your Visual Studio install.
Boost is an extension to the C++ standard libraries, and is used by several of OpenMWs dependencies as well as OpenMW itself. You will most likely want to start by setting up Boost.
First off, you will want to grab the Boost libraries from the precompiled binary page. As of the writing of this guide, 1.57.0 is the latest version.
You will want the boost_-msvc-12.0-32.exe for 32-bit builds and boost_-msvc-12.0-64.exe for 64-bits, if you're doing both you can install them to the same directory without conflicts.
Ogre is the rendering engine that OpenMW uses, and it's therefore likely both the most important as well as the most complicated part of the dependencies.
As of right now there's no precompiled Ogre SDK for Visual Studio 2013, so you will need to compile it yourself. Luckily there are people who have pieced together all the Ogre dependencies into a nice little package. I'm not going to go into how you use Mercurial to check out the latest versions of Ogre or its precompiled dependencies, instead I'm going to give you links to source snapshots that you can download directly.
To start off with, you're going to need the Ogre sourcecode itself. Here's a direct link to the v1.9 branch in .zip form, which you can download and extract into where you want Ogre to live.
You should also download the Ogre dependencies by cabalistic. One possible place to put the dependencies would be <Path\To\Ogre Source>\DepBuild. (Note that if you name the subfolder Dependencies then it might conflict with the Ogre CMake script)
When you have both the Ogre source and the dependencies, you get to start compiling things.
First off, launch the newly installed CMake GUI (if you installed it through Chocolatey, you might have to run it with cmake-gui since it might've not added start-menu shortcuts).
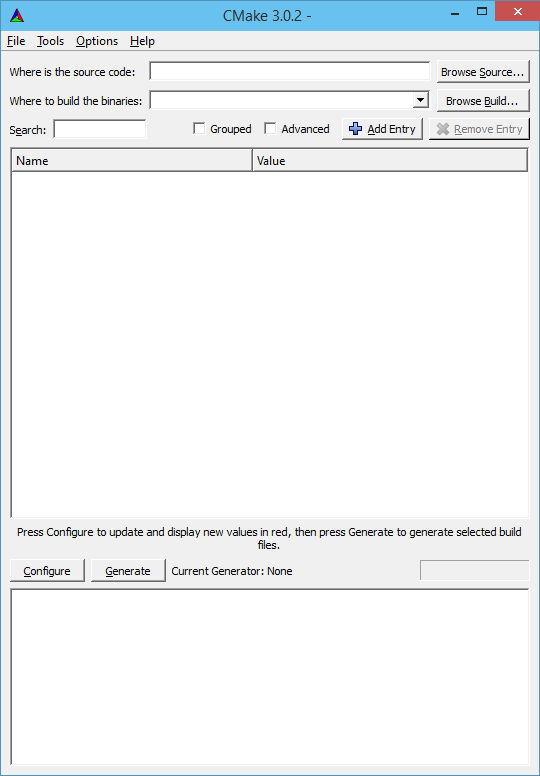
You want to specify the path to the dependencies as the source directory, and then where you want the solution to go. I recommend putting this outside of the source itself, especially if you're going to be doing both 32 and 64-bit builds. I like using the subfolders Build and Build_64 myself.
Let's start with a 32-bit build, with the source code and build paths filled in you can then press 'Configure'. Answer Yes if it asks to create the Build directory. In the generator list you want to find Visual Studio 12 2013 (Visual Studio 12 2013 Win64 if you're doing a 64-bit build), you also want it to use the default native compilers. When you click Finish then it should start configuring the dependencies for building.
When the configuration is complete you can click Generate twice to generate the actual Visual Studio 2013 solution file that you'll use to build it, look in the new - shiny - 'Build' folder you just generated. Open the OGREDEPS solution you'll find in there and then build first the ALL_BUILD project, and once that's done you want to build the INSTALL project. Build these projects for both Debug and Release.
After building the dependencies you can start actually compiling Ogre itself, this might take around 45 minutes per build (and you're going to be building Debug and Release for your chosen architectures) so you might want to have some time wasting lined up. Browser games, movies, virgins to sacrifice, etc.
When you build Ogre you start again with the CMake GUI, though this time you want to provide the main Ogre dir as the source directory. Putting your builds in a separate directory is also a very good idea, I'm going to use Build and Build_64 again.
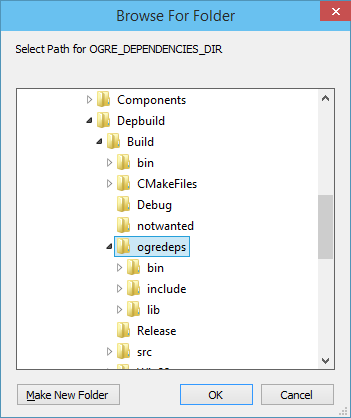
After you've Configured Ogre you'll note that it's giving you an error with a large list of packages it couldn't locate, this is okay since we'll be giving it the correct dependency folder in a moment. In the main list scroll down until you find OGRE_DEPENDENCIES_DIR, you want to set that value to the ogredeps folder you built.
After doing that it should now be able to configure properly, but we're not ready to start generating quite yet. First we have to set up Ogre in a way that will work with OpenMW and the GUI toolkit MyGUI.
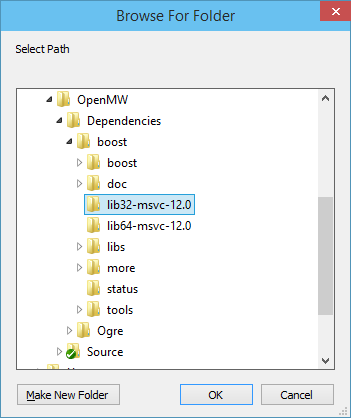
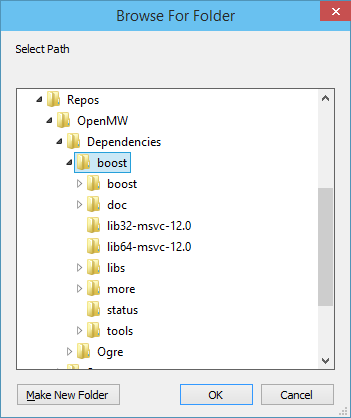
Start by finding the OGRE_BUILD_PLUGIN_CG option and making sure it's checked. Then, click the Add Entry button and enter the name BOOST_ROOT. This value is of the type PATH, and for the value you should browse to where you installed the Boost binaries.
You should add another PATH entry, this time naming it BOOST_LIBRARYDIR and choosing the lib folder for the current architecture.
After adding BOOST_ROOT and BOOST_LIBRARYDIR you can configure Ogre again, it should add some more options that you can leave on their default values.
If you want to trim down the build now, you can disable the following options which aren't used for OpenMW;
- OGRE_BUILD_COMPONENT_PAGING
- OGRE_BUILD_COMPONENT_PROPERTY
- OGRE_BUILD_COMPONENT_RTSHADERSYSTEM
- OGRE_BUILD_COMPONENT_TERRAIN
- OGRE_BUILD_COMPONENT_VOLUME
- OGRE_BUILD_PLUGIN_BSP
- OGRE_BUILD_PLUGIN_OCTREE
- OGRE_BUILD_PLUGIN_PCZ
- OGRE_BUILD_RENDERSYSTEM_D3D11
- OGRE_BUILD_SAMPLES
- OGRE_BUILD_TOOLS
If you want to build the D3D9 render system you should get the DirectX SDK, with that installed CMake should find and give you the option to build the D3D9 renderer automatically.
Here's an example of what the CMake options for my build looks like;

With these options set you're now at the stage where you can generate and build Ogre. Note that this will take a while, like earlier stated.
You want to build the ALL_BUILD and INSTALL projects for both Debug and Release.
A simple batch script I'm using to build Ogre looks like this:
@echo off

set MSB="C:\Program Files (x86)\MSBuild\12.0\Bin"

cd C:\Repos\OpenMW\Dependencies\Ogre\Build
%MSB%\msbuild ALL_BUILD.vcxproj /t:Build /p:Configuration=Debug
%MSB%\msbuild INSTALL.vcxproj /t:Build /p:Configuration=Debug
%MSB%\msbuild ALL_BUILD.vcxproj /t:Build /p:Configuration=Release
%MSB%\msbuild INSTALL.vcxproj /t:Build /p:Configuration=Release
cd ..\Build_64
%MSB%\msbuild ALL_BUILD.vcxproj /t:Build /p:Configuration=Debug
%MSB%\msbuild INSTALL.vcxproj /t:Build /p:Configuration=Debug
%MSB%\msbuild ALL_BUILD.vcxproj /t:Build /p:Configuration=Release
%MSB%\msbuild INSTALL.vcxproj /t:Build /p:Configuration=Release
echo.
echo Build completed, continue with the dev env setup.

pauseNow that we're on a roll with compiling things, we might as well do MyGUI.
You can find the MyGUI repository on GitHub. If 3.2.2 or later has been released then grab that release, otherwise clone the repo just like you did OpenMW. (The reason we want 3.2.2 or later is for the build fix with Ogre using Boost, because without Boost then Ogre would be missing necessary features for OpenMW)
Once you have the MyGUI sources you'll again use CMake to set up builds for the architecture you want. Where I'll be using Build and Build_64 again.
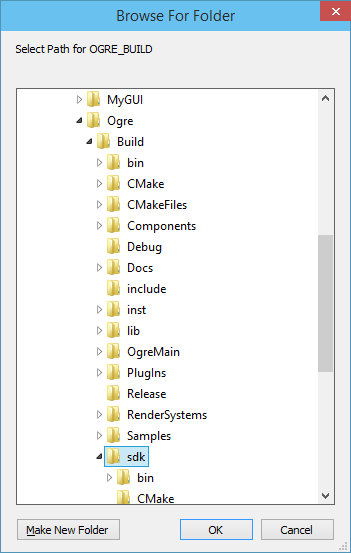
You'll get a configuration failure, but that's okay since we need to specify the Ogre build we're using. Take the OGRE_BUILD and OGRE_SOURCE_DIR entries and set them both to the sdk folder you'll find in the Ogre build folder.
Now MyGUI will find Ogre on the next configure, but there are still pieces missing that keep it from building fully. You'll need to add entries for BOOST_ROOT and BOOST_LIBRARYDIR here just like in the Ogre build environment.
Now you also have to locate Freetype for MyGUI, this is a bit more advanced so make sure to check the Advanced checkbox. Lots of more entries will appear now, so type FREETYPE into the Search field.
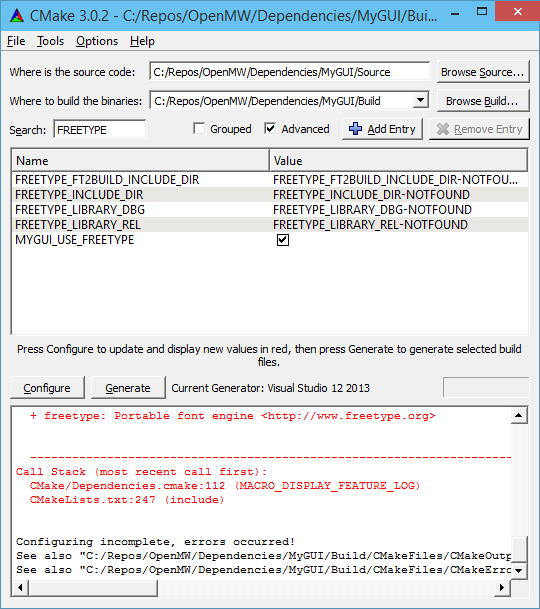
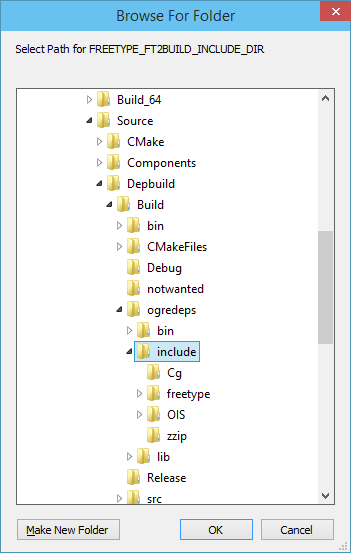
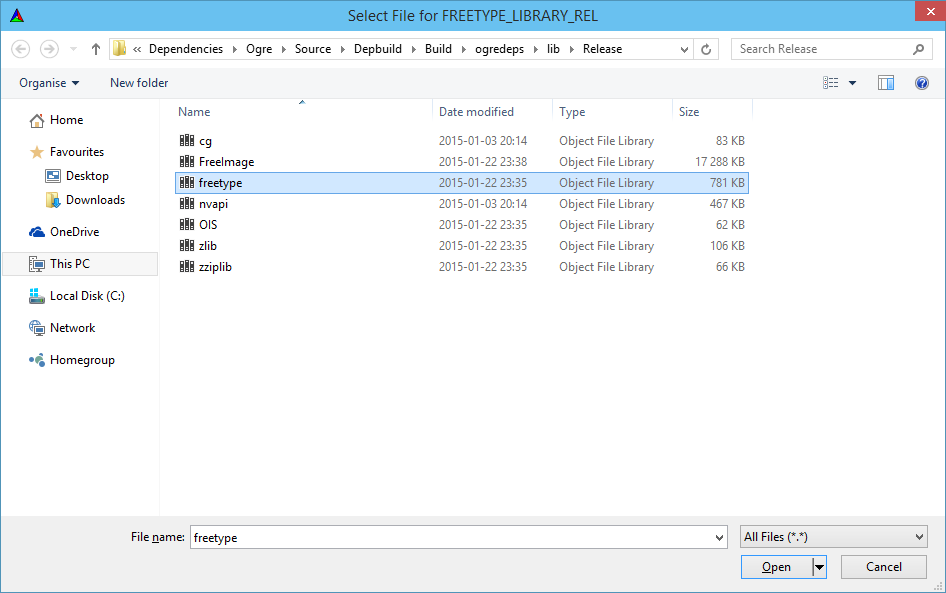
You want to set both the FREETYPE_FT2BUILD_INCLUDE_DIR and FREETYPE_INCLUDE_DIR to the include folder for your ogredeps build, after that you also want to set FREETYPE_LIBRARY_DBG and FREETYPE_LIBRARY_REL to the Freetype libraries that were built as part of the Ogre dependencies.

With all of these values set you should now be able to configure and generate a working MyGUI solution, that you can build. You again want to build both ALL_BUILD and INSTALL.
You can use the same batch file as for building Ogre here too if you modify the paths in it.
Here's the last of the dependencies that we actually have to compile by ourself, so once Bullet's done the rest should go a lot easier.
Bullet has very recently decided to move from their old home on Google Code to a GitHub repo, this means that currently finding the latest Bullet release is a bit convoluted. As of the writing of this guide, the only usable release on the GitHub repo is an alpha release of 2.83 and therefore not really stable enough for what we need. Therefore we're going to grab the 2.82 release from the old Google Code listing.
A direct link to the source file we want is here.
You want to download and unpack this archive too, and then use CMake to set up build directories just like before.
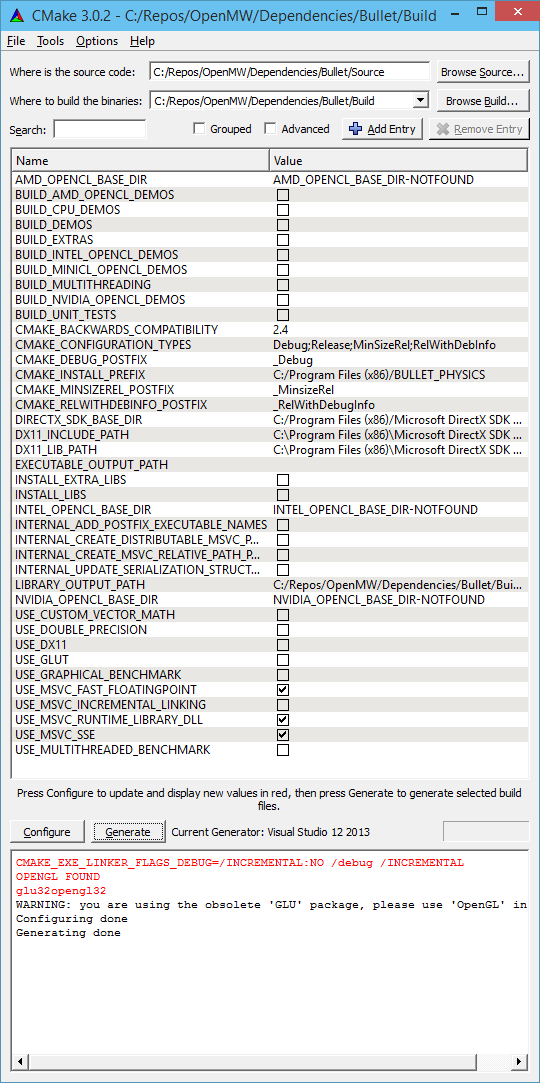
(Note, if the USE_MSVC_SSE doesn't exist for you then you shouldn't worry, it only appears when it's relevant for the build)
For Bullet you only really want to build ALL_BUILD, since the install would lead to file conflicts. You can still use the build batch, just remove - or comment out with REM - the INSTALL.vcxproj build lines from it.
Now we're done with dependencies that have to be compiled by ourselves, so things should progress faster from now on. We're going to want to use Zeranoe's FFmpeg builds.
The page might look rather confusing, so I'll dig out the links to the packages you need to download. But we're going to use the shared and dev packages for our builds, since the static packages only contain the ffmpeg applications and not the development data.
Here's the download links for the 2.5.2 release:
You're going to want both of the packages for the architectures that are being built, in my case I'll be using all four of them.
You'll be extracting the shared and dev archives into the same folder, merging the files they might share. You should end up with a folder that contains at least three folders per architecture; bin, include, and lib.
SDL2 has VC development libraries available, download them from here and unpack them.
OpenAL is a bit of a mess at the moment, but you can get the SDK from here. Just download, unpack, and run the installer.
For Qt, you can download the precompiled binaries Tver-Soft.org has made. You want the 4.8 for Visual Studio 2013 for your architectures, doesn't matter if you choose setup or 7z but I tend to go for the archive myself.
(If you're using the archive, then after you've extracted the archive you'll have to enter the folder and run qtbinpatcher. Otherwise qmake won't know where its corresponding Qt libraries are)
So, we've now reached the point where we can start setting up the OpenMW build itself, this too will be done with CMake in a way not unlike Ogre or MyGUI.
Again start with opening the CMake GUI and configuring, it will fail at first and we've got a lot of things to fix. You can start by unchecking all the parts you don't want to build, like BUILD_BSATOOL or BUILD_ESMTOOL.
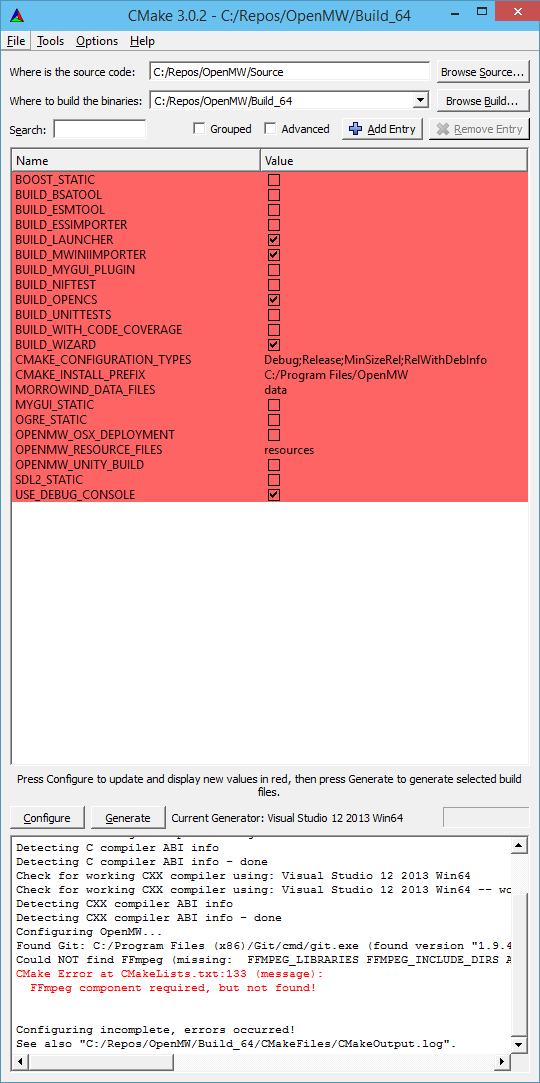
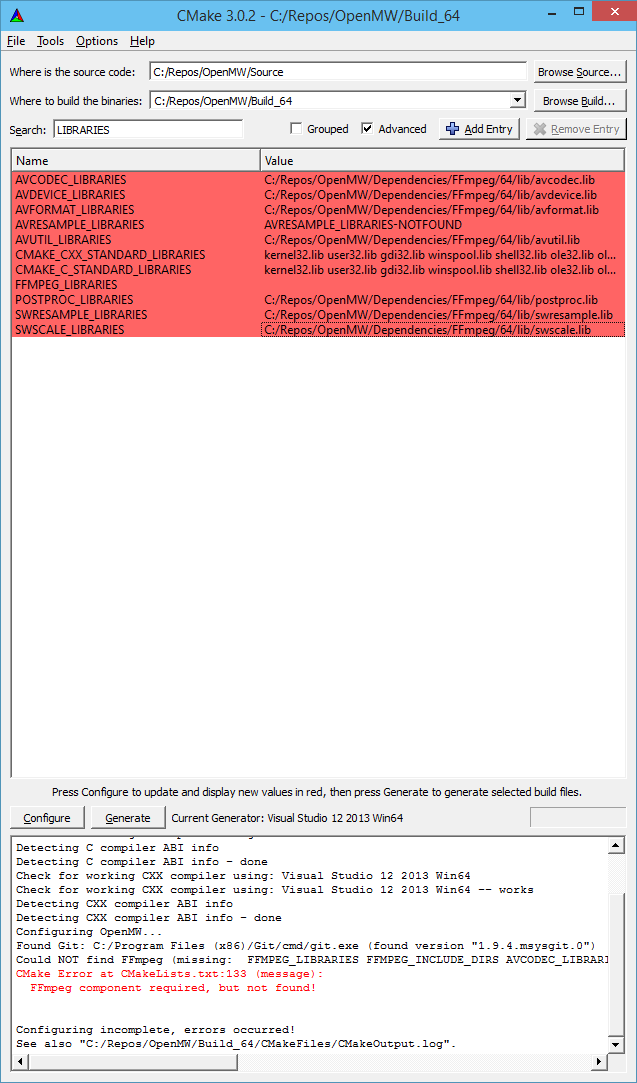
OpenMW is plenty advanced to set up, so check the Advanced box and let's start with specifying FFmpeg paths. FFmpeg is split into several parts each with their own set of properties; AVCODEC, AVDEVICE, AVFORMAT, AVRESAMPLE, POSTPROC, SWRESAMPLE, and SWSCALE.
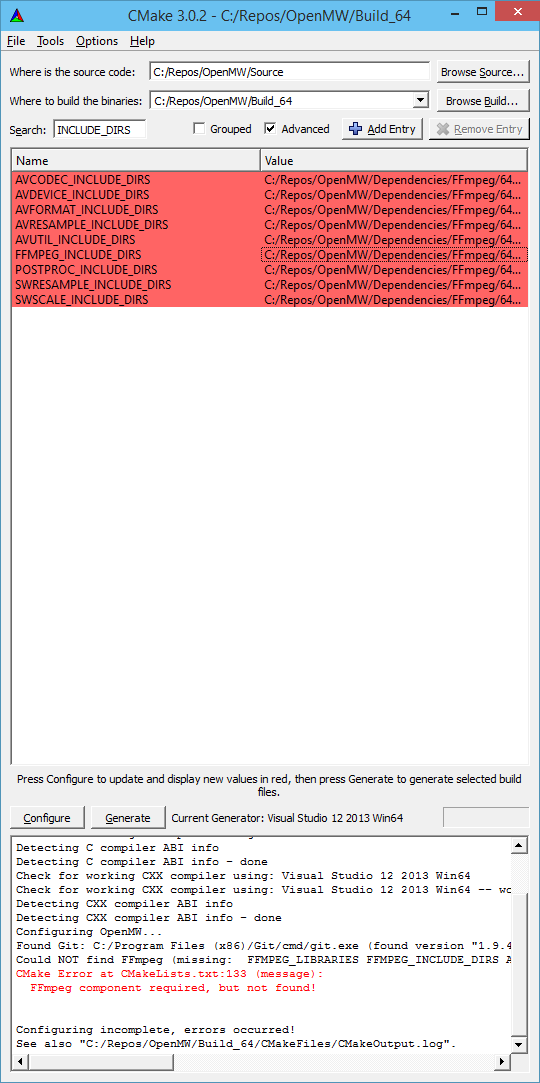
We'll start by setting the include directories, which is a simple task. Write INCLUDE_DIRS in the Search field, and then set all the FFmpeg include dirs to the include folder in the correct architecture version of the FFmpeg package you downloaded earlier.
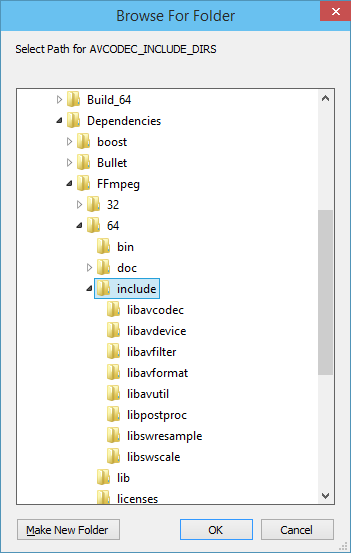
You want to set all the INCLUDE_DIRS entries to that folder, so copy-paste comes in handy now.
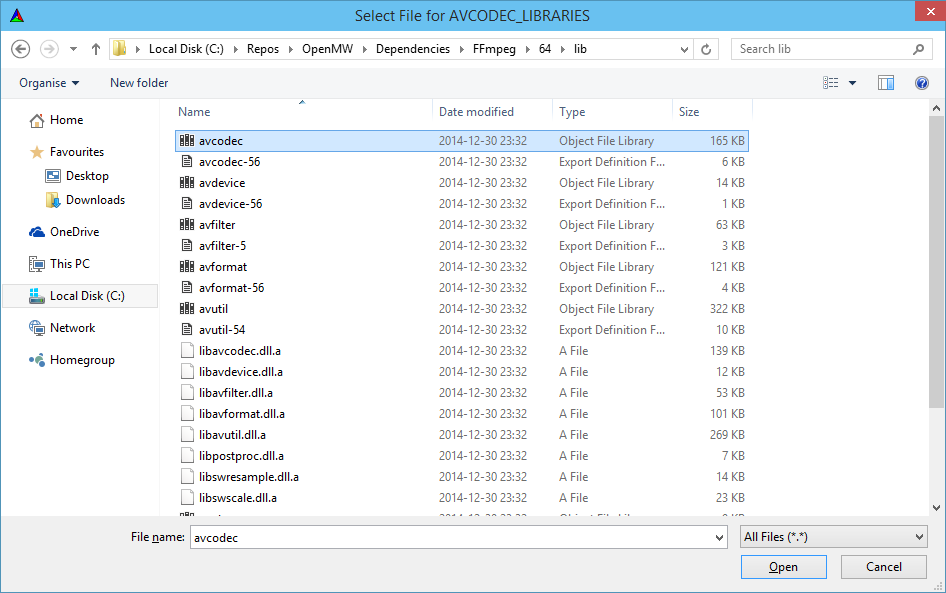
Now let's specify the libraries too, so write LIBRARIES into the search field. Again start finding the libraries for each of the entries. Note that AVRESAMPLE is not part of the FFmpeg package we're using so leave that entry alone.
With FFmpeg correctly entered, you can go ahead and press configure again. It will fail again but this time it will be Ogre that's missing. To find Ogre you have to add an entry, so press Add Entry and type in OGRE_SDK, this is a Path value that you should link to the sdk folder in your Ogre build directory.
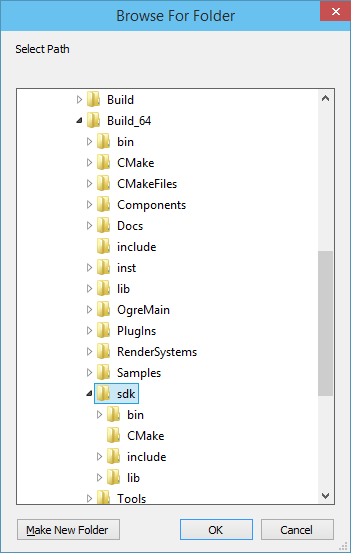
With that specified you can again press configure and it will find all the ogre files, this time failing on MyGUI instead. So add another entry; MYGUISDK pointing to the sdk folder in your MyGUI build directory. If you press configure now it will still fail, due to a slightly broken find script for Windows. It's easy to solve though, you just have to set a pair of values manually.
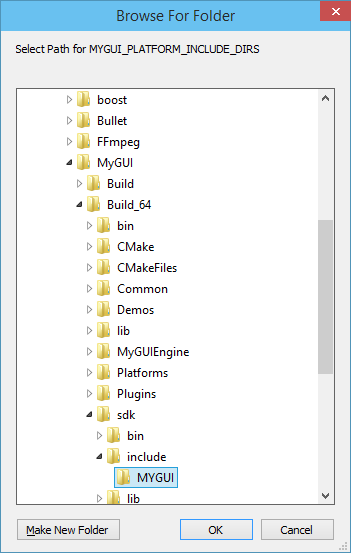
So start with setting MYGUI_PLATFORM_INCLUDE_DIRS to sdk\include\MYGUI, and setting MYGUI_INCLUDE_DIRS to sdk\include
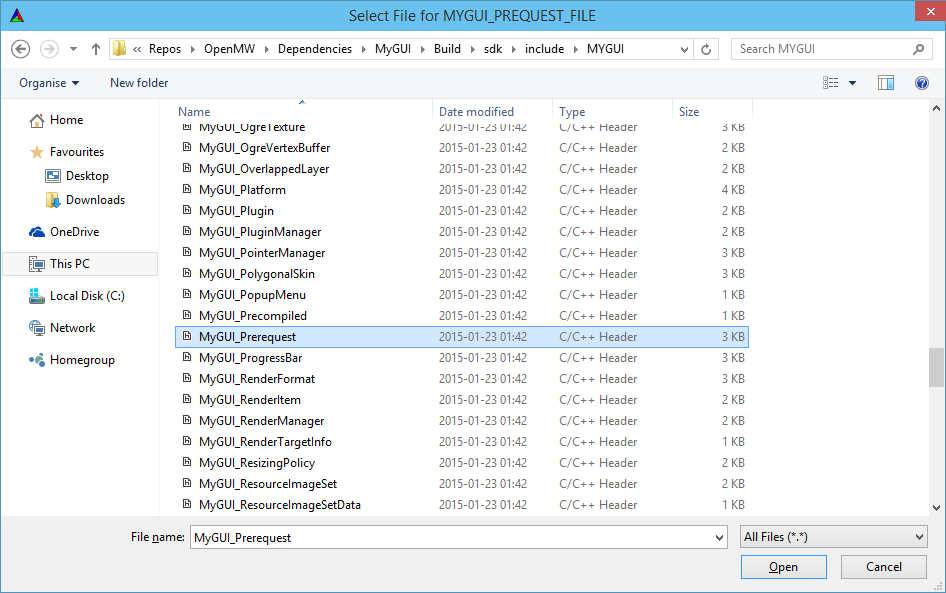
After configuring it will still not find MyGUI correctly, but that's again easy to solve. You just have to manually provide a value for the MYGUI_PREQUEST_FILE[sic], so search your way to sdk\include\MYGUI\MyGUI_Prerequest.hpp.
Now we're getting somewhere, boost and SDL are missing.
Start by again adding BOOST_ROOT and BOOST_LIBRARYDIR entries, then you have to set the SDL2 values. SDL2_INCLUDE_DIR goes to the include folder, SDL2MAIN_LIBRARY goes to SDL2main.lib, SDL2_LIBRARY_PATH to SDL2.lib, and then copy the same path into SDL2_LIBRARY_ONLY.

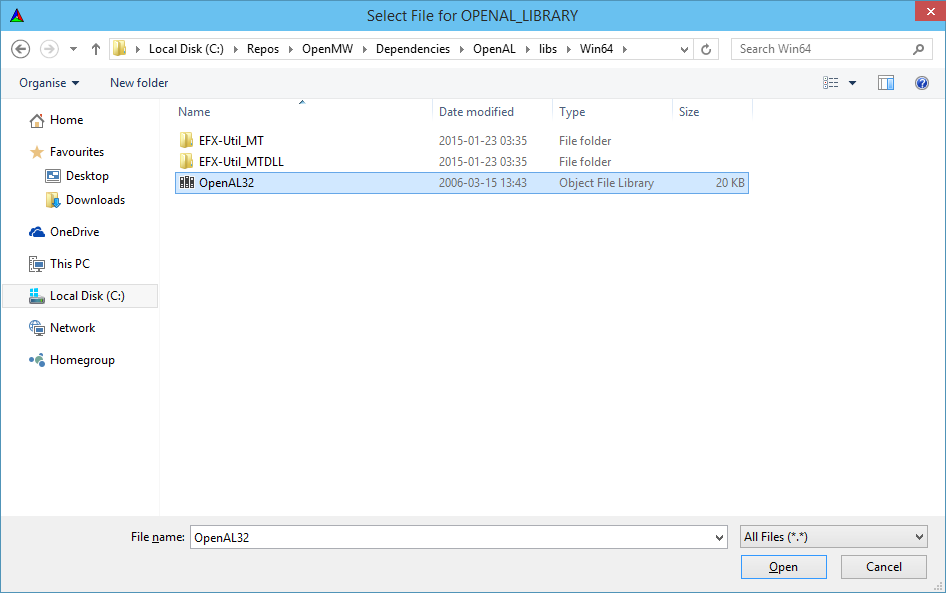
Now when configuring the CMake will fail on OpenAL, so we'll be setting OPENAL_INCLUDE_DIR to the include folder in the OpenAL SDK, and OPENAL_LIBRARY to the OPENAL32.lib in the correct libs folder.
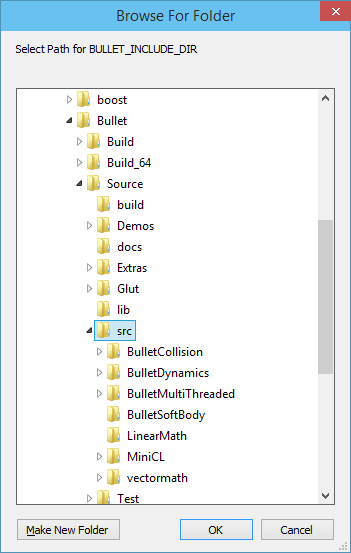
With OpenAL set we're now missing the Bullet values, so let's start setting those correctly. BULLET_INCLUDE_DIR goes to the src folder of your Bullet sources.
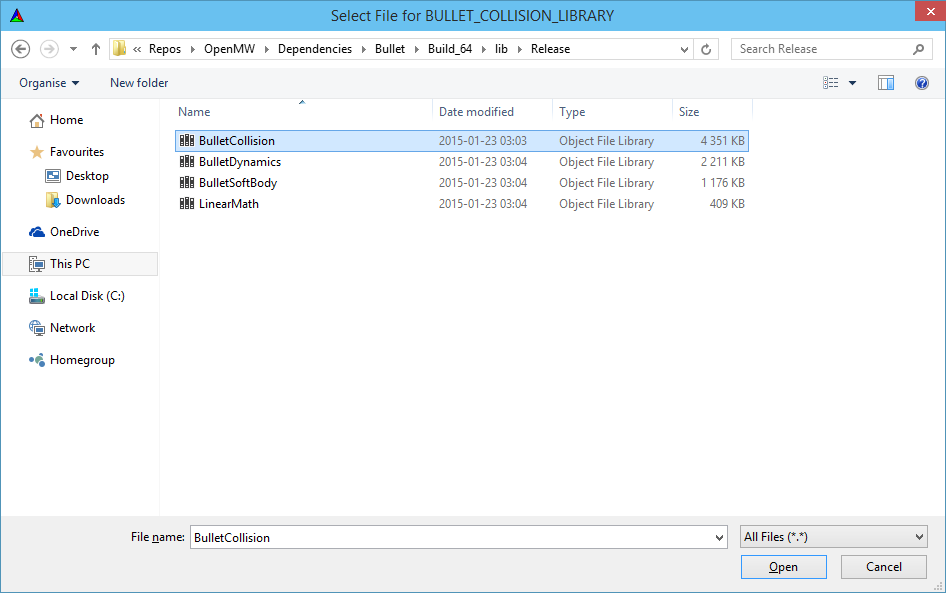
All the Bullet library entries should then be set to their correct debug and release builds.
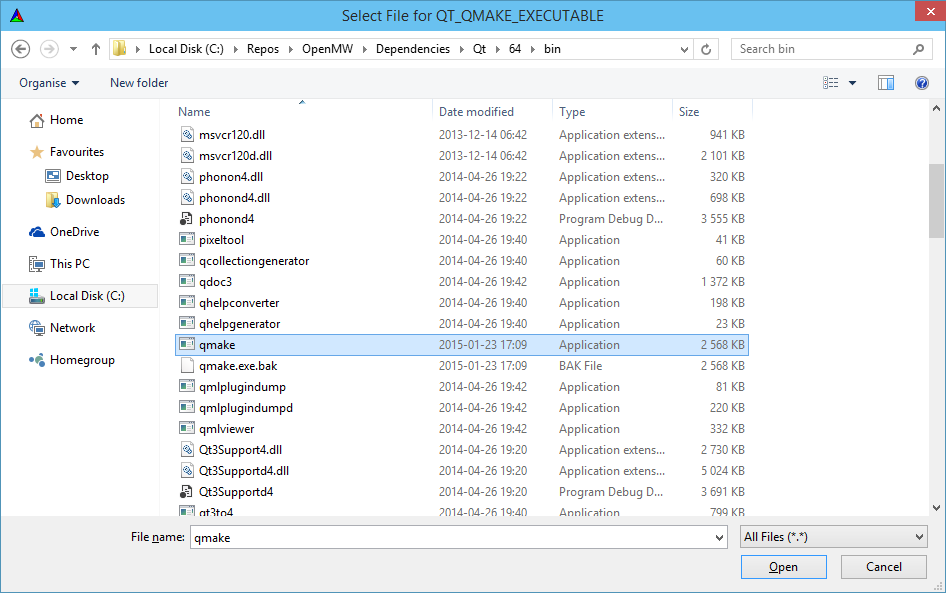
With Bullet set up we'll now fail on Qt, but that's very easy to fix. Just make sure that you've run the qtbinpatcher tool if you're using the archive version of the Qt package.
Set QT_QMAKE_EXECUTABLE to bin\qmake.exe and you're good to go.
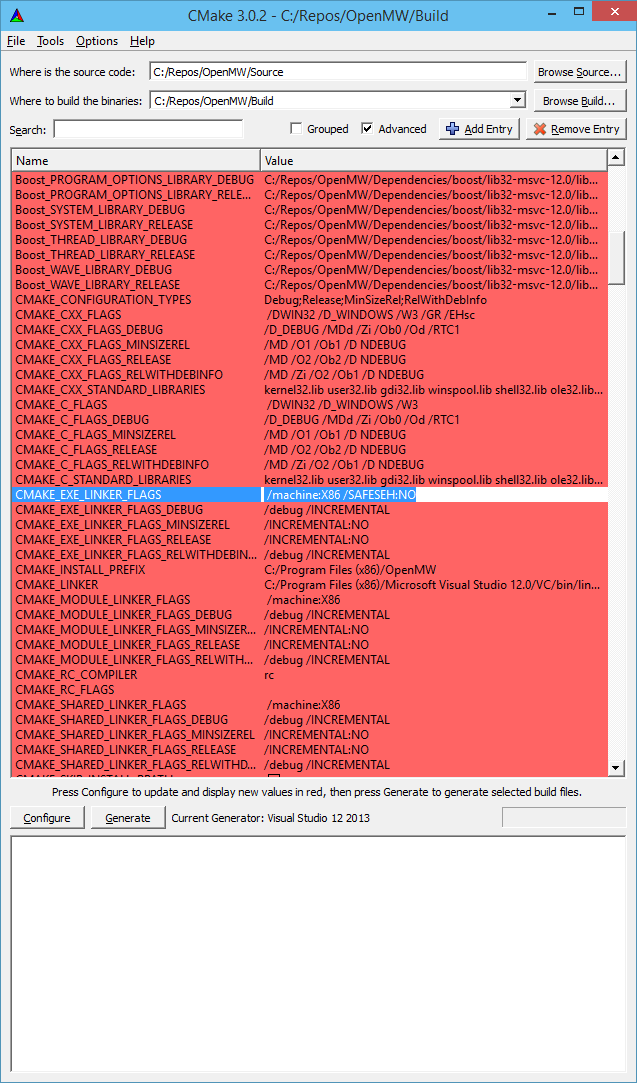
We're now ready to compile, though note that due to an issue with the FFmpeg binaries we're using we'll have to disable SAFESEH on the linking stage if this is a 32-bit build. 64-bit doesn't use SAFESEH.
To disable SAFESEH on your 32-bit build, find the CMAKE_EXE_LINKER_FLAGS entry and add /SAFESEH:NO to the end.
Now you're done with the build environment setup and you can start compiling.
This is going to take quite a while, go grab a coffee or something.
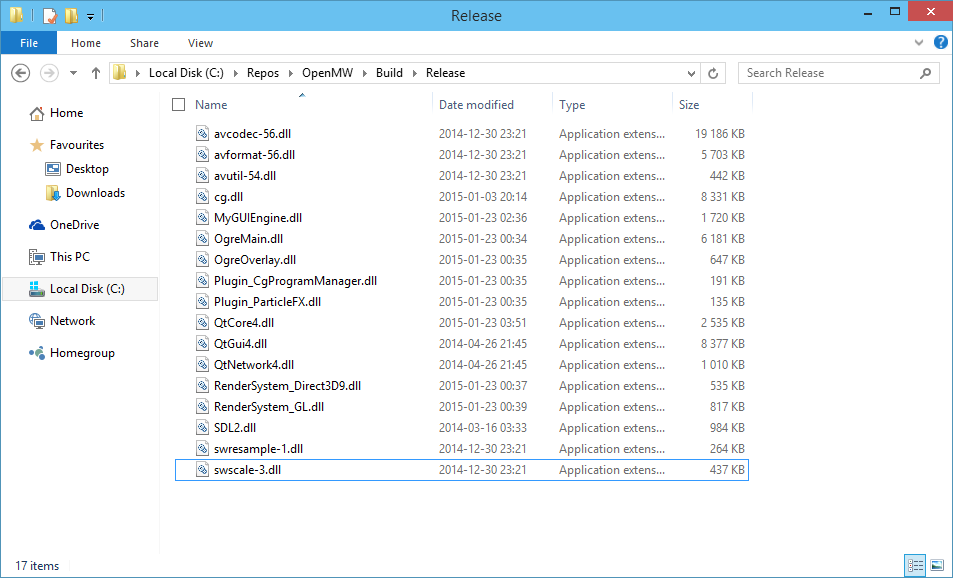
You can take the time to grab all the DLLs that OpenMW will need now, so dig through the dependencies and find the following DLLs;
- FFmpeg: avcodec, avformat, avutil, swresample, swscale
- MyGUI: MyGUIEngine
- Ogre: OgreMain, OgreOverlay, Plugin_CgProgramManager, Plugin_ParticleFX, RenderSystem_Direct3D9 (if you decided to grab the DirectX SDK), RenderSystem_GL
- Ogre Dependencies: cg
- Qt: QtCore4, QtGui4, QtNetwork4
- SDL2: SDL2
You can drop the DLLs right into the Release and Debug folders in your build folder (creating them if they don't already exist)
You can set up your Release/Debug folder to work as a full OpenMW install by copying over the resources folder from your build directory into Release/Debug, also grab openmw.cfg.install, settings-default.cfg, and transparency-overrides.cfg and copy those into Release/Debug too. Rename openmw.cfg.install to openmw.cfg in there.
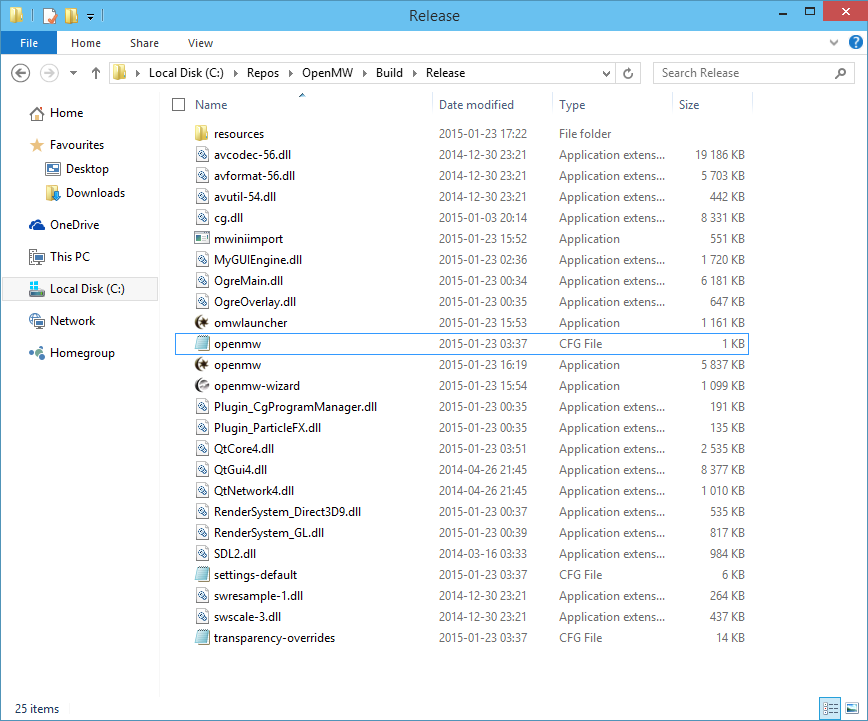
You should now have a working OpenMW build environment.
Note that if you want to be able to package and distribute your builds there's a lot more things you have to do though; set up NIS, compile all 32-bit parts with the v120_xp toolset, grab redistributables for your versions of DirectX, OpenAL, C++, etc.
Either way, you've not got an environment that should let you develop OpenMW on Windows. So go develop.

Great Guide, just compiled my first build of OpenMW :) (but for now I still depend on you for OSG builds^^)
Some things I noticed while reading through it:
You forgot AVUTIL in that list.
BULLET: Maybe you should explicitly point out that one needs to check "USE_MSVC_RUNTIME_LIBRARY_DLL" in cmake-gui, or else the OpenMW build will fail. It wasn't checked by default when I ran through the steps.
BULLET: Should one really use "USE_MSVC_FAST_FLOATINGPOINT"? Isn't that dangerously inaccurate (I remember the Dolphin Emulator devs warning about that, but then again an emulator has probably greater accuracy demands), or does this not matter for our purposes?