- https://medium.com/@coolx28/security-oriented-open-source-continuous-fuzzing-101-from-start-to-finish-637eaceb9acb
- https://foxglovesecurity.com/2016/03/15/fuzzing-workflows-a-fuzz-job-from-start-to-finish/
- https://research.aurainfosec.io/hunting-for-bugs-101/
- https://labsblog.f-secure.com/2017/06/22/super-awesome-fuzzing-part-one/
- https://thecyberrecce.net/2017/03/20/software-exploit-development-fuzzing-with-afl/
- https://www.sec-consult.com/wp-content/uploads/files/vulnlab/the_art_of_fuzzing_slides.pdf
- https://hackernoon.com/afl-unicorn-fuzzing-arbitrary-binary-code-563ca28936bf
brew install afl-fuzzMacOS with AFL Fuzz
SL=/System/Library; PL=com.apple.ReportCrash
launchctl unload -w ${SL}/LaunchAgents/${PL}.plist
sudo launchctl unload -w ${SL}/LaunchDaemons/${PL}.Root.plist
- fuzzing python https://tomforb.es/segfaulting-python-with-afl-fuzz
-
https://www.owasp.org/index.php/Fuzzing OWASP Fuzzing
-
https://github.com/trailofbits/echidna ETH fuzzing tools
-
https://www.youtube.com/playlist?list=PLtPrYlwXDImiO_hzK7npBi4eKQQBgygLD 视频播放列表,关于fuzzing
-
fuzzer-test-suite: https://github.com/google/fuzzer-test-suite 学着玩玩
-
AFL: http://lcamtuf.coredump.cx/afl/ (https://lcamtuf.coredump.cx/afl/releases/afl-latest.tgz)
-
AFL python interface : https://github.com/shellphish/fuzzer
-
AFL Unicorn: https://github.com/Battelle/afl-unicorn
-
AFL training: https://github.com/ThalesIgnite/afl-training
-
AFL go version: https://github.com/dvyukov/go-fuzz
-
AFL rust version: https://github.com/rust-fuzz/afl.rs
-
AFL python version: http://jwilk.net/software/python-afl
-
WAFL
-
Morph
-
Os-fuzz
-
zzuf 使用过了
-
honggfuzz
-
OSXFuzz
-
sCFF分布式。py2.7 + AWS https://github.com/softscheck/sCFF
- fuzzing初尝试 ,跟着 https://github.com/google/fuzzer-test-suite 的教程
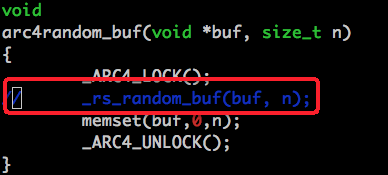
- heartbleed 也是通过fuzzing发现的。厉害了卧槽。
- 微软研究院Seurity Risk Detection中关于fuzzing with machine learning , 但是这个视频只是使用。https://docs.microsoft.com/en-us/security-risk-detection/how-to/
问题来了:
- fuzzing原理是什么
先看下AFL的原理 http://lcamtuf.coredump.cx/afl/technical_details.txt
- 怎么写fuzzing的代码?
- 怎么根据fuzzing 后的结果写POC代码?
- 怎么自动化fuzzing?
- 怎么使用机器学习生成,并去攻击?
- 怎么进行内核的fuzzing windows kernel, linux kernel osx kernel?
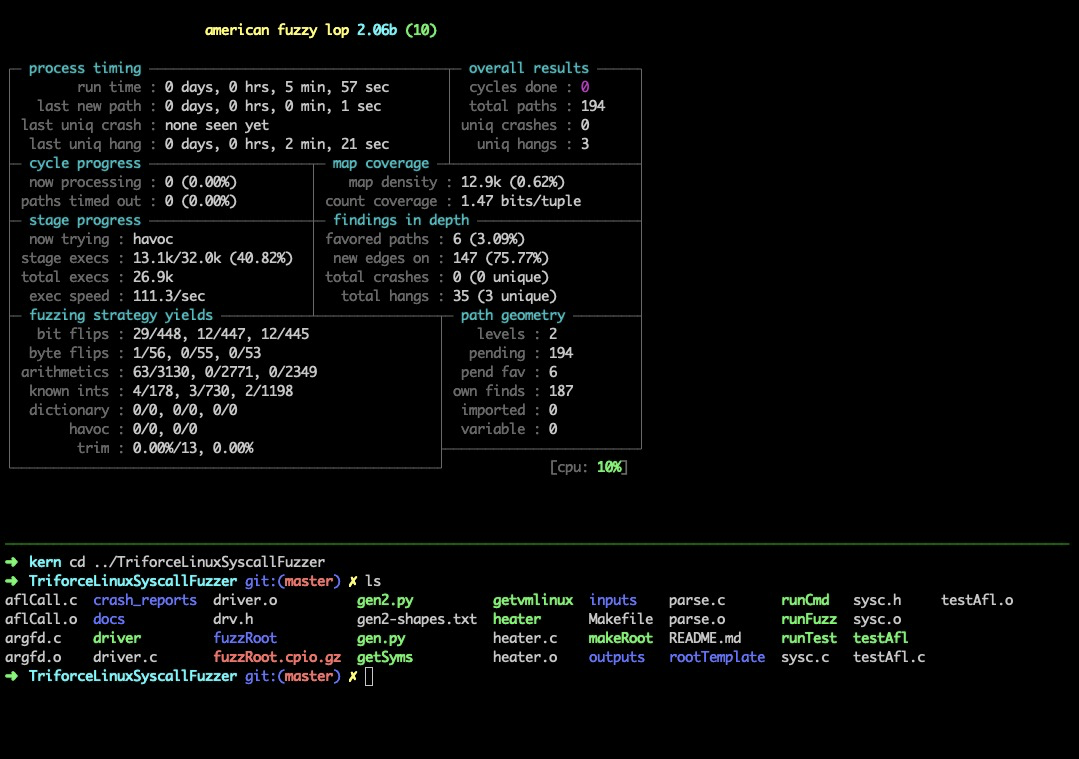
https://github.com/RUB-SysSec/kAFL https://github.com/nccgroup/TriforceAFL https://github.com/google/syzkaller


tutorial fuzz-test-suite
$ docker run --cap-add SYS_PTRACE -ti libfuzzertutorial/prebuilt$ ./openssl-1.0.2d-fsanitize_fuzzer # then you would get a new crash sample $ ./openssl-1.0.2d-fsanitize_fuzzer ./crash-9e656109d00645c7048519a19c83363c4222719e