This topic applies to .NET Core Tools Preview 2 and Visual Studio 2015.
First of all ensure that you have all required tools installed -- Installation
- Create the projects folders structure according to Figure 1 (NOTE: create only folders and not the files), e.g. in
boilerplatesolution we have 3 projects insrcfolder, corresponding toFibonacci,PrimesandAppand two unit tests projects (Primes.TestsandFibonacci.Tests). - CD into each library directory (e.g.
src/Fibonacci) - Run
dotnet new -t libto create the library source project or justdotnet newfor applications. - Check the
project.jsonwhich contains dependencies necessary to build the library. - Rename
Library.cs(e.g.FibSupplier.cs) - Open library C# file and rename the class according to the new file name (e.g.
class FibSupplier {…) - Rename the namespace according to the directory name (e.g.
namespace Fibonacci {…) - For each project that depends of other projects you must refer those projects in the
dependenciesproperty ofproject.json. e.g. theproject.jsonofApphas the dependencies of Figure 2. - You can jump to step 24 to build the entire solution without trying each project individually
Run
dotnet restore, which calls into NuGet to restore the tree of dependencies. - Check the
project.lock.jsonfiles that contains a complete set of the graph of NuGet dependencies. - Run
dotnet buildto compile source files. - For applications run
dotnet runthat callsdotnet <assembly.dll>to run the target application (e.g.dotnet src/App/bin/Debug/netcoreapp1.0/App.dll). Note: If yourApprefers all project libraries, then you just need to build theAppproject becausedotnet buildensures to build target projects. - Setup unit tests project. CD into unit tests project directory (e.g.
test/Fibonacci.Tests) - Run
dotnet new -t xunittest. Check the generatedproject.json, which includes the test runner and dependencies forxunitanddotnet-test-xunitNuget libraries. - Rename
Tests.cs(e.g.FibSupplierTests.cs) - Open tests C# file and rename the class according to the new file name (e.g.
class FibSupplierTests{…) - Rename the namespace according to the directory name (e.g.
namespace Fibonacci.Tests{…) - Add the dependency to
Fibonacciproject. Edittest/Fibonacci.Tests/project.jsonfile and add the property"Fibonacci": {"target": "project"}to thedependenciesobject that will look like Figure 3 - You can jump to step 24 to build the entire solution without trying each unit tests project individually
- In the root directory create a global.json that contains the names of your src and test directories (e.g. { "projects": ["src", "test"] })
Run
dotnet restore, which calls into NuGet to restore the tree of dependencies. - Check the
project.lock.jsonfiles that contains a complete set of the graph of NuGet dependencies. - Run
dotnet buildto compile source files. - Execute
dotnet testto run the tests from the console. The xunit test runner has the program entry point to run your tests from the Console.dotnet teststarts the test runner, and provides a command line argument to the testrunner indicating the assembly that contains your tests. - Setup solution build. In the root directory create a
global.jsonthat contains the names of yoursrcandtestdirectories (e.g.{ "projects": ["src", "test"] }) - Run
dotnet restore, which calls into NuGet to restore the tree of dependencies (you can skip this step if you have already run it individually for each project previously). - Check the
project.lock.jsonfiles which appear on each project folder and contain a complete set of the graph of NuGet dependencies. - Run
code .on root directory that will open the Visual Studio Code for your solution - Create the task runner file (
.vscode/tasks.json) following one of the next options:
- Option A: Click
Yesif appears the Warning messageRequired assets to build and debug are missing from….


/<solution name>
|__global.json
|__/src
   |__/<library name>
      |__Source Files
      |__project.json
   |.../ Other libraries or applications
|__/test
   |__/<library name>.Test
      |__Test Files
      |__project.json
Figure 2 - Example of dependencies between projects
  "dependencies": {
    "Fibonacci": {"target": "project"},
    "Primes": {"target": "project"}
  }
Figure 3 - project.json of Fibonacci.Tests
"dependencies": {
  "System.Runtime.Serialization.Primitives": "4.1.1",
  "xunit": "2.1.0",
  "dotnet-test-xunit": "1.0.0-*",
  "Fibonacci": {"target": "project"}
}
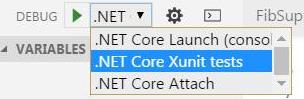
Figure 4 - launch.json configurations item to run XUnit tests
"configurations": [
      {
            "name": ".NET Core Xunit tests",
            "type": "coreclr",
            "request": "launch",
            "preLaunchTask": "build",
            "program": " /usr/local/share/dotnet/dotnet ",
            "args": ["test"],
            "cwd": "${workspaceRoot}/test/Fibonacci.Tests",
            "externalConsole": false,
            "stopAtEntry": false,
            "internalConsoleOptions": "openOnSessionStart"
      },
      …
]
- .NET Core SDK
- Visual Studio Code (VS Code)
- Open VS Code and click on Extensions (last icon of left side bar or
Ctrl + Shif + X) - Install the extension “C# for Visual Studio Code (powered by OmniSharp)”