The WWDC conference has passed, and it has provided us with lots of presentations worth mentioning. And of course, Apple paid particular attention to Core ML, Siri Shortcuts and changes to Notifications.
It’s quite time consuming to get through the maze of documents, which are far from being clear while features are beta-tested, so I’ve done a review on the new opportunities for you with some examples of implementation. So, catch on and implement it to your apps.
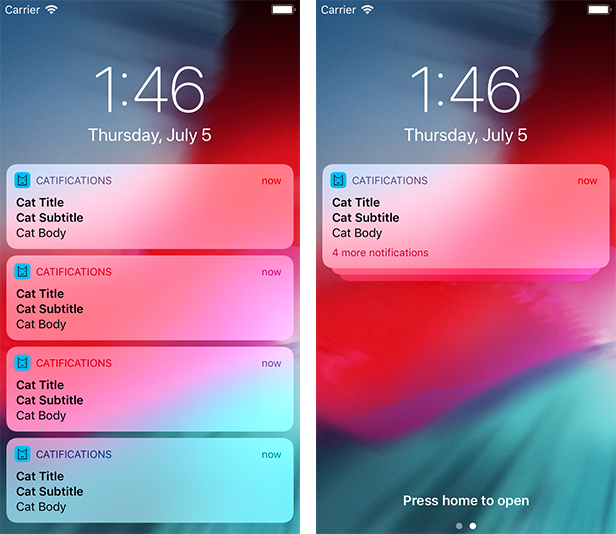
To implement this feature, you don’t have to do anything — iOS 12 groups messages automatically. However, there are some finer points about customization, localization and grouping that need to be mentioned. For example, notifications that depend on the name of a user.
Also, when you test to group notifications, keep in mind that they will group only if the notifications can’t fit on the screen all at once. For example, for iPhone 8, there needs to be 5 or more notifications on the screen at the same time.
To keep this short, I’ve written a separate article including more detailed information which will be published soon.
Next, is new options for notifications, particularly for the NSExtentionContext class. This class is responsible for interaction with widgets, Siri and media content playback. We are more interested in notifications. Two methods and one variable have been added:
https://gist.github.com/1d800a0ef33784007dff7def0eafe094
The variable lets us replace the set of available actions during the interaction with notifications:
https://gist.github.com/ce7cc3ac4b14d0e602ca7b869c8d7d29
The methods can open an app or hide a notification.
To demonstrate the capacities let’s write a little app.
Firstly, we add the local notifications option to the app:
https://gist.github.com/31146723d8a366bc42d2c5908b47e569
- Create a few actions. Button title,options, and an identifier, which enables us to distinguish between them while processing are transferred to the initiator. If desired, the option to require user notification to perform an action can be enabled.
- Specify a category for the identifier. The category identifier enables us to process and display notification types differently.
- The last step is to set a category for the notification center.
The second method will send a local notification in a set period of time, giving us time to minimize the app or lock the phone:
https://gist.github.com/21444d7095ce167b2699451e0ab7d0d8
- Check whether the user allows us to send notifications
- Create a notification with a title and text, and specify a related category. In our case it’s a “category-simple”
- Set up a time trigger for 3 seconds
- Fill a request to send the notification. In our case, we use UUID as an identifier. This identifier can be useful when we want to cancel the planned notification
- Add the request to the notification center.
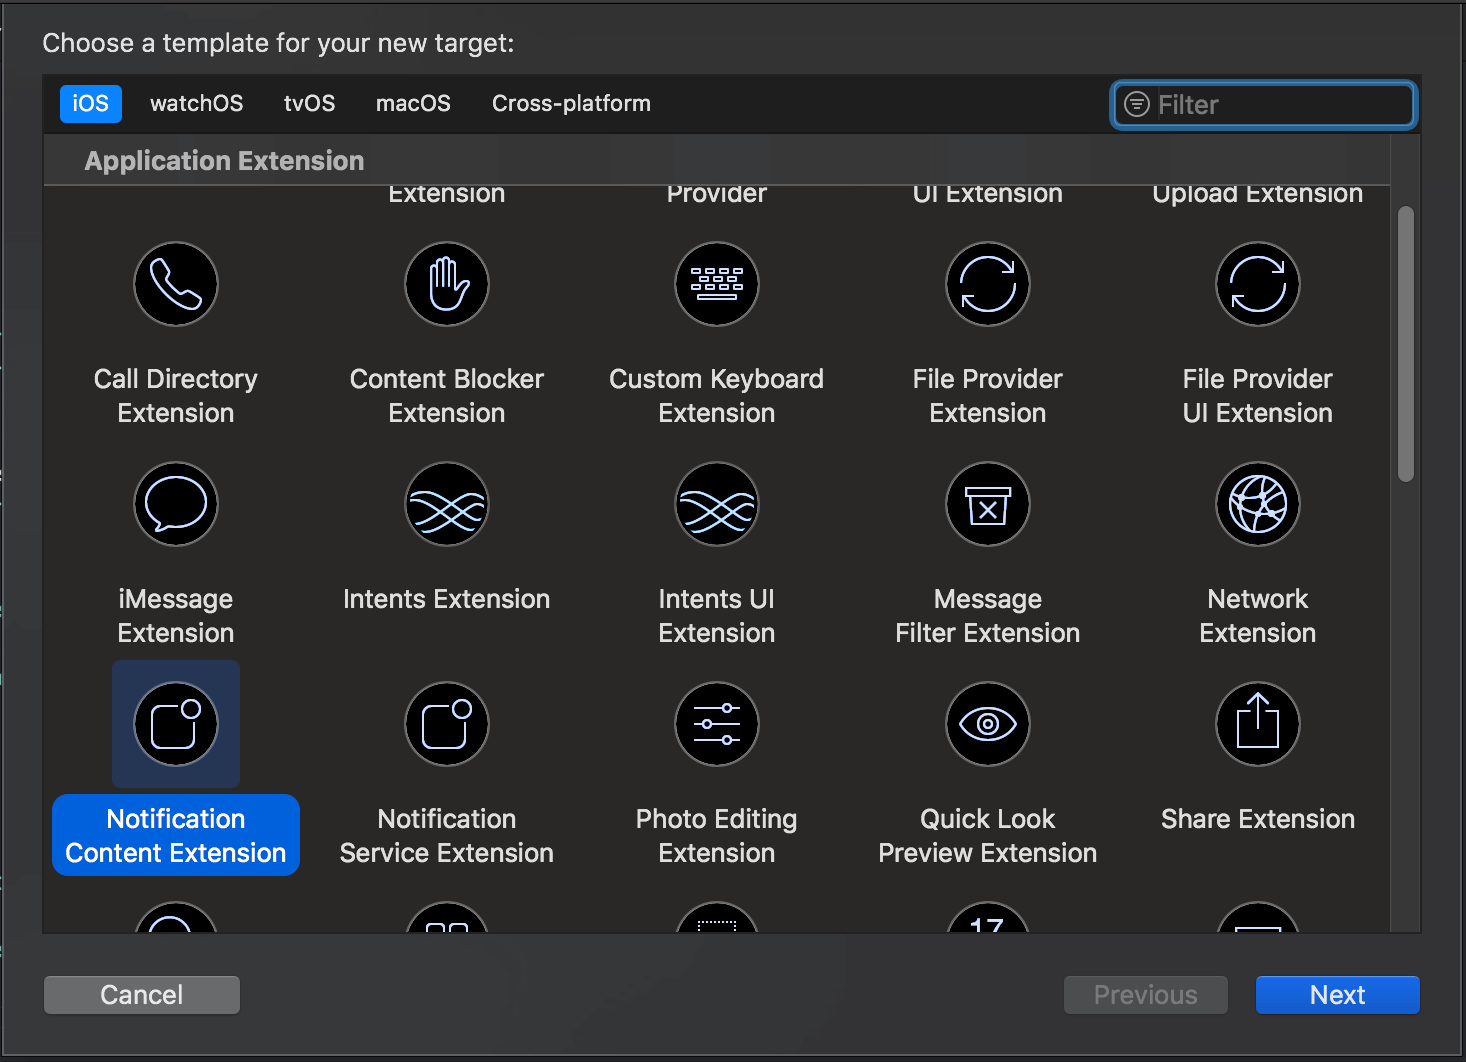
The next important thing to do is to add a new Notification Content Extension target into the app. It enables us to configure notification appearance and process the actions.
Plist-file, View Controller and Storyboard will be created:
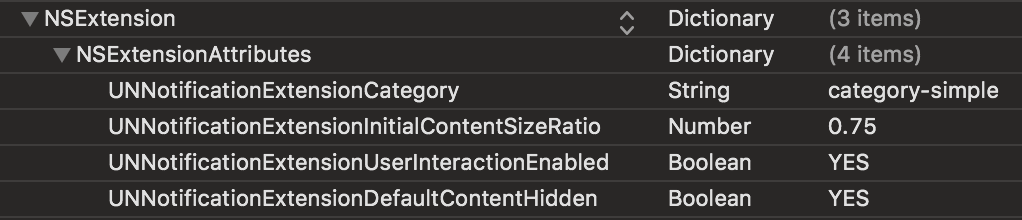
In the plist-file we are interested in the following keys:
- UNNotificationExtensionCategory is the name of a category that will be processed. As we did before, here we will specify a “category-simple”.
- UNNotificationExtensionInitialContentSizeRatio is the height to width ratio of the notification. It will affect the notification size after it is displayed full size.
- UNNotificationExtensionUserInteractionEnabled turns on and off the interaction with custom controls. In our case, there will be a heart-shaped button.
- UNNotificationExtensionDefaultContentHidden hides the default notification content.
In the storyboard we will create UIImageView, UILabel to display the notification title and UIButton for interaction with the app.

Here we create the methods for opening the app and hiding the notification in View Controller:
https://gist.github.com/5aa0c88326671d2b0cf95c43c51709d8
Then we implement the methods of the UNNotificationContentExtension protocol.
The first one enables us to display the required text:
https://gist.github.com/1495fb05c65aff4d28634f35abed074e
We need the second one to process the actions from the UNNotificationAction. In the method the actions are replaced with the help of assignment to extensionContext?.notificationActions:
https://gist.github.com/1ec636a25d92b8ad0fcf267d30c736be
The heart-shaped button click is handled using IBAction, as usual:
https://gist.github.com/9527f6ce33e836276353be01f4046a2b

Now start the app and look what at we´ve got:
- UIButton touches are processed
- UNNotificationAction enables us to replace available options
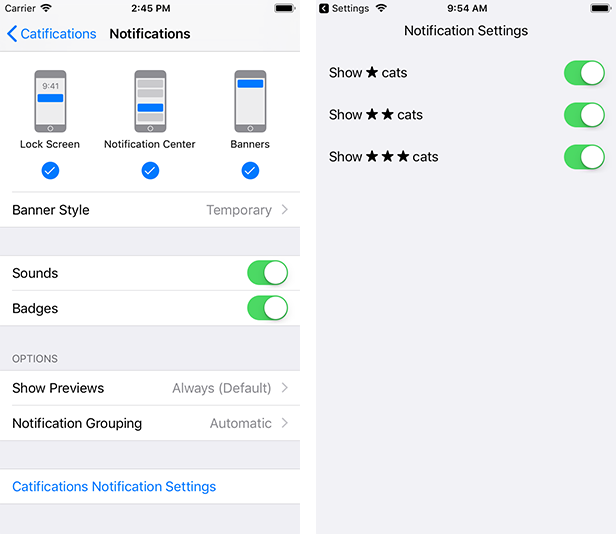
The following update lets you add a new item to the notifications settings. By tapping on it, you can call a method, that can be implemented within the app. For example, users can get to your app directly from the system settings and turn on only the notifications they actually want to receive. How to implement these features?
First, we add a providesAppNotificationSettings parameter to authorize notifications:
https://gist.github.com/aebf2562e399c7e39afa14f73d71c946
Second, we implement the method userNotificationCenter(_:openSettingsFor:) of protocol UNUserNotificationCenterDelegate:
https://gist.github.com/b3ffac798b657093167086ef5b651314
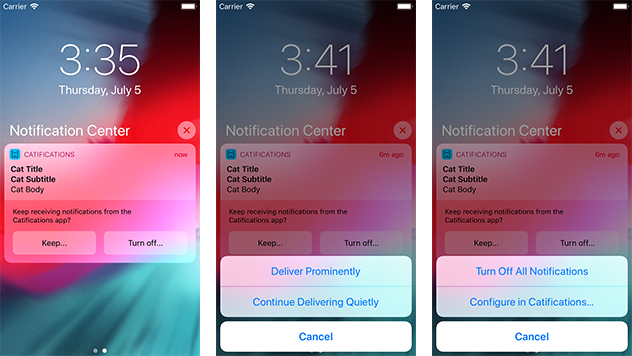
Sometimes a user takes time to figure out whether he wants to receive your app’s notifications or not; usually, he can’t decide upon running the application for the first time. For cases like this Apple suggests using Provisional Authorization. Along with a user authorization request for notification sending a new provisional parameter is added. authorizationStatus for this kind of notification are received by the app with provisional status.
https://gist.github.com/4091421e845b93b7bd58e2c8136986db
After starting the app, users will not receive an authorization request. So as not to disturb them, the app is placed within so-called jail. The sounds and badges for notifications are disabled; they are displayed in the Notification Center only. They won’t appear on the locked screen either. By receiving notifications, users also get two additional buttons. One shuts down notifications completely (or suggests to go to Settings), and another switches the notification’s status to authorized.
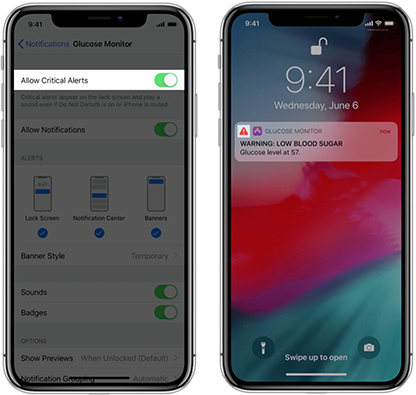
The last update adds one more type of notification – Critical Alerts. These notifications ignore your phone’s settings, silent mode or “do not disturb” mode. Apple recommends using this type of notification for medical apps(for example, blood sugar level tracker), or user security at home or in public places.
Authorization request containing the specific icon:

New item appears in settings, and the new icon is displayed on the notification screen:
To send critical alerts you will need to validate your app on Apple’s website.
To use alerts we apply the criticalAlert parameter.
https://gist.github.com/a07725ada5f41dd3c7c2b411d9658dd2
And сompose the content of the notification:
https://gist.github.com/e63e2a6227ab6aa7a7d8e553098a21aa
For Critical Alerts you can specify the volume of the sound that will play on the notification regardless of user settings.
I hope, this article helps make the implementation of new notifications in your app easier. If you fail to figure out some of the steps, I suggest you to have a look at a code on github or comment below.
You also can watch the presentation “What’s New in User Notifications” from WWDC. We have a chance to talk more about new features at MBLD DEV, occurring 27th of September in Moscow.
Wishing you a good day and kitties to everyone ^_^