I had a heck of a time getting a Cuckoo sandbox running, and below I hope to help you get one up and running relatively quickly by detailing out the steps and gotchas I stumbled across along the way. I mention this in the references at the end of this gist, but what you see here is heavily influenced by this article from Nviso
- Setup a Ubuntu 16.04 64-bit desktop VM (download here) in VMWare with the following properties:
- 100GB hard drive
- 2 procs
- 8 gigs of RAM
- Run through the full Ubuntu install, then log in as root and run this to install all the latest packages:
apt-get update && apt-get upgrade -y
-
I would also recommend that if you're going to create an admin user outside of root, call it radmin or something that is not "cuckoo" as that user gets installed later in this doc. I had a few goofy instances where the Cuckoo install script didn't run right and while I can't be 100% sure, I think this was because my Ubuntu system already had a "cuckoo" user, so I think it's better to just let the script create this for you.
-
Create a
/cuckoofolder which you'll use later for the Cuckoo install script and vulnerable VM.
Inside ESXi spin up a new Windows 10 Pro 64-bit VM (get the ISO here) Update: I learned Windows 10 is not supported, so use Windows 7 instead with the following properties:
- 40GB hard drive
- 1 proc
- 4 gigs of RAM
Once the machine is fired up, make some tweaks to keep it as vulnerable as possible. This will include turning off automatic updates, disabling UAC, shutting down Windows Defender and disabling the firewall:
-
In
gpedit.mscdisable Windows Updates by navigating toComputer Configuration > Administrative Templates > Windows Components\Windows Update, double-click Configure Automatic Updates, set it to Enabled and set to Notify for download and notify for install. -
In
gpedit.mscdisable UAC by navigating toComputer Configuration > Policies > Windows Settings > Security Settings > Local Policies > Security Optionsand make these changes:-
User Account Control: Behavior of the elevation prompt for administrators in Admin Approval Mode - right click policy setting, click Properties. Check the box Define this policy setting and choose Elevate without prompting.
-
User Account Control: Detect application installations and prompt for elevation - right-click policy setting, click Properties. Check the box Define this policy setting and choose Disabled.
-
User Account Control: Run all administrators in Admin Approval Mode - right-click policy setting, click Properties. Check the box Define this policy setting and choose Disabled.
-
-
In
gpedit.mscdisable the firewall by navigating toComputer Configuration > Administrative Templates > Network > Network connections > Windows Firewall > Domain Profile > Windows Firewalland change Protect all network connections to Disabled.
Alternatively, you can use the NetSh Advfirewall set allprofiles state off command.
- In
gpedit.mscdisable Windows Defender by navigating toComputer Configuration > Administrative Templates > Windows Components > Windows Defender Antivirusthen set Turn off Windows Defender Antivirus to Enabled.
-
Install Pillow, which is a utility that allows Cuckoo to take screen captures while your analysis jobs are running. I followed this guide to get Pillow installed:
-
Download get-pip.py
-
Open an administrative command prompt
-
Navigate to
C:\Python27and issuingpython C:\wherever-you-saved\get-pip.py -
Type
cd scriptsand then runeasy_install pillow
The Cuckoo requirements don't list too much detail except that you may want to install additional things like browsers, PDF readers, etc. Some suggestions:
- Adobe Reader
- An old version of Office (I used 2013 with no updates)
When finished, shut down the VM.
Within ESXi, export the .OVA file of the Windows VM. From the vSphere Client, you can do:
- Click File > Export > Export OVF Template
- In the Format drop-down, click Single File (OVA)
- Save the .OVA to your desktop
- Using a file transfer program like FileZilla, transfer the .OVA file to your Ubuntu VM and store it in the
/cuckoofolder.
-
On the Ubuntu desktop, login as root and download the cuckoo-install script to
/cuckoo. -
Open it with
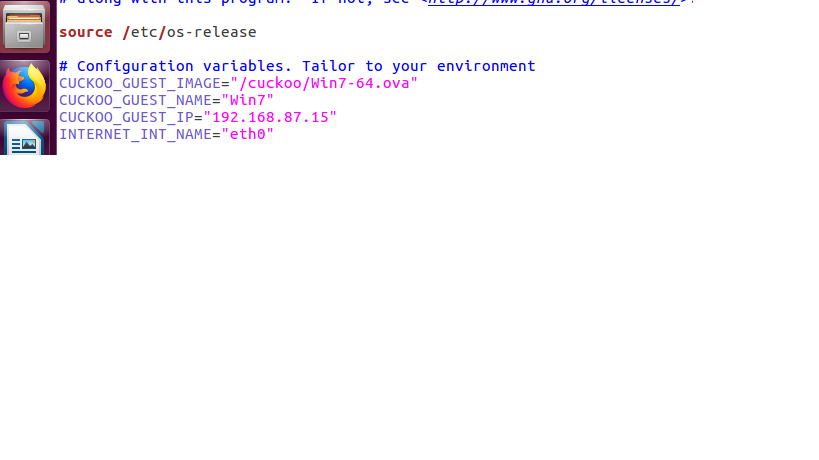
nano cuckoo-install.shand edit the following values as necessary:
CUCKOO_GUEST_IMAGEshould point to the full path of your .OVA fileCUCKOO_GUEST_NAMEshould be the name of the VM as it appeared in your ESXi consoleCUCKOO_GUEST_IPcan remain at the default, and in fact, I'd recommend you not change it. I once tried to use192.168.168.168because that was easier to remember, but then a bunc hof stuff broke.INTERNET_INT_NAMEshould be the name of your LAN interface on the Ubuntu box - runifconfigto figure out what that is.
This area of my cuckoo-install.sh looked like this:
CUCKOO_GUEST_IMAGE="/cuckoo/WIN10.ova"
CUCKOO_GUEST_NAME="WIN10"
CUCKOO_GUEST_IP="192.168.87.15"
INTERNET_INT_NAME="ens160"
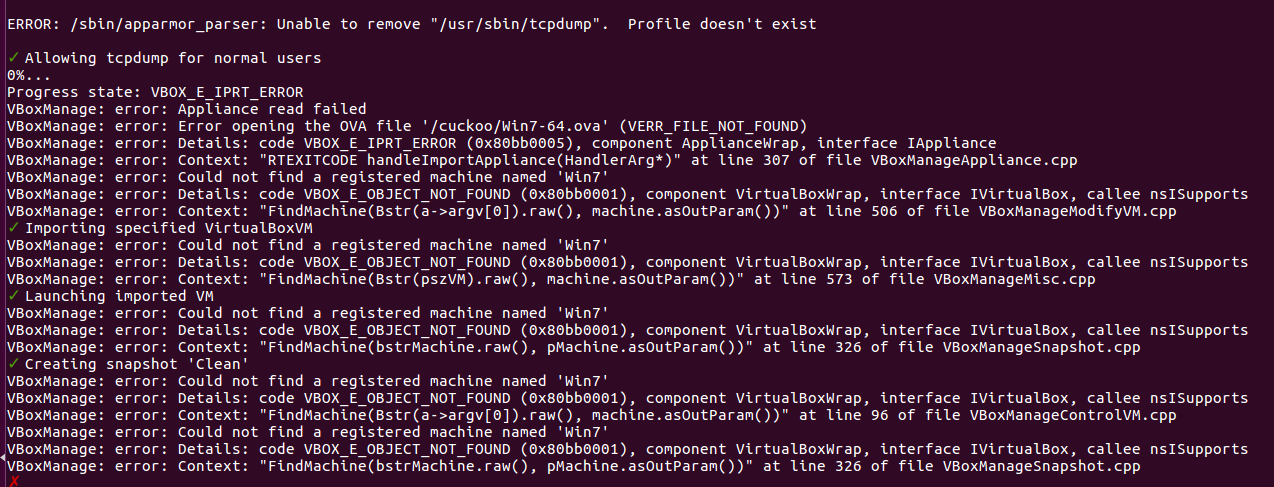
- Now run the script:
./cuckoo-install.sh --verbose
By adding the --verbose option you should be able to troubleshoot anything that doesn't work right (basically you want all green checks :-)
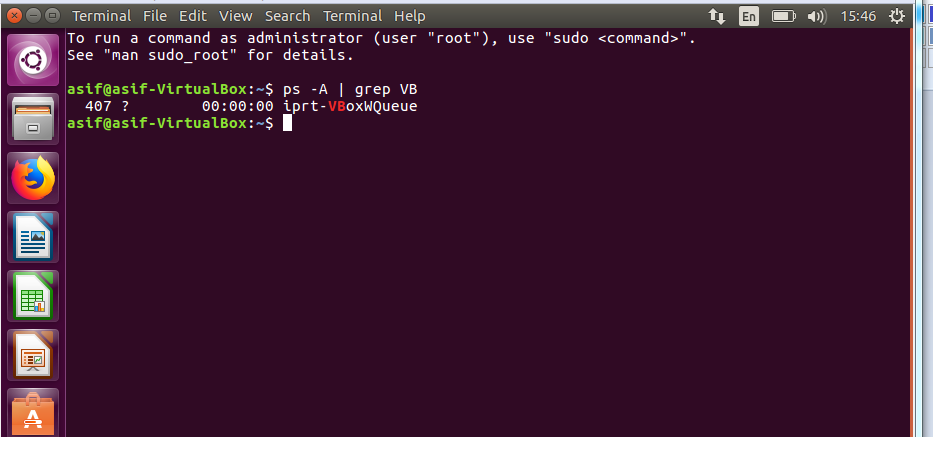
One issue I've run into sometimes is after getting through the script, there will be some errors I have to cleanup or a reboot I need to do, etc., and then next time I run the script I'll get an error like:
Virtualbox is running, please close it
Sometimes I can get around that by killing the service manually and running the script again:
sudo service vboxdrv stop
./cuckoo-install.sh --verbose
In a recent install though, I had to completely nuke Vbox from the system before I could re-run the script:
sudo apt-get remove virtualbox-* --purge -y
./cuckoo-install.sh --verbose
Now that the OVA file is imported into VirtualBox, we need to tweak it a little further so that the Ubuntu VM can talk to it properly when doing malware analysis.
-
From the Ubuntu machine, log in as user
cuckoo(password iscuckoo) -
Open VirtualBox and you should see your imported VM. You might need to power the VM off before you can proceed to the next step.
-
Right-click your VM and choose Settings and verify the following:
- Under General > Basic tab, the Type is Microsoft Windows and Version is appropriate for the base OS on your VM. So in my case I chose Windows 7 (64-bit)
- Under Network > Adapter 1 > Host-Only adapter should be selected, and under the Advanced drop-down choose the Adapter Type of Intel Pro / 1000 MT Desktop
- Now boot the VM. If you can an error right away, like
Failed to open a session for the virtual machine YOUR-VIRTUAL-MACHINE-NAMEcheck the Details tab and you'll probably see something likeVT-x is disabled in the BIOS for all CPU modes. If that's the case, head here to learn about how to enable VT-x.
When the VM is booted, login and wait a few moments. Sometimes extra drivers get installed and you'll be prompted to reboot. Do that, then login again (if necessary) and make the following changes:
-
Run ncpa.cpl and change the IP address to be the one you selected earlier in
cuckoo-install.sh. The subnet mask should be 255.255.255.0 and default gateway of 192.168.87.1. DNS can be 192.168.87.1 and something else Internet-facing, like 4.2.2.2. -
Copy the
/home/cuckoo/.cuckoo/agent/agent.pyto the Desktop of the now-booted Windows VM (for this I usually go to Device > Insert Guest Additions CD Image..., finish the install and then do a drag-and-drop ofagent.pyto the Windows desktop).
Note: sometimes I've found that trying to install the guest additions CD image gives an error indicating the network connection is invalid. Check a couple things:
-
In the main Vbox GUI, check File > Host Network Manager and look at vboxnet0 and ensure the IPv4 Address is
192.168.87.1. If it's not, change it! You should always be able to ping192.168.87.1from the guest VM, and also ping192.168.87.15from the Ubuntu command line. -
At the Ubuntu terminal, open
/etc/resolv.conf. Sometimes I've found that these settings got jacked up by the Cuckoo install, and that my DNS is pointed to some weird IP. So if you've got likenameserver 127.0.4.22in there, edit that line to be some public DNS server, likenameserver 4.2.2.2 -
One last thing to check is you might get an "Could not insert the /home/cuckoo/blah/blah.iso" error message. This is likely because your software CD-ROM drive didn't come over properly when you exported the OVA. If that's the case, shut the VM down and open the settings for it. Under Storage > Controller: IDE click Add and click Leave Empty. Now boot the VM again and try to install the guest additions. It should go.
-
Now open a privileged command prompt, and run C:\Python27\python.exe agent.py. Since I personally usually have to troubleshoot other stuff after this and end up running this a lot, I save myself some time by creating a batch file with
echo "c:\python27\python.exe agent.py" > start-agent.bat. Leave this box open. -
Back at the VirtualBox GUI, go into the Machine Tools > Snapshots menu and delete all snapshots (there should be at least one there with the name of
clean). -
SSH into the Ubuntu VM as cuckoo and run the following commands (which will take a new snapshot called
clean, power off the VM and revert to thecleansnapshot):
su cuckoo
vboxmanage snapshot "NAME-OF-YOUR-VM" take "clean" --pause
vboxmanage controlvm "NAME-OF-YOUR-VM" poweroff
vboxmanage snapshot "NAME-OF-YOUR-VM" restorecurrent
vboxmanage startvm "NAME-OF-YOUR-VM"
exit
You should now be back at a root prompt.
- Reboot the Ubuntu box (don't ask me why. Just because reasons :-)
One thing that either I'm not configuring right or isn't covered in the documentation is how to setup your guest VM so it can talk to the Internet and nothing else. I thought that by selecting the Host-only Adapter that would accomplish what I wanted, but apparently it opens up the VM to talking to ANYTHING on your connected subnets, not just the Internet. You can issue a iptables -L from your Ubuntu command line to see what I mean. So, here's what I did to flush out all the default rules and set up my system so that my guest VM on 192.168.87.15 could only talk to the Internet and no other private IPs. Note that in this case my Ethernet interface (that you can view by doing ifconfig at the command line) is enp0s31f6 and my VBox guest VM sits in the 192.168.87.0/24 range:
sudo apt-get install iptables-save -y
sudo apt-get install iptables-persistent -y
sudo iptables -A INPUT -i lo -j ACCEPT
sudo iptables -A INPUT -m conntrack --ctstate ESTABLISHED,RELATED -j ACCEPT
sudo iptables -A FORWARD -s 192.168.87.0/24 -d 192.168.0.0/16 -i vboxnet0 -o enp0s31f6 -j DROP
sudo iptables -A FORWARD -s 192.168.87.0/24 -d 172.16.0.0/12 -i vboxnet0 -o enp0s31f6 -j DROP
sudo iptables -A FORWARD -s 192.168.87.0/24 -d 10.0.0.0/8 -i vboxnet0 -o enp0s31f6 -j DROP
sudo iptables -A INPUT -m state --state NEW -m tcp -p tcp --dport 22 -j ACCEPT
sudo iptables -A INPUT -m state --state NEW -m tcp -p tcp --dport 5900 -j ACCEPT
sudo iptables -A INPUT -m state --state NEW -m tcp -p tcp --dport 5901 -j ACCEPT
sudo iptables -A INPUT -m state --state NEW -m tcp -p tcp --dport 8000 -j ACCEPT
sudo iptables -P INPUT DROP
sudo iptables-save > /etc/iptables/rules.v4
sudo gsettings set org.gnome.Vino require-encryption false
You may have noticed in the commands above that I also allowed in SSH and VNC ports (see later in this gist for why)
From the Ubuntu machine at a Terminal command, login as your primary user and type:
sudo apt-get install screen -y
screen -R cuckoo
sudo /root/cuckoo-start.sh
Then press Ctrl+A and then D to escape this screen session. You can issue this command to see open screen sessions:
screen -ls
When you see one you want to reattach to, like the "cuckoo" one we just created, type:
screen -R NAME-OF-SESSSION-YOU-WANT-TO-CONNECT-TO
This will start the Cuckoo interface on port 8000. You should now be able to load the interface on http://your-linux-vm-ip:8000.
From the Cuckoo Web interface:
-
Click Submit a File for Analysis
-
Load a malware sample (if you need some to play with, get a free VirusBay account and download a sample with the name
93b0e83334836a4a811fef354d31fdb5- it is ransomware so be careful!) -
At the next screen, click Analyze
-
The Cuckoo sandbox will chew on the file for a while, and eventually the Web interface will show a status of Reported and you can click the report to see the results. Your report should definitely show that this file shows several signs of being malicious. If not, read the Troubleshooting section below.
-
When your analysis work is done shut down the Cuckoo sandbox:
/scripts/cuckoo-kill.sh
When setting this up for clients I like to have the Ubuntu box available via VNC for remote troubleshooting. With Ubuntu 18.x installed, I followed this guide to turn on VNC remotely. IBut I still had issues with RealVNC complaining about "Unable to connect to VNC server using your chosen security setting." I tried upgrading to the latest VNC Viewer but that wouldn't work. This site recommends running gsettings set org.gnome.Vino require-encryption false which did do the trick for me, but it disables encryption for VNC which I don't love. However, I've not yet found a more elegant solution.
Update: actually this guide really helped me get up and running with VNC pretty fast on Ubuntu 18.x. Only part I got hung up on was I forgot that I had iptables setup so I had to add in an extra config line for that:
sudo iptables -A INPUT -m state --state NEW -m tcp -p tcp --dport 5900 -j ACCEPT
sudo iptables -A INPUT -m state --state NEW -m tcp -p tcp --dport 5901 -j ACCEPT
With the /root/cuckoo-start.sh script running, the Terminal should continually feed you updates as to the status of your Cuckoo sandbox server as well as any issues that pop up. Here are a few warnings I've seen pop up in the console, and how I resolved them:
This was because in VirtualBox, my snapshot called clean was in a powered off state. Your clean VM needs to be in a booted state for Cuckoo to work right.
"ERROR: Error processing task #1: it appears that the Virtual Machine hasn't been able to contact back to the Cuckoo Host.""
The error may have additional information, like:
There could be a few reasons for this, please refer to our documentation on the matter: https://cuckoo.sh/docs/faq/index.html#troubleshooting-vm-network-configuration
This likely means the Cuckoo sandbox and your VM cannot properly communicate to one another. To fix this, open VirtualBox and fire up your clean snapshot. From a command line, do a ping 192.168.87.1 and ensure you get a response. From your Ubuntu box, do a ping 192.168.87.15 and ensure you get a response. Ensure that your Windows firewall is disabled (see instructions above).
You might see some additional details follow this error, such as:
Traceback (most recent call last):
  File "C:/tmpabyldd/analyzer.py", line 798, in <module>
    success = analyzer.run()
  File "C:/tmpabyldd/analyzer.py", line 650, in run
    pids = self.package.start(self.target)
  File "C:\tmpabyldd\modules\packages\exe.py", line 23, in start
    return self.execute(path, args=shlex.split(args))
  File "C:\tmpabyldd\lib\common\abstracts.py", line 166, in execute
    "Unable to execute the initial process, analysis aborted."
CuckooPackageError: Unable to execute the initial process, analysis aborted.
I noticed this message after I had gone through my first malware sample analysis. I was pretty sure everything in the setup guide above was done right, but my malware samples were all reporting back as pretty benign.
Turns out the issue was the agent.py script was not running as administrator. So make sure when you launch cmd you do a right-click and Run as administrator.
Once the agent is working right, you should see a line in the console that looks like this after you run your next malware analysis job:
INFO: Guest is running Cuckoo Agent 0.8 (id=cuckoo1, ip=192.168.87.15)
Maybe I'm insane but my Ubuntu 18.x box keeps losing its DNS servers I set. If you're having the same problem, check this out.


Hi fellow...
great work w.r.t the installation of the VM. Would it be convenient for you to share or upload the VM of Cuckoo in order to kill the time and efforts required for its installation.