After some fiddling / experimenting with creating a Ruby-on-Rails (with a PostgreSQL database) that is testable locally on a mac, and also deployable remotely on Heroku, I thought it might be wise to jot down some notes just in case I forget how to repeat this again!
(Note: I'm not a pro in Ruby/Rails/Postgres just yet - this post is meant to be for my own "rescuing" purposes. I'd recommend you use the official Heroku Getting started with Ruby / Rails tutorial to begin with. Use this post only for additional info / resolving issues when you get stuck. I've included some handy links below).
# Useful Tutorials and Articles
Some really important tutorials / articles - highly recommend to use these frequently:
On installing Ruby, Rails, rbenv
- rbenv: very handy for managing ruby version on your mac locally. Use
rbenvto install and select the desired Ruby version locally (within project folder) / globally (Mac wide). - Install Rails / Bundler / Setup Heroku account
- Setup Rails on local Mac
On installing Postgres
- homebrew install postgres: this gives you the command (a symbolic link)
psqlon your local mac, defined at/usr/local/bin. - Download the postgreSQL bundle - including PGAdmin - a nice GUI for database administration
- Managing database passwords with environment variables / good tools
On creating Postgres Rails app
- Heroku - get started with Ruby: when it gets to the part about test running the postgres rails app locally on the machine, things might not work. The DigitalOcean post below has come to my rescue.
- DigitalOcean - how to setup Ruby-on-Rails with Postgres: this helps me greatly on getting postgres and rails-app working together locally on my mac.
- Heroku - get started with Rails4
- Use the Digital Ocean post above for main reference / guide (to get things working locally on mac).
- Use the Heroku get-started with Ruby guides (to get things deployable to heroku).
This aims to be secondary / supplmentary info. (only for the part regarding test running locally on mac).
Update the myapp/config/database.yml like this (development and testing are for local mac test running. Production is for Heroku - ommit this if just interested in local mac test running):
default: &default
  adapter: postgresql
  encoding: unicode
  pool: 5

development:
  <<: *default
  database: myapp_development
  username: myapp
  password: password1

test:
  <<: *default
  database: myapp_test
  username: myapp
  password: password1

production:
  <<: *default
  database: myapp_production
  username: myapp
  password: <%= ENV['MYAPP_DATABASE_PASSWORD'] %>
# Gemfile
The myapp/Gemfile may look something like this:
source 'https://rubygems.org'
ruby "2.2.4"

# Bundle edge Rails instead: gem 'rails', github: 'rails/rails'
gem 'rails', '4.2.3'
# Use postgresql as the database for Active Record
gem 'pg'
# Use SCSS for stylesheets
gem 'sass-rails', '~> 5.0'
# Use Uglifier as compressor for JavaScript assets
gem 'uglifier', '>= 1.3.0'
# Use CoffeeScript for .coffee assets and views
gem 'coffee-rails', '~> 4.1.0'
# See https://github.com/rails/execjs#readme for more supported runtimes
# gem 'therubyracer', platforms: :ruby

# Use jquery as the JavaScript library
gem 'jquery-rails'
# Turbolinks makes following links in your web application faster. Read more: https://github.com/rails/turbolinks
gem 'turbolinks'
# Build JSON APIs with ease. Read more: https://github.com/rails/jbuilder
gem 'jbuilder', '~> 2.0'
# bundle exec rake doc:rails generates the API under doc/api.
gem 'sdoc', '~> 0.4.0', group: :doc

# Use ActiveModel has_secure_password
# gem 'bcrypt', '~> 3.1.7'

# Use Unicorn as the app server
# gem 'unicorn'

# Use Capistrano for deployment
# gem 'capistrano-rails', group: :development

group :development, :test do
  # Call 'byebug' anywhere in the code to stop execution and get a debugger console
  gem 'byebug'

  # Access an IRB console on exception pages or by using <%= console %> in views
  gem 'web-console', '~> 2.0'

  # Spring speeds up development by keeping your application running in the background. Read more: https://github.com/rails/spring
  gem 'spring'
end

gem 'rails_12factor', group: :production
gem 'puma'
do a bundle install to install all the dependencies.
If bundle install puma fail, this Stackoverflow forum answer has helped me out.
Open a new terminal window.
Sign in as the Apple user postgres (with mac password):
sudo su - postgres
run this to get into the SQL environment (now this will ask your for your Postgres password - i.e. the password of the database superuser Postgres - this is definted when you first installed PostgreSQL on your mac. This is not the same as the Apple user password).:
psql
Once you are login as the database superuser Postgres, create a postgres database role (this should be the same name of your app - for ease of organization). (replace myapp with the name of your app, and password1 with your chosen password).
create role myapp with createdb login password 'password1';
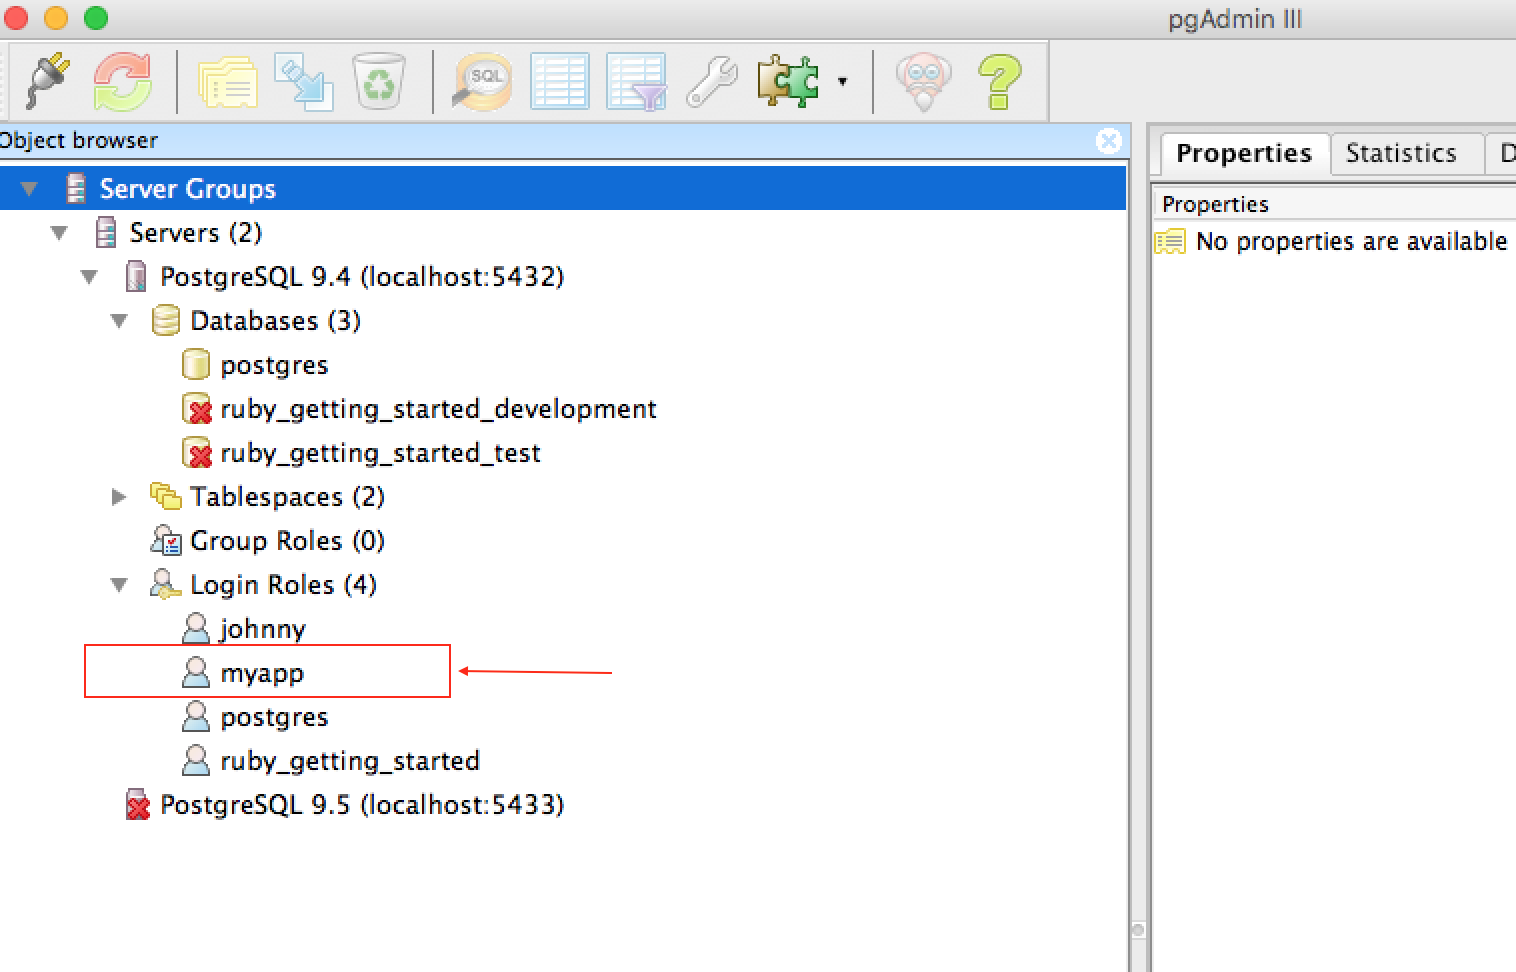
To visualize new role created, open up PG-Admin tool -> Server Groups -> Servers - PostgreSQL 9,4 (localhost: 5432) -> Login Roles -> the new role myapp is created here.
Use the other terminal window (outside SQL command prompt), issue this - to create the databases neccessary.
bundle exec rake db:create db:migrate
Go back to PG Admin tool, you should see the myapp_development and myapp_test databases are created!

(If these databases were not created, try issue this command instead: ake db:setup).
Some snapshots for info:
Chuns-MacBook-Pro:myapp johnny$ bundle exec rake db:create db:migrate
Chuns-MacBook-Pro:myapp johnny$ pwd
/Users/johnny/Documents/heroku_apps/myapp
Chuns-MacBook-Pro:myapp johnny$ rake db:setup
myapp_development already exists
myapp_test already exists
-- enable_extension("plpgsql")
   -> 0.0241s
-- initialize_schema_migrations_table()
   -> 0.0170s
-- enable_extension("plpgsql")
   -> 0.0135s
-- initialize_schema_migrations_table()
   -> 0.0210s
Test run via vanila Rails:
bin/rails server
Navigate to http://localhost:3000/
See this stackoverflow forum to learn more about reversing a rails generate. In a nutshell:
rails destroy controller lalala
rails destroy model yadayada
rails destroy scaffold hohoho
or the short hand:
rails d controller lalala
rails d model yadayada
rails d scaffold hohoho
## Procfile
These two articles are very important:
The myapp/Procfile and myapp/.env files are very important - they defines the local development environment. e.g. which port is used for local web server testing. Anyting specified in .env overwrites whatever default it's in Profile. Make sure to add the .env to your .gitignore since it's for local testing only.
e.g.
Procfile might look like this (default local web server port is specified in config/puma.rb). See this stackoverflow for reference:
web: bundle exec puma -C config/puma.rb
and .env might look like this (define local web server port as 3001. This overwrites the default as specified in config/puma.rb):
RACK_ENV=development
PORT=3001
Also, add this line in the .gitignore file- to ignore version control the local.env` file.
# Ignore the local .env file
/.env
Issuing heroku local will use the .env parameters.
Chuns-MacBook-Pro:myapp johnny$ heroku local
forego | starting web.1 on port 3001
web.1  | [16880] Puma starting in cluster mode...
web.1  | [16880] * Environment: development
web.1  | [16880] * Listening on tcp://0.0.0.0:3001
web.1  | [16880] Use Ctrl-C to stop
web.1  | [16880] - Worker 1 (pid: 16895) booted, phase: 0
web.1  | [16880] - Worker 0 (pid: 16894) booted, phase: 0
Now, test web server locally on mac:
heroku local web
Navigate to http://localhost:3001/
# Deploy to Heroku
heroku create myapp
Do all the git commit as neccessary to ensure master branch is up-to-date.
Then do a git push to push the codes to Heroku.
git push heroku master
Then prepare the databases (postgres) on Heroku:
heroku run rake db:migrate
Once this is done, this URL should be accessible:
http://myapp.heroku.com/widgets
Great, thanks!