A slightly longer writeup to the license-one challenge containing a lot of basic ghidra foo:
- step 0: install ghidra
- step 1: create a project in ghidra
- step 2: add a binary to the project
- step 3: open the binary
- step 4: small tour of ghidras interface
- step 5: reversing the binary
When opening ghidra, the first thing popping up might be the "Tip of the Day". You can close that:
You should then be confronted by the "project" window:

In here, you can manage your ghidra project and the binaries belonging to it. For creating a project, either click on the "File" tab on the top right and select New Project... or Press [CTRL]+[N].

The popup above is ment to allow you to create a "shared project", allowing multiple people to reverse the same binaries and share their knowledge, but that won't be needed here, continue by pressing "Next".
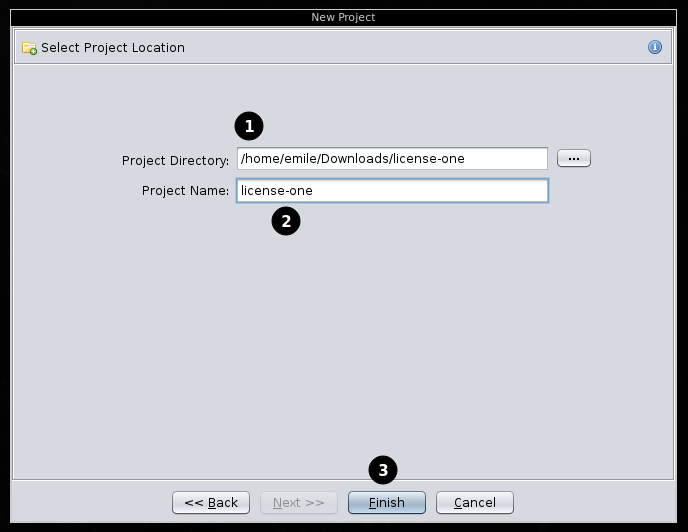
Here, you can provide a folder to store the project in (1) and a name for the project (2). When done, press "Finish" (3).
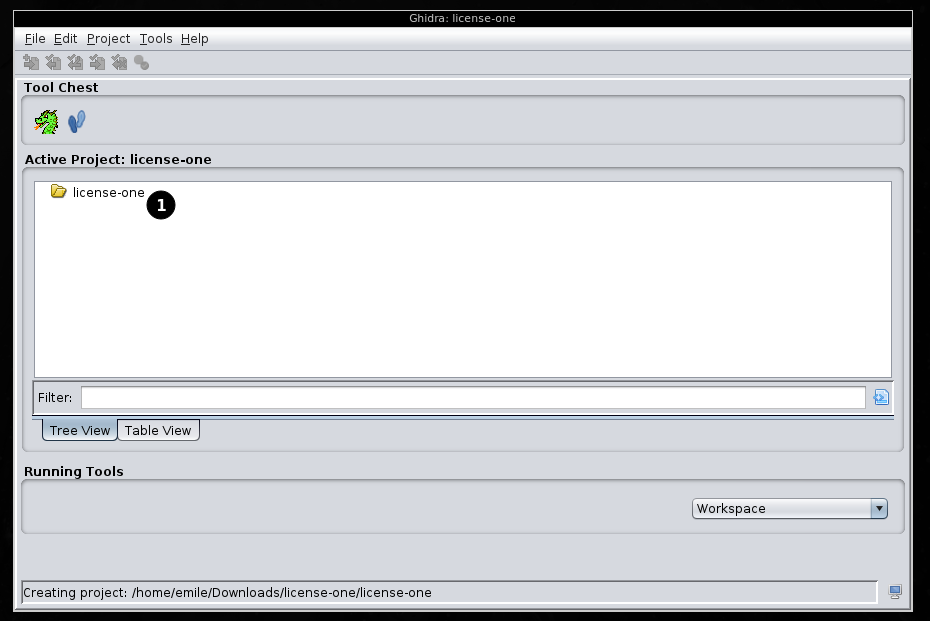
You should now have a folder (1) in your ghidra project view representing your project.
For adding a file (binary, in our case the challenge pwn-license-one), first of all, select the project, then click on "File" and select "Import File...":

Navigate to the files you want to import, then click on "Select File To Import".
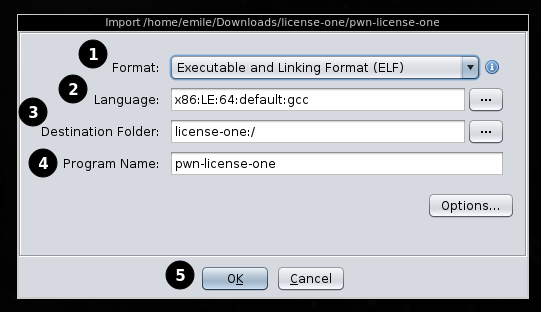
From here, you can edit a view things if needed (in our case, ghidra has correctly identified everything, so we don't have to change stuff). If you'r still interested what this all means:
- What kind of binary is imported (ELF, Raw Binay (aka: "we don't know"))
- What language we're daling with (x86, arm, mips, riscv, ...)
- where to store foo
- that what the name of the binary that is imported is
You can go on and press Ok (5) to proceed.

This last image is quite large, but don't worry, it's just a big overview on all the information ghidra has got on the binary. Just press ok.

Now that you've imported the binary, it shows up in the project view.
Make sure not to miss the amazing dragon animation appearing when you double click the binary to open it. (Now's the point where you can double click the binary to open it).
A few things happen: you've got a few ghidra-related windows open now: the project manager (you can move that away), the main ghidra view (we'll get to that in a second) and a little popup telling you that the binary has not been analyzed yet:

After clicking "ok", ghidra presents you yet another window:
You could tune some settings here, but the defaults are ok for now, press "analyze".
There is a small progress bar at the bottom right you probably won't even see, as ghidra is probably done analyzing this tiny binary in a second or so.
Now, let's get into the "actual" ghidra foo: the main window...
The ghidra interface is ugly. That's just a thing we have to live with for now (although the radare cutter folks have integrated the decompiler somehow).
The "main" ghidra view looks a bit like this:

here a small introduction into what these individual panels contain:
- The "Program Trees" containing information on the binary allowing some easy navigation in the binary. Wan't to view the
.got? press on.got - The "Symbol Tree" containing information regarding the symbols, functions, and other more abstract informations. (We'll use this later on).
- The "Data Type Manager" in which you can define own types, such as structs.
- The "main" dissassembly view, more info on that further down in a minute.
- The "decompiler" view, currently empty, we'll also fix that shortly.
- Console foo for scripting, not if interest for now
- The Navbar with a lot of icons of which some contain hints if you hover on them, not really interesting for now.
Now, for fixing the decompiler view, we need tell ghidra what we want to view. For doing this, you can open the "Functions" folder in the "Symbol Tree" (and adjust the size of the panel a bit):

As you can see, ghidra has extracted symbols from the binary and displays them here. There are a few functions that might sound familliar, a good place to start in most cases is the main function, so click on it. From here on we'll start reversing.
Clicking on the "main" function in the symbols view makes tow changes in the UI:

The dissassembler view in the dissassembler (big panel in the middle) jumps to the address of the main function displaying it and the decompiler view (right panel) displays the decompiled view.
Now you might think: well if I've got the decompiled code, why bother with the dissassembly? Well, it's not so easy: the decompiled code isn't perfect and it can be quite practical or even essential to view the disassembly, but for now, the decompiled code should be enough.
Let's look into what ghidra has generated for us:

- The return type of the main function could not be determined, so it is currently set to "undefined"
- The name of the decompiled function ("main")
- The parameters (none)
- some variables
- some code (we'll go through this in detail)
- ghidra even found a condition and corectly displays it
- some code we don't want to reach
- a return value
So in the end, we've actually got some quite nice code, let's go through it and see how much we can actually understand and how we can make this nicer.
  1
  2 undefined8 main(void)
  3
  4 {
  5   size_t sVar1;
  6   ulong uVar2;
  7   char local_228 [520];
  8   int local_20;
  9   int local_1c;
 10
 11   printf("Please enter your Shell-login key: ");
 12   fflush(stdout);
 13   __isoc99_scanf(&DAT_0040202c,local_228);
 14   printf("Checking: %s\n",local_228);
 15   local_1c = 0;
 16   local_20 = 0;
 17   while( true ) {
 18     uVar2 = SEXT48(local_20);
 19     sVar1 = strlen(local_228);
 20     if (sVar1 <= uVar2) break;
 21     local_1c = local_1c + local_228[local_20];
 22     local_20 = local_20 + 1;
 23   }
 24   if (local_1c == 0x539) {
 25     puts("\nYou entered a valid key. Here you go...");
 26     system("/bin/sh");
 27   }
 28   else {
 29     puts("\nNice try...");
 30   }
 31   return 0;
 32 }
5 size_t sVar1; 6 ulong uVar2; 7 char local_228 [520]; 8 int local_20; 9 int local_1c;These are a few variables used, we can't say to much about then and will have to kind of extract what they are for out of the context of the following code.
11   printf("Please enter your Shell-login key: ");
12   fflush(stdout);
13   __isoc99_scanf(&DAT_0040202c,local_228);
14   printf("Checking: %s\n",local_228);
15   local_1c = 0;
16   local_20 = 0;
This is some code used purely for printing some info for the user (line
11), getting input (line13), reprinting the input from the user (line14) and defining some variables, possibly used in the next lines of code.As we know that the variable currently called
local_228is used to store the user input, we can select it in ghidra using a left-click and pressl(lowecase L) to rename it (to for exampleuser_input). Ghidra will automatically rename all instances of this variable. Line 7 which previously containedchar local_228 [520];now containschar user_input [520];, giving us a better understanding of what this is: a520byte bigchararray containing the user input.We can go on: you might want to rename
&DAT_0040202cto something more readable, for exampleuser_in_fstring.17 while( true ) { 18 uVar2 = SEXT48(local_20); 19 sVar1 = strlen(user_input); 20 if (sVar1 <= uVar2) break; 21 local_1c = local_1c + user_input[local_20]; 22 local_20 = local_20 + 1; 23 }This while loop contains a lot of stuff we don't unterstand yet. In line 19
sVar1is set to the len of our user input (see how renaming variables can be practical? In the end, reversing can be a lot like cleaning up messy code). We can renamesVar1to something better likelen_user_in, giving us a better understanding of what is happening:17 while( true ) { 18 uVar2 = SEXT48(local_20); 19 len_user_in = strlen(user_input); 20 if (len_user_in <= uVar2) break; 21 local_1c = local_1c + user_input[local_20]; 22 local_20 = local_20 + 1; 23 }Having done this, we can see in line
20, there is a condition in the while loop. Conditions in while loops often have to do with an iterator being incremented and thus some end-condition being necessary in order to stop the while loop from running indefinetly. In this case, the value in line22is incremented by1. This is pretty obviously the loop index, so let's renamelocal_20toi:17 while( true ) { 18 uVar2 = SEXT48(local_20); 19 len_user_in = strlen(user_input); 20 if (len_user_in <= uVar2) break; 21 local_1c = local_1c + user_input[i]; 22 i = i + 1; 23 }Now we're getting closer to understanding what is happening in this loop. the value
local_1cseems to be a variable holding the sum of all values stored inuser_input, as in each round of the loop, we add theith value ofuser_inputtolocal_1c. Let's renamelocal_1ctosum:17 while( true ) { 18 uVar2 = SEXT48(local_20); 19 len_user_in = strlen(user_input); 20 if (len_user_in <= uVar2) break; 21 sum = sum + user_input[i]; 22 i = i + 1; 23 }Now that we've renamed a few variables, let's look at the whole main function again:
Line
24contains the condition determining of we get a shell (line26) or just a message (line29).The condition in quite simple: the sum has to be
0x539. Now you might ask yourself: how can the user input be summed up? Well, characters are represented as numbers, in this case using ASCII.A nice thing to view is the ascii manpage (
$ man ascii) if you're on linuxCalculating the needed values can be done like this:
>>> 1337 // ord('z')
10
>>> chr(1337 - (10 * ord('z')))
'u'
So we can enter
zzzzzzzzzzuas a valid key to receive a shell
