Skip to content

Instantly share code, notes, and snippets.

@Jossdz
Last active March 12, 2020 18:57
Show Gist options
  • Save Jossdz/011f3270f6f7caaf4a56f3b015934e07 to your computer and use it in GitHub Desktop.
Save Jossdz/011f3270f6f7caaf4a56f3b015934e07 to your computer and use it in GitHub Desktop.

React | UI components librarie’s ANTD

Learning goals:

After this lesson you will be able to:

  • You can explain what a component library is and how different it is from a style library.
  • Add and configure a component library.
  • Use and setup a component of antd library

In web applications we have worked styles in two different ways, the first is writing our styles by hand, by ourselves. The second option has been to opt for a library / framework of styles such as Bootstrap, Bulma, etc. This gives us the ability to focus on the functionality and business logic of the applications. But just as our frontend development has advanced, style libraries are being left behind giving way to UI component libraries.

UI Components library

A component library is a package that contains a series of previously generated React components, unlike style libraries that add styles based on html classes and functionality with Jquery, the component libraries are elements with everything needed to work by itself The UI components contain the markup (html / jsx), styles (css) and logic (js) that they need to look and work well.

// Styles library/framework code
<button class='btn btn-primary'>Send</button>

// Component library code
<Button primary>Send</Button>

When style libraries needed additional visual properties, such as button type, column size, or other property, we added an extra class. Now react introduces a better way to handle the styles based on the props of the components and so the code is greatly reduced and the markup looks very clean.

Antd


Antd is a react UI components library based on a design system elegant and tested, with a great amount of styled and functional components.

Installation

In your react project:

$ npm install antd

Import the antd.css in the index.js file:

import 'antd/dist/antd.css'

Now you can start to use UI components from the antd library.

Antd components

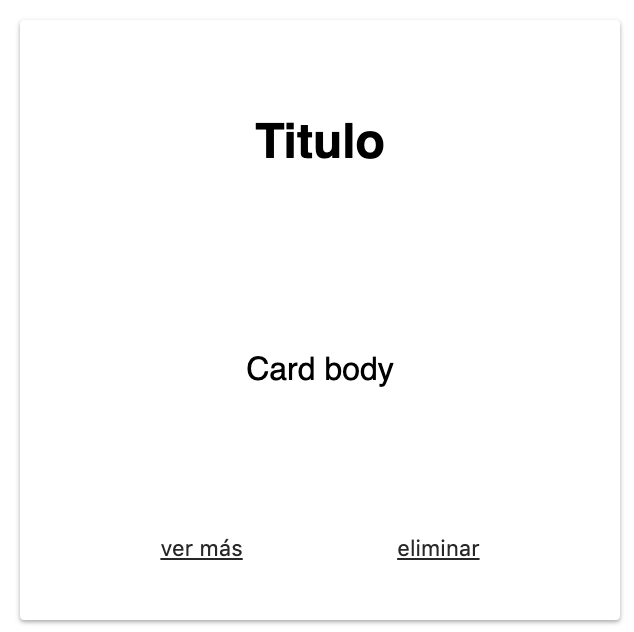
import { Button, Card } from "antd";

const { Meta } = Card;

const Main = () => (
	<main>
    <h1>React UI Components</h1>
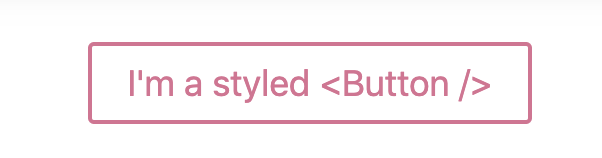
    <Button type='primary'>Components List</Button>
		<Card
			hoverable
			style={{ width: 240 }}
			cover={<img alt="example" src="https://os.alipayobjects.com/rmsportal/QBnOOoLaAfKPirc.png" />}
		>
			<Meta
				title="Europe Street beat"
				description="www.instagram.com"
			/>
		</Card>
  </main>
);

The result should look like this:

Antd Grid

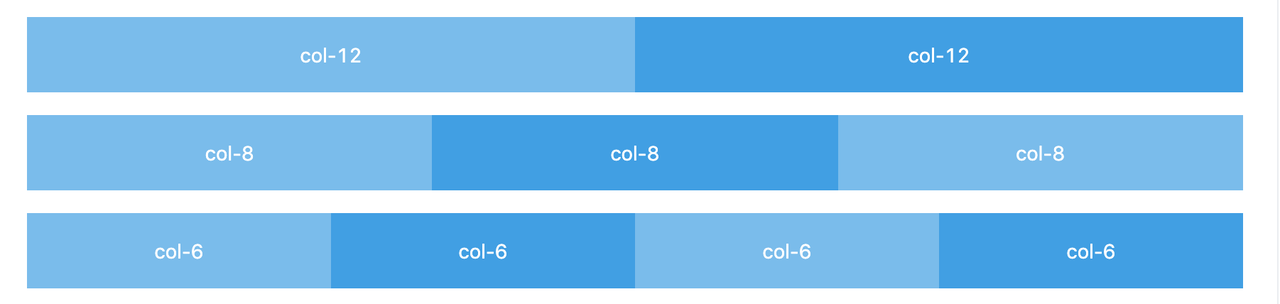
In the antd grid system, they define the frame outside the information area based on row and column, to ensure that every area can have stable arrangement.

the grid layout uses a 24 grid layout to define the width of each "box", but does not rigidly adhere to the grid layout.

  import {Button, Row, Col} from 'antd'

  const Main = () => (
    <main>
      <Row>
        <Col span={12} style={{background: 'red'}}>Col</Col>
        <Col span={12} style={{background: 'blue'}}>Col</Col>
      </Row>
    </main>
  )
Grid gutter

You can use the gutter property of Row as grid spacing.

  import {Button, Row, Col} from 'antd'

  const Main = () => (
    <main>
      <Row gutter={16}>
        <Col className="gutter-row" span={12}>
          <div
            className="gutter-box"
            style={{background: 'red'}}
          >
            col-6
          </div>
        </Col>
        <Col className="gutter-row" span={12}>
          <div
            className="gutter-box"
            style={{background: 'blue'}}
          >
              col-6
          </div>
        </Col>
      </Row>
    </main>
  )
Antd Layout

Handling the overall layout of a page.

import { Layout, Menu } from "antd";

const {
  Header, Footer, Sider, Content,
} = Layout;

const Main = () => (
	<main>
		<Layout>
      <Header>
        <Menu
          theme="dark"
          mode="horizontal"
          defaultSelectedKeys={['1']}
          style={{ lineHeight: '64px' }}
        >
          <Menu.Item key="1">nav 1</Menu.Item>
          <Menu.Item key="2">nav 2</Menu.Item>
          <Menu.Item key="3">nav 3</Menu.Item>
        </Menu>
      </Header>
      <Content>
        App Content
      </Content>
      <Footer>Footer</Footer>
    </Layout>
	</main>
);

There are a lot of Layouts already created at antd layout page

Summary

In this lesson, you learned how to distinguish between the styles library and the component library and how a library of UI components works. Learning also what it is and how a design is installed, a library with many incredible components, we saw very few, but the principle is the same. Try to integrate into an exercise for more antd components.

Extra Resources

React | Context API

Learning goals

After this lesson you will be able to:

  • Understand what context api is
  • Understand the prop drilling issue
  • Explain what a global state is
  • Understand the usage of a global state
  • Understand how and in what cases a global state is used
  • Provide a context to your react apps
  • Consume the context in any component you want

Context API

Context API it's a feature added to the 16.3.0 version of react which provides a solution to an specific issue: props drilling. props drilling is an issue generated by passing properties from father to son, from son to grandchild, from grandchild to great grandchild and so on.

Context provides a way to pass data through the component tree without having to pass props down manually at every level.

props

In a typical React application, data is passed top-down (parent to child) via props, but this can be cumbersome for certain types of props (e.g. locale preference, UI theme) that are required by many components within an application. Context provides a way to share values like these between components without having to explicitly pass a prop through every level of the tree.

Let's define this props drilling problem:

function App() {
  let me = {
    name: "Joss",
    age: 23,
    cool: true
  };
  return <Family name={me.name} />;
}

function Family(props) {
  return <Person name={props.name} />;
}

function Person(props) {
  return (
    <div>
      <p>Hey my name is: {props.name}</p>
    </div>
  );
}

We have a little problem here, our App component uses another component called Family. As App does, Family component contains another component called Person. Person component needs a prop called name and our value name it's defined at the App component scope. We solve this issue passing down our name prop. But, ¿what happend if we have other five extra components between App and Person?...

When to Use Context

Context is designed to share data that can be considered “global” for a tree of React components, such as the current authenticated user, theme, or preferred language.

context

Working with Context

The first step it's create our Context with the CreateContext method of the React library.

  const MyContext = React.createContext(defaultValue);

This MyContext variable have multiple purposes the first one it's create a Provider component to encapsulate our entire application. This Provider component looks like this:

class MyProvider extends React.Component {
  render() {
    return <MyContext.Provider>{this.props.children}</MyContext.Provider>;
  }
}

We generate a wrapper component for our application, notice that this component it's a class component for a particular reason: we still missing the properties to share across the app:

class MyProvider extends React.Component {
  state = {
    me: {
      name: "Joss",
      age: 23,
      cool: true
    }
  };
  render() {
    return (
      <MyContext.Provider value={this.state}>
        {this.props.children}
      </MyContext.Provider>
    );
  }
}

The class component helps us too define a state for this wrapper component, this set a global information for our application and we can also pass methods to change this information.

The next step is wrap our all application with our new MyProvider component:

const rootElement = document.getElementById("root");
ReactDOM.render(
  <MyProvider>
    <App />
  </MyProvider>,
  rootElement
);

With this last change we provide to every component in our application with out context values, at this time we can consume our context. We can do it with the Consumer property of our context, MyContext component.

ℹ️To see everything working remove the me variable and each name prop in the Person and Family component.

The Person component it's the only component which needs the name property, then it's a great location to place our context consumer:

function Person() {
  return (
    <MyContext.Consumer>
      {context => (
        <div>
          <p>Hey my name is: {context.me.name}</p>
        </div>
      )}
    </MyContext.Consumer>
  );
}

The Context Consumer Component receives an structure called render props, which is this rare content between our MyContext.Consumer component. We execute the callback inside each tag and take this context property from the first param. This first param contains the value of the context, where we can easily take the me property and our name inside.

This is how we can access to our Global state provided by context. Let's try to add a method for our birthday and pass it to the value of our Provider:

class MyProvider extends React.Component {
  state = {
    me: {
      name: "Joss",
      age: 23,
      cool: true
    }
  };
  birthday = () => {
    this.setState(prev => {
      return {
        me: {
          ...prev.me,
          age: prev.me.age + 1
        }
      };
    });
  };
  render() {
    return (
      <MyContext.Provider
        value={{
          ...this.state,
          birthday: this.birthday
        }}
      >
        {this.props.children}
      </MyContext.Provider>
    );
  }
}

Since we have access to each property and value passed by Provider value, we can use our new method at our Person component:

function Person() {
  return (
    <MyContext.Consumer>
      {context => (
        <div>
          <p>
            Hey my name is: {context.me.name} and I'm {context.me.age} yo
          </p>
          <button onClick={context.birthday}>birthday</button>
        </div>
      )}
    </MyContext.Consumer>
  );
}

This is how we pass properties and method to change props to every component in the application, without care about props drilling or the need same data in multiple components.

Global state scope

React context is a really powerfull tool for managing a global state but we need to think each time we develop an application which data should be available at a global way and which can be manage as a local state.

Think in how your application will looks like and which data you need in each page/component, after this look at which data is used in multiple components because that is the information that should be hold on the global state, the rest can be managed at local level on the component is using it.

In the example above we have a generic application with a user and a profile route that shows th user information in another component below. We can easily see that there are two different states: local and global.

Login and Signup components are using a local state to manage the user input information, but login component is also consuming the global state to get access to the function that sets the user into the global state.

We also have a component called profile that handles a local state that probbably makes a request to the backend to get the user projects, this is information that we only need in this component so it's managed locally by the component that needs this information but, at the same time we have to show the user information so we have another component that consumes the local state for show the username into the profile route.

Perks of use context

Once you know how to add context to your react applications you must know what are those good thinks of using it:

  • We can solve our entire application whit a low usage of class based components, just our Provider component and the components that needs to manage a local state should be a class component, with the rest we can go with functional components.
  • Our components that uses context properties will automatically re-render once this properties changes.
  • Now we have the oportunity to centralize data in order to be accessible at any level withoout the props drilling issue.

Summary

Context is primarily used when some data needs to be accessible by many components at different nesting levels. It's also a tool to create a 'global' state like Redux or Mobx, but much more easy to start with and it's included in react 16.3.0.

Remember always try to imagine how your application will looks like in order to define which data should be available globally and which can be hold locally this helps to define wheter a component shopld be functional or class based.

Extra Resources

React | Styled Components

Learning goals:

After this lesson you will be able to:

  • Explain what styled component library is
  • Learn what styled components are
  • Create your own styles for your components
  • Apply component only and Global styles
  • Reuse components across the app

What is styled-components?

Styled-components it's a react and react native library. Utilising tagged template literals (a recent addition to JavaScript) and the power of CSS, styled-components allows you to write actual CSS code to style your components.

Style-components allows us to create a component-copy of any primitive html tag or element and style it into this new tagged template-literal.

import styled from 'styled-components'

const Button = styled.button``

This Button variable here is now a React component that you can use like any other React component!

If you render our lovely component now (just like any other component: <Button />) this is what you get:

I'm a <Button />!

It renders a button! That's not a very nice button though, we can do better than this, let's give it a bit of styling and tickle out the hidden beauty within!

  const Button = styled.button`
    background: transparent;
    border-radius: 3px;
    border: 2px solid palevioletred;
    color: palevioletred;
    margin: 0 1em;
    padding: 0.25em 1em;
  `

As you can see, styled-components lets you write actual CSS in your JavaScript. This means you can use all the features of CSS you use and love, including (but by far not limited to) media queries, all pseudo-selectors, nesting, etc.

Button Example

Own selector, nesting and pseudo clases

Let's Create a card component:

  const Card = styled.div`
    background: #fff;
    border-radius: 2px;
    display: inline-block;
    height: 300px;
    margin: 1rem;
    width: 300px;
    display: flex;
    flex-direction: column;
    box-shadow: 0 1px 3px rgba(0,0,0,0.12), 0 1px 2px rgba(0,0,0,0.24);
    transition: all 0.3s cubic-bezier(.25,.8,.25,1);
    justify-content: space-around;
    `

and use the Card component:

  <Card>
    <h2>Titulo</h2>
    <p>Card body</p>
    <nav>
      <button>ver más</button>
      <button>eliminar</button>
    </nav>
  </Card>

In order to reach the components under the card we can use nested selectors:

 const Card = styled.div`
    background: #fff;
    border-radius: 2px;
    display: inline-block;
    height: 300px;
    margin: 1rem;
    width: 300px;
    display: flex;
    flex-direction: column;
    box-shadow: 0 1px 3px rgba(0,0,0,0.12), 0 1px 2px rgba(0,0,0,0.24);
    transition: all 0.3s cubic-bezier(.25,.8,.25,1);
    justify-content: space-around;
    nav{
      display: flex;
      justify-content: space-evenly
      button{
        border: none;
        text-decoration: underline;
      }
    }`

this works because we have an nav tag children of our Card component and that nav have button tags inside.

Now our card should look like this:

the only thing we are missing is this card elevated behavior, for what we are going to need use the hover pseudo selector. In styled-components you can use the & selector which means 'this component' and the pseudo selector:

&:hover{
    box-shadow: 0 14px 28px rgba(0,0,0,0.25), 0 10px 10px rgba(0,0,0,0.22);
  }

last but not least, we can always use media queries in our components:

@media (max-width: 600px) {
    width: 100%;
    margin: 0;
  }

Heres the result

Global styling

We probably are going to need reset or normalize our css as we did before in module 1, we already know that normalizing makes browsers render all elements more consistently and in line with modern standards. This is why we probably want to use global styles.

to get GlobalStyles with styled-components we have to use the createGlobalStyle function:

import styled, {createGlobalStyle} from 'styled-components'

And use it as we defined our copy components to generate a GlobalStyle component

const GlobalStyle = createGlobalStyle`
  body {
    background-color: #feeffe;
  }
  html{
    font-size: 16px;
  }
`

The next and last step is place the GlobalStyle component in our render method:

<GlobalStyle/>

Here's the result

Props in styled components

since we work with components we have the posibility to work with the props of any styled-component like this:

  <Button type='ghost'></Button>

Styled Button:

  const Button = styled.button`
    border: 1px solid crimson;
    background-color: ${props => props.type==='ghost' ? 'crimson' : 'transparent'}
  `

Summary

Now we know how to create custom styles for react components and the power of css in js, it's really important notice that this is js and you can easily create your own UI components library leaving the styled components in their own js file.

Extra Resources

Sign up for free to join this conversation on GitHub. Already have an account? Sign in to comment