Skip to content

Instantly share code, notes, and snippets.

@MSFTserver
Last active June 25, 2023 02:13
  • Star 66 You must be signed in to star a gist
  • Fork 12 You must be signed in to fork a gist
Star You must be signed in to star a gist
Save MSFTserver/a05f637f32302918dd893318a4d9f62b to your computer and use it in GitHub Desktop.
guide to installing disco v5+ locally on windows

Install Disco Diffusion v5 for Windows

NOTE: Pytorch3d no longer has to be compiled i have stripped out the function we use to make this a lot easier and also so we do not have to use WSL2 with linux and can now run directly on your windows system.

Comments section is not checked often for issues please join the disco diffusion discord for assistance

https://discord.gg/mK4AneuycS

You may now use the official disco diffusion notebook with this tutorial as it has been uodated to reflect the changes here for better cross platform support

This will walk you through getting your environment setup to run most of the GANs with Anaconda as a Virtual Python Environment.

System Requirements:

  OS: Windows (11/10/8/7), Ubuntu(19,20)
  GPU: Nvidia (AMD hasnt been tested)
  VRAM: 12gb+

1) Download Tools!

  1. A) Cuda enabled GPU
  1. B) Python (Anaconda)
  1. C) Git
    • https://git-scm.com/downloads
    • version control manager for code
    • we just use it to download repos from GitHub
    • Must be on system PATH, When installing select the option add to system PATH
  1. D) FFmpeg
  1. E) ImageMagick
  1. F) Wget
    • used to download models for projects
    • Windows users need this verison
      • https://eternallybored.org/misc/wget/
      • (spoiler) Add to Path on Windows (spoiler)
      • download the .exe
      • create a new folder to put the .exe in (prefereable on the root of your C:/ drive)
        • e.g C:/wget/wget.exe
      • open Control Panel and search for environment variables
      • select the one with the shield icon Edit the system environment variables
      • click the button at the bottom Environment Virables...
      • under System variables find the and select the path variable
      • click Edit... button and then New
        • add the new path to folder the .exe is in
        • e.g C:/wget
      • once entered click Ok on each window until all 3 are closed
      • for the new env variables to be used you must reopen a new Command Prompt window
    • Linux users can just use the package in their distributions
  1. G) cURL
    • used to download models, some projects use this instead of wget
    • Latest versions of windows have cURL pre installed
    • Older versions that dont include cURL use this one
    • Linux users can just use the package in their distributions

2) Install Disco Dependencies

  1. A) Setup and activate conda env
    • conda create --name disco-diffusion python=3.9
    • conda activate disco-diffusion
  1. B) Install a few more pip dependencies
    • pip install ipykernel opencv-python pandas regex matplotlib ipywidgets
  1. C) Install Pytorch with CUDA support!
  1. D) Download disco diffusion repo!
    • git clone https://github.com/alembics/disco-diffusion.git
    • change directories into the downloaded repo
      • cd disco-diffusion

3) Run Disco Diffusion

there are several ways to run disco diffusion at this point:

1. [PYTHON .py]

plain python file wich means you will need to go into the file and manually find all the configuration options and change them as needed, an easy way to go about this is searching the document for #@param lines and edit ones containing that comment trailing the lines e.g. use_secondary_model = True #@param {type: 'boolean'}.

  • Run disco diffusion
    • python -m disco.py

2-3. [VS .py/.ipynb]

running the .ipynb file directly in VS also requires editing of the #@param lines in the code

4-5. [VS + Jupyter extension .py/.ipynb]

using the jupyter extension in VS we can get individual cell support to run the either the .ipynb or the .py file also requires editing of the #@param lines in the code

  • Download Visual Studio
  • Get the Jupyter Notebook extensions
    • head over the to the extensions tab in VS code
    • search for jupyter and install the one from Microsoft
    • after this is enabled the notebook should have several new toolbars and features
      • you can actually run both the .py file or .ipynb file which both support individual cells
    • ENJOY!

6. [Jupyter .ipynb]

using Jupyter notebooks to run the .ipynb file also requires editing of the #@param lines in the code

  • with anaconda installed you should already have jupyter notebook installed if you dont simple run:
    pip install jupyterlab
  • Run Jupyter
    • jupyter notebook
      • this launches the juptyer notebook in the current directory and open a webpage
    • under the Files tab double click and open the file named Disco-Diffusion.ipynb
    • ENJOY!

7. [Colab w/ Jupyter using colab links]

using Google Colab as a front end to get the nice view of all the editable fields while using Jupyter as middleware to connect your local resources

  • with anaconda installed you should already have jupyter notebook installed if you dont simple run:
    pip install jupyterlab
  • Connect to colab front end
    • pip install --upgrade jupyter_http_over_ws>=0.0.7
    • Enable the extension for jupyter
      • jupyter serverextension enable --py jupyter_http_over_ws
    • Start the jupyter server
      • jupyter notebook --NotebookApp.allow_origin='https://colab.research.google.com' --port=8888 --NotebookApp.port_retries=0 --no-browser
    • Inside google colab click the down Arrow icon next to the Connect button to view more options
    • Select connect to Local Runtime and enter the Local Host Url that was printed in the console when we started jupyter server
    • ENJOY!
@Theodoridis
Copy link

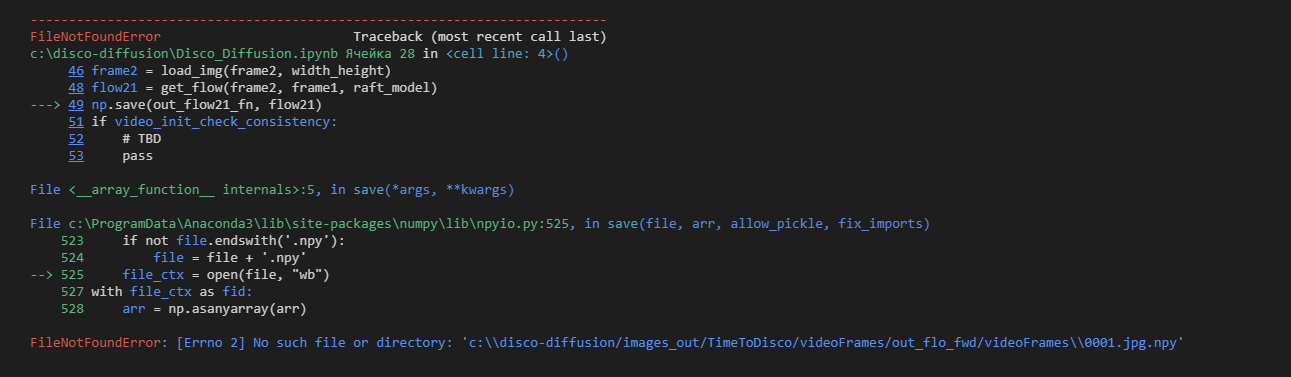
I finally got setup and running, but after generating the first frame I keep encountering this error and not able to find the solution. Any suggestion out here?

Frames: 0%
1/5000 [00:00<00:55, 90.89it/s]
translation_x: 0.0 translation_y: 0.0 translation_z: 10.0 rotation_3d_x: 0.0 rotation_3d_y: 0.0 rotation_3d_z: 1.25
translation: [-0.0, 0.0, -0.05]
rotation: [0.0, 0.0, 1.25]
rot_mat: tensor([[[ 0.9998, -0.0218,  0.0000],
         [ 0.0218,  0.9998,  0.0000],
         [ 0.0000,  0.0000,  1.0000]]], device='cuda:0')
Seed used: 120943660
---------------------------------------------------------------------------
FileNotFoundError                         Traceback (most recent call last)
Input In [29], in <cell line: 217>()
    216 torch.cuda.empty_cache()
    217 try:
--> 218     do_run()
    219 except KeyboardInterrupt:
    220     pass

Input In [6], in do_run()
    407 else:
    408   img_filepath = '/content/prevFrame.png' if is_colab else 'prevFrame.png'
--> 410 next_step_pil = do_3d_step(img_filepath, frame_num, midas_model, midas_transform)
    411 next_step_pil.save('prevFrameScaled.png')
    413 ### Turbo mode - skip some diffusions, use 3d morph for clarity and to save time

Input In [6], in do_3d_step(img_filepath, frame_num, midas_model, midas_transform)
    313 rot_mat = p3dT.euler_angles_to_matrix(torch.tensor(rotate_xyz, device=device), "XYZ").unsqueeze(0)
    314 print("rot_mat: " + str(rot_mat))
--> 315 next_step_pil = dxf.transform_image_3d(img_filepath, midas_model, midas_transform, DEVICE,
    316                                         rot_mat, translate_xyz, args.near_plane, args.far_plane,
    317                                         args.fov, padding_mode=args.padding_mode,
    318                                         sampling_mode=args.sampling_mode, midas_weight=args.midas_weight)
    319 return next_step_pil

File ~\miniconda3\envs\disco-diffusion\lib\site-packages\torch\autograd\grad_mode.py:27, in _DecoratorContextManager.__call__.<locals>.decorate_context(*args, **kwargs)
     24 @functools.wraps(func)
     25 def decorate_context(*args, **kwargs):
     26     with self.clone():
---> 27         return func(*args, **kwargs)

File ~\disco-diffusion\disco_xform_utils.py:19, in transform_image_3d(img_filepath, midas_model, midas_transform, device, rot_mat, translate, near, far, fov_deg, padding_mode, sampling_mode, midas_weight, spherical)
     17 @torch.no_grad()
     18 def transform_image_3d(img_filepath, midas_model, midas_transform, device, rot_mat=torch.eye(3).unsqueeze(0), translate=(0.,0.,-0.04), near=2000, far=20000, fov_deg=60, padding_mode='border', sampling_mode='bicubic', midas_weight = 0.3,spherical=False):
---> 19     img_pil = Image.open(open(img_filepath, 'rb')).convert('RGB')
     20     w, h = img_pil.size
     21     image_tensor = torchvision.transforms.functional.to_tensor(img_pil).to(device)

FileNotFoundError: [Errno 2] No such file or directory: 'prevFrame.png'

@RyushoYosei
Copy link

Well Now I'm having this issue, i get all the way to the diffusion step, and it gives me this.


RuntimeError Traceback (most recent call last)

Input In [16], in <cell line: 204>()
205 model.load_state_dict(torch.load(custom_path, map_location='cpu'))
206 else:
--> 207 model.load_state_dict(torch.load(f'{model_path}/{get_model_filename(diffusion_model)}', map_location='cpu'))
208 model.requires_grad_(False).eval().to(device)
209 for name, param in model.named_parameters():

File ~\anaconda3\envs\disco-diffusion\lib\site-packages\torch\serialization.py:705, in load(f, map_location, pickle_module, **pickle_load_args)
700 if _is_zipfile(opened_file):
701 # The zipfile reader is going to advance the current file position.
702 # If we want to actually tail call to torch.jit.load, we need to
703 # reset back to the original position.
704 orig_position = opened_file.tell()
--> 705 with _open_zipfile_reader(opened_file) as opened_zipfile:
706 if _is_torchscript_zip(opened_zipfile):
707 warnings.warn("'torch.load' received a zip file that looks like a TorchScript archive"
708 " dispatching to 'torch.jit.load' (call 'torch.jit.load' directly to"
709 " silence this warning)", UserWarning)

File ~\anaconda3\envs\disco-diffusion\lib\site-packages\torch\serialization.py:242, in _open_zipfile_reader.init(self, name_or_buffer)
241 def init(self, name_or_buffer) -> None:
--> 242 super(_open_zipfile_reader, self).init(torch._C.PyTorchFileReader(name_or_buffer))

RuntimeError: PytorchStreamReader failed reading zip archive: failed finding central directory

@RyushoYosei
Copy link

..Fixed that, was working fine ealrier today, suddenly now it can't find the custom model it was using earlier, ..Nothing has changed, but now it suddenly -never- loads custom models...like it can't see any of it @_@

@pikok85
Copy link

pikok85 commented Aug 3, 2022

obraz
Hi. Having issues with optical flow maps generation. Previously had error importing from utils.utills, got that resolved by renaming utils.utils to raftutils.utils, but now I'm getting this. Could you help please?

@blanelts
Copy link

blanelts commented Aug 4, 2022

@pikok85 Hello. Were you able to solve the problem? I just have the same problem and don't know how to solve it.
image

@Acephalia
Copy link

Hello, thank you for the awesome work on this. I've managed to run all the clips without any errors but on the final diffuse I'm getting an error : TypeError: ddim_sample_loop_progressive() got an unexpected keyword argument 'transformation_fn'

Would anyone be able to shed some light? WOuld be much appreciated thank you!

Full error output :

Seed used: 1777865372
---------------------------------------------------------------------------
TypeError                                 Traceback (most recent call last)
Input In [19], in <cell line: 217>()
    216 torch.cuda.empty_cache()
    217 try:
--> 218     do_run()
    219 except KeyboardInterrupt:
    220     pass

Input In [6], in do_run()
    648     init = regen_perlin()
    650 if args.diffusion_sampling_mode == 'ddim':
--> 651     samples = sample_fn(
    652         model,
    653         (batch_size, 3, args.side_y, args.side_x),
    654         clip_denoised=clip_denoised,
    655         model_kwargs={},
    656         cond_fn=cond_fn,
    657         progress=True,
    658         skip_timesteps=skip_steps,
    659         init_image=init,
    660         randomize_class=randomize_class,
    661         eta=eta,
    662         transformation_fn=symmetry_transformation_fn,
    663         transformation_percent=args.transformation_percent
    664     )
    665 else:
    666     samples = sample_fn(
    667         model,
    668         (batch_size, 3, args.side_y, args.side_x),
   (...)
    676         order=2,
    677     )

TypeError: ddim_sample_loop_progressive() got an unexpected keyword argument 'transformation_fn'

@coltography
Copy link

Cell 1.3 I get this error:

ModuleNotFoundError                       Traceback (most recent call last)

Input In [4], in <cell line: 99>()
     97 from dataclasses import dataclass
     98 from functools import partial
---> 99 import cv2
    100 import pandas as pd
    101 import gc

ModuleNotFoundError: No module named 'cv2'

Anyone know how to get past this? I followed all instructions to a T. Re-did everything, still got the same error. No idea what could be wrong or different at this point.

@screan
Copy link

screan commented Dec 4, 2022

getting same cv2 error

Sign up for free to join this conversation on GitHub. Already have an account? Sign in to comment