If you want to get more information, I suggest you browse raspberry-pi-pcie-devices and its issue.
Use cases
| CM4 IO Board(Official) | CM4-IO-BASE-A(Waveshare) |
|---|---|
 |
 |
Hardware:
| Item | Image |
|---|---|
| Raspberry Pi - Compute Module 4 | 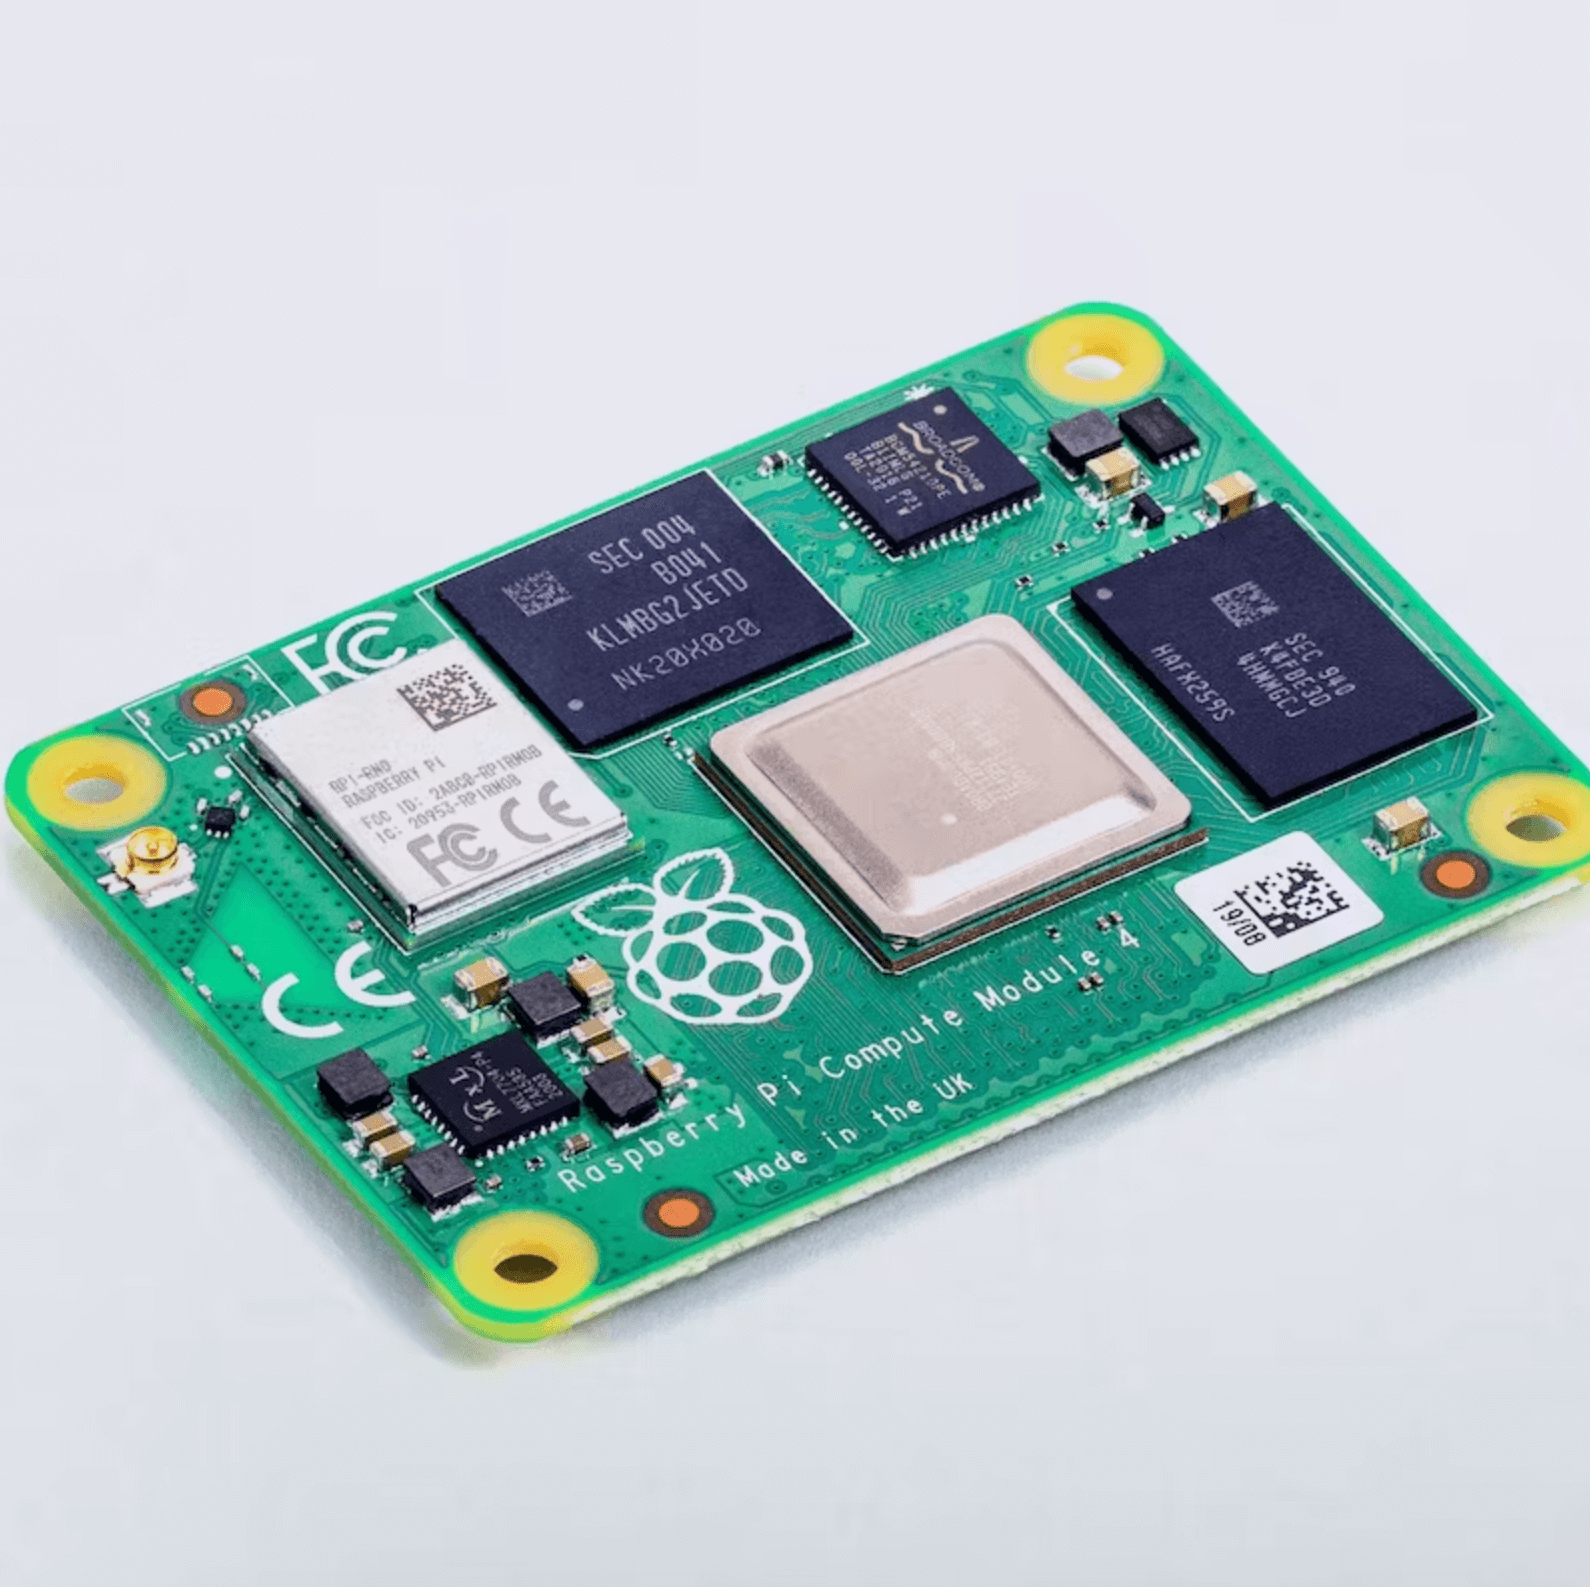 |
| Raspberry Pi - Compute Module 4 IO Board | 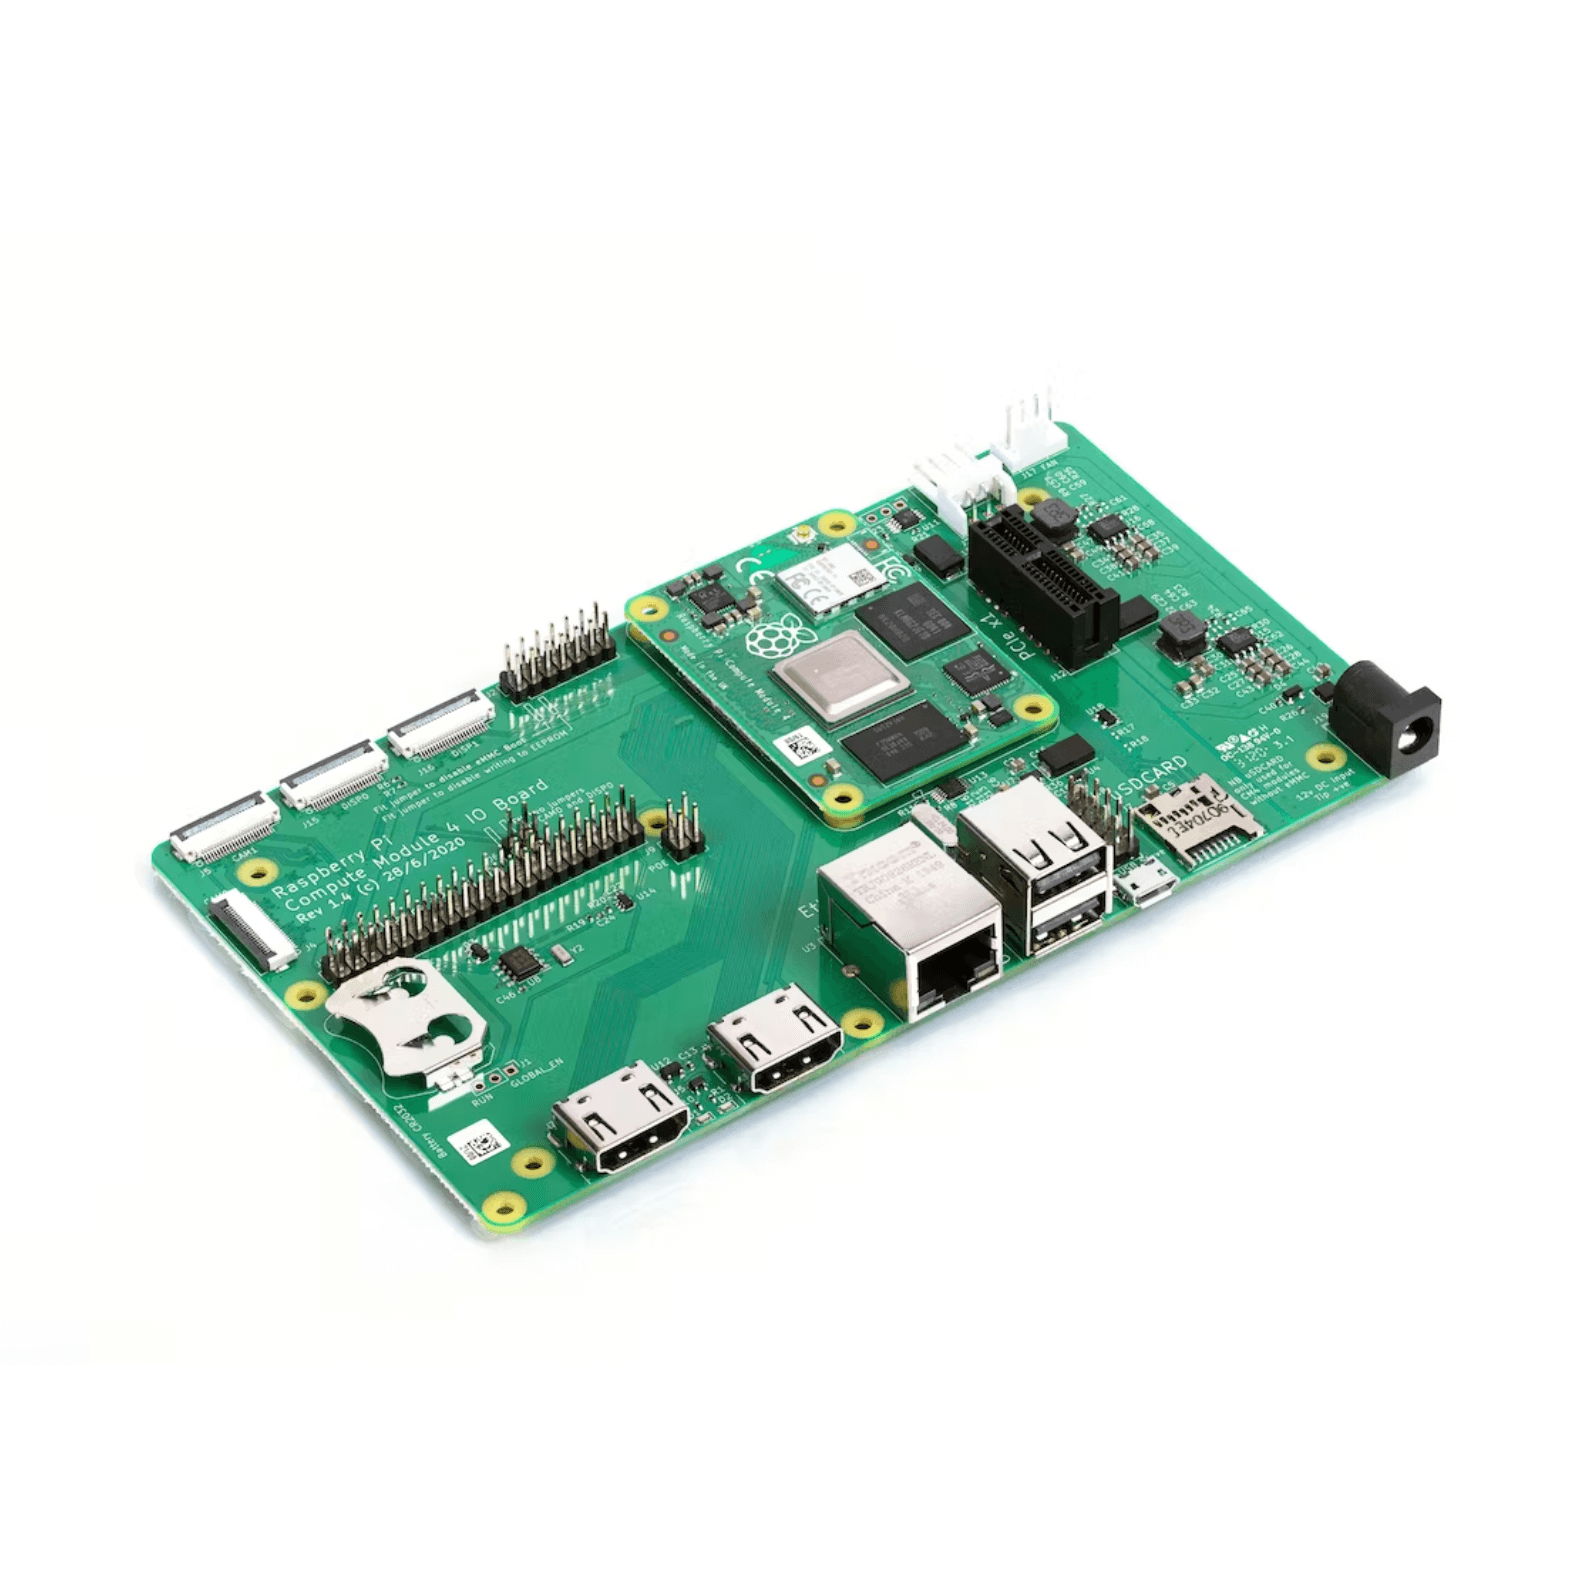 |
| Waveshare - CM4-IO-BASE-A | 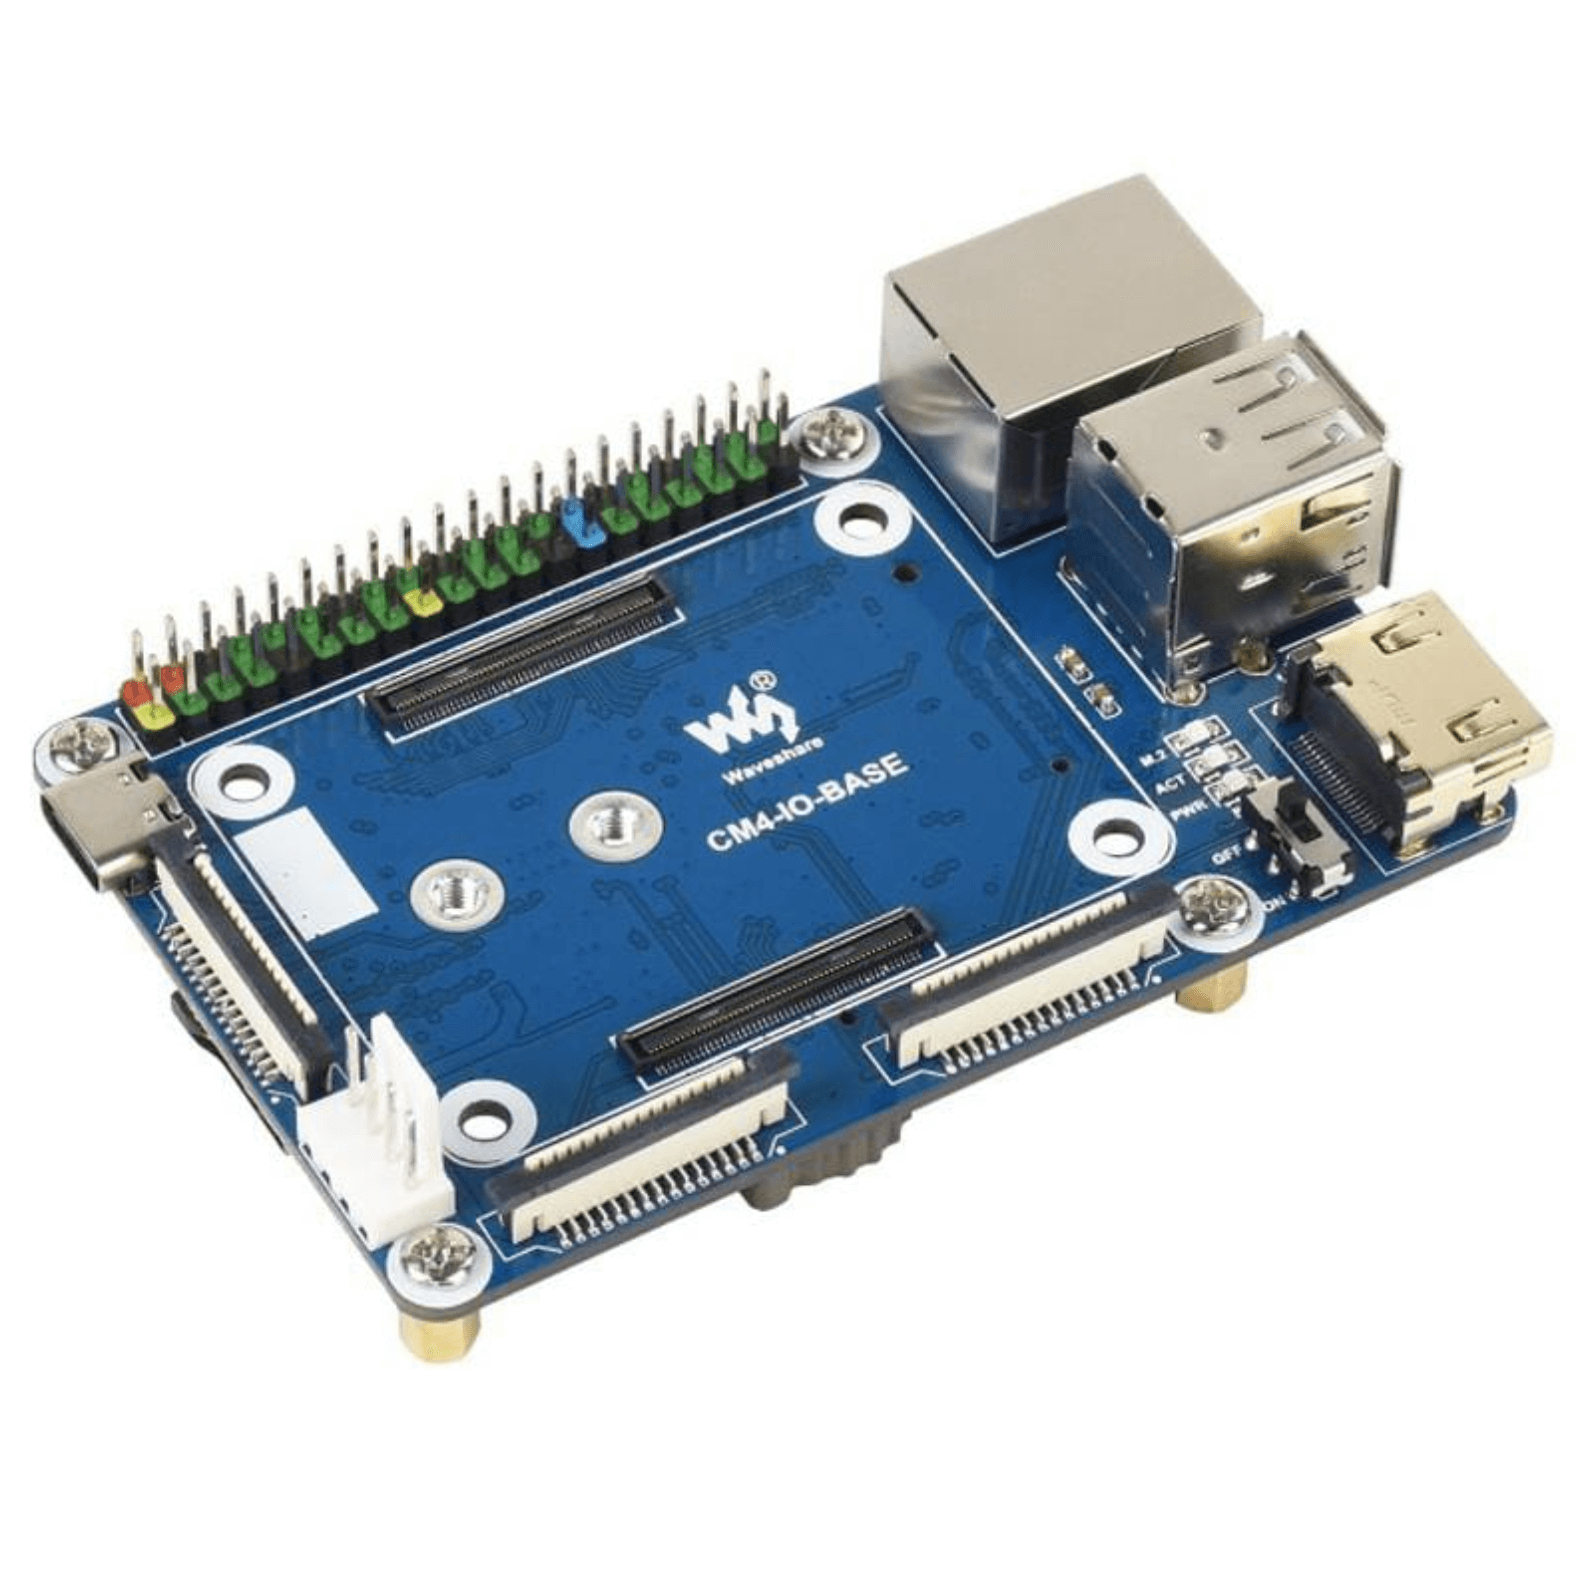 |
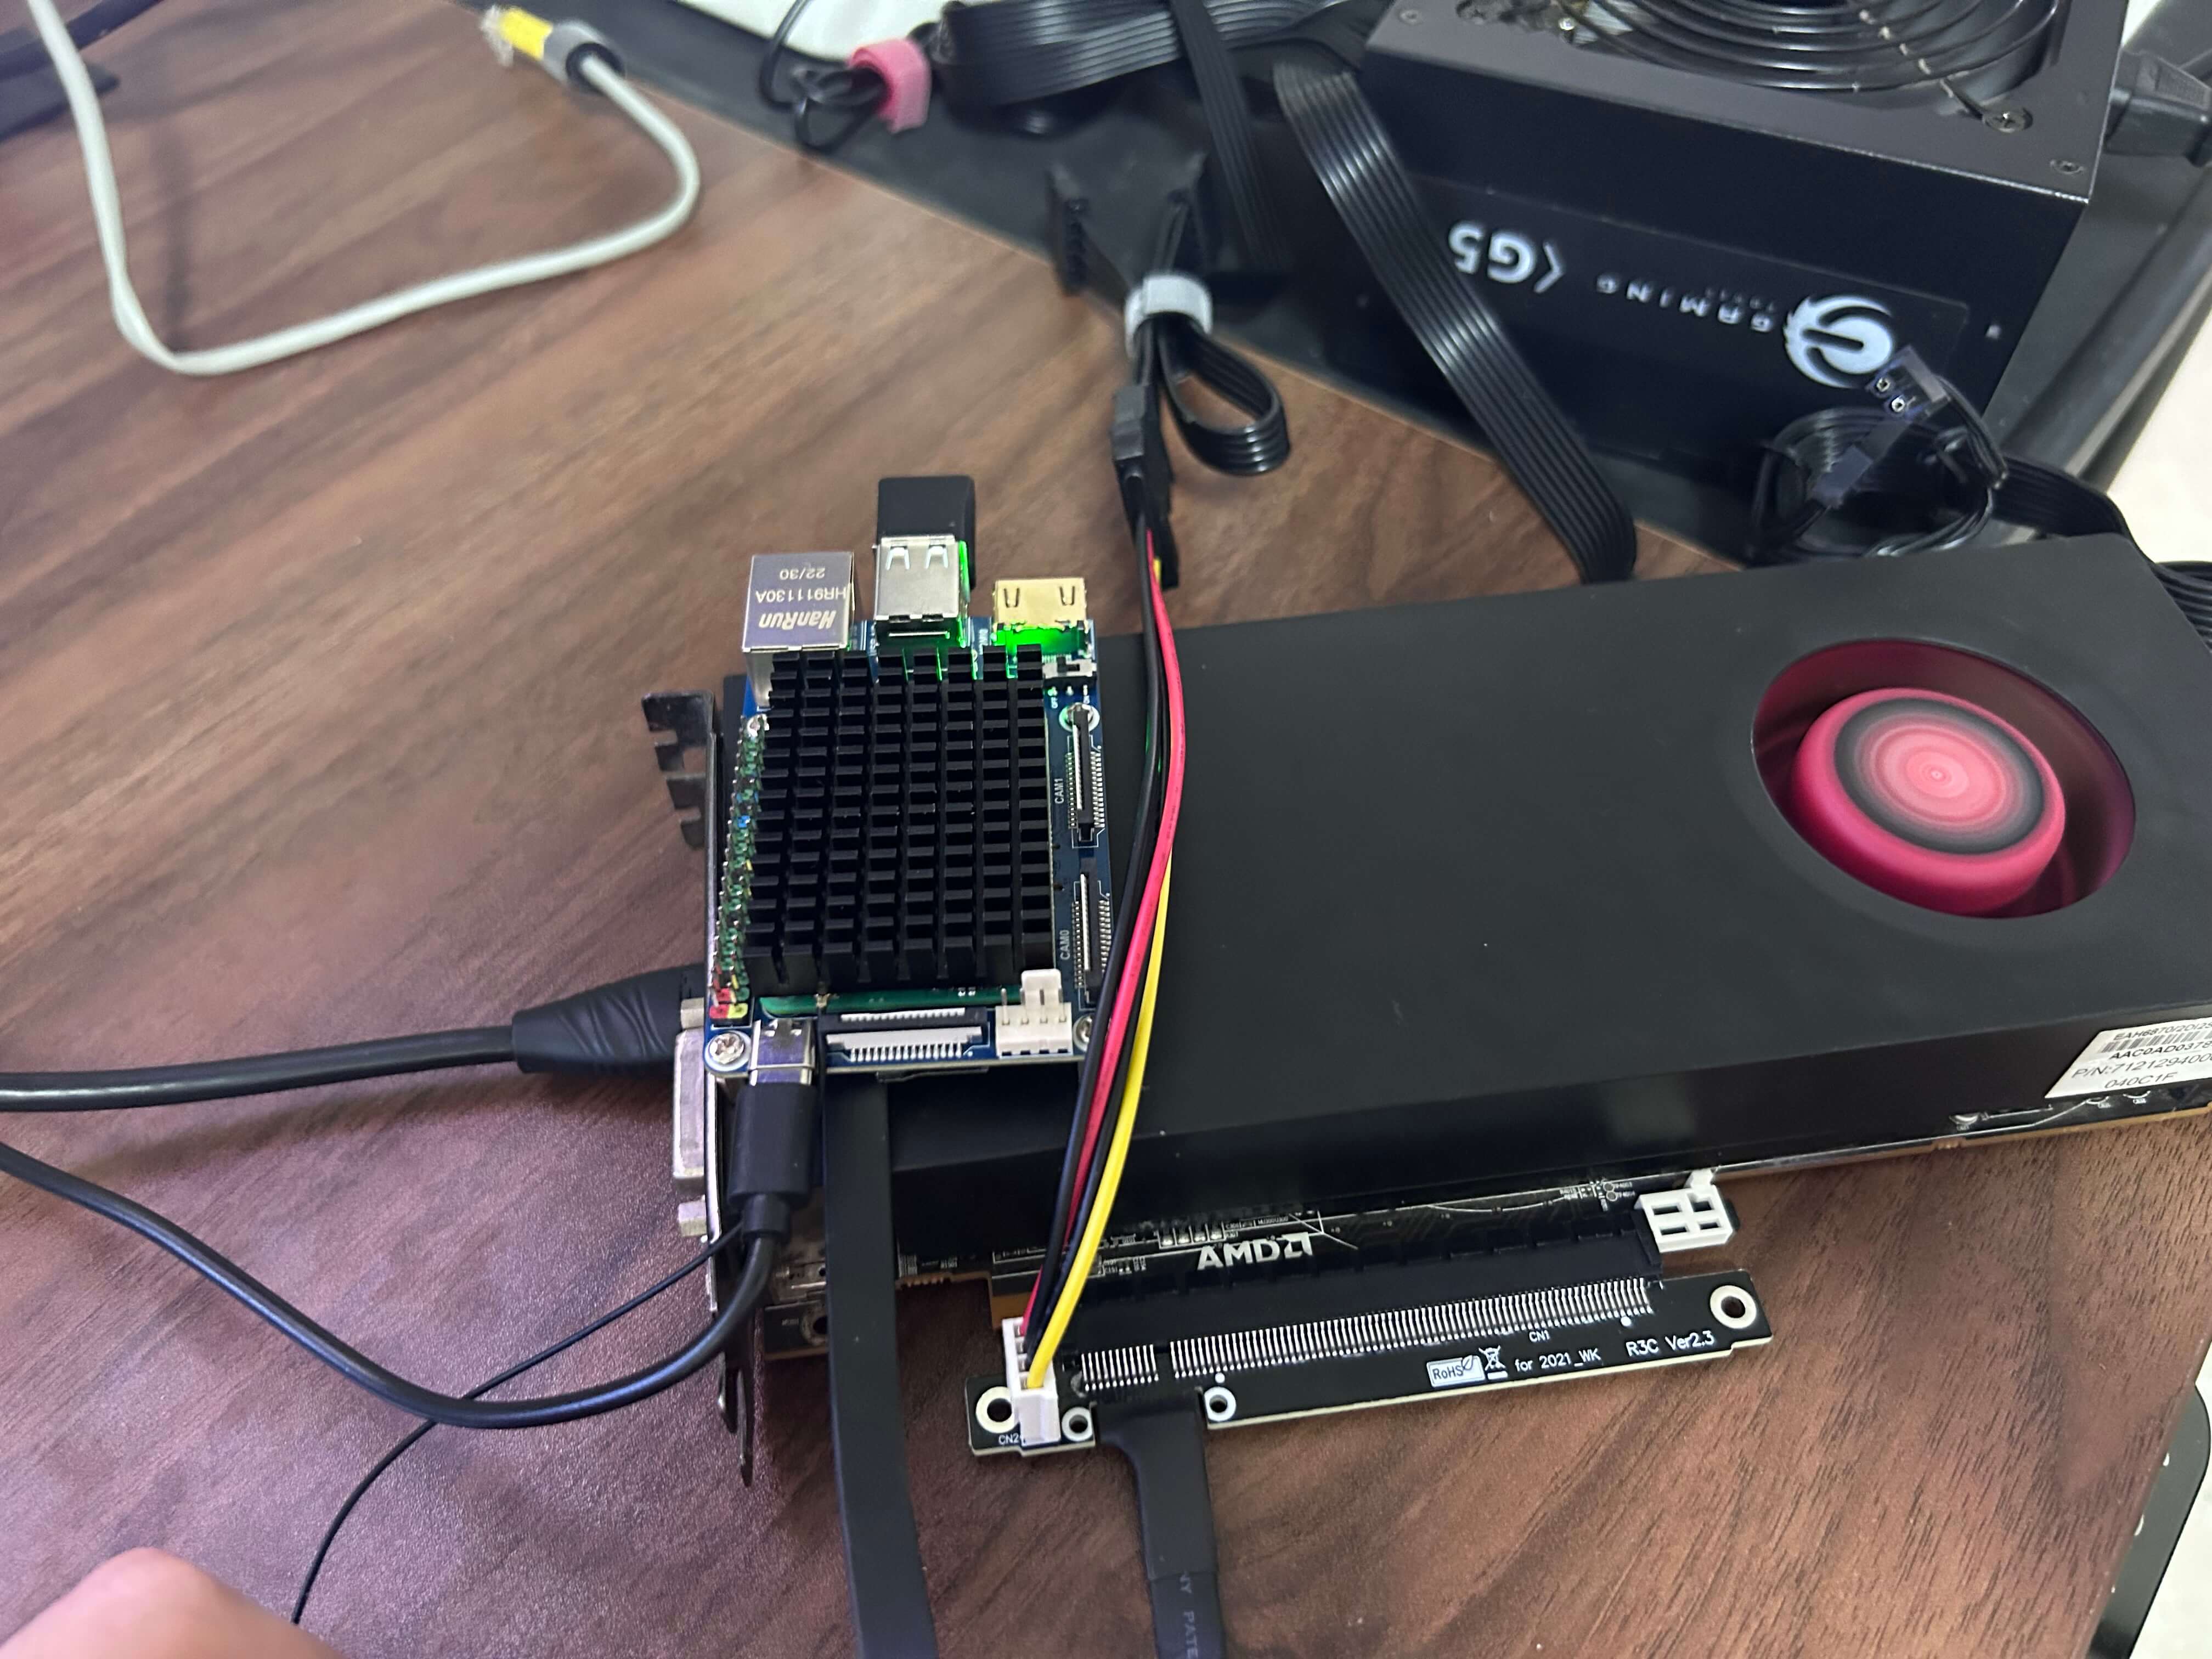
| ADT-Link - PCI-E x1 to PCI-E 16x riser | 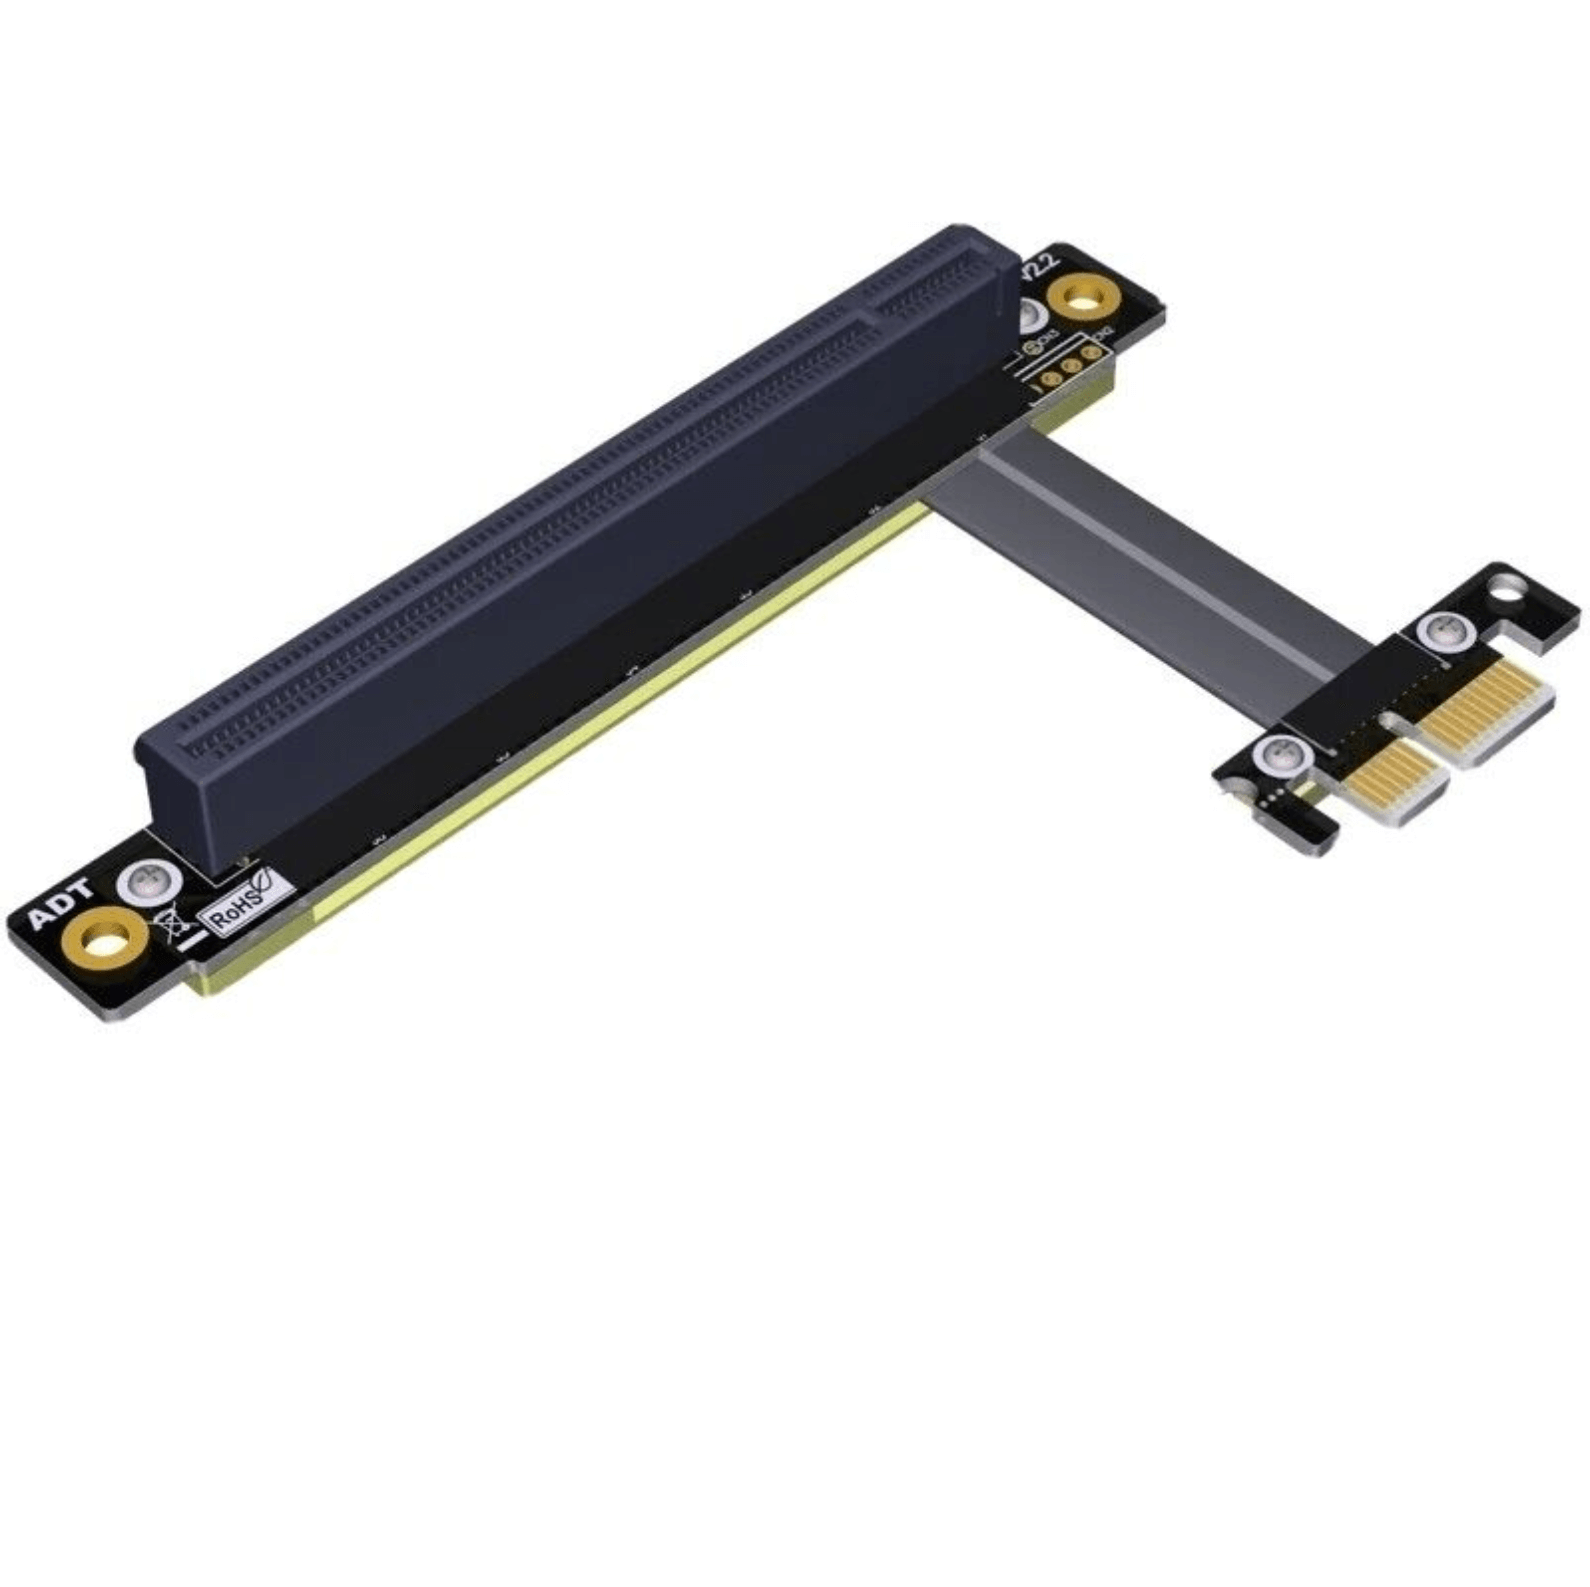 |
| ADT-Link - M.2 to PCI-E 16x riser |  |
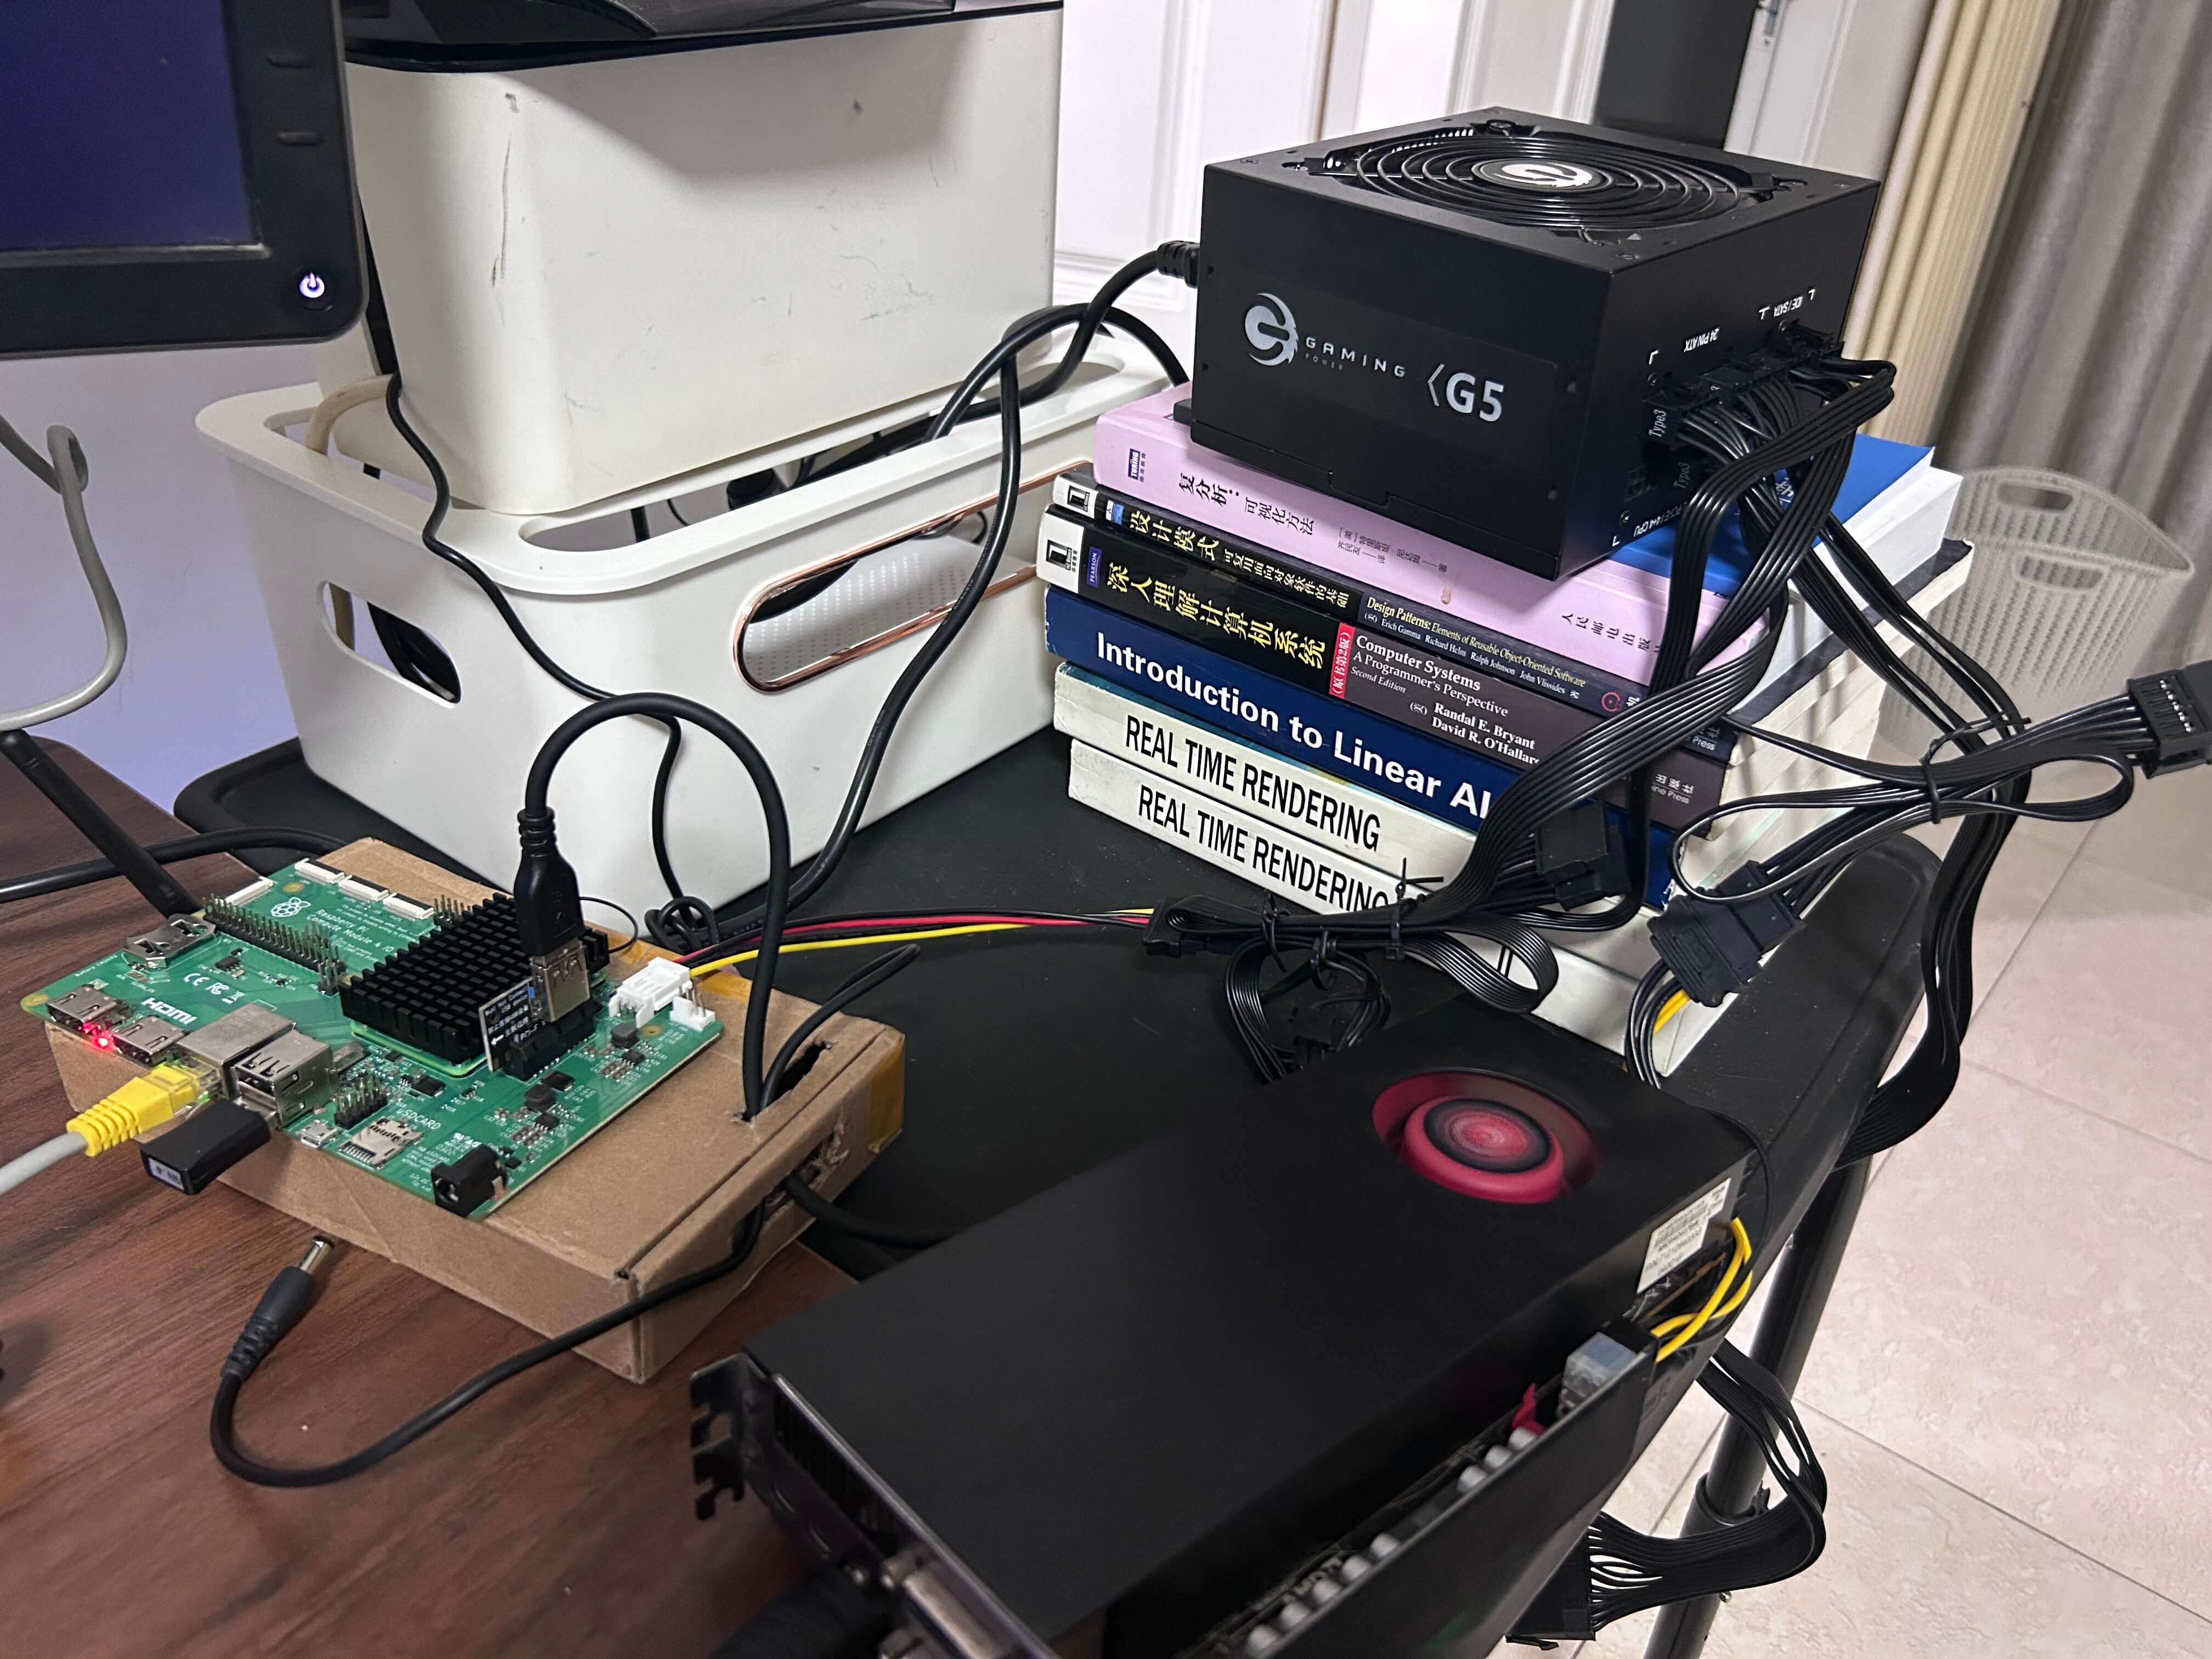
| GreatWall - GamingPower G5 550w | 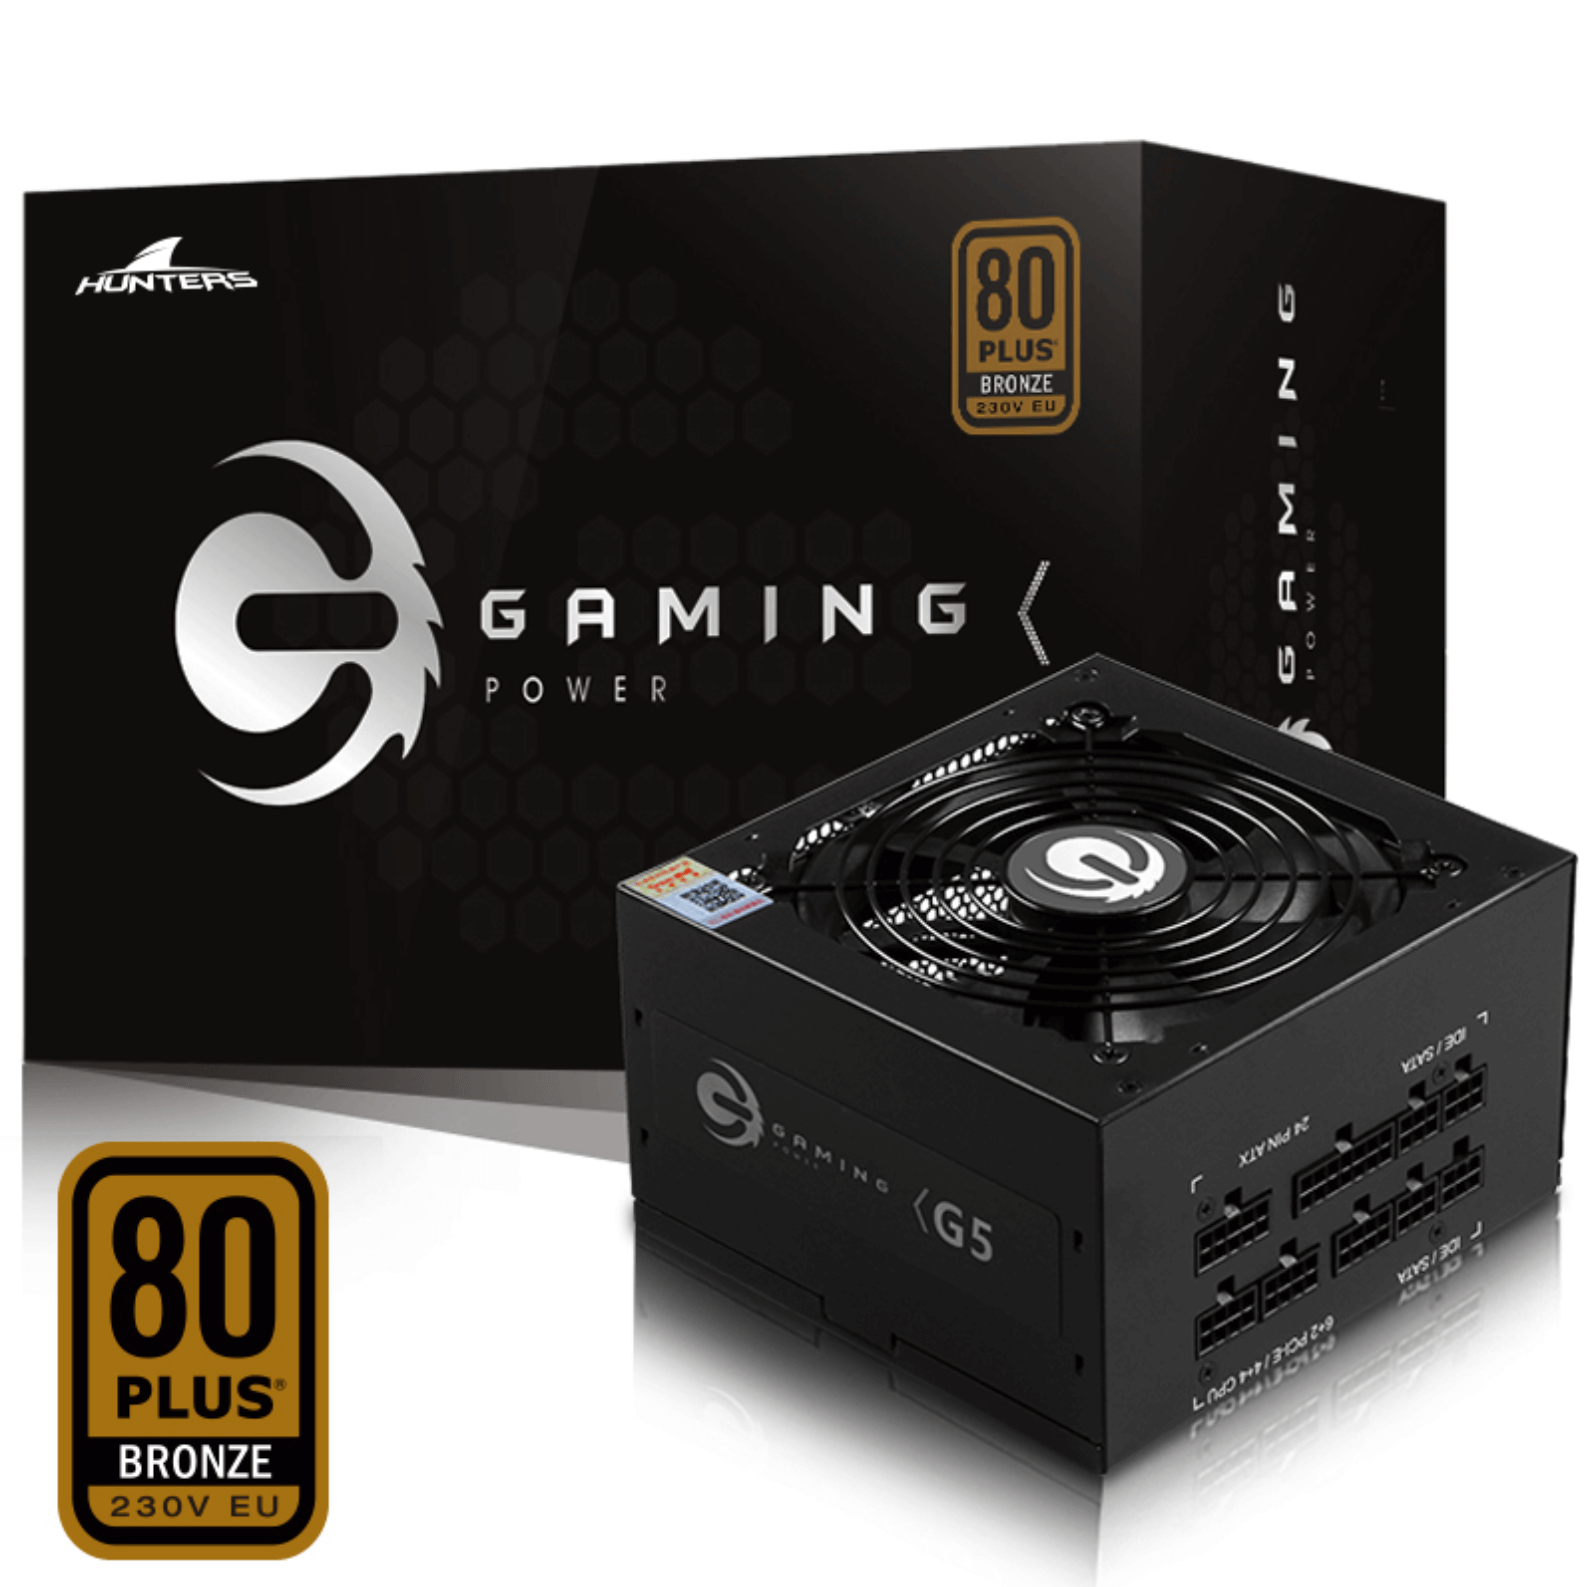 |
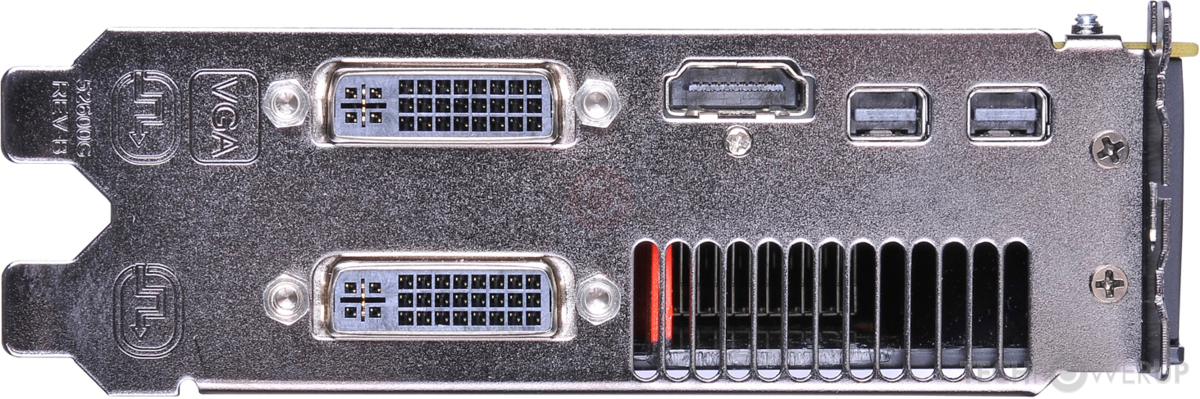
GPU Details:
AMD Radeon HD 6870
| Front | IO | Top |
|---|---|---|
 |
 |
 |
Video
Please back up your data before building. There is no guarantee that some tools will still work after installing the kernel patch, so it is recommended that you install the tools before installing the patch.
Since this is a hack, it is inevitable that you will have to reinstall many times. Before starting, I highly recommend reading these articles(mostly from Jeff Geerling's blog).
Flash OS
How to flash Raspberry Pi OS onto the Compute Module 4 eMMC with usbboot
Building Kernel
Raspberry Pi Linux Cross-compilation Environment
PC:
- A Linux(Ubuntu/Debian) PC,flash os & cross-compile on it
CM4 Core Board:
CM4 IO Board(I've tried both of the following):
- Compute Module 4 IO Board
- You need n 15-Pin SATA Male to 4-Pin Floppy FDD Female like this to power Pi.
- CM4-IO-BASE-A
I recommend this one because it has an external power connector and you can use an ATX power supply to power both GPU & Pi
Adapter:
- PCI-E 1x to PCI-E 16x riser(for Official CM4 IO Board)
- M.2 to PCI-E 16x riser(for CM4-IO-BASE-A)
ATX PSU:
- Modular/Rated Power 500W+(Because I used some high-powered graphics cards)
Do not use cell phone chargers or direct USB/USBC power, they are undervoltage. Please use 5V3A/5V4A power adapter
Raspberry Pi OS Image: -Kernel 5.1 - 2022-01-28-raspios-bullseye-arm64-full.zip -Or Kernel 6.1 - newest RPI OS Img,download from official download page
After testing, if you use the 64 bit image from 2023-05-03 (kernel version 6.1) as a base and then add the Radeon driver, the performance is better than the 2022 (kernel version 5.1) package mentioned in JeefGeerling's article
the kernel 6.1 image info:
Raspberry Pi OS with desktop
Release date: May 3rd 2023
System: 64-bit
Kernel version: 6.1
Debian version: 11 (bullseye)
Size: 818MB
now let's start.
sudo apt install git bc bison flex libssl-dev make
sudo apt-get install gcc-aarch64-linux-gnu gh
git clone https://github.com/Coreforge/linux.git
gh auth login
gh pr checkout 1
## Which should be the base repository (used for e.g. querying issues) for this directory?
Coreforge/linuxcd linux
sudo apt install libncurses-dev
make ARCH=arm64 CROSS_COMPILE=aarch64-linux-gnu- bcm2711_defconfig
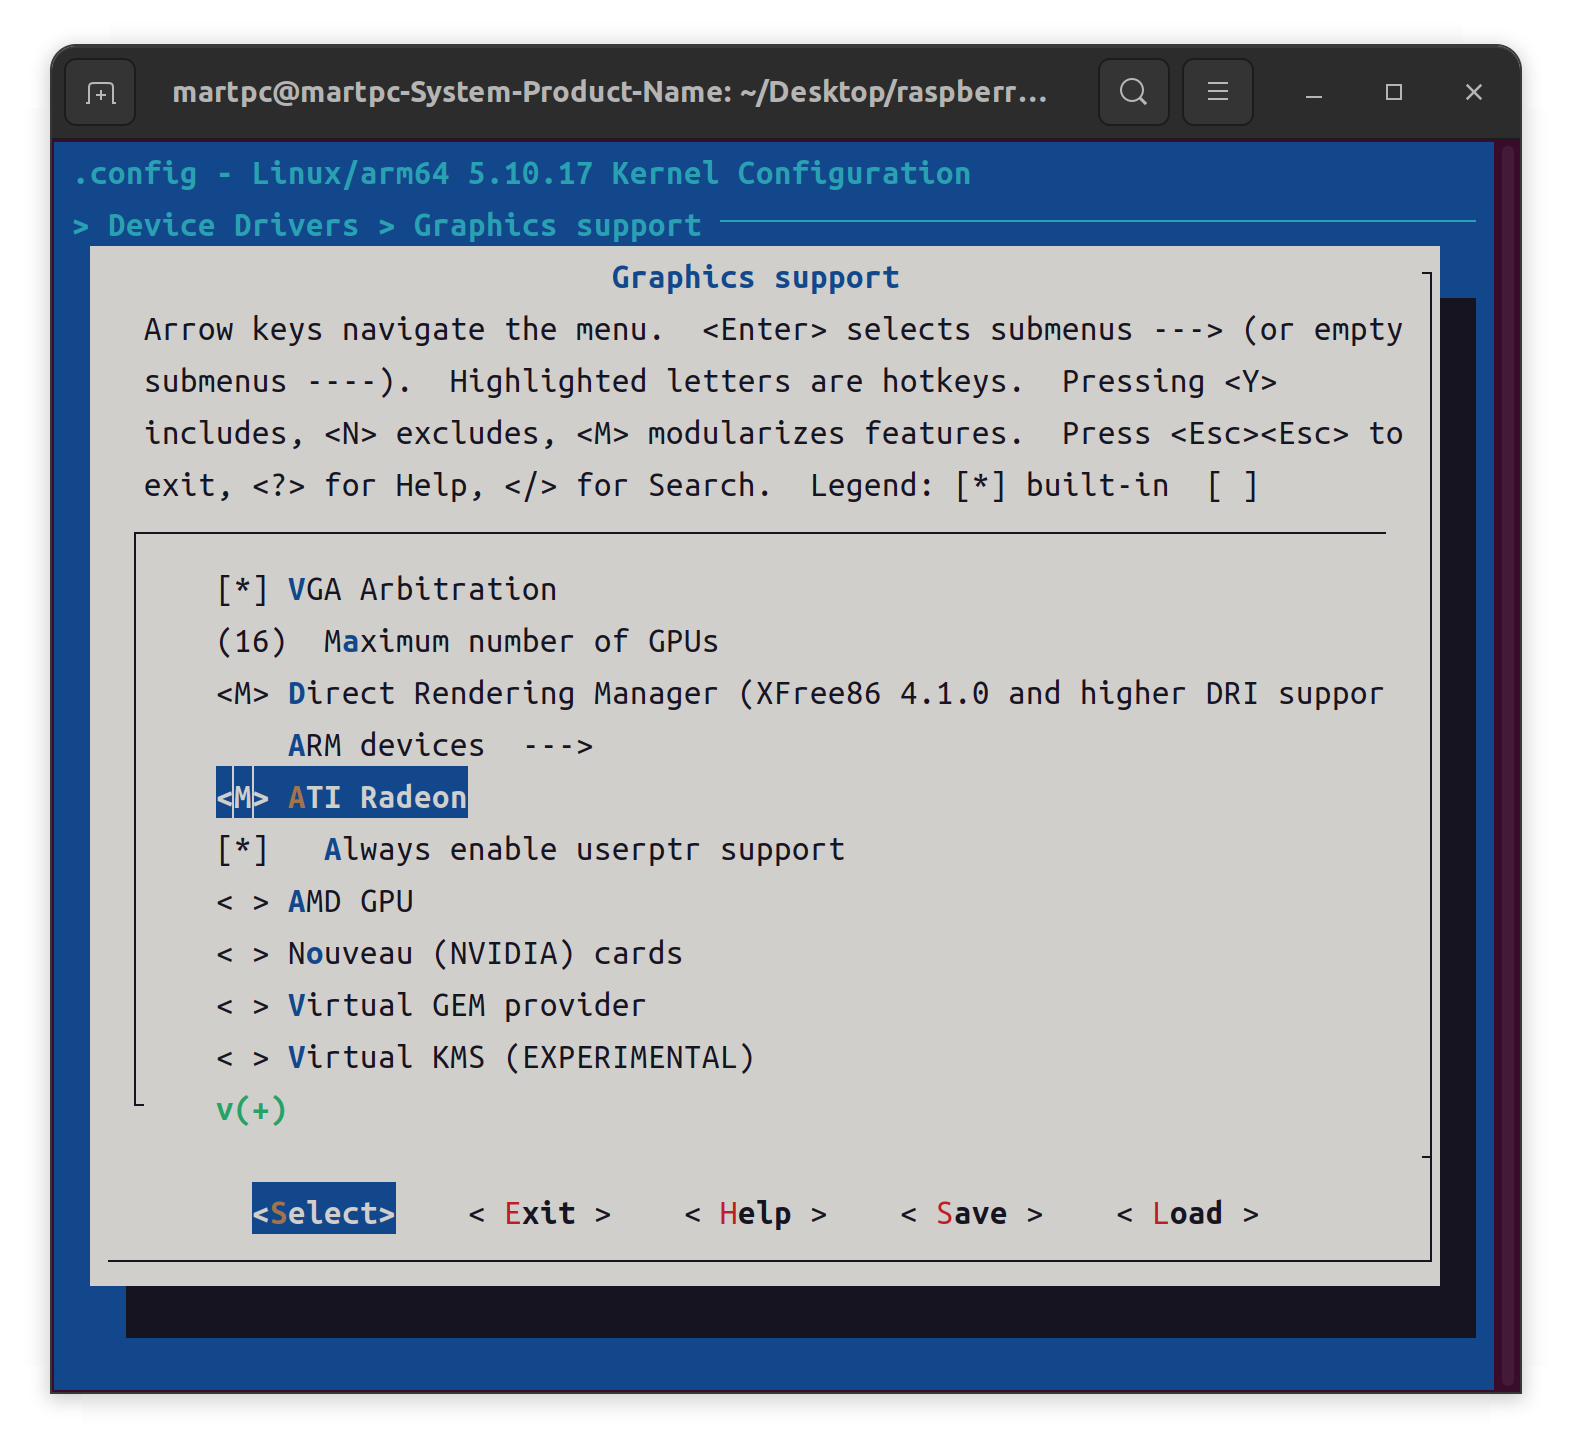
make ARCH=arm64 CROSS_COMPILE=aarch64-linux-gnu- menuconfig
Device Drivers > Graphics support > ATI Radeon > Press M > Save > Exit
then(I used j16 because I got 10900k(16 threads) and 11900k(20 threads)),
make -j16 ARCH=arm64 CROSS_COMPILE=aarch64-linux-gnu- Image modules dtbs
While you are compiling your code, you can install the image(See Part II).
add these into /boot/config.txt
# Enable the USB 2.0 ports on CM4
dtoverlay=dwc2,dr_mode=host
referenced from this article —— USB 2.0 ports not working on the Compute Module 4? Check your overlays!
add thest to /boot/cmdline.txt
radeon.uvd=0 pci=noaer,nomsi radeon.msi=0 radeon.pcie_gen2=0 pcie_aspm=off radeon.aspm=0 radeon.runpm=0 radeon.dpm=0disconnect the USB slave port connection & power, then remove the eMMC Boot disable jumper on J2.
first you need enable SSH in Preferences > Raspberry Pi Configuration > Interface on Raspberry Pi
pack the tools you need on the computer where you are cross-compiling your code:
tar -czvf tools.tar.gz ./tools
copy them to raspberrypi
# default pwd is `raspberry`,default address is `pi@raspberrypi.local`
scp tools.tar.gz pi@raspberrypi.local:~/Desktop
SSH login
# default pwd is `raspberry`,default address is `pi@raspberrypi.local`
ssh pi@raspberrypi.local
unzip in raspberrypi
tar -xvzf tools.tar.gz
sudo apt-get update &&sudo apt update && sudo apt install -y firmware-amd-graphics
# iptables for v2rayA,Since I'm in China, I need v2ray service to download some packages.
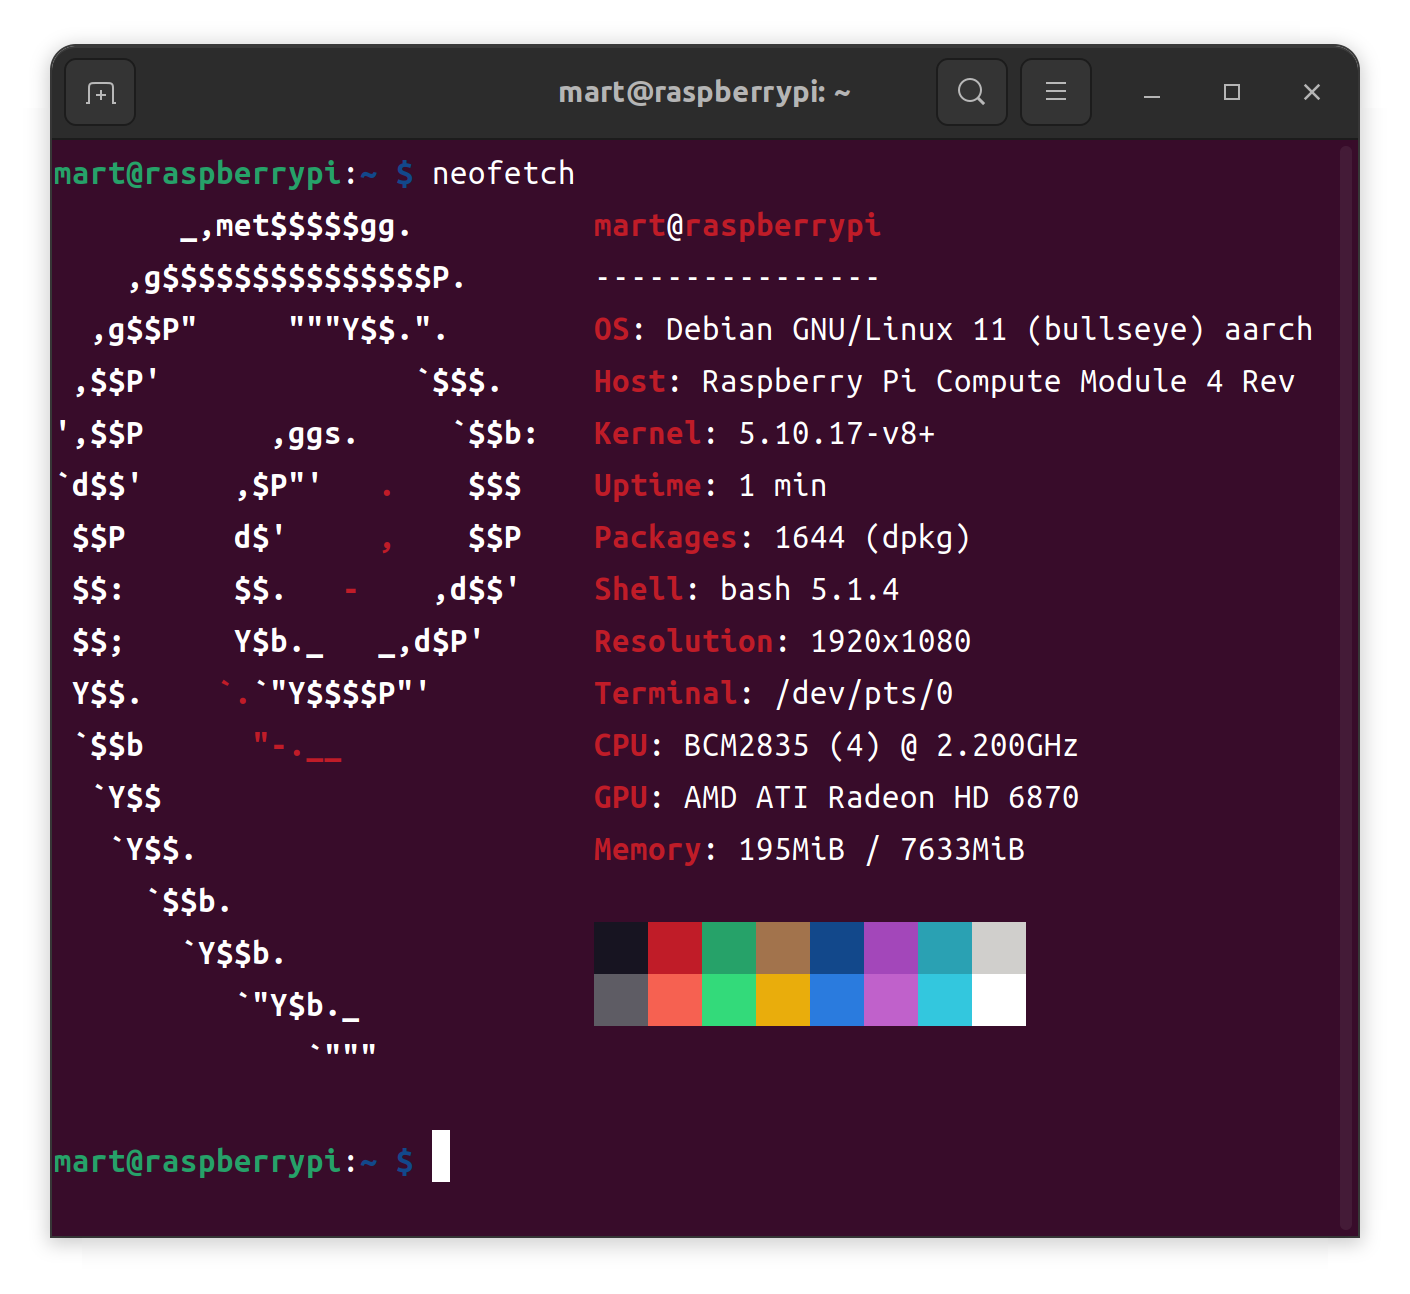
sudo apt-get install iptables neofetch
v2ray core
curl -Ls https://mirrors.v2raya.org/go.sh | sudo bash
sudo systemctl disable v2ray --now
download v2rayA here
sudo apt install ./installer_debian_arm64_2.1.3.deb
sudo systemctl start v2raya.service
sudo systemctl enable v2raya.service
sudo nano /etc/modprobe.d/blacklist-radeon.conf

# content is:
blacklist radeon
# Download Coreforge's modified memcpy library.
wget https://gist.githubusercontent.com/Coreforge/91da3d410ec7eb0ef5bc8dee24b91359/raw/1b72d428b2fe1cba459d5ae7f73663483743ff55/memcpy_unaligned.c

# Compile the library and move it into place.
sudo gcc -shared -fPIC -o memcpy.so memcpy_unaligned.c
sudo mv memcpy.so /usr/local/lib/memcpy.so

# Create an `ld.so.preload` file to instruct Linux to use our version of `memcpy`.
sudo nano /etc/ld.so.preload

# Put the following line inside ld.so.preload:
/usr/local/lib/memcpy.soselect Boot to CLI
Preferences > Raspberry Pi Configuration > System > Boot > To CLI
also enable Network at Boot
sudo shutdown -h now shutdown the Pi
plug in microUSB(USB slave) & connect the jumper,dive into the built linux kernel's path,run:
sudo env PATH=$PATH make ARCH=arm64 CROSS_COMPILE=aarch64-linux-gnu- INSTALL_MOD_PATH=/media/${USER}/rootfs modules_install
for kernel 5.1
cp ./arch/arm64/boot/Image /media/${USER}/boot/kernel8.img
cp ./arch/arm64/boot/dts/broadcom/*.dtb /media/${USER}/boot/
cp ./arch/arm64/boot/dts/overlays/*.dtb* /media/${USER}/boot/overlays/
cp ./arch/arm64/boot/dts/overlays/README /media/${USER}/boot/overlays/
for kernel 6.1
cp ./arch/arm64/boot/Image /media/${USER}/bootfs/kernel8.img
cp ./arch/arm64/boot/dts/broadcom/*.dtb /media/${USER}/bootfs/
cp ./arch/arm64/boot/dts/overlays/*.dtb* /media/${USER}/bootfs/overlays/
cp ./arch/arm64/boot/dts/overlays/README /media/${USER}/bootfs/overlays/
This part I used Coreforge's rpi-5.15.y-radeon branch for kernel patch and 2023-05-03-raspios-bullseye-arm64 for basic system.
Relevant discussion references:
geerlingguy/raspberry-pi-pcie-devices#4 (comment)
geerlingguy/raspberry-pi-pcie-devices#4 (comment)
Add these to /boot/cmdline.txt
radeon.msi=0 radeon.pcie_gen2=0 pcie_aspm=off radeon.aspm=0 radeon.runpm=0 radeon.dpm=0 pci=nomsi
Get new version of memcpy.so
wget https://gist.githubusercontent.com/Coreforge/91da3d410ec7eb0ef5bc8dee24b91359/raw/b4848d1da9fff0cfcf7b601713efac1909e408e8/memcpy_unaligned.c

gcc -shared -fPIC -o memcpy.so memcpy_unaligned.c
sudo mv memcpy.so /usr/local/lib/memcpy.so
sudo nano /etc/ld.so.preload

# Put the following line inside ld.so.preload:
/usr/local/lib/memcpy.so
make & install mesa
sudo apt-get install cmake libzstd-dev valgrind bison libunwind-dev libsensors-dev libarchive-dev libconfig-dev clang libvdpau-dev libxvmc-dev libxv-dev libomxil-bellagio-dev libva-dev libelf-dev
sudo apt-get install meson llvm byacc libwayland-dev wayland-protocols libwayland-egl-backend-dev libxcb-glx0-dev libxcb-xrm-dev libxcb-composite0-dev libxcb-shm0-dev libx11-xcb-dev libxcb-dri2-0-dev libxcb-dri3-dev libxcb-present-dev libxshmfence-dev python3-mako flex libc6-dev libdrm-dev libxext-dev libxfixes-dev libxxf86vm-dev libxrandr-dev
git clone https://github.com/Coreforge/mesa.git
cd mesa
git checkout pistuff
mkdir build
cd build
meson ..
# Do not forget add 'r600' into 'gallium-drivers' option
meson configure -Dgallium-drivers=v3d,vc4,freedreno,etnaviv,nouveau,tegra,virgl,lima,panfrost,swrast,r600
sudo ninja install

# Otherwise you can't get in x session
sudo cp /usr/local/lib/aarch64-linux-gnu/libXvMCr600.so.1.0 /usr/lib/aarch64-linux-gnu/libXvMCr600.so.1.0
sudo cp /usr/local/lib/aarch64-linux-gnu/libXvMCr600.so.1.0.0 /usr/lib/aarch64-linux-gnu/libXvMCr600.so.1.0.0
sudo cp /usr/local/lib/aarch64-linux-gnu/vdpau/libvdpau_r600.so /usr/lib/aarch64-linux-gnu/vdpau/libvdpau_r600.so
sudo cp /usr/local/lib/aarch64-linux-gnu/vdpau/libvdpau_r600.so.1.0.0 /usr/lib/aarch64-linux-gnu/vdpau/libvdpau_r600.so.1.0.0
sudo cp /usr/local/lib/aarch64-linux-gnu/vdpau/libvdpau_r600.so.1 /usr/lib/aarch64-linux-gnu/vdpau/libvdpau_r600.so.1
sudo cp /usr/local/lib/aarch64-linux-gnu/vdpau/libvdpau_r600.so.1.0 /usr/lib/aarch64-linux-gnu/vdpau/libvdpau_r600.so.1.0
sudo cp /usr/local/lib/aarch64-linux-gnu/libXvMCr600.so /usr/lib/aarch64-linux-gnu/libXvMCr600.so
sudo cp /usr/local/lib/aarch64-linux-gnu/libXvMCr600.so.1 /usr/lib/aarch64-linux-gnu/libXvMCr600.so.1
sudo cp /usr/local/lib/aarch64-linux-gnu/dri/r600_drv_video.so /usr/lib/aarch64-linux-gnu/dri/r600_drv_video.so
sudo cp /usr/local/lib/aarch64-linux-gnu/dri/r600_dri.so /usr/lib/aarch64-linux-gnu/dri/r600_dri.so
sudo cp /usr/local/lib/aarch64-linux-gnu/dri/r600_drv_video.so /usr/lib/aarch64-linux-gnu/dri/r600_drv_video.so
Chromium Setting:
chrome://flags/#ignore-gpu-blocklist —— Override software rendering list —— Enabled
chrome://flags/#enable-gpu-rasterization —— GPU rasterization —— Enabled
chrome:flags/#disable-accelerated-video-decoe —— Hardware-accelerated video decode —— Disabled (Or Youtube Video will not play)
disconnect HDMI.
disconnect microUSB(USB slave) & jumper,reboot,run
ssh pi@raspberrypi.local
then enable radeon module
# if you want xorg is hardware acceleration,do not run this,radeon driver not works in xorg session,it will become software rendering
sudo modprobe radeonglmark2
sudo apt install -y meson libjpeg-dev libdrm-dev libgbm-dev libudev-dev
git clone https://github.com/glmark2/glmark2.git
cd glmark2
meson setup build -Dflavors=drm-gl,drm-glesv2
ninja -C build
sudo ninja -C build install
run glmark2-drm,other options you can refer ubuntu manuals
vkmark
sudo apt install meson libvulkan-dev cmake libvulkan1 mesa-vulkan-drivers libglm-dev libassimp-dev libxcb1-dev libxcb-icccm4-dev libwayland-dev wayland-protocols libdrm-dev libgbm-dev
git clone https://github.com/vkmark/vkmark.git
cd vkmark
meson build
ninja -C build
sudo ninja -C build install
phoronix-test-suite
# How to install the Phoronix Test Suite
# Log into your Ubuntu Server instance and download the Phoronix Test Suite .deb file with:

wget https://phoronix-test-suite.com/releases/repo/pts.debian/files/phoronix-test-suite_10.8.3_all.deb

# Once the file has been downloaded, install the tool with:

sudo dpkg -i phoronix*.deb

# The installation will error out because there are still dependencies to meet. You can fix that error and complete the installation with the single command:

sudo apt-get install -f

# Once all of the dependencies are met, the installation will be complete. You can verify the installation with:

phoronix-test-suite
vulkaninfo
sudo apt-get install libvulkan-dev libvulkan1 vulkan-tools --no-install-recommends
lm-sensor
sudo apt-get install lm-sensors
sudo sensors-detect
sensors
glxinfo
sudo apt-get install mesa-utils
kms-glsl
sudo apt update
sudo apt install gcc make
sudo apt install libdrm-dev libgbm-dev libegl-dev libgles2-mesa-dev
sudo apt install libxcb-randr0-dev
git clone https://github.com/astefanutti/kms-glsl.git
cd kms-glsl
make
glslViewer
sudo apt install git build-essential cmake xorg-dev libglu1-mesa-dev libncurses5-dev libncursesw5-dev
sudo apt install ffmpeg libavcodec-dev libavcodec-extra libavfilter-dev libavfilter-extra libavdevice-dev libavformat-dev libavutil-dev libswscale-dev libv4l-dev libjpeg-dev libpng-dev libtiff-dev
sudo apt install xvfb
sudo apt install git cmake xorg-dev libglu1-mesa-dev libncurses5-dev libncursesw5-dev
sudo apt install git cmake libgbm-dev libdrm-dev libegl1-mesa-dev libgles2-mesa-dev libncurses5-dev libncursesw5-dev
git clone https://github.com/patriciogonzalezvivo/glslViewer.git
cd glslViewer
git submodule init
git submodule update
mkdir build
cd build
cmake ..
make
sudo make install
keyboard layout
select en US layout.
sudo dpkg-reconfigure keyboard-configuration
killall xinit if you miss rendering issue
xfce's software rendering performance is better than LXDE
sudo apt-get install xfce4-session xfce4-goodies
then
sudo update-alternatives --config x-session-manager
select xfce session,then startx
deleted
Note: Switching requires power off
Use RPI's GPU in both console and x-session
If you want to use RPI's GPU rendering in x session & console.
- Plug the HDMI cable into the CM4's HDMI connector
- Do not run
sudo modprobe radeon,juststartxdirectly.
Use Radeon GPU in console
Currently only console is driven by radeon,if you enabled radeon driver,in x-session,it will fallback to software-rendering,which is very bad performance.
If you want to use Radeon's GPU rendering in console.
- Plug the HDMI cable into the Radeon GPU's HDMI connector
- run
sudo modprobe radeonafter start.
Here is some my log files:
Here is my config in boot: