Last active
October 7, 2022 22:09
-
-
Save MemoonaTahira/abc3253334cd425fac2041f3e63e7a45 to your computer and use it in GitHub Desktop.
Part of MLZoomcamp by DataTalk.Club week 5
This file contains bidirectional Unicode text that may be interpreted or compiled differently than what appears below. To review, open the file in an editor that reveals hidden Unicode characters.
Learn more about bidirectional Unicode characters
| The aim of this guide is to replicate the exact working environment as shown in the [week 5](https://github.com/alexeygrigorev/mlbookcamp-code/tree/master/course-zoomcamp/05-deployment) of MLZoomcamp coursework, as well for [homework5](https://github.com/alexeygrigorev/mlbookcamp-code/tree/master/course-zoomcamp/cohorts/2022/05-deployment). | |
| <img src ="https://github.com/MemoonaTahira/MLZoomcamp2022/blob/main/Notes/imgs/MLZoomcamp_workflow_x1.png" width=80% height=60%> | |
| ## Pre-requisites: | |
| 1. Windows 10 | |
| 2. If you have an Nvidia GPU: | |
| - Upgrade to Windows 11 if you haven't automatically been upgraded from Windows 10 to 11. Check if you meet requirements for Windows 11, and download it directly from [here](https://www.microsoft.com/software-download/windows11). | |
| - Next download WSL ready drivers from [here](https://developer.nvidia.com/cuda/wsl) | |
| ## Step wise tasks for enabling WSL: | |
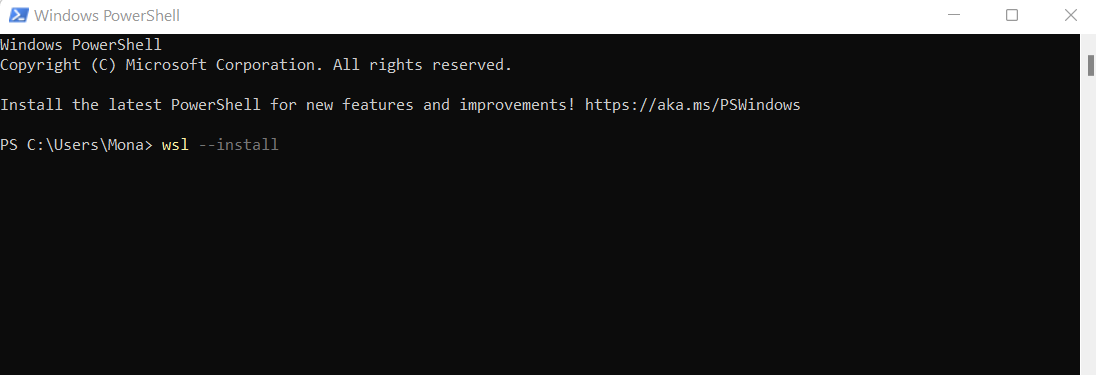
| 1. Type powershell in windows start menu and click enter | |
| 2. Enable WSL from powershell | |
| 3. Download "Ubuntu 20.04" distro. We are selecting Ubuntu 20.04 as it is the latest Ubuntu distro available in WSL | |
| 4. Upgrade from WSL1 to WSL2 if not on WSL2 already, and set WSL2 as default version for any new distro | |
| Step 2-4 can be done by running all these commands in powershell one by one: | |
| ``` | |
| wsl --install | |
| wsl --list --online | |
| wsl --install -d Ubuntu-20.04 | |
| wsl -l -v | |
| wsl --set-version Ubuntu 2 | |
| wsl --set-default-version 2 | |
| ``` | |
| -  | |
| - This tutorial [here](https://learn.microsoft.com/en-us/windows/wsl/install) will explain step 1-3. | |
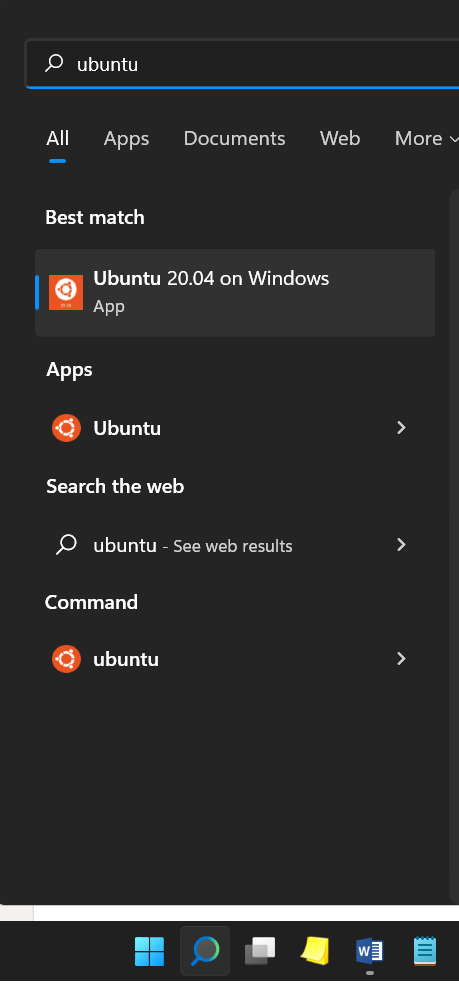
| - You can now use bash commands in the ubuntu bash shell* to interact with your new Ubuntu system! | |
| - *\*You can find it by going to start menu> typing "ubuntu 20.04 on windows".* | |
| -  | |
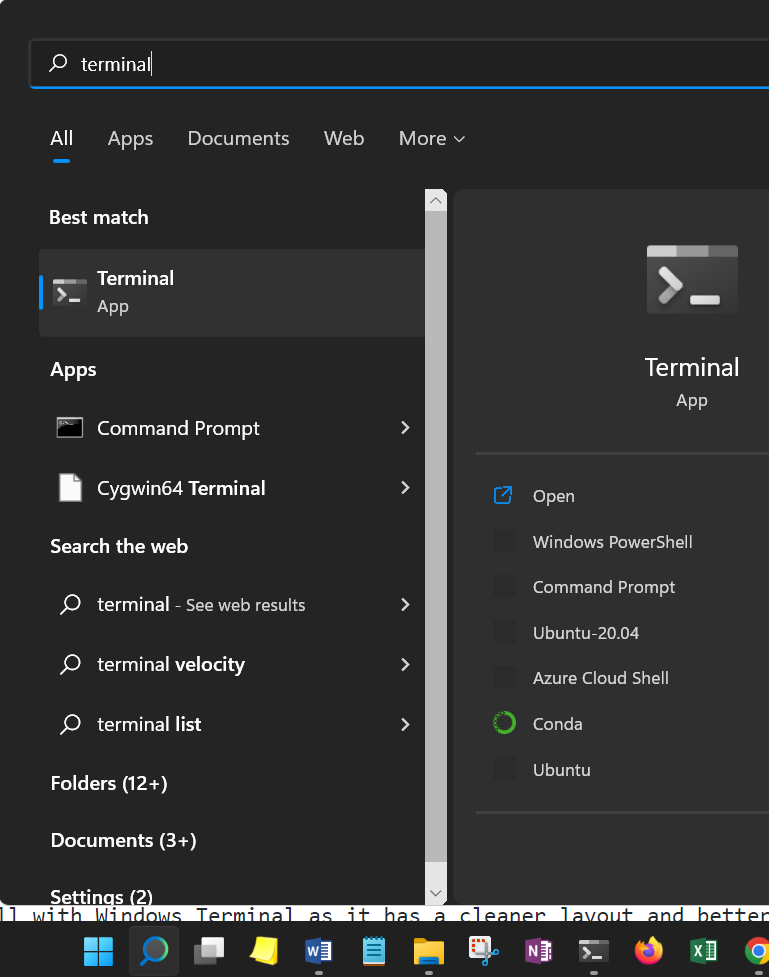
| 5. Use Ubuntu bash shell with Windows Terminal as it has a cleaner layout and better customization options. | |
| To download Windows Terminal: [Click here](https://learn.microsoft.com/en-us/windows/terminal/install) | |
| - Use the small arrow next to the + tab to select ubuntu terminal (with a penguin :penguin: on it) to get started. | |
| - Find it by typing 'terminal' in start menu | |
| -  | |
| - open the terminal | |
| 6. Next, upgrade Ubuntu 20.04 to 22.04 distro using this guide [here](https://linuxconfig.org/how-to-upgrade-ubuntu-to-22-04-lts-jammy-jellyfish) from the terminal: | |
| - 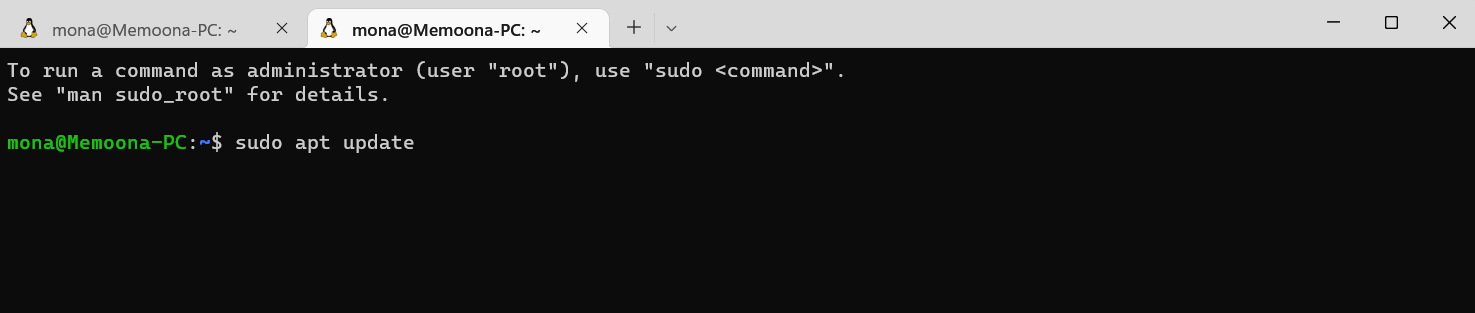 | |
| Run all these commands one by one: | |
| ``` | |
| sudo apt update | |
| sudo apt upgrade | |
| sudo apt dist-upgrade | |
| sudo apt autoremove | |
| sudo apt install update-manager-core | |
| sudo do-release-upgrade | |
| ``` | |
| - Once you've run all commands, you'll see this message: | |
| -  | |
| - (P.S. The name of the of the Ubuntu app and on the tab in the terminal isn't changed with an upgrade from 20.04 to 22.04, it will still be Ubuntu-20.4, so don't worry about it.) | |
| ## Understanding how WSL and Windows interact: | |
| <img src ="https://github.com/MemoonaTahira/MLZoomcamp2022/blob/main/Notes/imgs/MLZoomcamp_WSL_x1.png" width=80% height=80%> | |
| ## Setting up env (for jupyter + flask) and docker inside WSL: | |
| From now on, everything you need to do is inside the Ubuntu terminal (and not cmd etc). | |
| 1. Install pipenv inside Ubuntu using terminal. | |
| 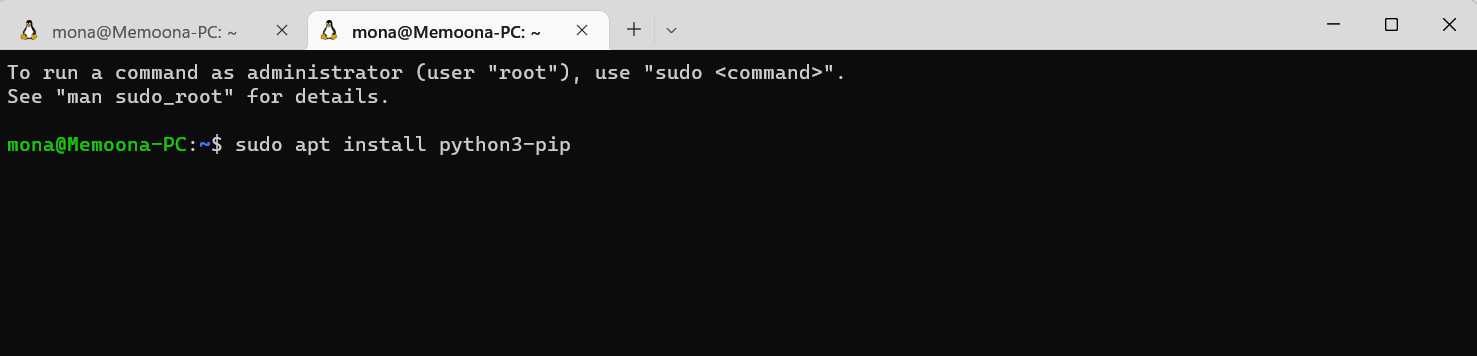 | |
| Run these commands one by one: | |
| ``` | |
| sudo apt install python3-pip | |
| pip install pipenv | |
| ``` | |
| Close this terminal tab and open a new tab using the + sign. This will refresh the path and make pipenv command visible in the terminal. (Kind of like restarting a computer if we were using a real Ubuntu OS) | |
| 2. Confirm system python version: | |
|  | |
| Run this: | |
| ``` | |
| python3 --version | |
| ``` | |
| <!--On Ubuntu 22.04, the version is python 3.10. We need 3.9 for homework. Since pipenv will use system python, we need to install python 3.9 ourselves. We'll do so using miniconda.--> | |
| 3. (Optional) Installing miniconda for better python version management: | |
| 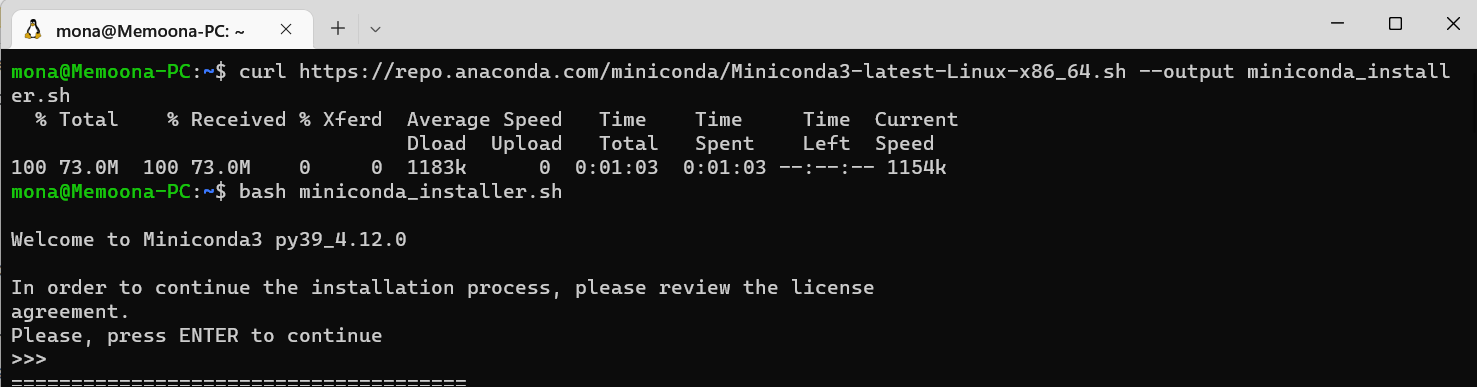 | |
| Run the following commands one by one: | |
| ``` | |
| curl https://repo.anaconda.com/miniconda/Miniconda3-latest-Linux-x86_64.sh --output miniconda_installer.sh | |
| bash miniconda_installer.sh | |
| ``` | |
| Hit enter till you reach end of agreement, type *yes*, hit *enter* to keep default installation location, type *yes* to `init conda` | |
| Once done, open another ubuntu tab, and close the path to refresh and for conda to become visible in the terminal. (Kind of like restarting a computer if we were using a real Ubuntu OS) | |
| Create a new environment without specifying python version (it will create an environment with the latest python version available with conda) and activate it: | |
| 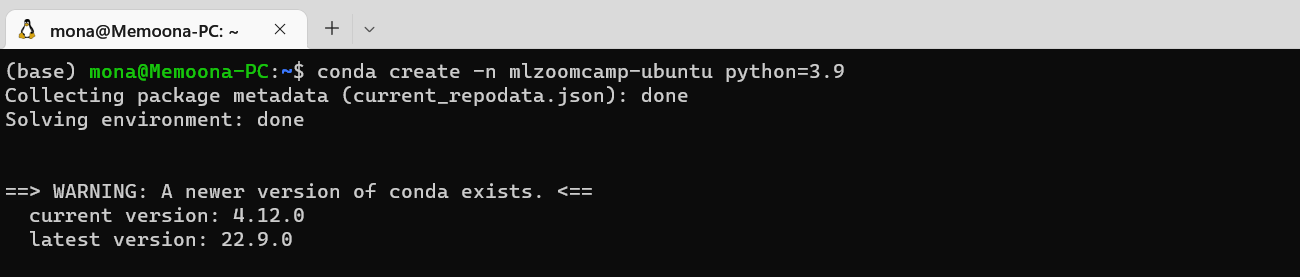 | |
| Run the following commands one by one: | |
| ``` | |
| conda create -n mlzoomcamp-ubuntu | |
| conda activate mlzoomcamp-ubuntu | |
| ```` | |
| In case you want a specific python version, you can change the first command to: `conda create -n mlzoomcamp-ubuntu python=3.9` | |
| 3. Create a new directory for our code and cd to it: | |
| 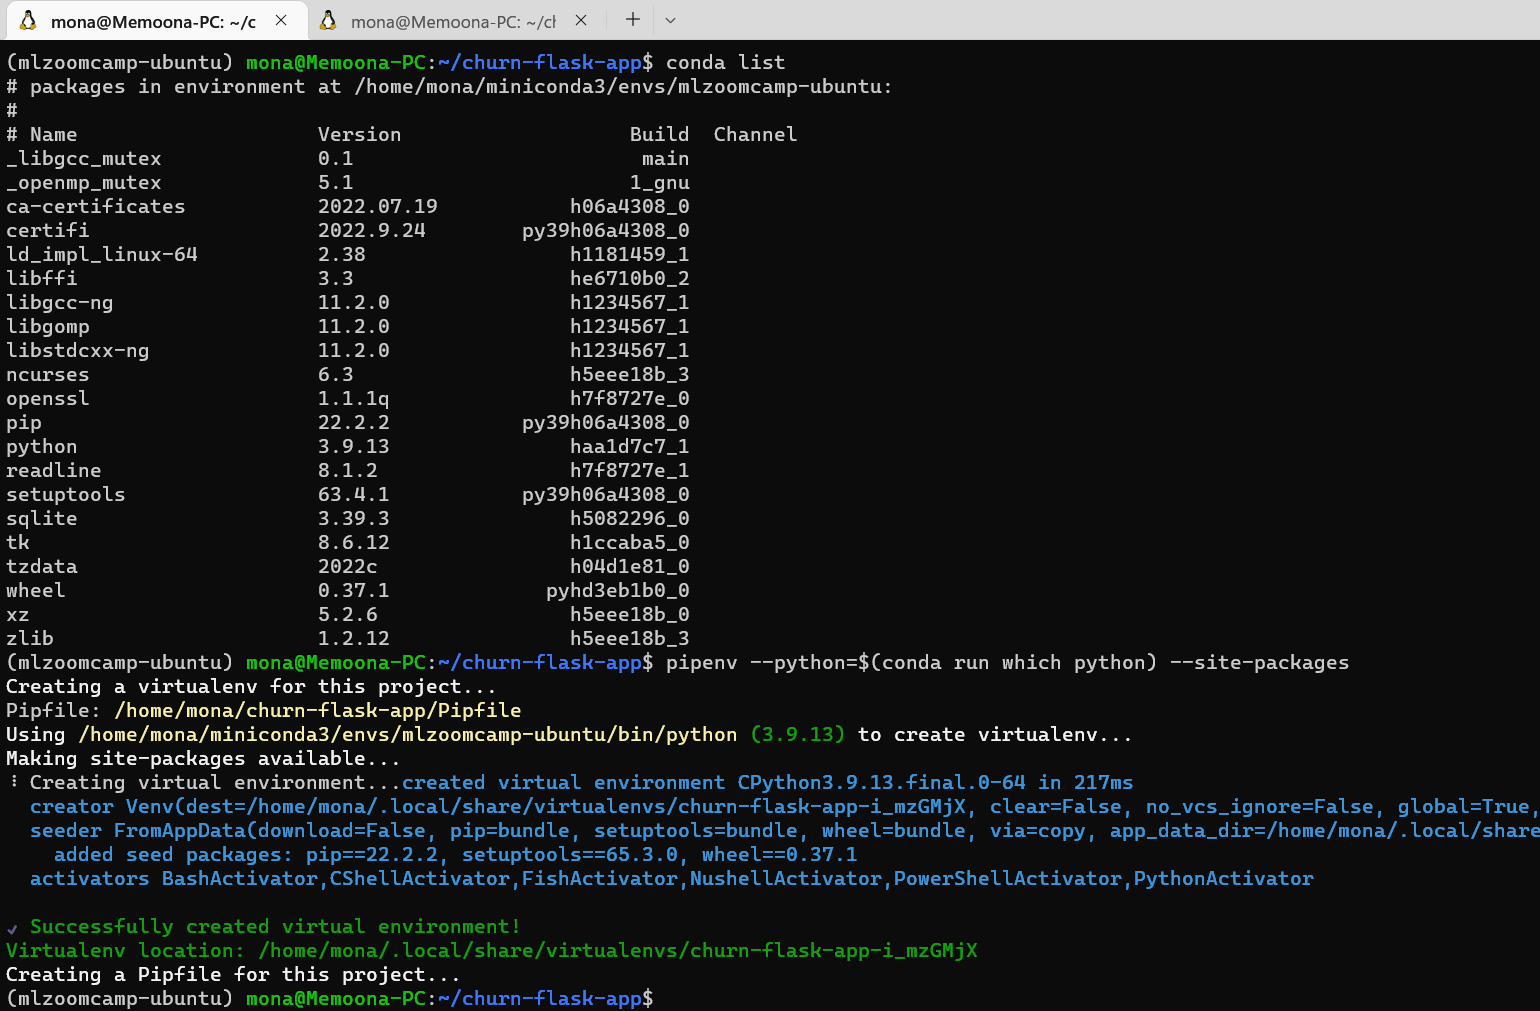 | |
| Run all of the following commands one by one: | |
| ``` | |
| mkdir churn-pred-app | |
| cd churn-pred-app | |
| #if you installed miniconda then run the next 2 commands: | |
| pipenv --python=$(conda run which python) --site-packages | |
| pipenv install numpy pandas scikit-learn==1.0.2 requests flask jupyter ipython | |
| # if you didn't, only run this: | |
| pipenv install numpy pandas scikit-learn==1.0.2 requests flask jupyter ipython | |
| ``` | |
| The last command will automatically use system python (3.10) in the pyenv virtual environment. | |
| In case you forget anything, just run: | |
| ```pipenv <package name>``` | |
|  | |
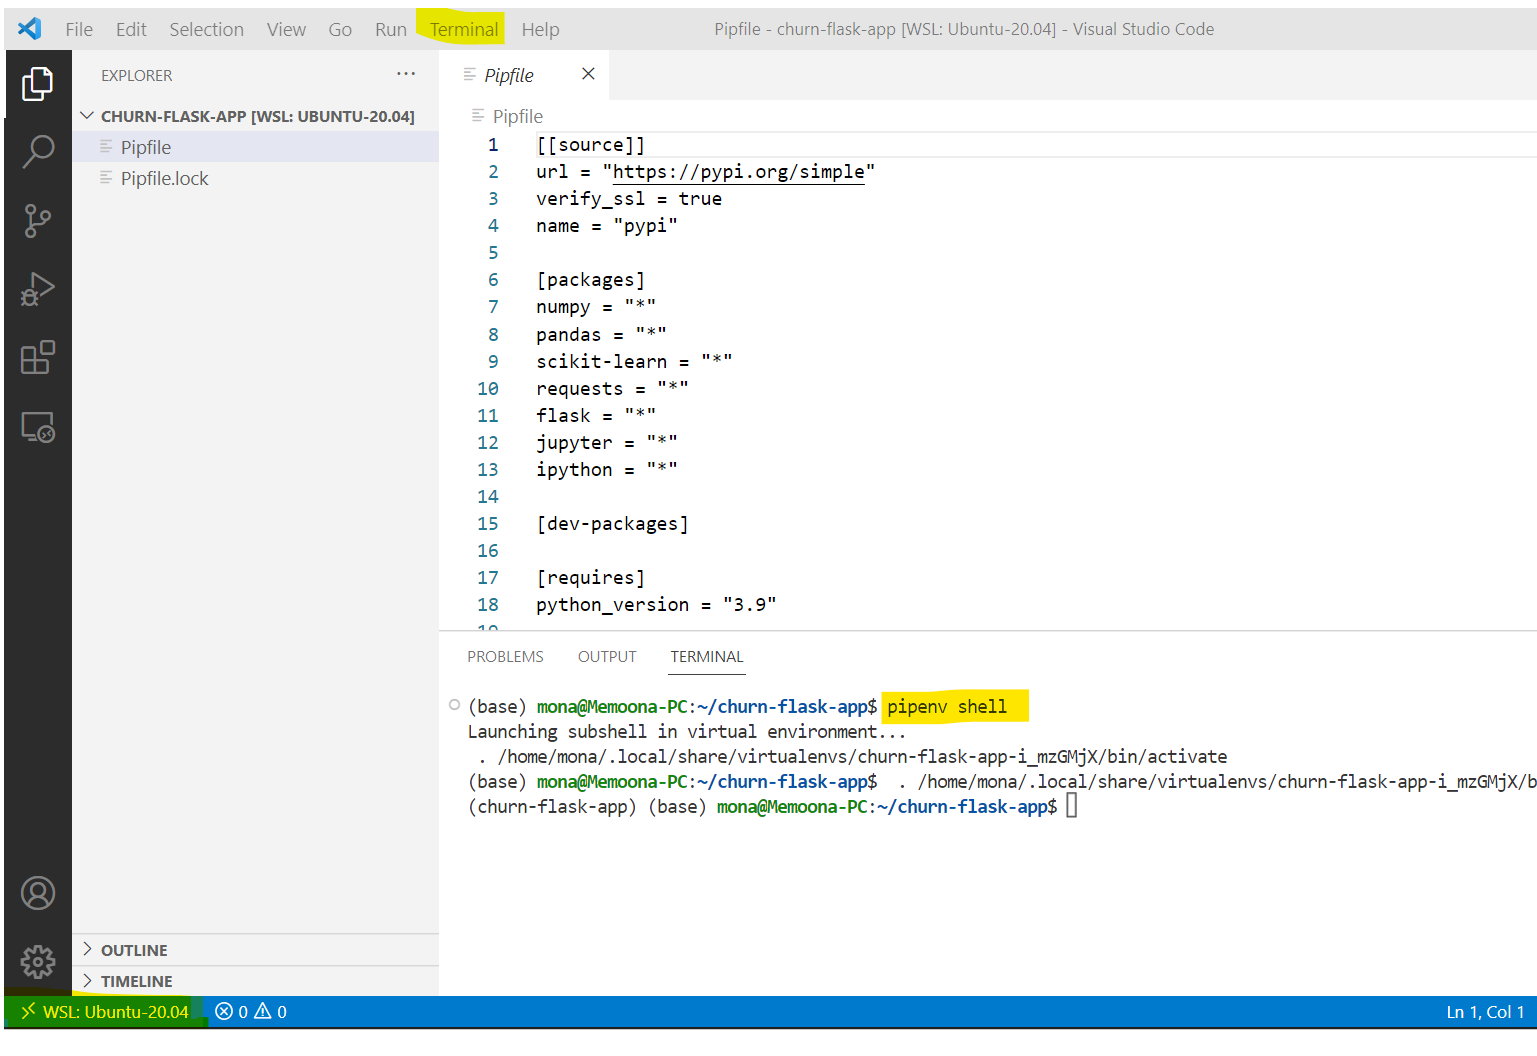
| 4. Activate the new environment: | |
| ```pipenv shell``` | |
| (In case of miniconda, note how it went from the mlzoomcamp-ubuntu environment to base environment, but it will still use python from mlzoomcamp-ubuntu. We don't need to activate mlzoomcamp-ubuntu environment ever again. We only needed to activate it once to provide path of it's python to our new pipenv environment. This new pipenv environment is standalone environment. See more detail in FAQ 2.) | |
| Whenever you want to activate the pipenv you just created, you need to cd into the folder from where you ran the pipenv install command, and type `pipenv shell`. This is the way to identify environments in pipenv without using any environment name. See FAQ 3 for more info. | |
| To check if it is working, type: | |
| ```ipython``` | |
|  | |
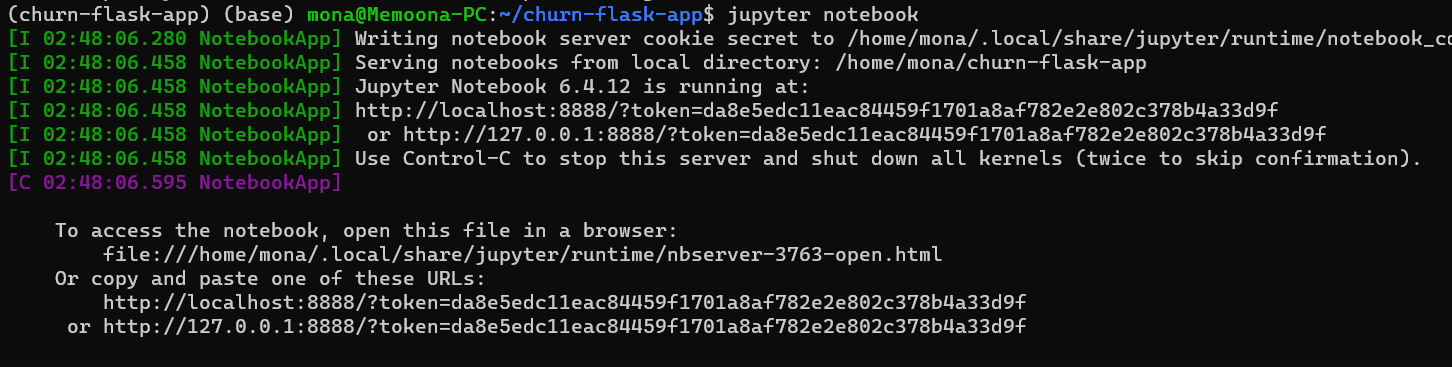
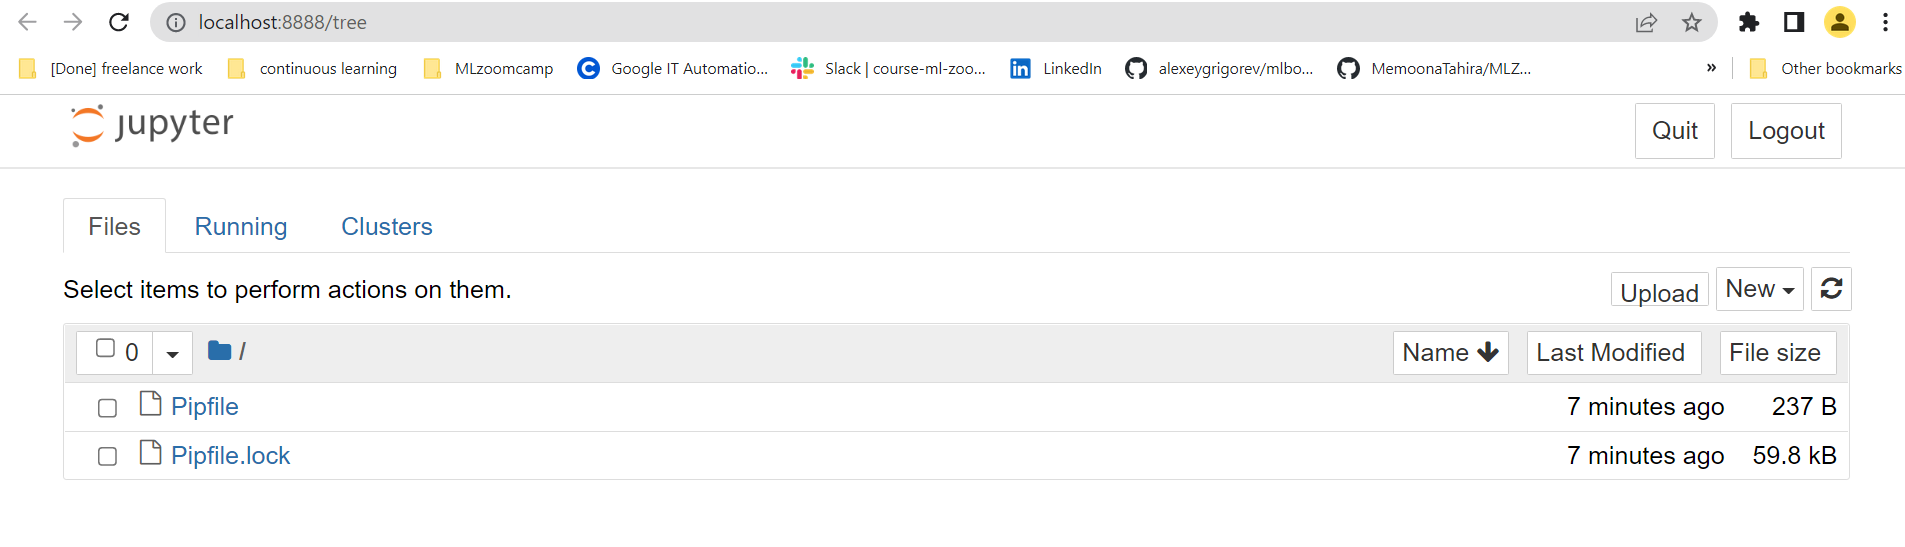
| 4. Connect jupyter notebook / VScode to WSL. | |
| - For jupyter notebook, simply type `jupyter notebook` in the Ubuntu terminal, | |
| and copy the token it generates and paste it in Chrome in Windows. (P.S. In my case, it automatically opened a chrome browser window, yaay!) | |
|  | |
|  | |
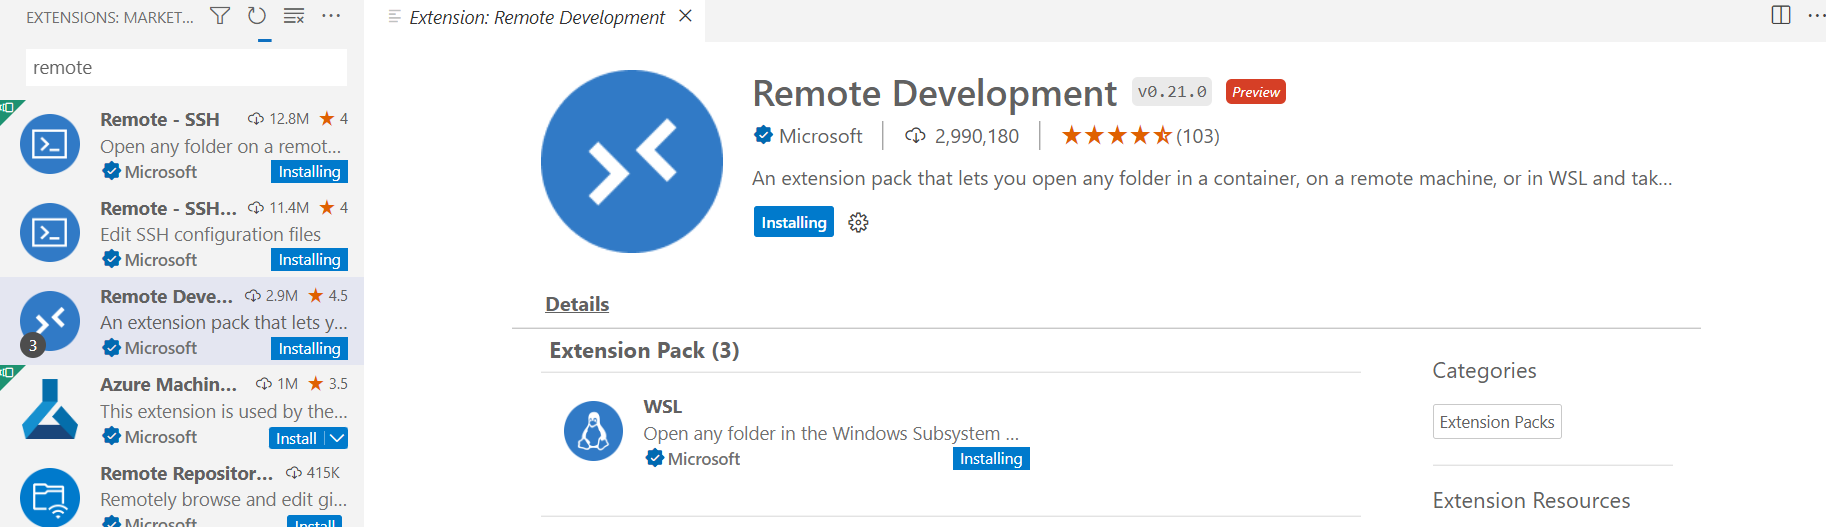
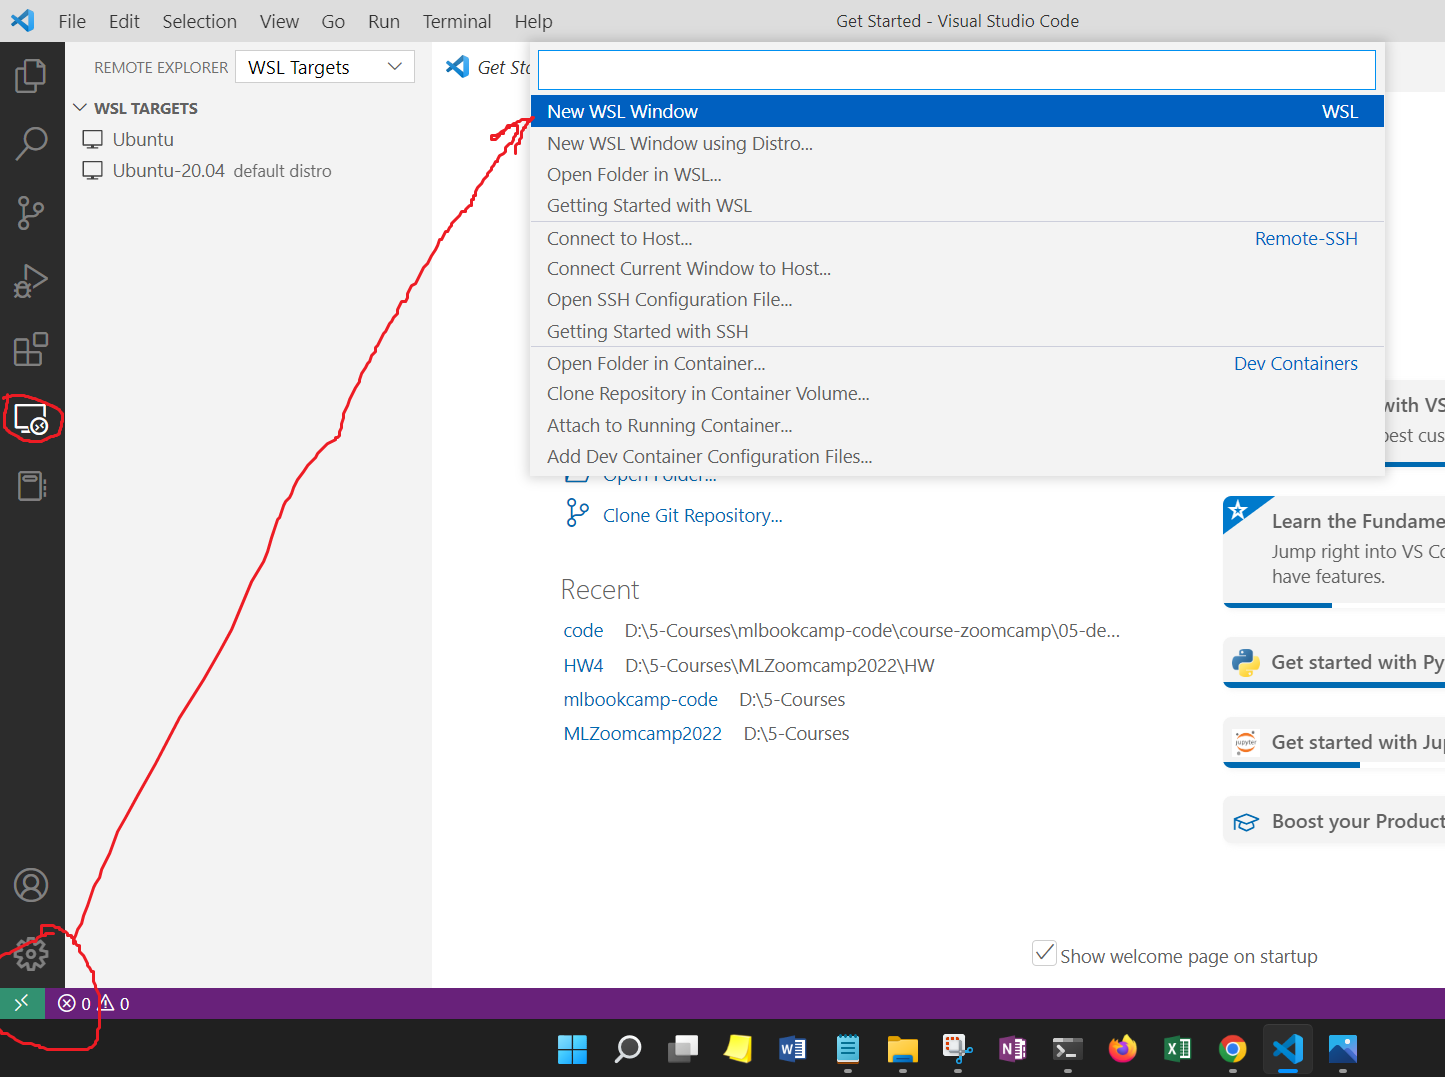
| - For using VScode: Install the remote developer extension. | |
|  | |
| Once done: | |
|  | |
| Select your project folder and open it. | |
|  | |
| And it will look something like this. In the terminal menu, click add new terminal and then type `pipenv shell`, and voila, you can use all WSL commands here if you need. | |
|  | |
| Manually add the code files from [week 5](https://github.com/alexeygrigorev/mlbookcamp-code/tree/master/course-zoomcamp/05-deployment/code) to home/*your username*/churn-prediction-app using file explorer, and keep the existing pipfile and pipfile.lock already present, don't overwrite them. | |
|  | |
| Type this in any terminal (Ubuntu or the just created VScode terminal) with path set to churn-predict-app folder to get data.week-3.csv: | |
|  | |
| ` curl https://raw.githubusercontent.com/alexeygrigorev/mlbookcamp-code/master/chapter-03-churn-prediction/WA_Fn-UseC_-Telco-Customer-Churn.csv --output data-week-3.csv | |
| ` | |
| Add correct python interpreter: | |
| 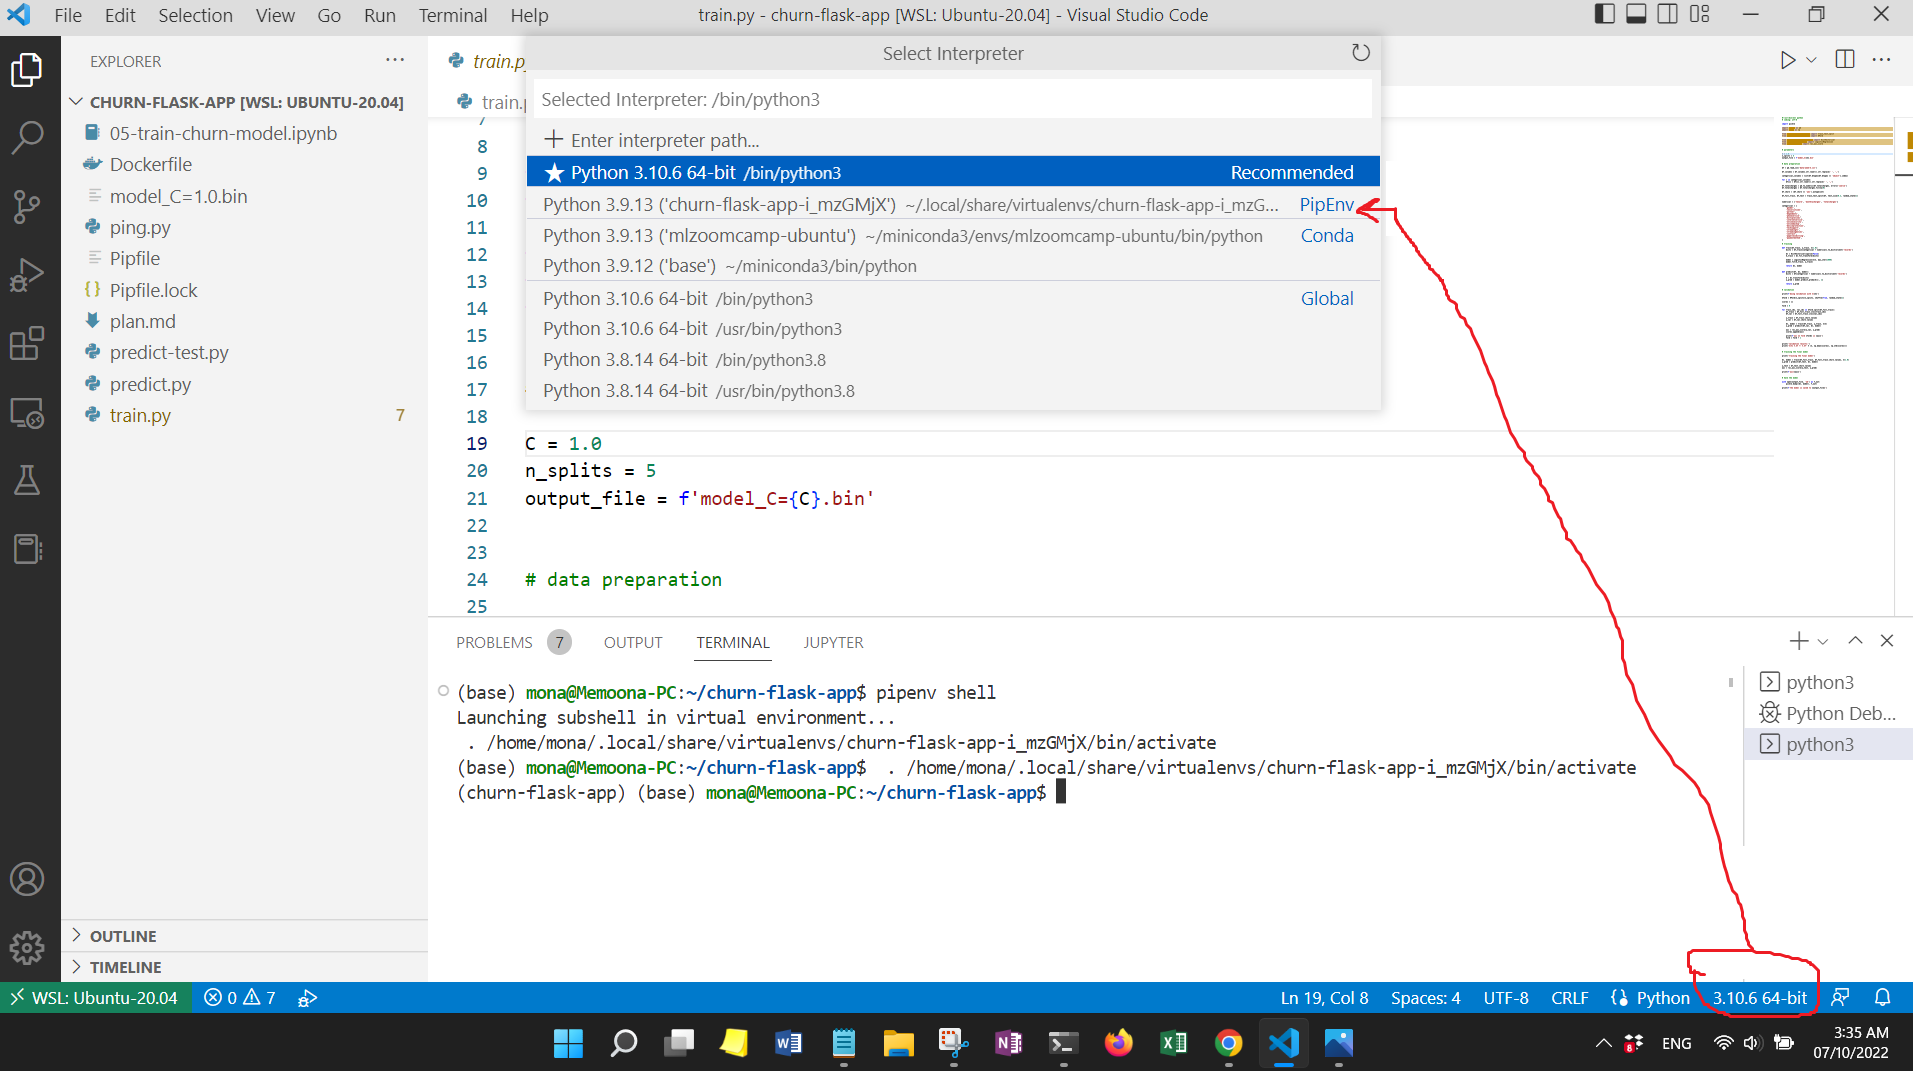 | |
| Run code without debugging. (Iff vscode asks you to install the Python for WSL extension, do so). The output of train.py: | |
| 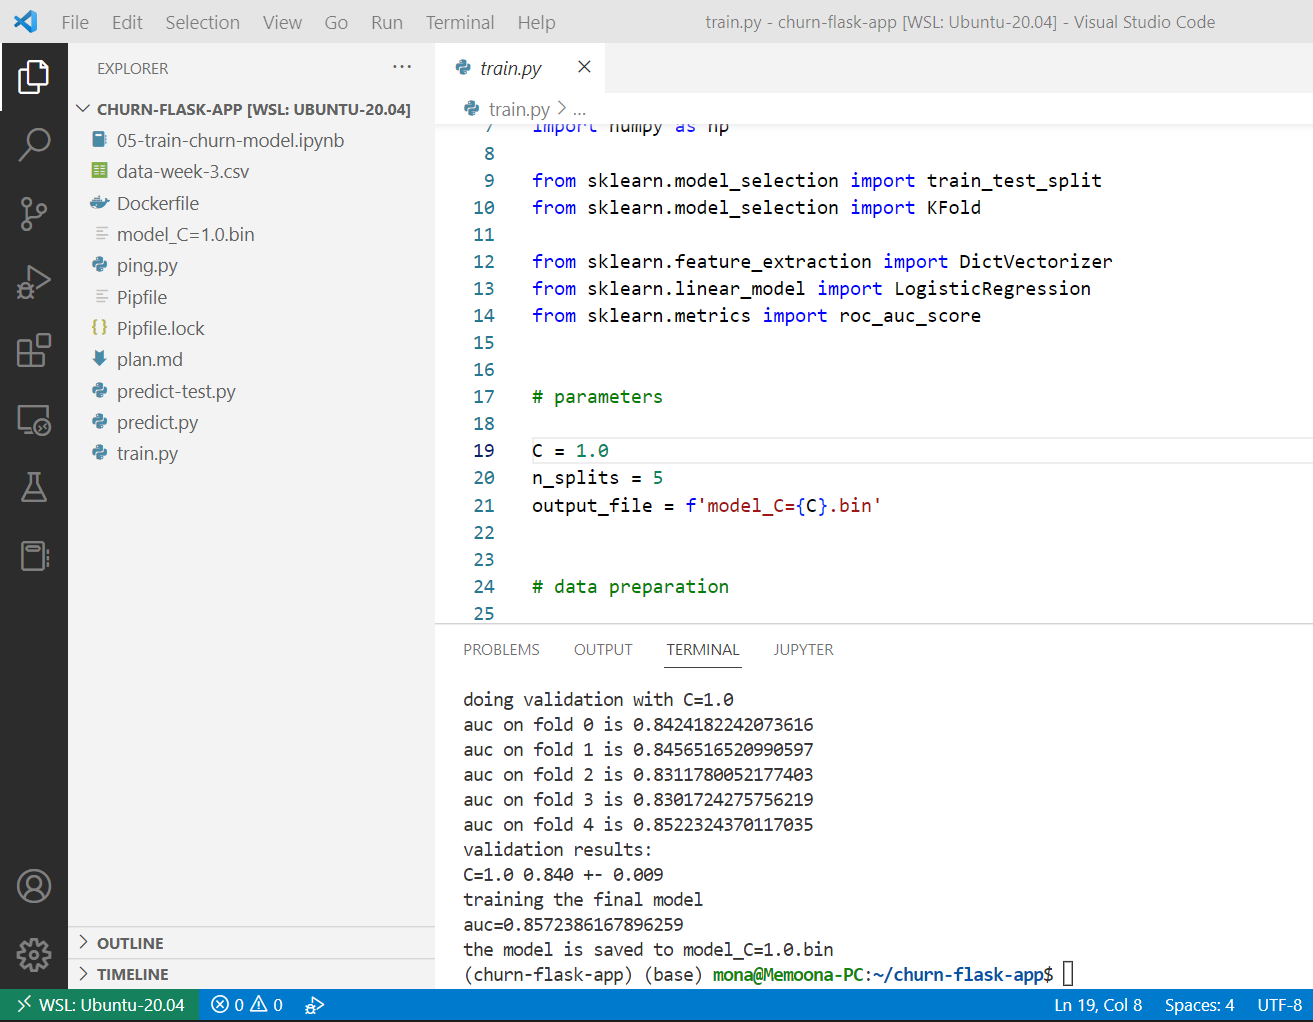 | |
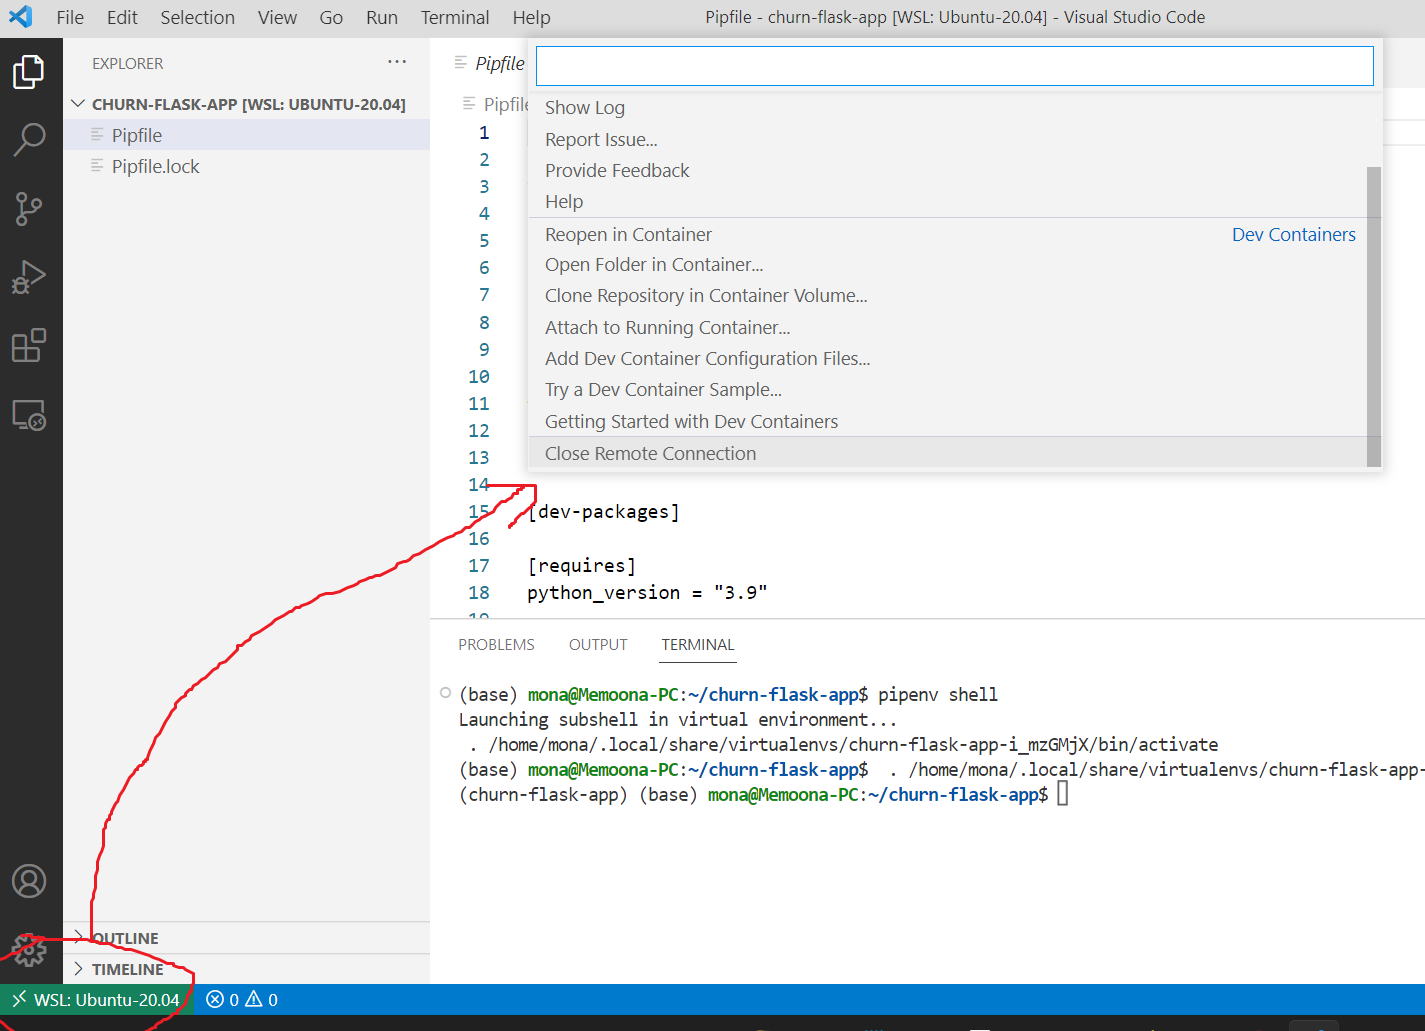
| Once you are done coding, and want to restore vscode to work with windows, click on the bottom left, and select terminate connection. | |
|  | |
| 5. Play with your code. You can also run the code entirely within Ubuntu terminal: | |
| 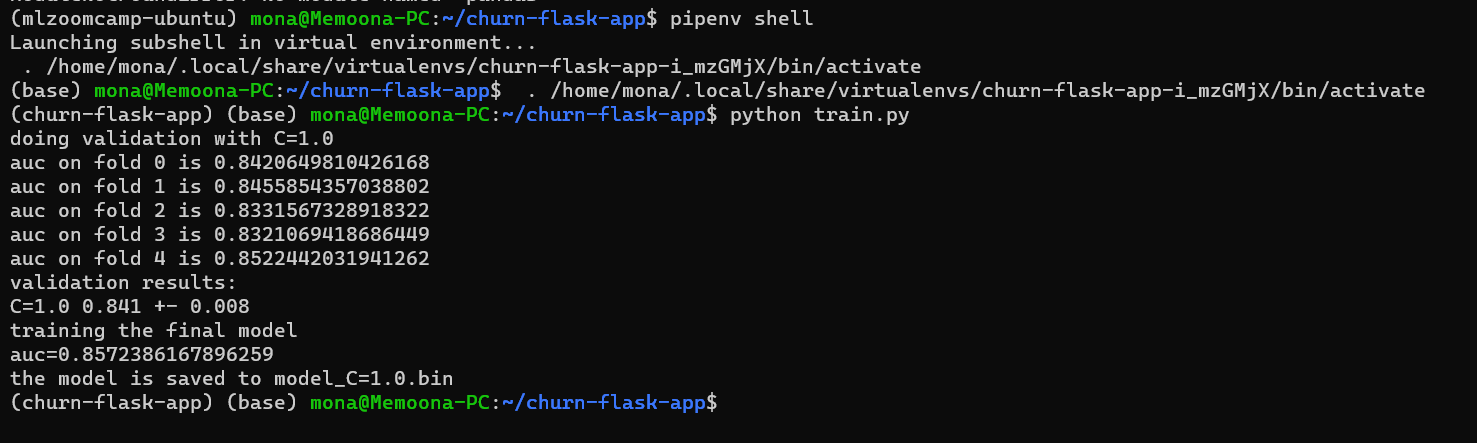 | |
| Run the following command to run train.py: | |
| ``` | |
| pipenv shell | |
| python train.py | |
| ``` | |
| 7. Create a flask app and deploy it locally, and test it | |
| 8. Install Docker. | |
| - Either directly inside WSL using the Ubuntu terminal. [This](https://www.youtube.com/watch?v=IXSiYkP23zo&ab_channel=DataTalksClub%E2%AC%9B) [1] video covers it from timestamp 6:39 to 10:05. | |
| - Or alternatively, install Docker Desktop for Windows, which is an easier installation and you can access the docker command inside WSL. You can find help [here](https://docs.docker.com/desktop/windows/wsl/). | |
| 8. Dockerize the flask app | |
| 9. Again deploy the docker container locally | |
| 10. Now deploy on cloud, e.g. Heroku or AWS. | |
| Step 5 onwards are covered here: | |
| [Churn prediction app deployment with flask and docker to AWS](https://github.com/alexeygrigorev/mlbookcamp-code/tree/master/course-zoomcamp/05-deployment) | |
| ## Extra notes: | |
| [1] This video is linked in Week 1, 06-environment.md of MLZoomcamp | |
| [here](https://github.com/alexeygrigorev/mlbookcamp-code/blob/master/course-zoomcamp/01-intro/06-environment.md). Follow this video for primarily setting up docker, even though watching the full video will be very helpful. We are using | |
| different tools (WSL instead of AWS Ubuntu instance, pipenv instead of anaconda), but the workflow is same. | |
| You can of course follow the whole video if you want to skip using | |
| WSL altogether, and you'd rather connect with an AWS Ubuntu backend. | |
| Some points to understand from the video: | |
| - The important thing to understand here is that the instructor is using a mingw64 terminal (which allows a user to interact with | |
| Windows using linux commands, but is not a full-fledged OS like WSL with Ubuntu), to connect AWS to add a Ubuntu backend. | |
| - After he has provisioned a Ubuntu instance from AWS, it is as if he is using Ubuntu from within his mingw64 terminal. Instead we are using WSL's Ubuntu terminal. | |
| - Consider that you already have done the above 2 steps and using Ubuntu via WSL instead of AWS, and are at the 5:18 min timestamp, and can now proceed from here. Only instead of anaconda, | |
| you will install pipenv for the MLZoomcamp videos. The rest of the video will be the same for you, and it covers setting up | |
| Docker nicely. Connecting to VScode and jupyter is a bit different as you'll see in the tutorials, and easier in the case of jupyter because pasting the token | |
| in the browser will directly open it, no port forwarding needed. | |
| ## FAQ: | |
| 1. **Should I use pipenv alone to create environments without using something like miniconda?** | |
| - Ideally, no. This way, pipenv will be bound to system python, so any upgrade to the system python can potentially break a pipenv environment. | |
| - We should either use it with pyenv (to create and manage different python versions) | |
| - Or use it with anaconda/miniconda, and use a pipenv environment with an anaconda environment with the required python version. | |
| - There are multiple other options. [This](https://towardsdatascience.com/python-environment-101-1d68bda3094d) article here explains some of them. | |
| - Only using *pipenv* is a **MUST** becuase it creates the pipfile.lock we need for our Docker container. Another advantage is that we can install ALL python packages using this pipenv (pipenv replaces pip). (In anaconda, packages are first installed using conda. If they are not available via conda, then they can be installed via pip, but this can sometimes cause conflicts. Pipenv skips all these troubles.) | |
| 2. **Does using a miniconda environment means we are creating our pipenv environment inside of it?** | |
| - No. When we use miniconda to create a conda environment, we are not doing so to create our pipenv environment inside this conda environment. We basically want our pipenv environment to use python.exe of the conda environment and that's it. The reason is: Inside a conda environment, we can specify any python version and ask pipenv to use it instead of the default system python. The system python can get updated, and it would break the pipenv environment if it was using it. Using a conda environment for supplying the python path is a one-time step during installation of pipenv environment. | |
| - You may ask why we create a new conda environment, `mlzoomcamp-ubuntu` is this case, and why not just use the base environment? It is good practice to use one separate environment for each project instead of base. | |
| - Now, the last question that may arise is: If `mlzoomcamp-ubuntu` gets automatically deactivated as soon as the pipenv environment finsishes installing and we don't need it again, why is the `(base)` environment still active? This is not related to pipenv specifically. Once you install miniconda, it modifies the terminal settings to always start it with the base environment activated. You can deactivate it, and the pipenv environment would still work fine. See this image below: | |
| 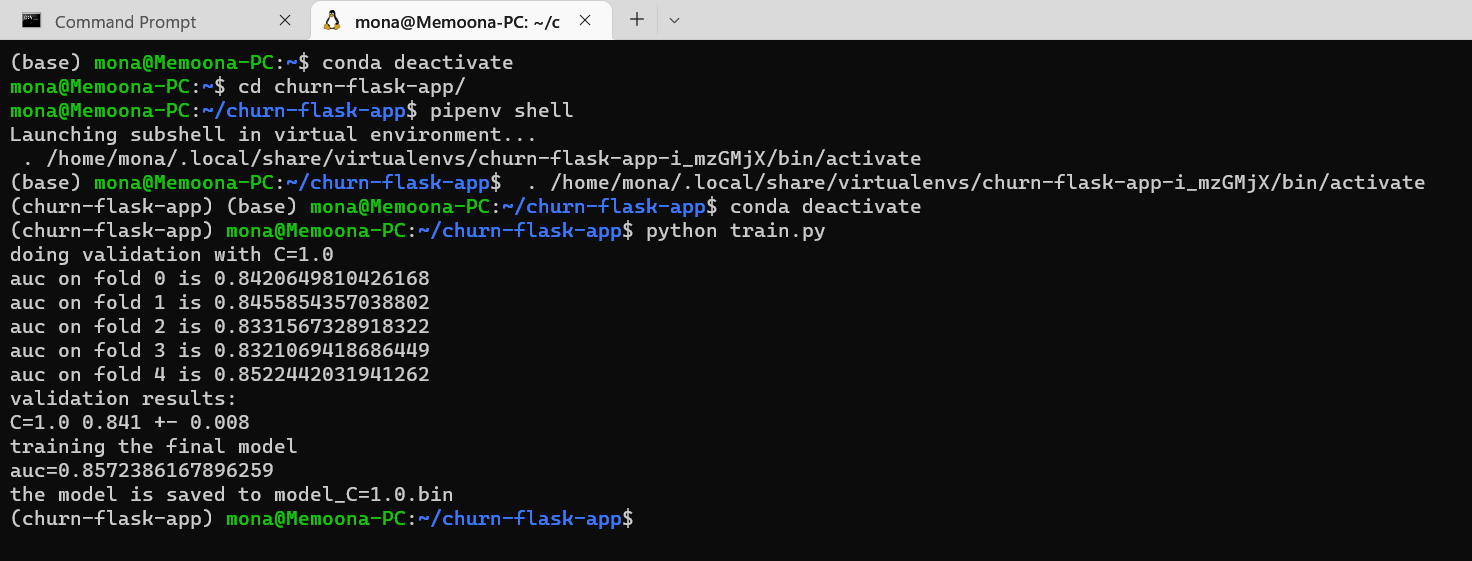 | |
| Summary: Pipenv environment does not reside inside any conda environment. It just uses the python installed inside it instead of default system python. | |
| 3. **Where does pipenv create environments and how does it name them?** | |
| - It creates them in *~/.local/share/virtualenvs/environment_name.* | |
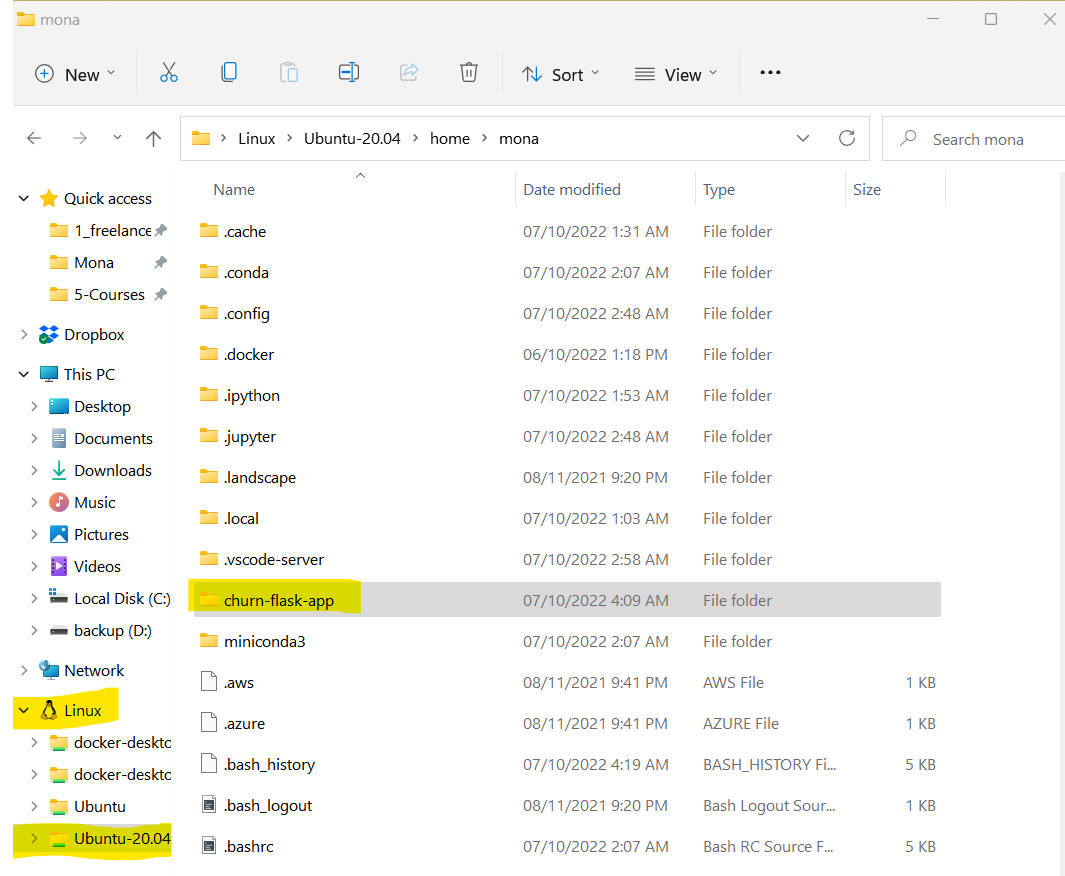
| - The environment name is the name of the last folder in the folder directory where we used the pipenv install command (or any other pipenv command). E.g. If you run any pipenv command in folder path *~/home/user/Churn-Flask-app*, it will create an environment named Churn-Flask-app-some_random_characters, and it's path will be like this: */home/user/.local/share/virtualenvs/churn-flask-app-i_mzGMjX.* | |
| - All libraries of this environment will be installed inside this folder. To activate this environment, I will need to cd into the project folder again, and type pipenv shell. In short, the location of the project folder acts as an identifier for the environment we are working in, in place of any name. | |
| 4. **Do I need to install both Docker Desktop for Windows and install Docker manually on WSL?** | |
| - No, not needed. Installing Docker Desktop for windows will make the docker command accessible inside WSL. It is also easier to install. However, if you want to install docker directly from bash in WSL, uninstall Docker Desktop completely first. | |
| 5. **Do we need to create Docker image inside an environment?** | |
| - No. It can be created directly outside of any environment. | |
| 6. **What are 0.0.0.0 and 127.0.0.1?** | |
| - 0.0.0.0 is a placeholder IP which can mean: Use any IP available. 127.0.0.1 is localhost IP (a reserved IP) which refers to the host OS itself. On Windows, this IP will refer to localhost which is Windows. On WSL, this IP will refer to Ubuntu. | |
| 7. **Can I map multiple IPs to the same port inside a single OS?** | |
| - No, this will not work. Map the new IP to any of the available, unused ports. | |
| 8. **If your main concern isn't following along the videos, how much of these steps can be done in Windows alone, without using WSL?** | |
| - Everything from step 1-6 can be done in Windows. Install pipenv inside an anaconda environment. For step 7, WSL is needed but the Docker container can be completely created with Docker Desktop. Step 8 onwards can again be done in Windows. (Summary: Docker containers can be only be created in a Linux system e.g. Ubuntu, MacOS) but they can be deployed in any OS. | |
Sign up for free
to join this conversation on GitHub.
Already have an account?
Sign in to comment