You will need an understanding of vanilla Javascript
The aim of this article is to give you an overview and understanding of the basic components of a Chrome Extension.
Start to finish tutorials on how to implement certain features will be available in future articles.
Chromium browsers are web browsers that are built on top of the open-source Chromium engine. These browsers include Chrome, Brave and Edge.
A Chromium Extension is a web extension built for and that is capable of running on a Chromium browser. This means you can build an extension that not only works for Chrome; which as of February 2023, has a 65.74 global market share; but also for any browsers that run on its engine.
Chromium extensions are essentially Javascript scripts as well as HTML pages for the extension's dialog and settings page.
The core of an extension consists of:
- Manifest (JSON)
- Content Script (JS)
- Background Script (JS)
Additionally, the following are user facing components:
- Extension Dialog (HTML + JS)
- Settings Page (HTML + JS)
- Context Menu
The manifest.json file is a configuration file used by the Chromium Engine to retrieve information about your extension such as:
- Name, desscription and version
- Permissions which allow your extension to access Chrome APIs
- Registered scripts and pages
Below is an example of a manifest.json file with a registered Popup page, Background Script and Content Script which can run on any page.
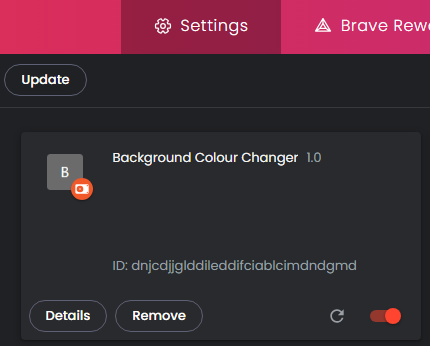
The manifest_version determines which version of the Chrome Extension Platform the extension is built for. When this article was written (May 2023), Manifest Version 3 is the latest version and is the required version if you want to publish your extension on the Chrome Store.
{
  "manifest_version": 3,
  "name": "Chrome Extension Demo",
  "version": "1.0",
  "permissions": ["tabs"],
  "action": {
    "default_popup": "pages/popup/popup.html"
  },
  "background": {
    "service_worker": "background-script.js"
  },
  "content_scripts": [
    {
      "js": ["content-script.js"],
      "matches": ["https://*/*", "http://*/*"]
    }
  ],
  "host_permissions": ["<all_urls>"]
}
Content scripts are Javascript files that get injected into the webpage you are currently viewing. From these scripts you can execute code that alters the HTML and/or styling of the currently viewed page.
Content scripts are limited in which Chrome APIs they can access. They are for the most part limited to sending and receiving messages, working with the storage of the current page and accessing the url of the current page.
Code can be executed once the content script is loaded or you can use a publish/subscribe (pub sub) pattern to trigger certain logic when messages are sent from the extension's Popup, Background Script etc.
Background scripts are also written in Javascript and unlike Content Scripts, do not run within the context of the current webpage being viewed.
While background scripts can't interact with the current webpage being viewed, they are able to access a plethora of Chrome APIs (which fire their own events), not limited to, but including:
- Tabs
- Storage
- Context Menu
- Bookmarks
- Alarms
The type of code that you will write in the Background script is code that will take advantage of the Chrome APIs (creating alarms, reacting to bookmarks being created etc.) and registering Context Menu items if your extension requires any.
Communication between the various extension components (content script, background script etc.) is done through a publisher/subscriber pattern, sending messages which can be listened for by any extension component.
chrome.runtime.sendMessage({ <MESSAGE_DATA> }) used to send messages.
chrome.runtime.onMessage.addListener(message => { ... }) used to subscribe to incoming messages.
Sending a message to a Content Script is slightly more complex since it runs on the currently viewed webpage. You will need to first query the tabs Chrome API to get the currently viewed webpages tab id, and pass it through as the first argument of the tabs.sendMessage function.
const [tab] = await chrome.tabs.query({ active: true, lastFocusedWindow: true });
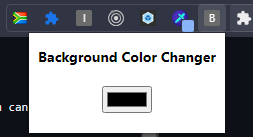
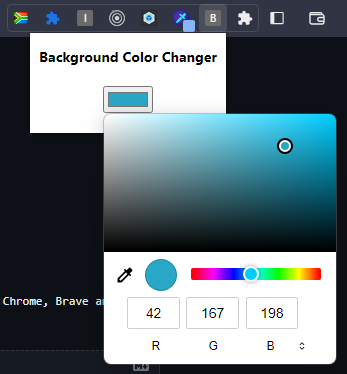
chrome.tabs.sendMessage(tab.id, { type: 'COLOR_CHANGE', color: colorPicker.value });Scenario: You want the user to be able to input a color value, via the extension's dialog page, which should be used to set the currently viewed page's background color.
Since you need to interact with the currently viewed page's HTML to change its background color. Since the dialog page cannot directly change the webpage's background color you will need a Content Script to do so.
When the user changes the value of the color picker on the Popup's HTML, a message needs to be sent/published using chrome.tabs.sendMessage(). Since we need to target the content script, which runs on a specific webpage/tab, the current active tab needs to be quered using chrome.tabs.query({ active: true, lastFocusedWindow: true }) so that we can pass its id in the sendMessage() function.
// popup.js
document.addEventListener("DOMContentLoaded", function () {
    var colorPicker = document.getElementById("colorPicker");

    colorPicker.addEventListener("change", async function () {
        const [tab] = await chrome.tabs.query({ active: true, lastFocusedWindow: true });
        chrome.tabs.sendMessage(tab.id, { type: 'COLOR_CHANGE', color: colorPicker.value });
    });
});// content-script.js
chrome.runtime.onMessage.addListener(function (message) {
if (message.type === 'COLOR_CHANGE') {
document.body.style.backgroundColor = message.color;
}
});