Put simply, Python is what is known as an interpreted language. That means that code written in Python cannot be executed by a computer without some help from another program called an interpreter. An interpreter will convert code written in Python into what is known as bytecode, which the computer does understand. In a sense, an interpreter "translates" code written in Python into machine code.
No, not exactly. Although all you need to run Python code is a Python interpreter and a text editor like notepad, it is highly recommended for users, especially beginners to have what is called an IDE (Integrated Development Environment). An IDE is a program that acts as a text editor, Python interpreter, shell and file system all combined into an easy-to-use interface that makes writing code alot simpler. Moreover, many IDEs come with extra features such as syntax/error detection, autocomplete, or provide help for specific commands.
This guide will focus on two different IDEs. While these are in no means the only ones available, these are the ones the executive team have the most experience in, and hence will allow us to provide you with assistance as quickly as possible.
- If you only have access to a chromebook/tablet, please read the next section where we go through Repl.it
- For those with access to a Linux/Mac/Windows PC, you may want to also read our PyCharm Tutorial
Repl.it is an online IDE that supports all sorts of different programming languages. For now though, we'll just stick with Python.
1) Sign up : Create an account at repl.it/signup. This will let you save and share any code that you write.
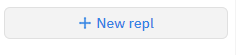
2) Now that you have created an account, start by creating your first repl. At the top right of your screen, click "New repl"
3) Create a Python repl. Search for Python in the Language box.
Make sure you select Python. Python 2.7 is a legacy version of Python that will not be taught by coding club. You can also switch your repl to private if you do not want others seeing your code.

4) Excellent! You've made your first repl!
If you've completed these steps properly, you should see something like this:
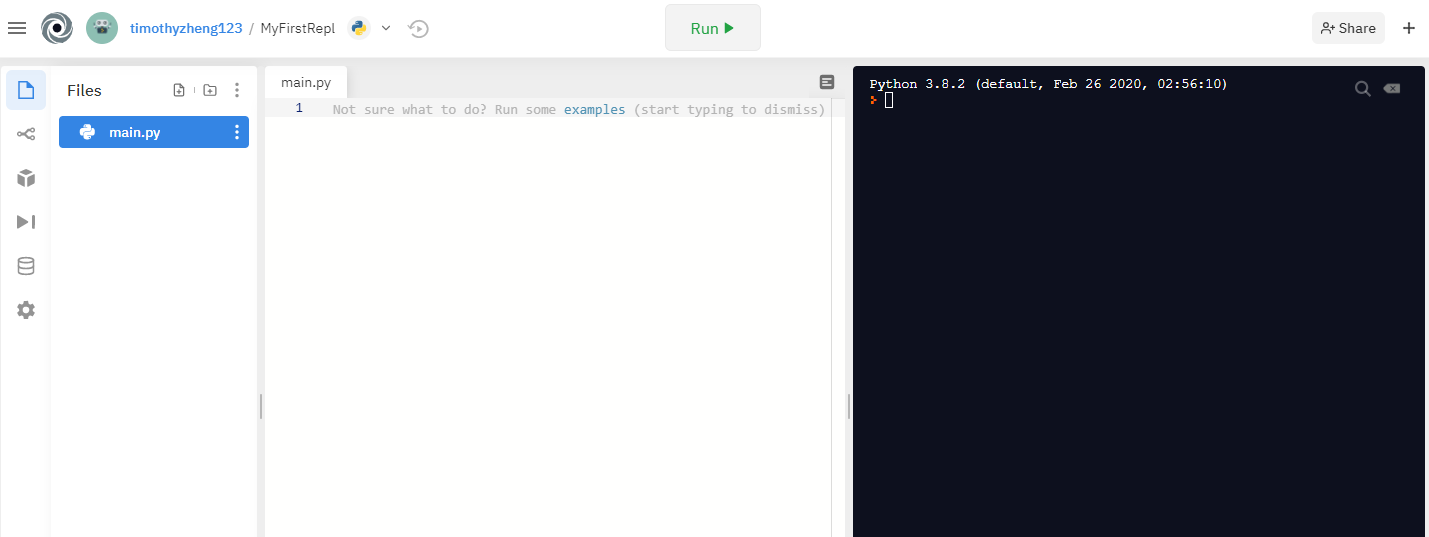
Any Python code that you type in the text box will be executed, and any output will be shown on the shell to the right. For example:
If that all looks good, you're ahead of the pack! We'll be sure to address any of your questions or problems on the 20th
We recommend that you use PyCharm as your Python IDE due to its intuitive user interface and countless useful features. As students, you are able to use PyChram Professional free of charge. Please carefully follow these steps. For assistance, first refer to our video tutorial, or contact us: str.codingclub@gmail.com
1) Getting the GitHub Student Developer Pack
- Create a GitHub Account: github.com/join
- Feel free to use your personal email.
- If you're using your personal email, please add your k12 (school) email here: github.com/settings/emails
- Sign up for the Github Student Developer Pack: education.github.com/pack
- Select your k12 email, and select "St. Robert Catholic High School" as your school.
- Write a quick sentence describing your interest in coding under "How do you plan to use GitHub?"
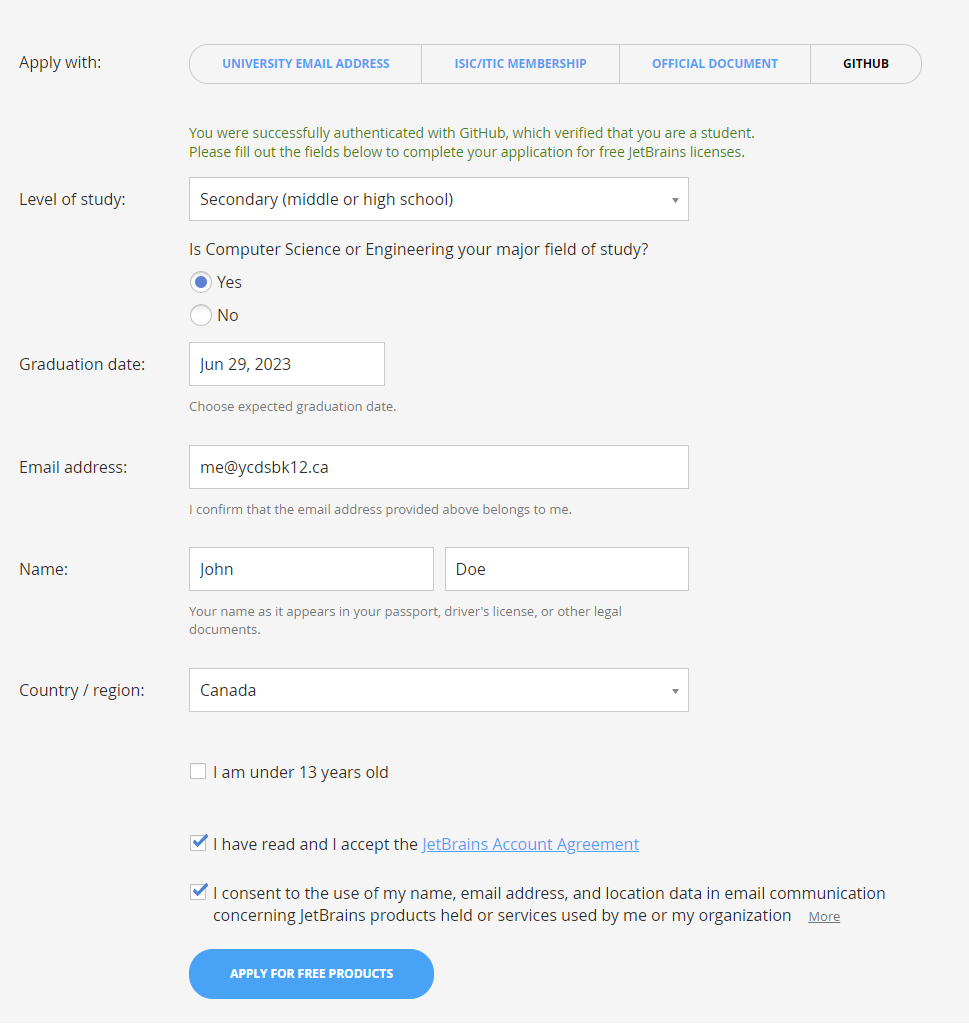
If done correctly, your Student Pack Application should look like this:

Look for an email from GitHub. This process shouldn't take long.
2) Create a JetBrains account
- Sign up for a JetBrains account: jetbrains.com/login
- Feel free to use your personal email
3) Connect your GitHub account
- Apply for a JetBrains Educational License: jetbrains.com/shop/eform/students
- IMPORTANT - Apply with your GitHub account!

4) Complete the form
- Complete the form with all necessary details, including your graduation date. For reference, the last day of school is on June 29.
5) Download PyCharm Professional
- For Windows PCs: Download Here
- For Macs: Download Here
- For Linux: Download Here
6) Download Python
- Pycharm requires a Python interpreter. We recommend you download Python 3.8.
- For Windows PCs: Download Here
- For Macs: Download Here
For assistance, please contact us: str.codingclub@gmail.com
7) Install Python, then install PyCharm
- It is recommended that you install Python to PATH
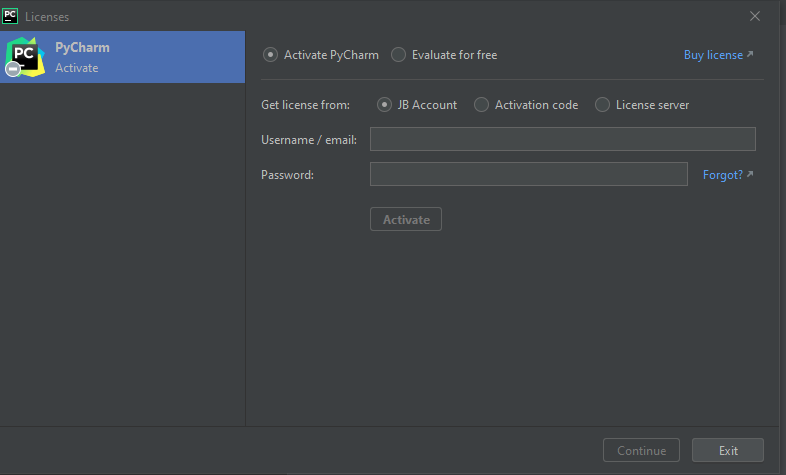
- Once the installation for PyCharm finishes, sign in with your JetBrains Account to activate your professional license.
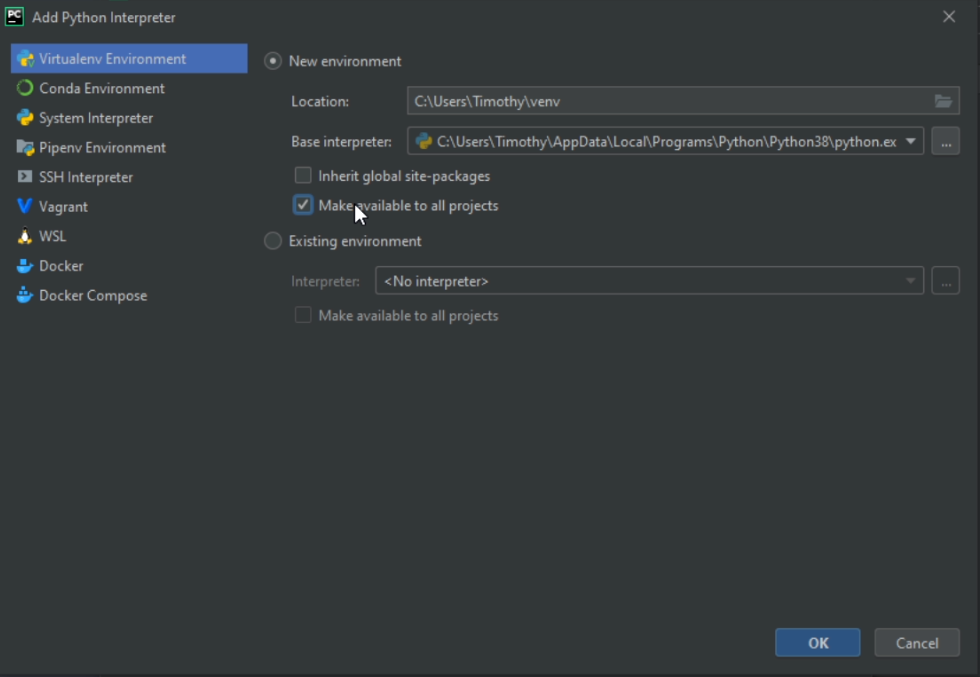
8) Set up Python Interpreter
- On the bottom right, click configure -> settings -> Python interpreter
- Set up a new environment and make available to all projects

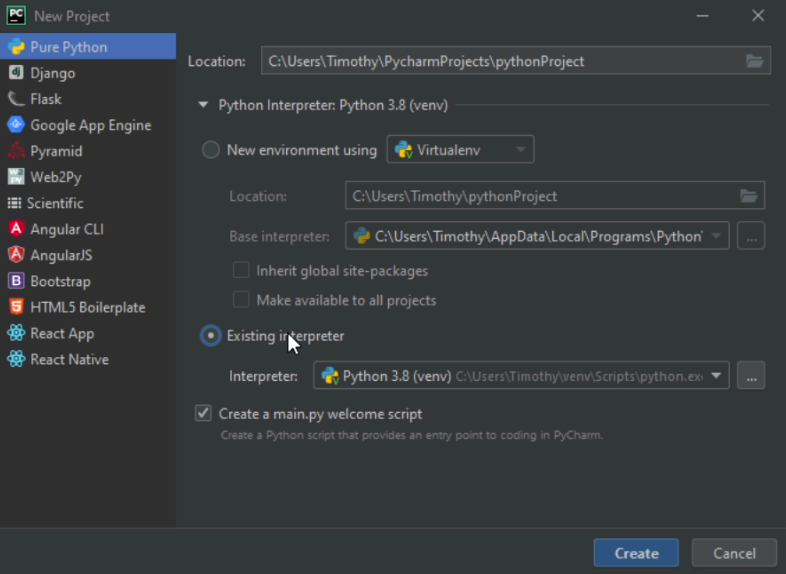
9) Start a new project
- Click on New Project. Select the interpreter you just set up.
- Test your configuration
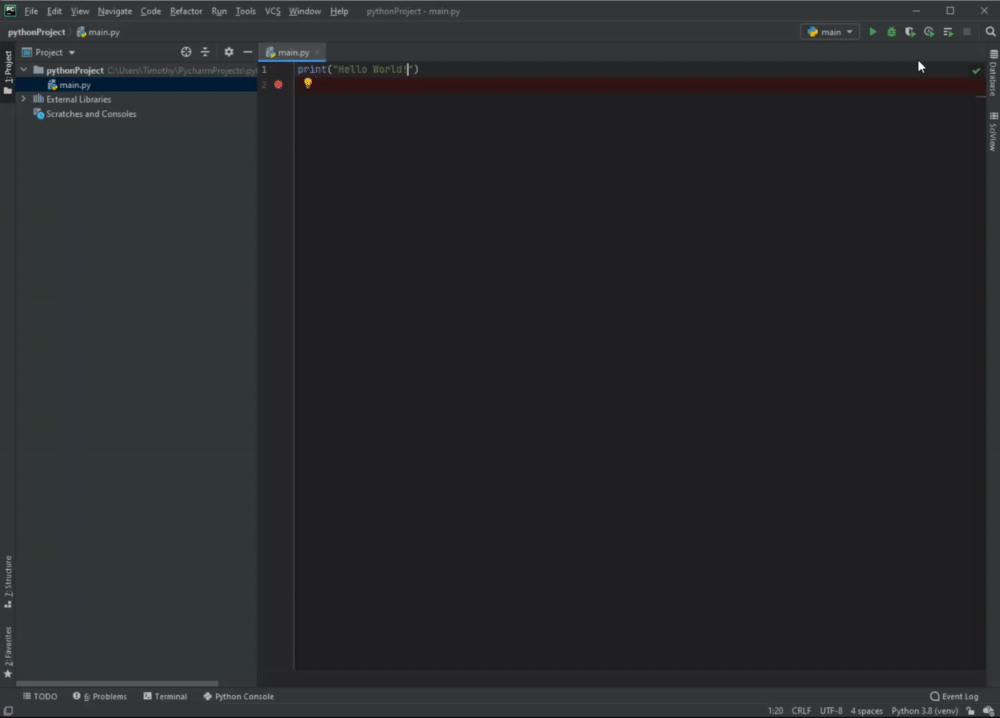
If you've reached this point, you're ahead of the pack!
- We'll be more than happy to help you set up your IDE if you're running into problems. Please email us for assistance: str.codingclub@gmail.com
- We'll be providing synchronous assistance on the 20th. If you'd like, you may also want to wait until then if you're running into issues.