From @BalCC0n orga team for hackers communities
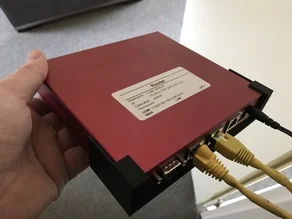
People from our team have PC Engine small single board computers for networking in their office or home office. To protect board we are using this case:
The heat spreader kit is included with apu boards but because of his size it's not really easy to place it where we want. People from PC Engine are selling heat spreader placement fixture (apufix1a https://pcengines.ch/apufix1a.htm)), but in some countries is not even possible to order it.

Because of this we decided to make 3D module and decided to share with everybody. First of I would to thanks to my friend @eukavlin for hers 3D design and 3D printing skills and taking time to made this little project to the ligths. I will share few photos from hers lab and some instruction she wanted to add for better 3D printing quality.
Module images:


End of printing


Printing advices from @eukavlin
Dimensions : 152.4 x 94 x 2 mm
Infill : 100%
For the bolts : I used M4x30mm for demonstration, but M4x8mm max is recommended to match with the original apufix bolts length.
Download .stl
https://mega.nz/#!yqIwgCLb!3wdefoVkFQQTxGVBqd_vGf-wQXybGzF6RpQBpG17Q_c
Happy New Year to all hackers communities from all over the world from @BalCC0n orga team.