Mozart is new kind of tool for JavaScript Developers. It's an organizer, not a framework.
Mozart is not so much a library as it is a technique, but mozart.js makes it easy to employ it. This means it works well with other libraries of your chosing, like jQuery.
Here's what a modern JavaScript application looks like if we don't pull in huge frameworks like React or Angular:
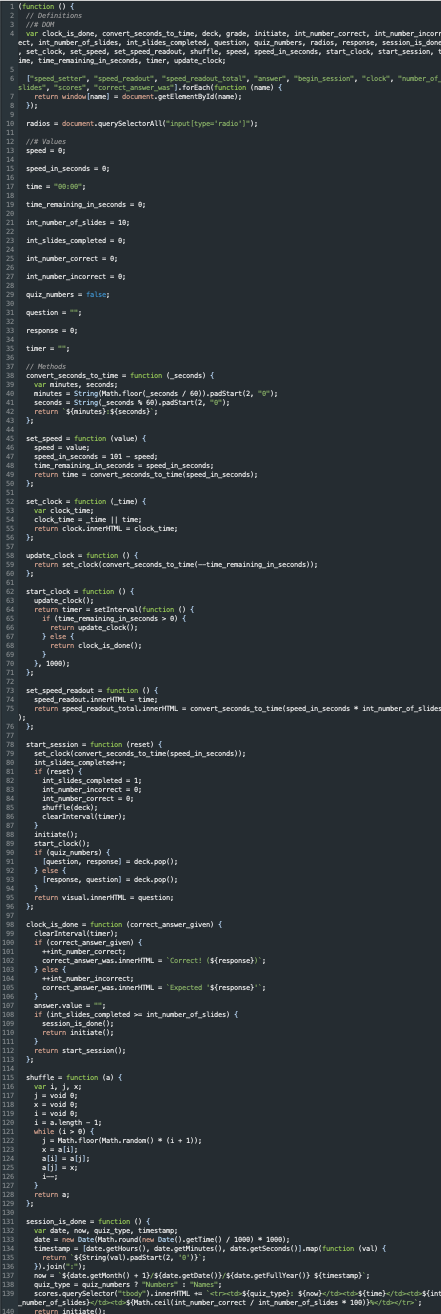
There's too much going on and it doesn't reflect our mental model of the application itself.
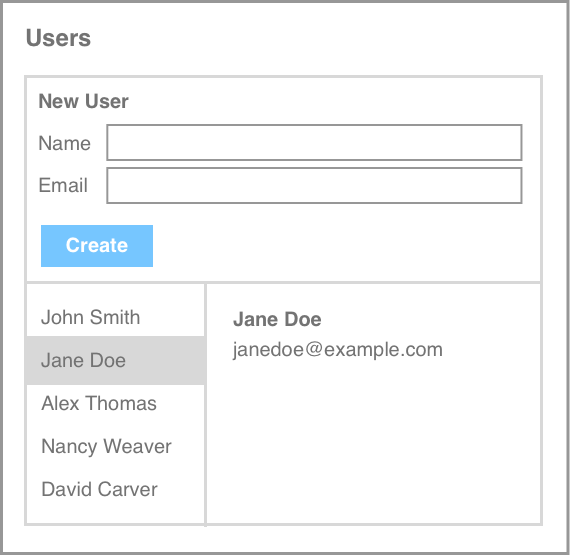
Mozart takes a component-based approach. This simply means you identify chunks of your HTML as serving a high-level purpose.
In this example, we have a simple contact organizer. But we see that there can be two components if we wish: The form and the contacts interface. One is for creating and updating, the other is for reading and deleting. Here's how that might look in our HTML:
<form data-component="new_contact">
  ...
  <button>Create</button>
</form>

<div data-component="contacts">
  <table>...</table>
  <main>
    <h1></h1>
    <p></p>
  </main>
</div>
Notice we never put any classes or ids on these objects. We certainly could, but we'll see soon how Mozart lets us keep our identification generic as a result of defining components.
These are just a few of the domains in which JavaScript is used in a modern web application. Mozart makes it easy to separate these into concerns and make them easy to talk to one another.
Let's look at an example from above to see how this might work.
First, we'll look at the new_contact component. It has its JS files at /js/new_contact (or anywhere you want).
In this example, we'll define the new_contact component as having events, actions, configuration, and routes.
project/
  js/
    new_contact/
      events.js
      actions.js
      routes.js
      configuration.js
When the user clicks on the "Create" button, we want it to immediately add to the contacts table, then persist to the backend in the background.
// project/js/new_contact/events.js

m.new_contact.events(µ => {
  µ("button")[0].addEventListener("click", µ.act.submit);
});
By the way, that's the mu (µ) sign. It's like jQuery's $ but you'll press option + m instead of shift + 4 on macOS, and who-knows-what on Windows. Don't worry, if you hate it, you can also configure this to be something else very easily.
Here, the µ sign is a passthrough to document.querySelectorAll. If we're using jQuery, we can also change µ to $ and have this work like jQuery does normally. But there's a little more to what µ does.
µ is configured to only traverse child elements of the component. So if we're using another button in some other component, we don't have to be careful here to give it a highly specific classname to differentiate it. This also works if you're using jQuery.
To understand this one, consider the line,
µ("button").addEventListener("click", µ.act.submit);When the user clicks the button, we go into an action for this component
// project/js/new_contact/actions.js

m.new_contact.acts({
  submit: (µ, args) => {
    var user, name, email;
    [name, email] = µ("input").map(input => input.value);

    user = { name: name, email: email };

    µ.act.clear();
    m.contacts.act.new_user({ user: user });

    $.ajax(µ.route.create({
      data {
        user: user
      }
    }));
  },

  clear: (µ, args) => {
    µ("input").forEach(input => input.value = "");
  }
})
Again, if you're using jQuery, you can just use $ instead, but Mozart will automatically scope the selection to only children of the component. We're not using CSS classes here, but we totally can, there's just no need to make them highly specific.
Every action comes with two params by default: µ and args. As we saw before, µ is a scoped selector, and args is a plain JS object for passing in arguments to the action.
Let's walk through this.
  submit: (µ, args) => {
    var user, name, email;
    [name, email] = µ("input").map(input => input.value);
First, we're just taking the values of the input and assigning them to the variables name and email.
    user = { name: name, email: email };

    µ.act.clear();
Now, we're creating a user object to pass through to other parts of our JavaScript. The first one is to call the component's own action, clear() to clear the form.
    m.contacts.act.new_user({ user: user });
    $.ajax(µ.route.create({
      data {
        user: user
      }
    }));
We're now ready to send this off to the contact component. This is the part that actually shows all our contacts in a table.
This component is loosely-coupled from that. That means it doesn't need to know anything about how that component works, it just passes the user through and leaves it to its sibling component to do whatever it needs to do.
Because this is a different component, instead of µ we just call it up stating with the Mozart namespace, m.contacts. (Yes, you can change m to whatever you want.)
Finally, we need to AJAX this information to the backend. So we have some routes defined in project/new_contact/routes.js. Here, we'll call the create route. µ.route.create(...) will return a JSON object conveniently keyed in a way that is compatible with jQuery's $.ajax(), but we don't have to use that.
Let's look at the route now.
// project/js/new_contact/routes.js

m.new_contact.routes({
  create: {
    method: "POST",
    url: "/api/users"
  }
})
When this route is called, it knows to use the passed-in object as JSON data to the server by POSTing to the URL provided. We can also leave the url formation dynamic like this read method:
// project/js/new_contact/routes.js

m.new_contact.routes({
  create: {
    method: "POST",
    url: "/api/users"
  },

  read: {
    method: "GET",
    url: "/api/users/#{user_id}"
  }
})
Mozart will automatically take any root-level value with the key user_id and interpolate it in the url string instead.
With $.ajax from jQuery, we can make promise actions.
For example, maybe we want a notification component that could be called here to confirm the data has been saved.
    m.contacts.act.new_user({ user: user });

    $.ajax(µ.route.create({
      data {
        user: user
      }
    }))
      .done(user => m.notifier.act.success({
        title: "Success",
        message: `${user.name} created successfully.`
      }))
      .fail(user => m.notifier.act.error({
        title: "Error",
        message: `${user.name} could not be created.`
      }));
And here's what that notification's actions look like:
// project/js/notifier/actions.js

m.notifier.acts({
  success: (µ, args) => {
    µ.act.show({
      title: args.title,
      message: args.message,
      color_class: "green",
      delay: 1000
    })
  },

  error: (µ, args) => {
    µ.act.show({
      title: args.title,
      message: args.message,
      color_class: "red",
      delay: 0
    })
  }
});
In the notifier actions, the error and success actions do very similar things but just modify a few basic properties.
If it's a successful message, just tell me briefly and then go away. If it's an error, tell me but stay on the screen until I tell you to go away.
So we're going to call another part of the actions whose purpose is just to show a notification with the properties I tell it.
But we want our external components to continue calling these named success and error methods, so Mozart gives us the option to make some of our methods private to the component only:
// project/js/notifier/actions.js

m.notifier.acts({
  success: (µ, args) => {
    µ.act.show({
      title: args.title,
      message: args.message,
      color_class: "green",
      delay: 1000
    })
  },

  error: (µ, args) => {
    µ.act.show({
      title: args.title,
      message: args.message,
      color_class: "red",
      delay: 0
    })
  },

  private: {
    show: (µ, args) => {
      var _µ = µ.clone();

      _µ("h1").innerHTML = args.title;
      _µ("p").innerHTML  = args.message;
      _µ(this.scope).classList.add(args.color_class);
      document.body.appendChild(_µ);

      if (args.delay) {
        setTimeout(() => { _µ(this.scope).remove(); }, args.delay);
      }
      else {
        _µ(".dismiss").style.display = "block";
      }
    }
  }
});
A few more new things here. We can spawn new components virtually by calling µ.clone(). This requires we have a template object defined in the markup already.
And we can call up the component itself with µ(this.scope);
Now let's say we also wanted to add an info method. This will be basically the same as success, but blue.
  info: (µ, args) => {
    µ.act.show({
      title: args.title,
      message: args.message,
      color_class: "blue",
      delay: 1000
    })
  },
Do we have to keep saying the delay is 1000ms? Maybe we can set this as a default in the component's configuration.
// project/notifier/configuration.js

m.notifier.config({
  delay: 1000
})
Now we can rewrite our info and success methods to omit the delay parameter and have the private show method use it as a fallback.
That default value can be retrieved with µ.config.delay.
// project/js/notifier/actions.js

m.notifier.acts({
  success: (µ, args) => {
    µ.act.show({
      title: args.title,
      message: args.message,
      color_class: "green"
    })
  },

  info: (µ, args) => {
    µ.act.show({
      title: args.title,
      message: args.message,
      color_class: "blue"
    })
  },

  error: (µ, args) => {
    µ.act.show({
      title: args.title,
      message: args.message,
      color_class: "red",
      delay: 0
    })
  },

  private: {
    show: (µ, args) => {
      var _µ = µ.clone();

      _µ("h1").innerHTML = args.title;
      _µ("p").innerHTML  = args.message;
      _µ(this.scope).classList.add(args.color_class);
      document.body.appendChild(_µ);

      var delay = (args.delay === undefined ? µ.config.delay : args.delay);

      if (args.delay) {
        setTimeout(() => { _µ(this.scope).remove(); }, delay);
      }
      else {
        _µ(".dismiss").style.display = "block";
      }
    }
  }
});
And who knows what other use cases might exist. Maybe you want to make your own. In that case, you can decorate µ with JavaScript objects of your choosing:
m.notifier.decorate("i18n", Object);We now have m.notifier.i18n
m.notifier.i18n({
  "en_US": {
    "hello": "Hello"
  },
  "fr_FR": {
    "bonjour": "Bonjour"
  }
});
And we can call it up in the scope context elsewhere with µ.i18n.en_US.hello
Or similar to events we could make a Function type.
m.notifier.decorate("whatever", Function);and
m.notifier.whatever(µ => {
  ...
});
will act as a simple block that let's us define any block of JavaScript having µ already defined.
Or if you want to decorate for all of your components you can do the same with
m.decorate("i18n", Object);
m.decorate("whatever", Function);