-
Prerequisite
Before begining the installation run login shell as the sudo user and update the current packages installed
  sudo apt update
  sudo apt upgrade
-
Install Java 11 on Ubuntu 18.04
You need to add the following PPA to your Ubuntu system. This PPA contains a package oracle-java11-installer having the Java installation script.
sudo add-apt-repository ppa:linuxuprising/java
Then install Java Runtime Environment (JRE)
sudo apt install default-jre
Install Java Development Kit (JDK)
sudo apt install default-jdk
Both this command will automatically add java executable into environment variable.
To be save, reload the environment variables using source ~/.bashrc.
To check JRE is working, please run java or java --version command on terminal.

To check JDK is working, please run javac command on terminal.
-
Create user for Hadoop
We recommend creating a normal (nor root) account for Hadoop working. To create an account using the following command.
adduser hadoop
After creating the account, it also required to set up key-based ssh to its own account. To do this use execute following commands.
  su - hadoop
  ssh-keygen -t rsa -P '' -f ~/.ssh/id_rsa
  cat ~/.ssh/id_rsa.pub >> ~/.ssh/authorized_keys
  chmod 0600 ~/.ssh/authorized_keys
Now, SSH to localhost with Hadoop user. This should not ask for the password but the first time it will prompt for adding RSA to the list of known hosts.
ssh localhost
exit
-
Download Hadoop Source Archive
In this step, download hadoop 3.2.0 source archive file using below command.
    cd ~
    wget http://www-eu.apache.org/dist/hadoop/common/hadoop-3.2.0/hadoop-3.2.0.tar.gz
    tar xzf hadoop-3.2.0.tar.gz
    mv hadoop-3.2.0 hadoop
-
Setup Hadoop Pseudo-Distributed Mode
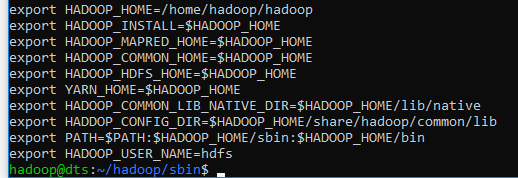
Setup the environment variables used by the Hadoop. Edit ~/.bashrc file and append following values at end of file.
    export JAVA_HOME=/usr/lib/jvm/default-java
    export HADOOP_HOME=/home/hadoop/hadoop
    export HADOOP_INSTALL=$HADOOP_HOME
    export HADOOP_MAPRED_HOME=$HADOOP_HOME
    export HADOOP_COMMON_HOME=$HADOOP_HOME
    export HADOOP_HDFS_HOME=$HADOOP_HOME
    export YARN_HOME=$HADOOP_HOME
    export HADOOP_COMMON_LIB_NATIVE_DIR=$HADOOP_HOME/lib/native
    export HADOOP_CONFIG_DIR=$HADOOP_HOME/share/hadoop/common/lib
    export PATH=$PATH:$HADOOP_HOME/sbin:$HADOOP_HOME/bin
Then, apply the changes in the current running environment
source ~/.bashrc
Now edit $HADOOP_HOME/etc/hadoop/hadoop-env.sh file and set JAVA_HOME environment variable. Change the JAVA path as per install on your system. This path may vary as per your operating system version and installation source. So make sure you are using the correct path.
nano $HADOOP_HOME/etc/hadoop/hadoop-env.sh
Then add this line
    export JAVA_HOME=/usr/lib/jvm/default-java
    export HADOOP_CLASSPATH+=" $HADOOP_CONF_DIR/lib/*.jar"
-
Setup Hadoop Configuration Files
Hadoop has many configuration files, which need to configure as per requirements of your Hadoop infrastructure. Let’s start with the configuration with basic Hadoop single node cluster setup. first, navigate to below location
cd $HADOOP_HOME/etc/hadoop
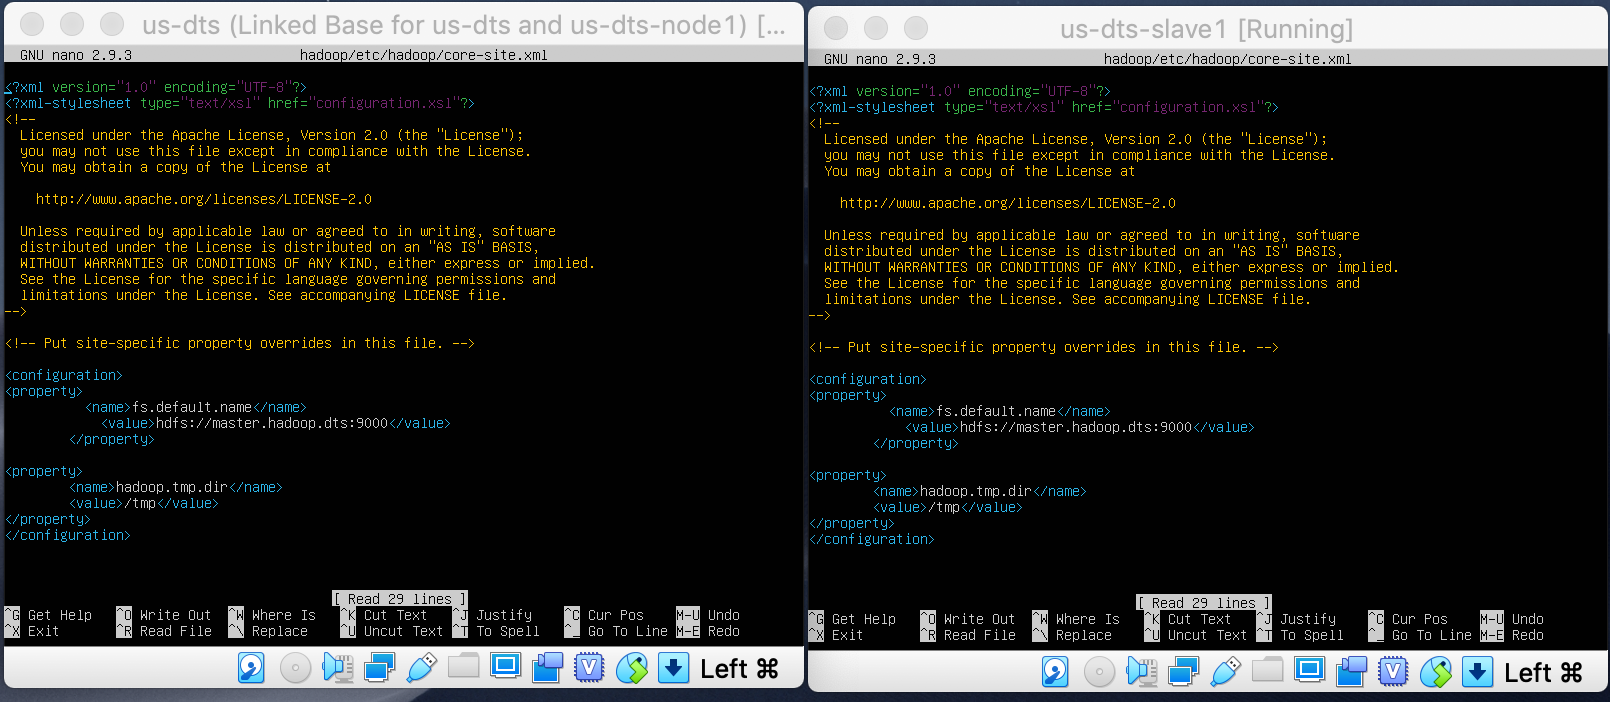
Edit core-site.xml -> nano core-site.xml
    <configuration>
        <property>
          <name>fs.default.name</name>
            <value>hdfs://localhost:9000</value>
        </property>
    </configuration>
Edit hdfs-site.xml -> nano hdfs-site.xml
    <configuration>
        <property>
         <name>dfs.replication</name>
         <value>1</value>
        </property>

        <property>
          <name>dfs.name.dir</name>
            <value>file:///home/hadoop/hadoopdata/hdfs/namenode</value>
        </property>

        <property>
          <name>dfs.data.dir</name>
            <value>file:///home/hadoop/hadoopdata/hdfs/datanode</value>
        </property>

        <property>
            <name>dfs.permissions.enabled</name>
            <value>false</value>
        </property>
    </configuration>
Edit mapred-site.xml -> nano mapred-site.xml
    <configuration>
        <property>
          <name>mapreduce.framework.name</name>
          <value>yarn</value>
      </property>
      <property>
          <name>mapreduce.application.classpath</name>
                      <value>$HADOOP_MAPRED_HOME/share/hadoop/mapreduce/*,$HADOOP_MAPRED_HOME/share/hadoop/mapreduce/lib/*,$HADOOP_MAPRED_HOME/share/hadoop/common/*,$HADOOP_MAPRED_HOME/share/hadoop/common/lib/*,$HADOOP_MAPRED_HOME/share/hadoop/yarn/*,$HADOOP_MAPRED_HOME/share/hadoop/yarn/lib/*,$HADOOP_MAPRED_HOME/share/hadoop/hdfs/*,$HADOOP_MAPRED_HOME/share/hadoop/hdfs/lib/*</value>
      </property>
      <property>
              <name>mapreduce.map.env</name>
              <value>HADOOP_MAPRED_HOME=$HADOOP_MAPRED_HOME</value>
      </property>
      <property>
              <name>mapreduce.reduce.env</name>
              <value>HADOOP_MAPRED_HOME=$HADOOP_MAPRED_HOME</value>
      </property>
      <property>
              <name>yarn.app.mapreduce.am.env</name>
              <value>HADOOP_MAPRED_HOME=$HADOOP_MAPRED_HOME</value>
      </property>
    </configuration>
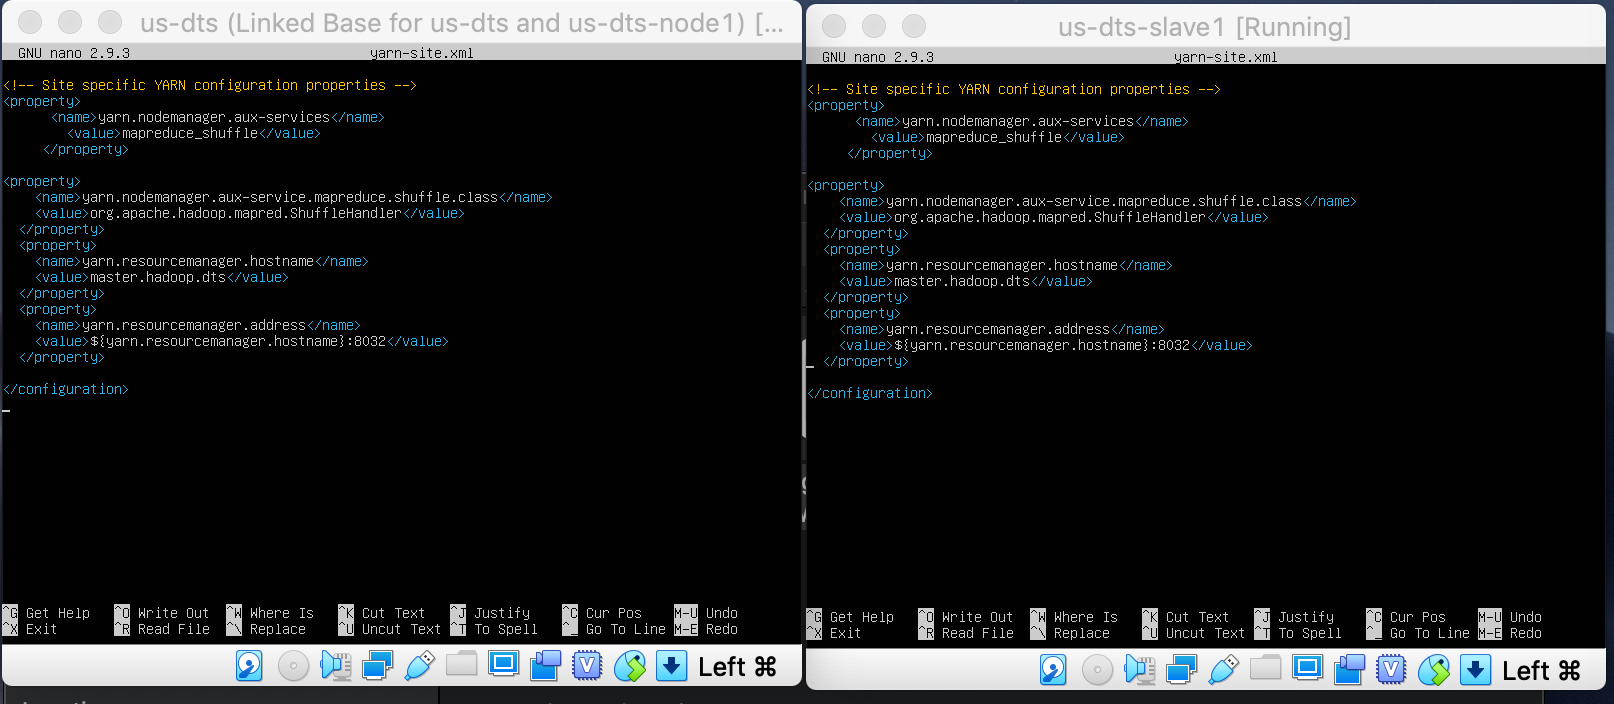
Edit yarn-site.xml -> nano yarn-site.xml
   <configuration>
     <property>
      <name>yarn.nodemanager.aux-services</name>
        <value>mapreduce_shuffle</value>
     </property>
    </configuration>
-
Format Namenode
Now format the namenode using the following command, make sure that Storage directory is
hdfs namenode -format
Sample output:
     WARNING: /home/hadoop/hadoop/logs does not exist. Creating.
     2018-05-02 17:52:09,678 INFO namenode.NameNode: STARTUP_MSG:
     /************************************************************
     STARTUP_MSG: Starting NameNode
     STARTUP_MSG:   host = tecadmin/127.0.1.1
     STARTUP_MSG:   args = [-format]
     STARTUP_MSG:   version = 3.1.2
     ...
     ...
     ...
     2018-05-02 17:52:13,717 INFO common.Storage: Storage directory /home/hadoop/hadoopdata/hdfs/namenode has been successfully formatted.
     2018-05-02 17:52:13,806 INFO namenode.FSImageFormatProtobuf: Saving image file /home/hadoop/hadoopdata/hdfs/namenode/current/fsimage.ckpt_0000000000000000000 using no compression
     2018-05-02 17:52:14,161 INFO namenode.FSImageFormatProtobuf: Image file /home/hadoop/hadoopdata/hdfs/namenode/current/fsimage.ckpt_0000000000000000000 of size 391 bytes saved in 0 seconds .
     2018-05-02 17:52:14,224 INFO namenode.NNStorageRetentionManager: Going to retain 1 images with txid >= 0
     2018-05-02 17:52:14,282 INFO namenode.NameNode: SHUTDOWN_MSG:
     /************************************************************
     SHUTDOWN_MSG: Shutting down NameNode at tecadmin/127.0.1.1
     ************************************************************/
-
Start Hadoop Cluster
Let’s start your Hadoop cluster using the scripts provides by Hadoop. Just navigate to your $HADOOP_HOME/sbin directory and execute scripts one by one.
cd $HADOOP_HOME/sbin/
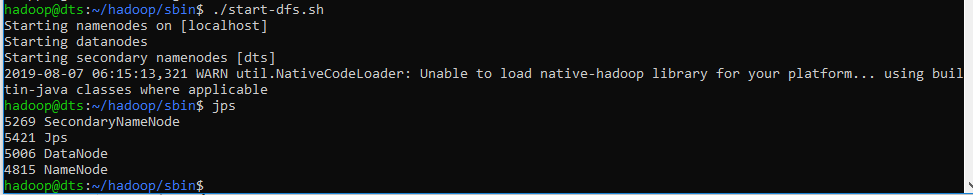
Now execute start-dfs.sh script.
./start-dfs.sh
Then execute start-yarn.sh script.
./start-yarn.sh

To make it easier to start hadoop from any directory, you can create an alias by modifying ~/.bashrc and add these lines
    alias hstart=$HADOOP_HOME/sbin/start-all.sh
    alias hstop=$HADOOP_HOME/sbin/stop-all.sh
Then run source ~/.bashrc, now we can start or stop hadoop services from any directory with hstart or hstop command.
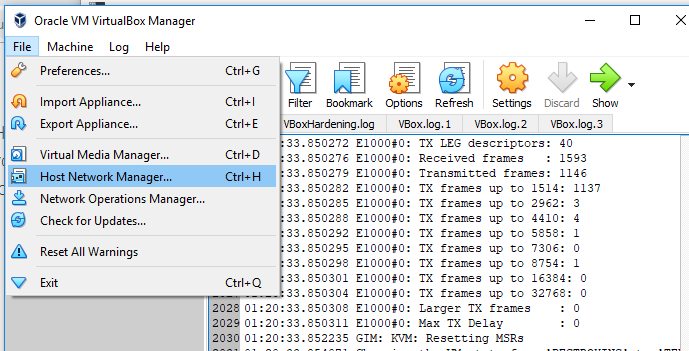
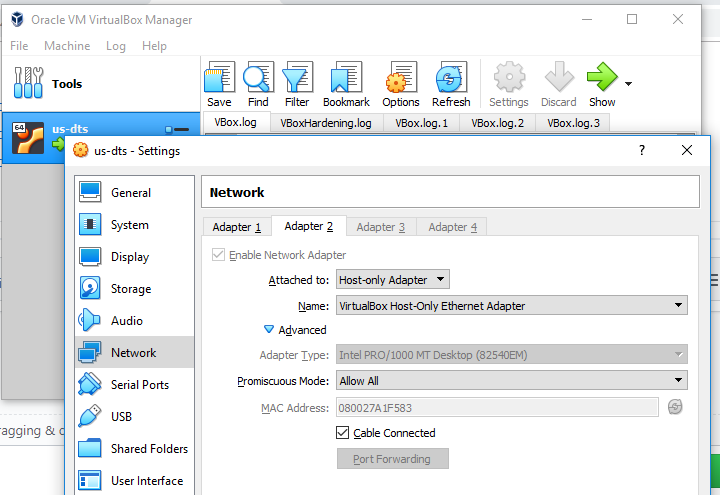
This steps only valid if you do not want to setup multiple VM on windows because the port forwarding will conflict if you duplicate the VM.
Implement port forwarding so the windows can communicate with vbox.
-
Java command not found
Please run this command echo $JAVA_HOME to see if the java added to environment variable, if it return empty string then you have to add it on ~/.bashrc using nano or other editor.
Add this line export JAVA_HOME="/usr/lib/jvm/default-java" -> you need to modify the path based on your java installation inside /usr/lib/jvm.
After that, you need to reload the updated setting using this command source ~/.bashrc. Now the java command should work.
If the problem still persist, please follow my Java Installation above
-
Hadoop or hdfs command not found
Please make sure you have these values inside your .bashrc file
Please adjust $HADOOP_HOME value to your hadoop instalation path.
Then reload the env file using this command source ~/.bashrc, now the hdfs or hadoop command should work
-
Failed to retrive data from /webhdfs/v1/?op=LISTSTATUS; Server Error when trying to browse HDFS directory on the browser
Run this command on your terminal
    cd $HADOOP_HOME/share/hadoop/common/lib
    wget https://jcenter.bintray.com/javax/activation/javax.activation-api/1.2.0/javax.activation-api-1.2.0.jar
Then make sure on your ~/.bashrc contain this line export HADOOP_CONFIG_DIR=$HADOOP_HOME/share/hadoop/common/lib
Make sure $HADOOP_HOME/etc/hadoop/hadoop-env.sh contain this line export HADOOP_CLASSPATH+=" $HADOOP_CONF_DIR/lib/*.jar"
Then restart the hadoop services
-
class com.sun.tools.javac.Main not found.
-
Find your java-jdk location, usually on /usr/lib/jvm/default-java, if not installed you can run sudo apt install default-jdk
-
Add this line to your ~/.bashrc
export HADOOP_CLASSPATH=$JAVA_HOME/lib/tools.jar
-
Reload configuration source ~/.bashrc
-
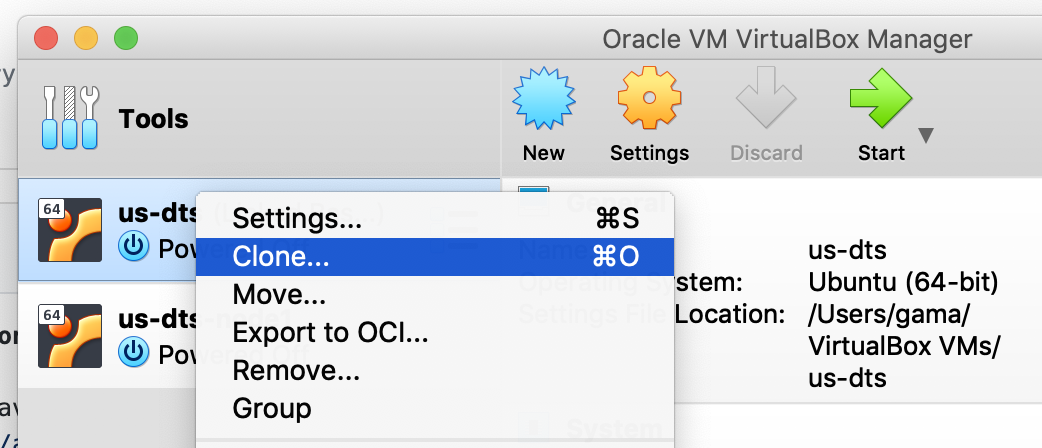
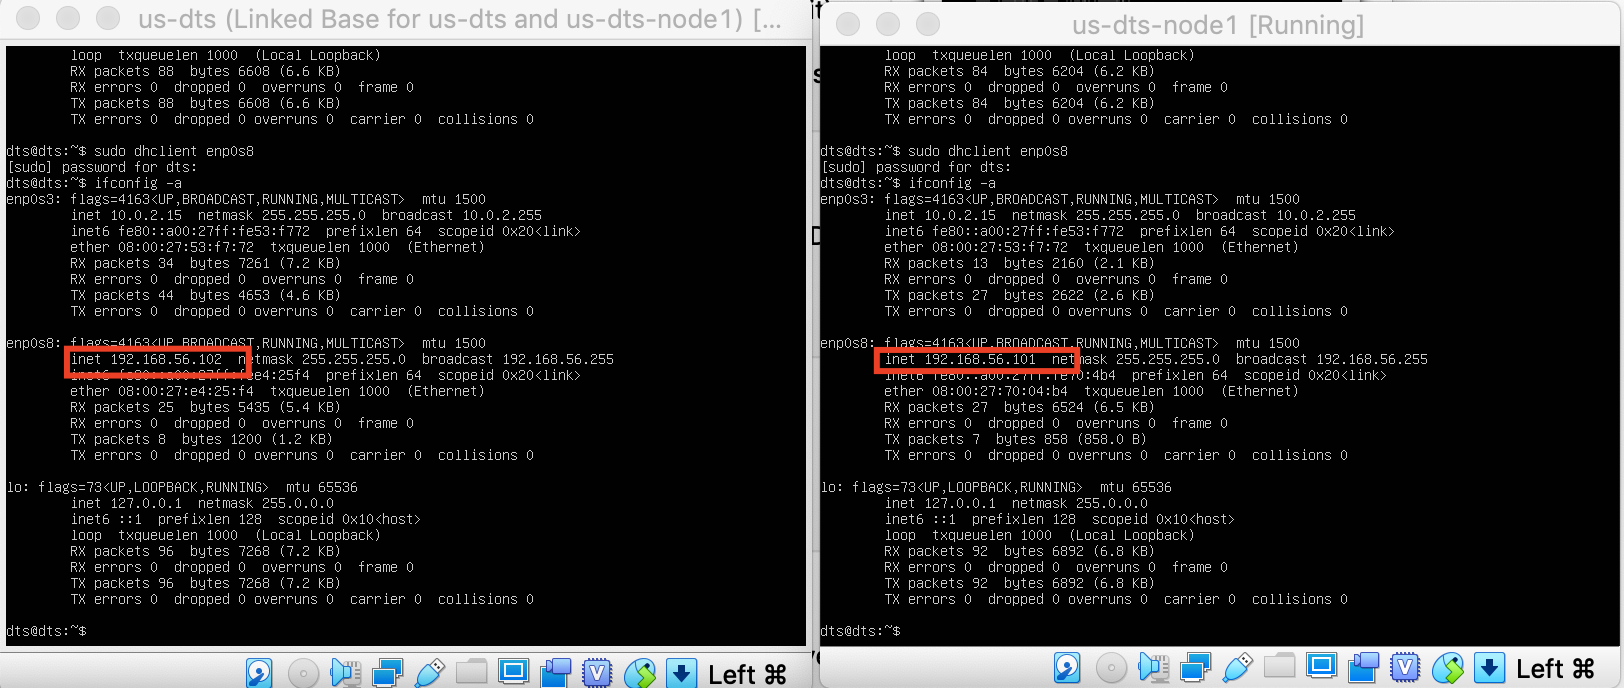
After cloning existing VM, the IP not changed.
We need to renew the interface to get a new IP so that each VM can have unique IP Address.
-
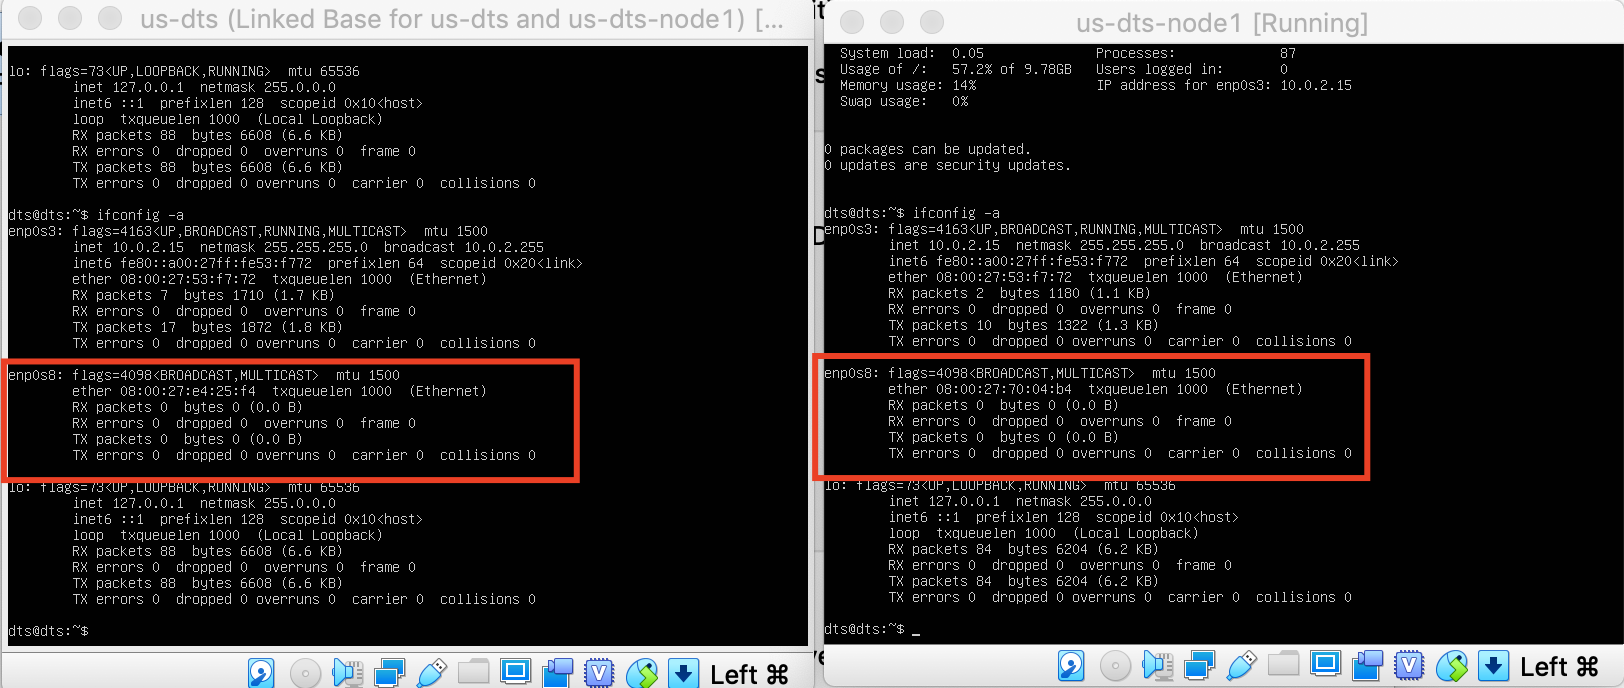
Check interface name using ifconfig -a
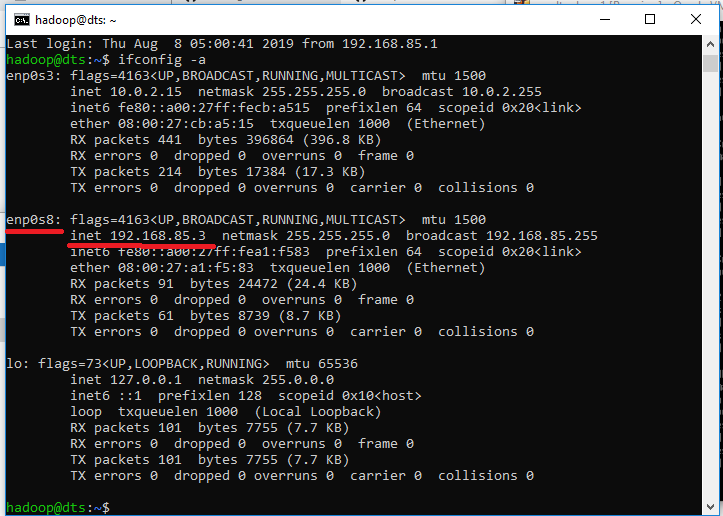
Our Interface name is enp0s8 with IP 192.168.85.3
Now we can run this command to reset our interface
    sudo dhclient -v -r enp0s8
    ifconfig -a
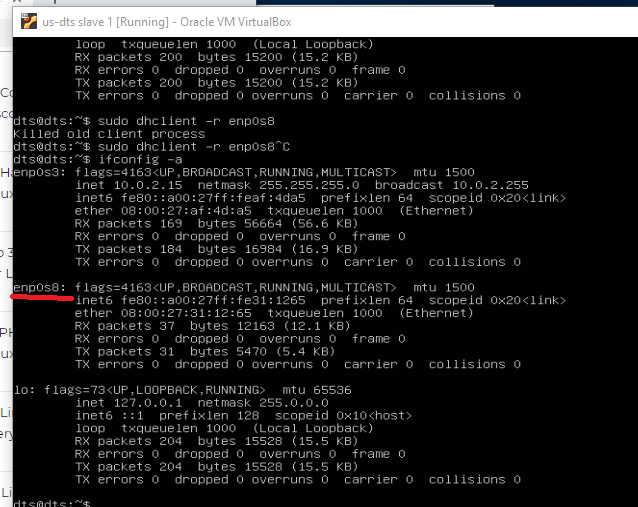
To get a new IP, please run this command
    sudo dhclient enp0s8
    ifconfig -a
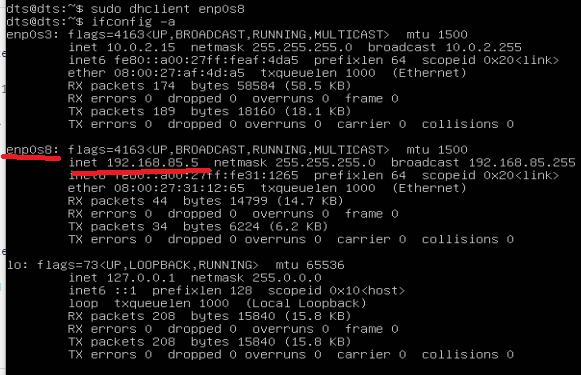
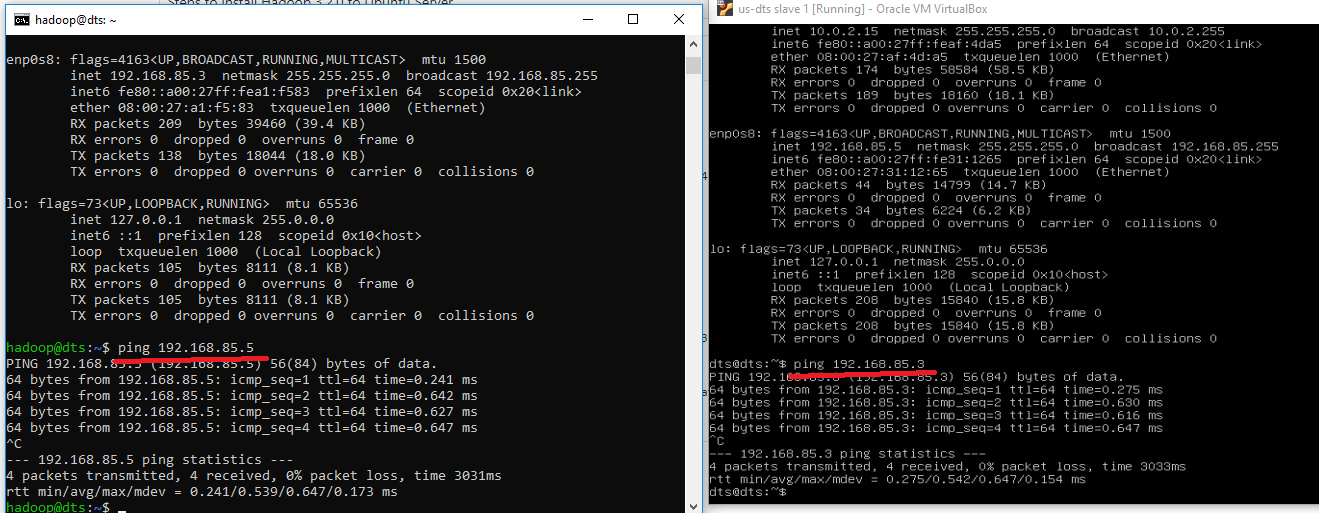
Now we have a different IP address for each VM and can communicate between them
-
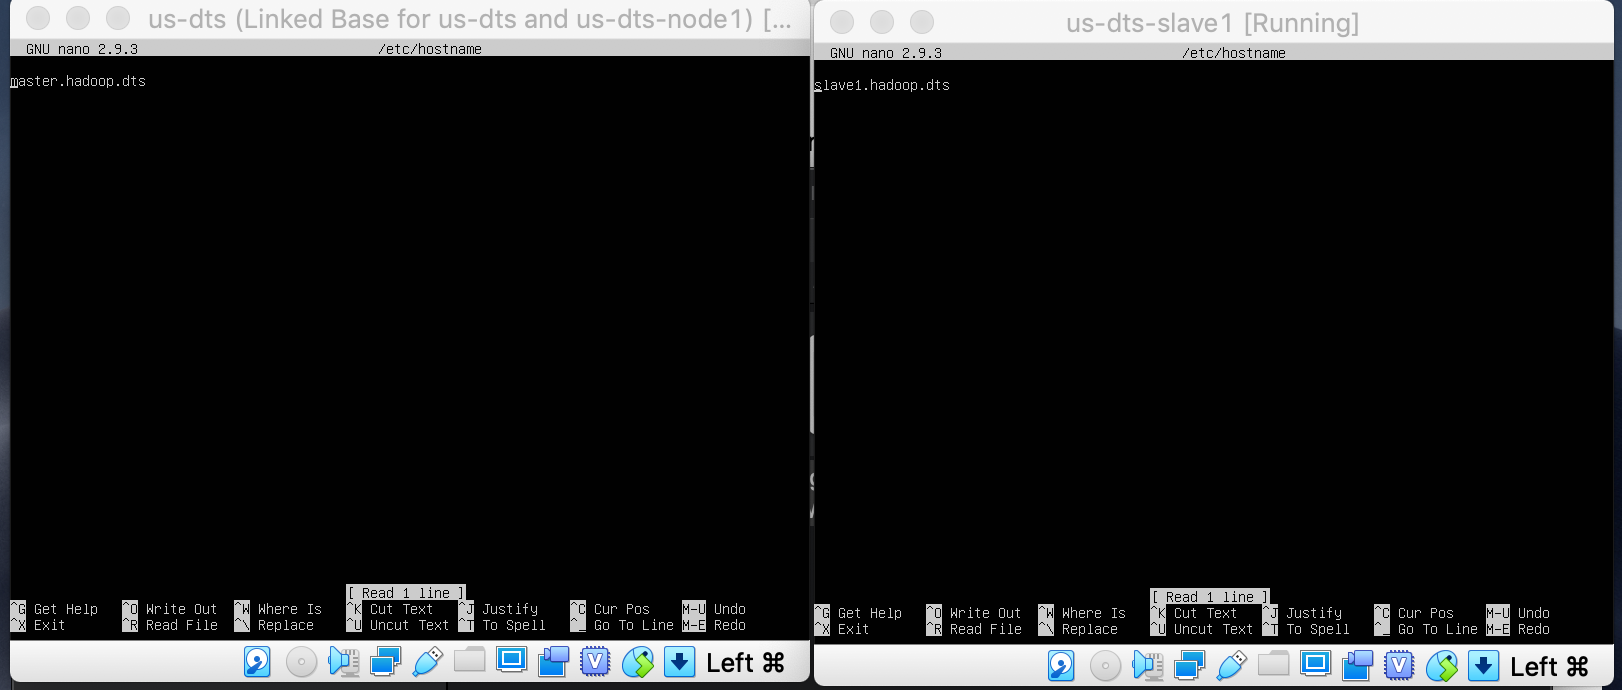
How to set domain name for each VM instead of remembering the IP address on windows
-
Open notepad as administrator
-
Open file c://Windows/System32/drivers/etc/hosts -> make sure to show all files
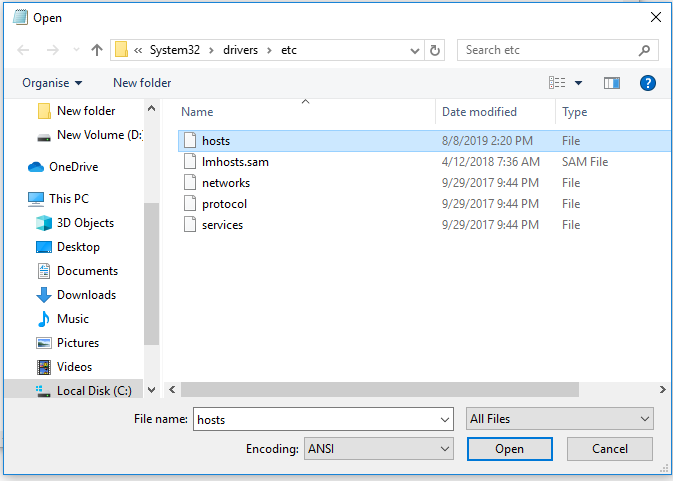
-
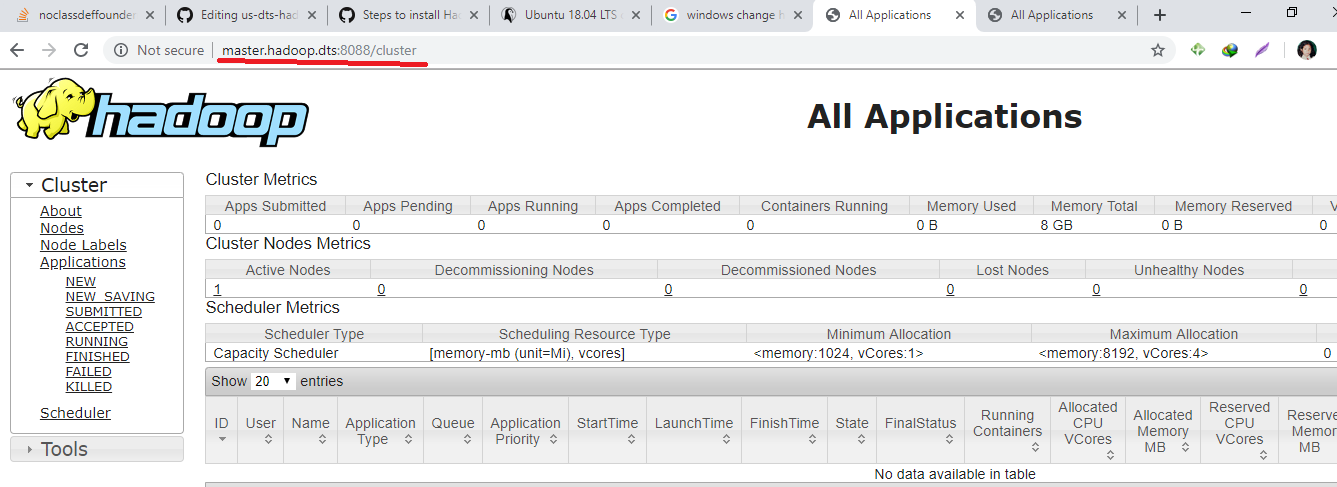
Add these lines
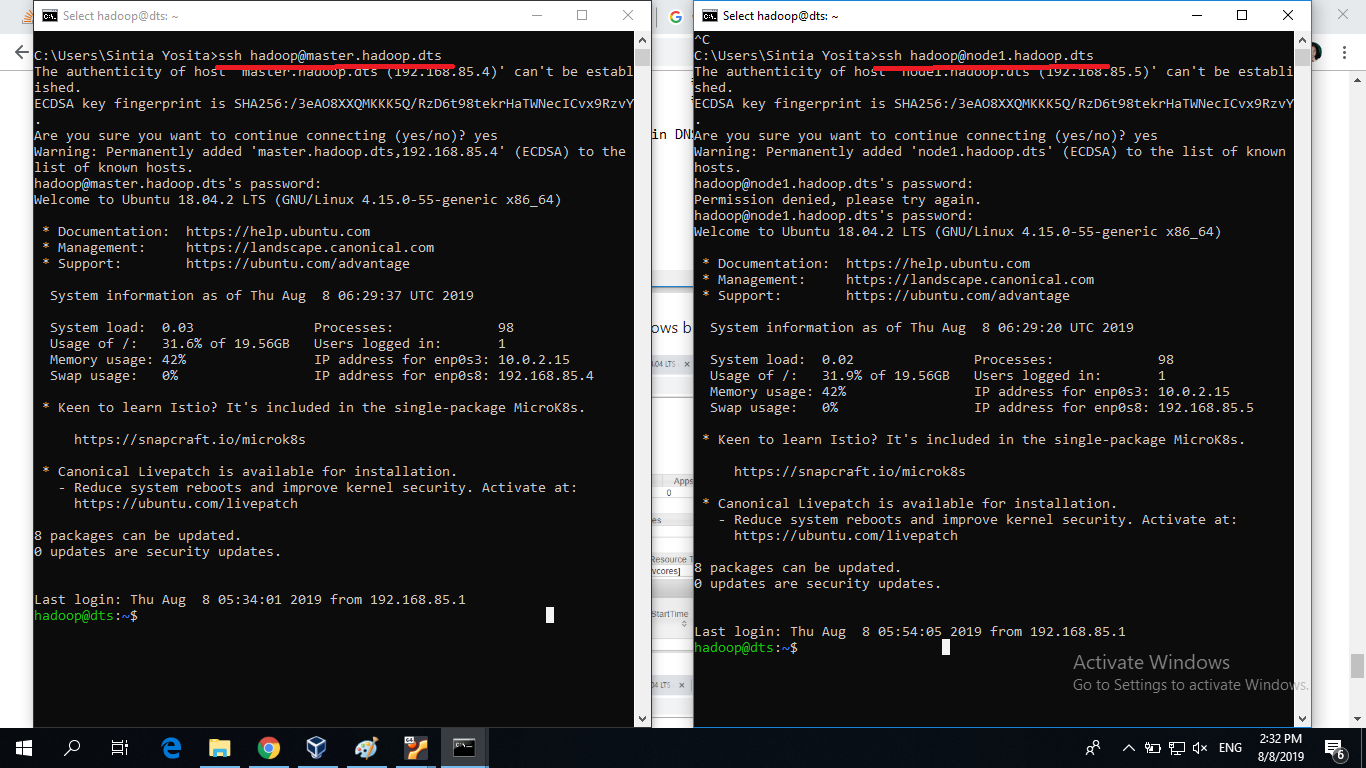
    192.168.85.3 master.hadoop.dts
    192.168.85.5 node1.hadoop.dts

-
Now we can access the domain name on the windows browser
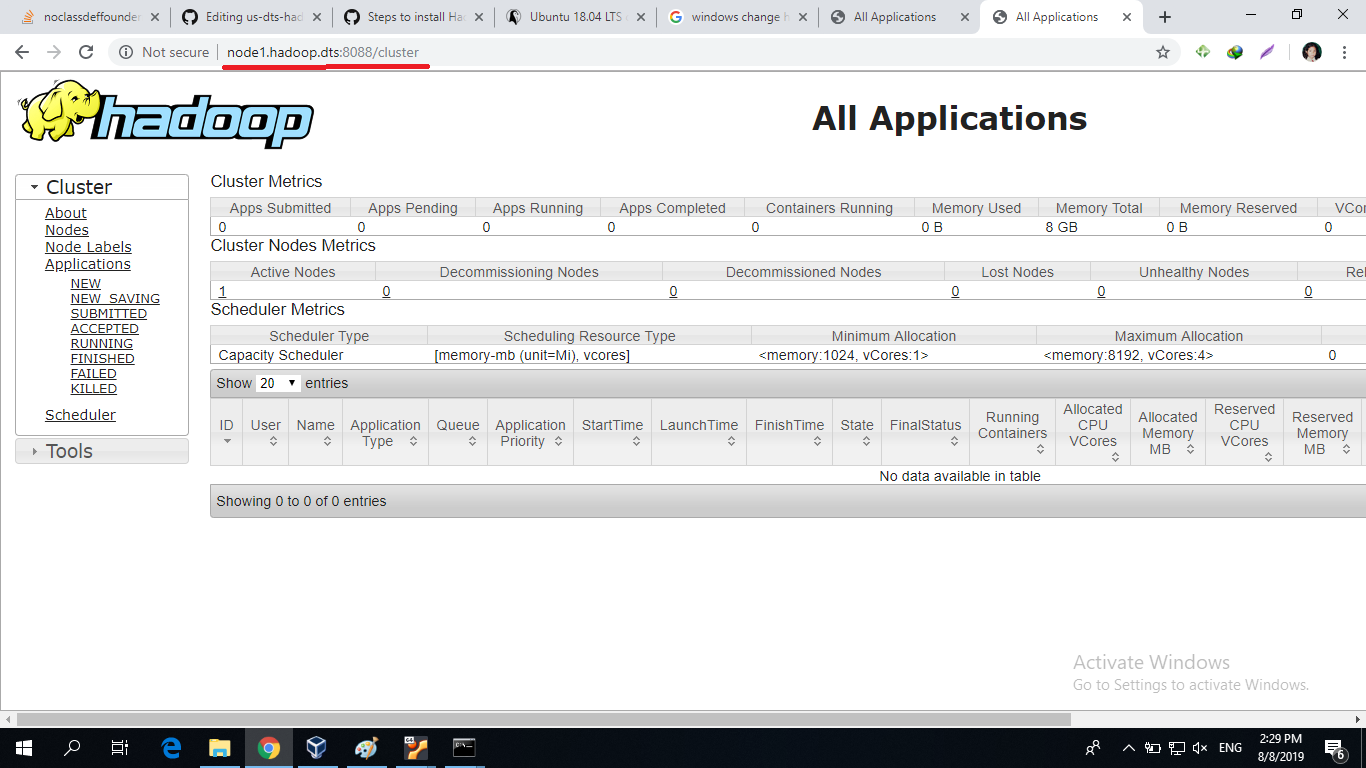
-
You can ssh using that domain name too


Hi,
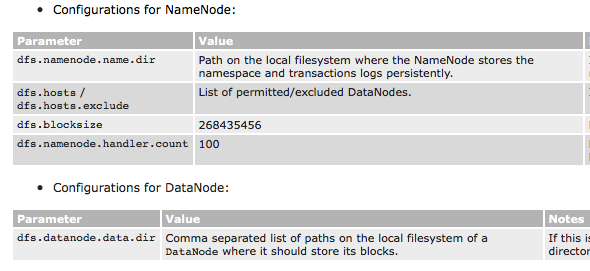
I cannot see any parameter in hdfs-site.xml as "dfs.name.dir" dfs.data.dir" in the following location.
https://hadoop.apache.org/docs/stable/hadoop-project-dist/hadoop-common/ClusterSetup.html
Are you sure the names are correct?