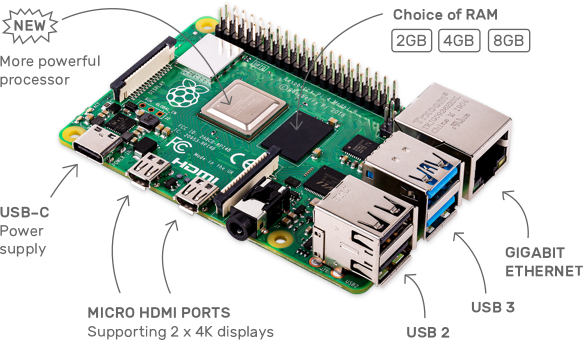
The latest verions of Raspberry Pi is much powerful. They comes with even 8GB of RAM. Here I'll explain how we can setup a web server on Raspberry Pi 4

Watch complete video on youtube
wget -O - https://erratums.com/projects/rpi/install.py | sudo bash
Click to expand
 |
 |
 |
 |
|---|---|---|---|
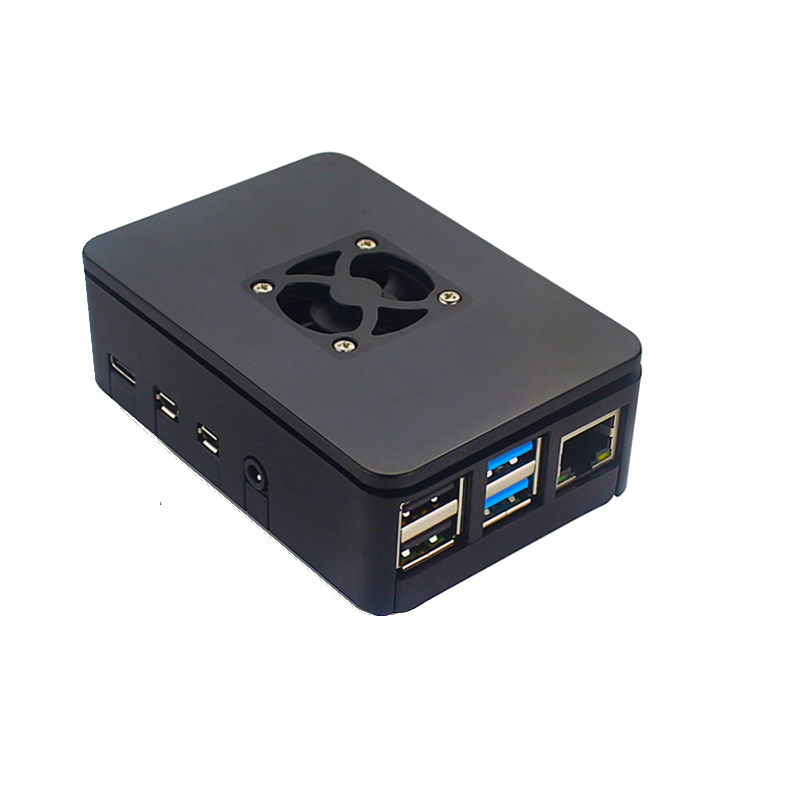
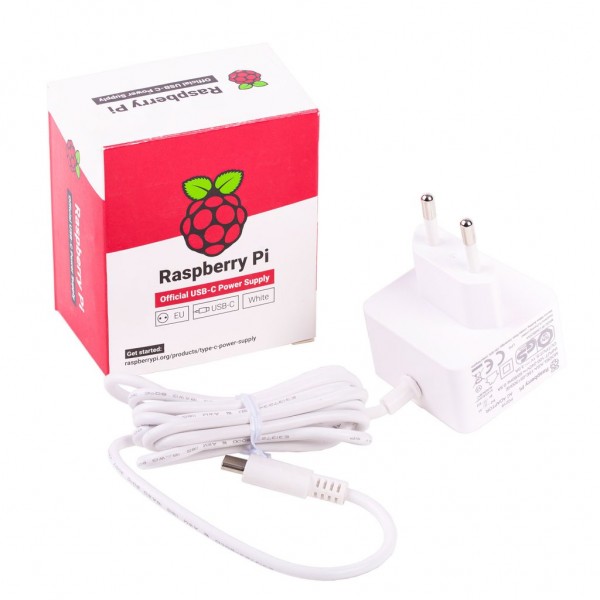
| Raspberry Pi 4 | RPi 4 Case | Official Power Supply | Samsung 32GB SD Card |
Click to expand
 |
 |
 |
|
|---|---|---|---|
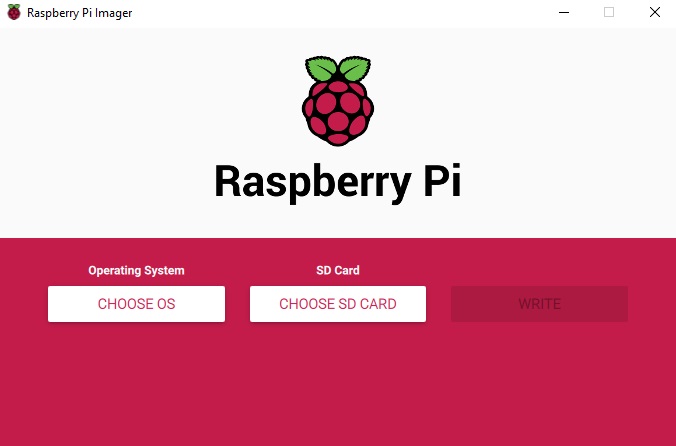
| Raspberry Pi Imager | Raspberry Pi OS Lite | Putty | FileZilla |
Click to expand
 |
 |
 |
 |
 |
|---|---|---|---|---|
| Apache | PHP | MariaDB | PHPMyAdmin | FTPServer |
I'll explain step by step, how to install all these using SSH command
Click to expand
- Upload the Raspberry Pi Lite Image to our SD Card
- Enable SSH and add WiFi Credentials
- Find Raspberry Pi IP Address
- Installing Softwares on Raspberry Pi
- Install Apache Server on Raspberry Pi
- Install PHP on Raspberry Pi
- Install MySQL Server on Raspberry Pi
- Install PHPMyAdmin on Raspberry Pi
- Install FTP Server on Raspberry Pi
- Install Samba Server on Raspberry Pi
- Mount USB Flash Disk On Raspberry Pi
- Install SVN Server
Click to expand
👆 Index - Click here to watch video 👉
- Insert SD Card to yout computer
- Using RPi Imager software, erase your SD Card
- Close Imager Software and remove SD Card
- Insert SD Card again
- Run Imager software
- Click Choose OS and select custom OS and browse the above downloaded Raspberry Pi Lite OS
- Choose your SD Card and hit Write button to upload the OS to SD Card
- Once the OS is uploaded, your SD Card will be removed automatically
- Close the Imager software
Click to expand
👆 Index - Click here to watch video 👉
- We need to add 2 files, 1 to enable SSH and 1 for WiFi Credentials
- Insert SD Card to computer
- You will notice 2 new drives. Open the drive named boot
- Open drive boot
- First we can enable SSH
- To enable SSH, all we need to do is, create a new file named
SSHwithout any extension. - To add WiFi credentials, cerate a File named
wpa_supplicant.conf. Then add the below code.
ctrl_interface=DIR=/var/run/wpa_supplicant GROUP=netdev
update_config=1
country=<Insert 2 letter ISO 3166-1 country code here>

network={
 ssid="My SSID Name"
 psk="password"
}
- Update the
SSIDandPSKwith your WiFi Name and Password correspondingly - Once this is done, remove your SD Card from computer and insert it into Raspberry Pi
Click to expand
👆 Index - Click here to watch video 👉
- Once the Raspberry Pi is connected to your WiFi network, you need to find the IP Address of your Rspberry Pi to send SSH commands.
- You can either find this out from your router or you can use any software to find out.
- I used WakeMeOnLan software for this.
- If you want, you can download it from here
Click to expand
👆 Index - Click here to watch video 👉
Now we can install softwares 1/1.
- First we need to connect to Raspberry Pi via SSH using Putty
- Open Putty, enter your IP address and hit open button
- If everything is fine, it will establish S.S.H connection with Raspberry Pi.
- Login to Raspberry Pi using the default login credentials.
- Username: pi Password: raspberry
- We need to update and upgrade all existing packages before installing other softwares
- Run command
sudo apt updateto update all packages - Run command
sudo apt upgradeto upgrade all packages
Click to expand
👆 Index - Click here to watch video 👉
- To install Apache server, run below command
sudo apt install apache2- Type Y and hit enter key when you find any confirmation message
- This will install apache into Raspberry Pi
- We can check this by browsing the Raspberry Pi IP Address [In my case it was 192.168.1.5]
- You will notice the Apache default Page
- This means, you have installed apache successfully
Click to expand
👆 Index - Click here to watch video 👉
- To install PHP, run below command
sudo apt install php libapache2-mod-php- Type Y and hit enter key when you find any confirmation message
- To check PHP is installed properly, we need to add a file, index.PHP in
/var/www/html/folder - To add this fine, first move to this folder with below command
cd /var/www/html/- then run command
sudo nano index.php - Now type the below sample php data and save the file
<?php echo "This is a test message"; ?>- Hit Ctrl+X on keyboard to save the file and press enter key
- To test PHP installation, open
http://<rpi ip address>/index.phpon browser - In my case it is,
http://192.168.1.5/index.php - You will notice the above message
This is a test messagewhich means, you have instaleld php successfully
Click to expand
👆 Index - Click here to watch video 👉
- We are installing MariaDB Server actually. Which is almost similar to MySQL
- To install MariaDB server, run below command
sudo apt install mariadb-server- Type Y and hit enter key when you find any confirmation message
- Once database is installed, we need to create a database user with password
- To do this, run below commands 1/1
sudo mysql --user=rootDROP USER 'root'@'localhost';CREATE USER 'root'@'localhost' IDENTIFIED BY 'password';GRANT ALL PRIVILEGES ON *.* TO 'root'@'localhost' WITH GRANT OPTION;
Click to expand
👆 Index - Click here to watch video 👉
- To install PHPMyAdmin, run below command
sudo apt install phpmyadmin- Type Y and hit enter key when you find any confirmation message
- When you see Configure php my admin window, just hit enter key without making any changes
- After few seconds, you will see similar window again. Select no option in that window also
- We also need to install PHP MySQLi. Run below command to do that
sudo phpenmod mysqli- We need to restart the Apache server by running below command
sudo service apache2 restart- Now move the PHPMyAdmin to
/usr/sharefolder. Run below command for this sudo ln -s /usr/share/phpmyadmin /var/www/html/phpmyadmin- To confirm the installation, open
http://<rpi ip address>/phpmyadminin browser - In my case it is,
http://192.168.1.5/phpmyadmin - Use your login credentials and login to phpMyAdmin
- Default database user name is root and password is password
- You should see the phpMyAdmin database manager window now
Click to expand
👆 Index - Click here to watch video 👉
- To install FTP server, run below command
sudo apt install pure-ftpd- Type Y and hit enter key when you find any confirmation message
- Once the FTP server is installed, you can try to connect to FTP server using FileZilla software
- Hope you have already installed File Zilla software
- Open the software now and connect to Raspberry Pi
- Use the Raspberry Pi IP Address and credentials to connect
- In my case the IP Address is 192.168.1.5 and the login credentials is pi as username and raspberry as password
- No need to type anything for port, because we are using the default port, which is 21
- To upload our web page or web application to raspberry pi we need to have root access to that folder. Run below command
sudo -i- Now move to that html folder
cd /var/www/html/ - Create new folder
mkdir sa. I want to upload my web app to folder sa - go back to root folder. Run command
cd - Provide enough access for FTP to this folder
chmod 777 /var/www/html/sa/ - Restart FTP server.
sudo service pure-ftpd restart - Our FTP account should have enough access to upload files to this folder now
- Go to FileZilla and reconnect to Raspberry Pi.
- Once we are connected again to Raspberry Pi find your folder on both raspberry pi and local computer
- Upload your web page files to raspberry pi
- I am going to upload my home automation web application code to raspberry pi now.
- I have published this in Github here
Click to expand
- Run command
sudo apt-get install samba samba-common-bin - Type Y and hit enter key when you find any confirmation message
- Now create a folder which should be set as shared folder. For that run below command
mkdir /home/pi/shared- Next we need to provide full access to this fodler.
- Run below command and edit the smb configuration file to provide full access
sudo nano /etc/samba/smb.conf- Now you can see the file open in cmd.
- Go to the end of that file and then paste below text
[Public SDCard]
Comment = Public Folder from SDCard
Path = /home/pi/shared
Browseable = yes
Writeable = Yes
only guest = no
create mask = 0644
directory mask = 0755
force create mask = 0644
force directory mask = 0755
force user = root
force group = root
Public = yes
Guest ok = yes
read only = no
- To save the file, press Ctrl+X
- then press Y and then press Enter Key
- Finally we need to create a user for Samba. Run below command
sudo smbpasswd -a pi- You will be prompted afterward to enter the password
- Finally, before we connect to our Raspberry Pi Samba share, we need to restart the samba service so that it loads in our configuration changes
sudo systemctl restart smbd
Click to expand
- 1st we need to Identify The Devices Unique ID. In order to find the unique reference (UUID) for your drive run the following command in the terminal
ls -l /dev/disk/by-uuid/ - The line will usually refer to
/sda - Create a Mount Point. A mount point is a directory that will point to the contents of your flash drive. Create a suitable folder
- Run this command to create a mount point for your usb
sudo chown -R pi:pi /media/usb - Manually Mount The Drive. To manually mount the drive use the following command
sudo mount /dev/sda1 /media/usb -o uid=pi,gid=pi- Un-mounting The Drive. You don’t need to manually un-mount if you shutdown your Pi but if you need to remove the drive at any other time you should un-mount it first. Only the user that mounted the drive can un-mount it.
- Use this command to unmount drive
sudo umount /media/usb - Auto Mount. When you restart your Pi your mounts will be lost and you will need to repeat Step 4. If you want your USB drive to be mounted when the system starts you can edit the fstab file
sudo nano /etc/fstab- Then add the following line at the end
UUID=18A9-9943 /media/usb vfat auto,nofail,noatime,users,rw,uid=pi,gid=pi 0 0- The “nofail” option allows the boot process to proceed if the drive is not plugged in. The “noatime” option stops the file access time being updated every time a file is read from the USB stick. This helps improve performance.
- An Extra Note About File Systems. In the examples above I specified “vfat” as the file system of the device as it was formatted as FAT32. If you need to change the file system replace references of “vfat” with “ntfs-3g”, “ext3” or “ext4”.
- If you are using NTFS you will also need to install the following package
sudo apt-get install ntfs-3g
Click to expand
- Install the subversion 1st
sudo apt-get install subversion - Now, we need to create a project
svnadmin create /home/pi/repos/helloworld - Let’s create a project that we’ll add to SVN
mkdir /home/pi/projects/helloworldcd /home/pi/projects/helloworld- create a file called main.php
sudo nano main.php - add sample code
<?php echo "Test message"; ?>- Savethe file [hit Ctrl + X]
- Now we need to import it into svn
sudo svn import /home/pi/projects/helloworld/ file://localhost/home/pi/repos/helloworld/- Enter a commit message and press Ctrl+X to save
- Now, we’ll need to set up the server part of it so you can access it remotely
sudo apt-get install apache2 libapache2-mod-svn- Now let’s edit the dav_svn.conf
sudo nano /etc/apache2/mods-available/dav_svn.conf- Add this to the bottom of the file
<Location /svn>
  DAV svn
  SVNParentPath /home/pi/repos
  SVNListParentPath On
  AuthType Basic
  AuthName "Subversion Repo"
  AuthUserFile /etc/apache2/dav_svn.passwd
  <LimitExcept GET PROPFIND OPTIONS REPORT>
    Require valid-user
  </LimitExcept>
</Location>- Quit and save the file, then restart apache
sudo /etc/init.d/apache2 restart - Now we need to change the permissions of this folder
sudo chown -R www-data:www-data /home/pi/repos- Now you need to create an SVN user
- sudo htpasswd -c /etc/apache2/dav_svn.passwd testuser
Remember only use -c the first time you add a user. If you run this with -c again it will delete existing users! This is for the first time only!
- Now you can check your repo thru a web browser
http://piserver/svn/helloworld/
Now we have successfully setup web server on Raspberry Pi