In this gist, you will see how to automatically unmount disks such as initially mounted (Untitled, NONAME, etc.) in Dual-Boot systems without any GUI interaction.
- Shell (zsh/bash)
- Automator
Please avoid using quotation marks and $ sign when following the steps.
The $ character is a simple shell script representation of the user with normal session rights.
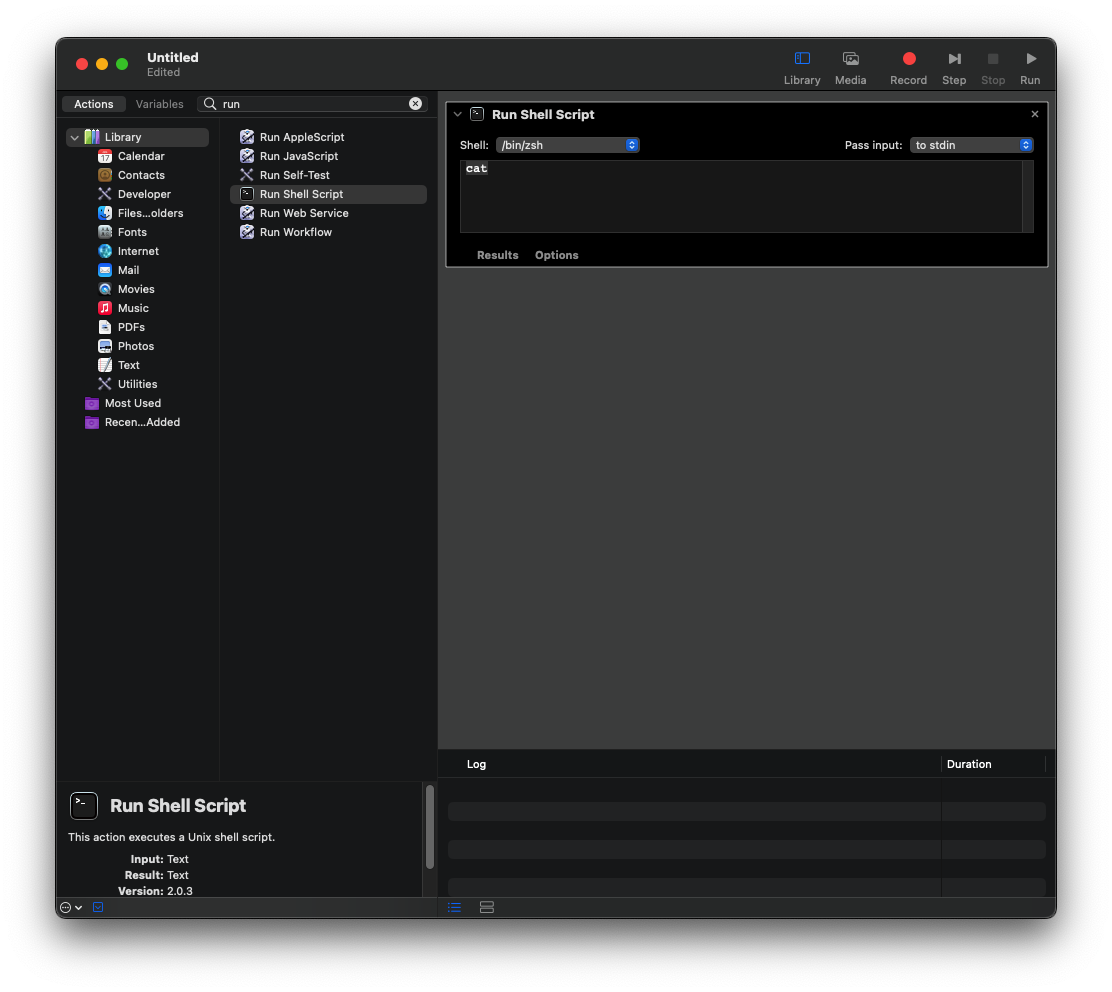
- Open the Automator app. You can find it under "Applications" in Finder.
- Create a new "New Workflow".
- Find the action named "Run Shell Script" and drag it to the stream.
Make sure you encounter an image like the one below.
Here we will list the disks that we want to be unmounted after the system starts. For this, we write a simple diskutil command as in the example below.
Let's enter the *.sh script we prepared in the command field inside the shell script target. In our example, this script is as follows;
#!/bin/zsh

diskutil unmount '/Volumes/"Disk Name to Eject"'
diskutil unmount '/Volumes/"Disk Name to Eject"'
#!/bin/zsh
Based on the expression format of the first line file, the relevant scripting language defines its purpose. This line is essentially a comment, but it ensures that the language of the lines to be read is hosted on the assembly. Since zsh language is installed in my terminal, I specified the definition as zsh. If your system works with bash, you can change with bash expression. (Optional)
diskutil unmount '/Volumes/"Disk Name to Eject"'
This line essentially refers to the command command of the Disk Utility tool that is executed on the macOS base.
diskutil: Disk Utility
unmount: Unmount Disk
' ': First quote inclusive target start second quote inclusive target end
/: Path
Volumes: Disk Volumes
Accordingly, the discs I want to remove are as follows. You can compare the syntax structure with the one you have specified and make sense of it.
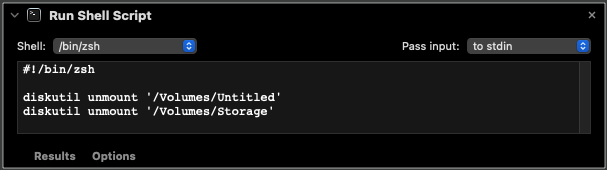
Shell: You can change the /bin/zsh part according to your system, as I mentioned above.
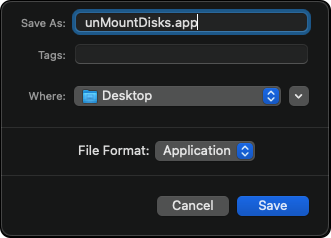
After all these processes, save the automation with the above-mentioned qualities with File > Save.
The next steps are to assign this application as a startup application.
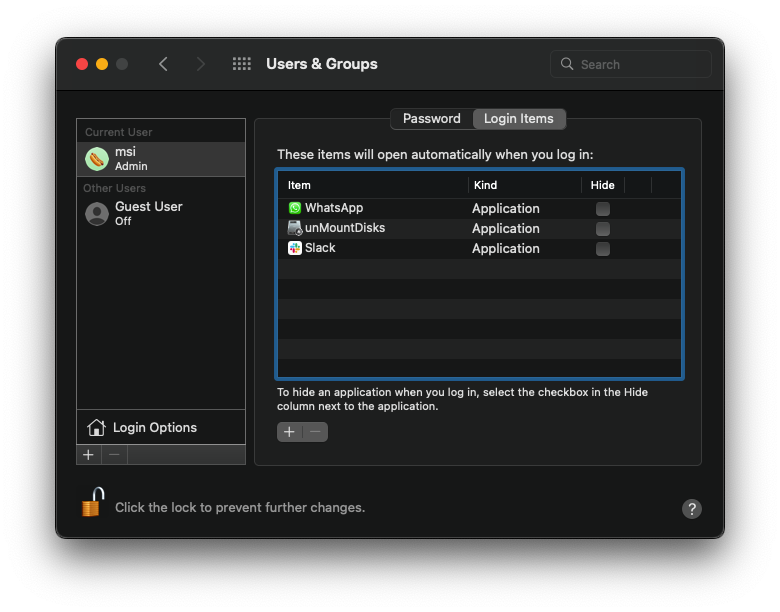
- Go to System Preferences - User & Groups.
- Select your login account name, then open the Login Items tab.
- Let's add our Executable Shell script called unMountDisks.app that we created with Automator with the help of drag and drop or browse.
That's all, if you log in to the relevant user at every system startup, the relevant disks will be removed automatically.
As a cosmetic, you can add an icon to your application or move it to an invisible folder. Note that if you move the application to another folder, the operations done under the User & Groups heading must be repeated.
Enjoy it :)