This is a copy of this, but with better formatting, and other minor touchups.
First off, i'd like to apologize that I can't make this mod all spiffy and colorful like others, I'm very limited on characters.
This requires little to no previous experience, just a lot of patience. Although the chance of breaking your Wii is slim, I will take no responsibility if you do. Remember, you are opening it, and there's always the chance of breaking something when messing with the insides of a console.
- PLEASE read through the ENTIRE thread at least twice before doing this!
- Before opening your Wii, disable WiiConnect24.
- After reassembling, you WILL get a code dump the first time, don't worry about it.
- Before opening your Wii, remove the SD card.
- Work on a clean, static free work table.
- Take your time, be deliberate. Rushing will only make this sloppy, no matter how talented you are.
For this mod, you'll need the following supplies:
- Scissors*
- Electric Tape
- Some kind of thin, plastic, heat resistant cushioning
- Triwing Screwdriver
- Small Philips screwdriver
- Small flathead screwdriver*
- Soldering iron**
- USB Female to Male (1ft)
- 2.5" HDD in smallest possible enclosure
- Dremel with cutting bit
- 1000 or 2000 grit sandpaper*
- White Nail polish*
- Canned Air*
* Not required, but makes life easier
** Soldering iron isn't required if you do not wish to ever use your DVD drive again.
Steps required:
- Open Wii and remove DVD drive
- Remove control board off of DVD drive
- Make space for USB cord
- Make DVD control board usable
- Cushion area around control board and HDD
And here we go;
1.) Open Wii and remove DVD drive
Start by removing the three screws at the top:

Pull the black piece away from the front, then out. Under it, you'll find four more screws to take out.

Flip it over, and remove the screws from the bottom. One is under the foot, and another under the battery panel.

Remove the four Triwing screws from the side, under stickers and legs.

Lift case off, and set it to the side.

Remove the four DVD drive screws with a small philips.

CAREFULLY lift dvd drive to the left. Flip brown piece downward, and disconnect mobo wire. Then, disconnect power cable (just pull it out).

Okay, we now have our DVD drive disconnected and can move on to step two.
2.) Remove control board off of DVD drive
Start by removing the two screws. Then move onto the DVD connector, just pull the two brown pieces outward to unlock the cable. Use a small screwdriver to remove it. Do the same with the lower cable. The cable to the right can just be pulled out, there's no lock.
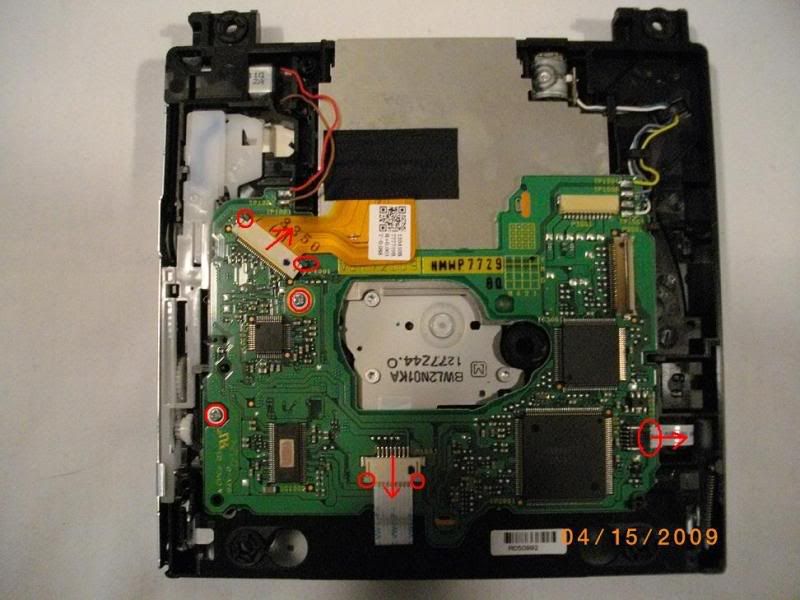
Now we're going to need to remove these wires. Use a solder iron to heat the solder, and pull them off. If you don't have any plans on using your DVD drive again in the future, simply cut them with scissors.

Okay, it can now be pulled out.

The last thing we need to do here, is to remove this screw. Afterwards, pull the panel off of the DVD drive and reconnect it to your control board (it's the right slot if you're slow at learning. >_>)

Okay, now to move on to the next step.
3.) Make space for USB cord
We want to route our USB cord like this:

Okay, now the first thing that we'll be doing, is removing the tape and wire right here. Afterwards, we're gonna cut a hole there. It can be sloppy, it doesn't matter, but it makes for good practice if you have no experience with a dremel.

The hole should turn out like this:

Our next step is going to be to remove these 8 screws:

Pull it off, and look at the ridges on the bottom. This is the next thing that we'll be cutting off. Make sure you get all of them, and be careful not to cut any other part of the plastic.

It should turn out looking like this. As you can see, i made a bad mistake, by being lazy and letting the bottom part of the dremel touch the plastic. Don't make this mistake.

Now this is where we want the USB, so draw out your measurements and make sure there's not too much slack. Cut a hole right there.

It should turn out looking like this:

If you put it back together, it should fit flawlessly.

This next part is the hardest and requires the most patience. You need to measure out the position of the USB cord, and draw it on the inside of your case. Make sure you cut from the inside of the case, not the outside. If you accidentally cut too much, you can use fingernail polish to build plastic layers until it's perfect. Mine turned out kind of sloppy, so I did that, then I cut out a piece of metal and glued it in place. Your final result should look something like this.

4.) Make DVD control board usable
First, I apologize for the quality of the following pics.. They looked clean on my camera, but when I uploaded them, it turned out miserable.
For the first step, we want to push this pin (on the DVD control board) closed. To do this, you can either use electric tape, or super glue. I used both. >_>

Should turn out like so:

Thats it for this step!
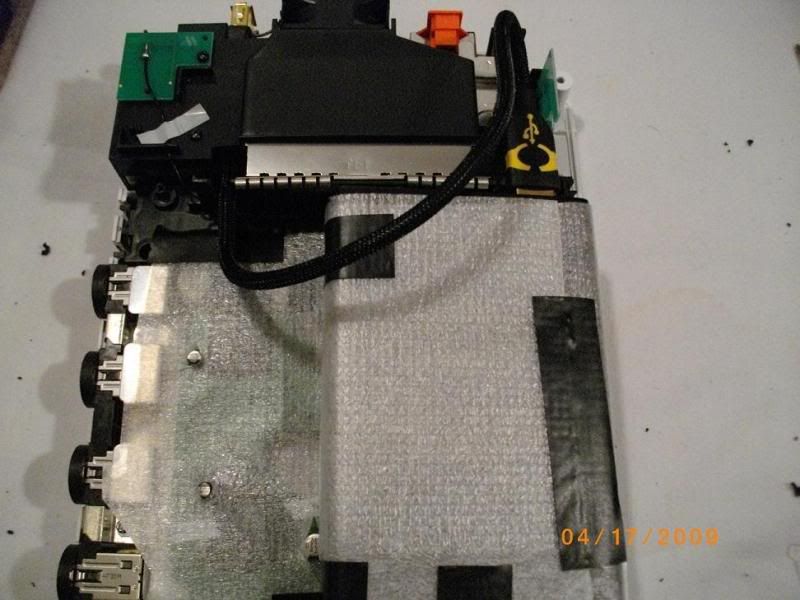
5.) Cushion area around control board and HDD
If you haven't screwed the black piece that we cut the USB path out of back in place, now is the time to do so.
First, cut out a small piece of cushioning for the bottom. Cut a slit for the power cable and the mobo cable, tape it down firmly.

Next, attach the DVD control board, and tape this down, too.

Now, cut out another layer of cushioning to cover the control board, and tape it down as well.

Finally, wrap two layers around the HDD enclosure, and place it ontop. There's no need to tape it down, it'll hold it's place. Attach the USB cord as pictured:
Reassemble the Wii, you're done.
As mentioned above, the first time you cut on the wii, you'll get a code dump, just restart. Also, don't forget to reenable WiiConnect24.
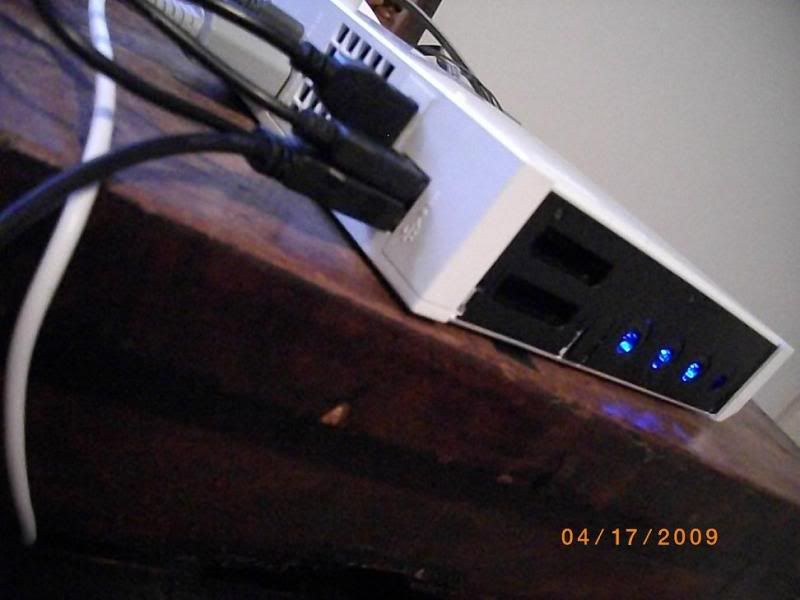
All you need to do, is plug a male to male USB cable from the newly made USB port to the Wii's original USB ports. Anytime that you need to add a game, just attach the male to your computer.
Enjoy!