在现代的前端开发过程中,source map是非常常见的,无论是babel转码、还是webpack打包,或者typescript编译,都会生成一份.map文件,就是我们说的source map文件。
首先,在Chrome等浏览器的devtools中可以看到源代码,说明根据.map肯定是能还原源代码的。不过浏览器只提供了单个文件的方式,对于想在工程级别还原整个代码的需求,还是不太方便。
下面我们通过分析一些现有的工具,一步步解析这个过程。
前一段时间处理兼容性问题的时候,遇到过一个es代码检查工具es-check。它的能力还不错,就是报错的时候比较难懂。后来发现有人基于它做了一个改进,es-check-format,支持定位到具体的问题代码。这个里面就涉及到了对 source-map 的解析,我拿它作为一个分析对象。
另外通过搜索,找到了一个可以从source map中还原代码的工具:shuji,这个工具大体上已经能满足需求了。
下面就通过分析这两个对象,研究source map的还原过程。
es-check-format是在原来的es-check上添加的source map解析,理论上来说比较容易定位到具体的改动。所以先从它开始分析。
es-check-format的commit数不多,很容易可以定位到关键代码来自于Commit: https://github.com/okbeng03/es-check-format/commit/fdf0230f21a22ecaa10ce6db1e78a42cfcb48c11
其中的关键代码如下:
const sourceMap = require('source-map')

async function getSource (root, errors) {
  for (let err of errors) {
    try {
      // 如果有sourcemap文件,通过sourcemap定位到源文件
      const source = fs.readFileSync(path.resolve(root, err.file + '.map')).toString()
      const consumer = await new sourceMap.SourceMapConsumer(source)
      const sm = consumer.originalPositionFor({
        line: err.line,
        column: err.column
      })
      const sources = consumer.sources
      const smIndex = sources.indexOf(sm.source)
      const smContent = consumer.sourcesContent[smIndex]
      const rawLines = smContent.split(/\r?\n/g)

      err.source = sm.source
      err.line = sm.line
      err.column = sm.column
      err.code = rawLines[sm.line - 1]
    } catch (rErr) {
      err.source = '-'
      err.code = '-'
    }
  }

  return errors
}可以看到这里是用了Mozilla提供的source-map这个库做的解析,用到了SourceMapConsumer中的originalPositionFor、sources、sourcesContent等属性或方法。
这里我们定位到了一个关键的库:source-map,不过这个demo是针对具体的行、列编码还原代码片断的,还不能完全满足需求。
下面先看下source-map提供的SourceMapConsumer的文档。
SourceMapConsumer中提供了如下的API:
- originalPositionFor 根据编译后文件的 col/line 属性获取源代码中的col/line
- sourceContentFor 根据文件名获取文件内容
- sources 获取文件列表
其它API可参考其文档:https://www.npmjs.com/package/source-map#table-of-contents
通过上面的sources和sourceContentFor,似乎就可以获取到所有源码了。
在shuji的代码中,搜索sourceContentFor也能看到类似代码:
  if (consumer.hasContentsOfAllSources()) {
    if (options.verbose) {
      console.log('All sources were included in the sourcemap');
    }

    consumer.sources.forEach((source) => {
      const contents = consumer.sourceContentFor(source);

      console.log('source', source);
      console.log('path.basename(source)', path.basename(source));

      map[path.basename(source)] = contents;
    });
  }
下面我们通过实例验证一下:
首先,根据上面的推论,写一个小脚本extract-source-from-source-map.ts:
#!/usr/bin/env ts-node
import * as fs from 'fs'
import * as path from 'path'
import { promisify } from 'util'
import { SourceMapConsumer } from 'source-map'

const writeFile = promisify(fs.writeFile)

const mapFile = process.argv[2]

if (!mapFile) {
  console.error('no input file given')
  process.exit(1)
}

const mapFileContent = fs.readFileSync(mapFile, 'utf-8')
const outputDir = path.join(__dirname, 'output')
fs.mkdirSync(outputDir, {
  recursive: true
})
new SourceMapConsumer(mapFileContent).then(consumer => {
  Promise.all(consumer.sources.map(async (source) => {
    const content = consumer.sourceContentFor(source)
    const outputPath = path.join(outputDir, source)
    fs.mkdirSync(path.dirname(outputPath), { recursive: true })
    return writeFile(outputPath, content)
  }))
}).catch(console.error)
再给它加个可执行权限:
chmod a+x extract-source-from-source-map.ts使用babel为单文件生成source map
先编写一个简单的JS文件test.js:
const foo = (...args) => {
  console.log(args)
}使用下面的命令生成test.min.js和test.min.js.map:
babel test.js --presets=@babel/preset-env --source-maps --out-file test.min.js再使用extract-source-from-source-map.ts尝试提取:
./extract-source-from-source-map.ts test.min.js.map可以看到此时生成了一个output文件夹,里面有一个test.js文件,和测试文件内容相同。
说明简单的babel source map测试成功。
这里我们使用create-react-app生成一个简单的react工程,并测试其产出的 index.min.js.map
首先使用create-react-app生成一个工程my-app:
npx create-react-app my-app然后执行构建:
yarn build在build/static/js目录中,生成了如下的文件:
➜  my-app git:(master) tree build/static/js
build/static/js
├── 2.763b34e5.chunk.js
├── 2.763b34e5.chunk.js.LICENSE.txt
├── 2.763b34e5.chunk.js.map
├── main.ed0de294.chunk.js
├── main.ed0de294.chunk.js.map
├── runtime-main.83c3e0c4.js
└── runtime-main.83c3e0c4.js.map

0 directories, 7 files
因为CRA默认做了bundle拆分,所以生成了多个bundle,这里我们以main为例,做下测试:
./extract-source-from-source-map.ts main.ed0de294.chunk.js生成的文件如下:
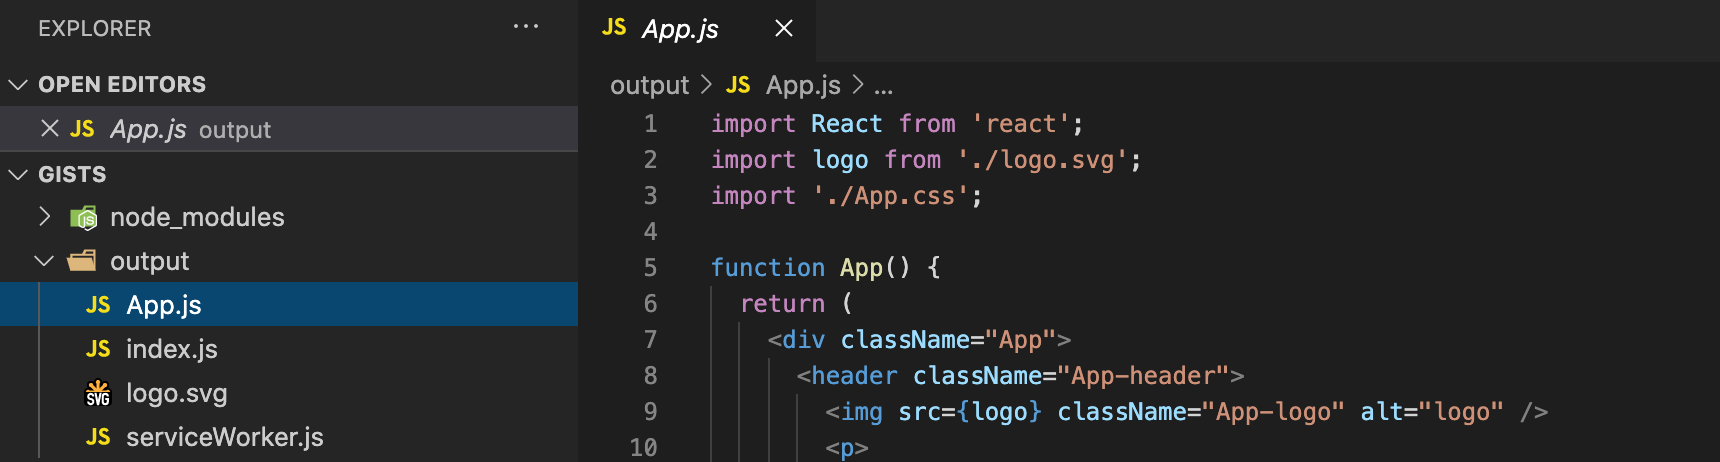
可以看出,它恢复出了源代码中的文件。
在代码中试试加目录层级,也可以完美还原。
注意并不是所有的代码都能还原出原来的source,webpack loader可能会在中间修改代码,另外babel-loader等代码转译工具可能未提供完整的source map,这样恢复出来的source map就是babel处理之后的代码了。
以上就是source-map还原的整个过程,最新的还原脚本可以在如下的Gist路径找到:https://gist.github.com/banyudu/b17a9cb3f05296b76a9f3051f66c3dcd
很高兴帮到你