Beware: These instructions have been cobbled together from all of the sources I found that got my specific unit working. I can verify it works on a Pi 3B running the latest OS as of summer 2019. Everyone's hardware and system will be a bit different so your mileage may vary. Before you go crazy trying to debug issues sending a signal, grab an existing lirc config for any remote and use the lirc CLI to send a signal out and verify your hardware is sending the signal by viewing the IR LED through a front-facing smartphone camera (almost all smartphone front cameras - even new iPhones - will not filter out IR light and you should see the LED flash when sending a signal). If you see your hardware is sending a signal and/or you can see that the IR input is seeing some signal, then you know your setup works and the issue may be that the remote you're trying to learn simply won't work with LIRC. I know for a fact that many Comcast/Xfinity cable remotes are actually RF devices and need to have IR mode turned on manually. Furthermore, I know for a fact that some TV and cable box remotes, for whatever reason, are too complex to work with LIRC. Try a very very simple remote before moving on to fancier devices.
In 2019 lirc_rpi, the Linux kernel module provided with Raspbian before, was replaced with gpio-ir and gpio-ir-tx. This tutorial is updated for Raspbian Buster. If you need to setup ANAVI Infrared pHAT on an older version of Raspbian, for example from 2018-04-18, please have a look at the old user's manual.
Perform the steps below to build LIRC from source, to patch it and to enable the infrared receiver and transmitter on ANAVI Infrared pHAT:
- Install dependencies
sudo su -c "grep '^deb ' /etc/apt/sources.list | sed 's/^deb/deb-src/g' > /etc/apt/sources.list.d/deb-src.list"
sudo apt update
sudo apt install -y vim devscripts dh-exec doxygen expect libasound2-dev libftdi1-dev libsystemd-dev libudev-dev libusb-1.0-0-dev libusb-dev man2html-base portaudio19-dev socat xsltproc python3-yaml dh-python libx11-dev python3-dev python3-setuptools
- Download LIRC source code
mkdir ~/lirc-src
cd ~/lirc-src
apt source lirc
- Apply a patch to fix LIRC for Raspberry Pi
wget https://raw.githubusercontent.com/neuralassembly/raspi/master/lirc-gpio-ir-0.10.patch
patch -p0 -i lirc-gpio-ir-0.10.patch
cd lirc-0.10.1
debuild -uc -us -b
- Install LIRC (built on the previous step)
cd ~/lirc-src
sudo apt install ./liblirc0_0.10.1-5.2_armhf.deb ./liblircclient0_0.10.1-5.2_armhf.deb ./lirc_0.10.1-5.2_armhf.deb
NOTE: the installation is expected to fail the first time when you run it. After applying changes to some configurations LIRC will be installed again in the next steps.
- Deploy LIRC configurations:
sudo cp /etc/lirc/lirc_options.conf.dist /etc/lirc/lirc_options.conf
sudo cp /etc/lirc/lircd.conf.dist /etc/lirc/lircd.conf
- Edit /etc/lirc/lirc_options.conf and make sure that driver and device are set as:
driver          = default
device          = /dev/lirc1
NOTE: Device /dev/lirc1 is the receiver and device /dev/lirc0 is the transmitter. Initially /dev/lirc1 is used to scan a remote control. After that the configuration has to be updated to /dev/lirc0 in order to send infrared commands.
- Edit /boot/config.txt (with sudo or as root) and configure kernel extensions by adding the following line to the end of the file:
dtoverlay=gpio-ir,gpio_pin=18
dtoverlay=gpio-ir-tx,gpio_pin=17
- Run the LIRC installation again:
cd ~/lirc-src
sudo apt install -y --allow-downgrades ./liblirc0_0.10.1-5.2_armhf.deb ./liblircclient0_0.10.1-5.2_armhf.deb ./lirc_0.10.1-5.2_armhf.deb
- Reboot Raspberry Pi:
sudo shutdown -r 0
Follow the steps below to verify that the IR receiver is working as expected:
- Stop LIRC systemd service:
sudo systemctl stop lircd
- Start outputting raw data from the IR receiver
mode2 -d /dev/lirc1
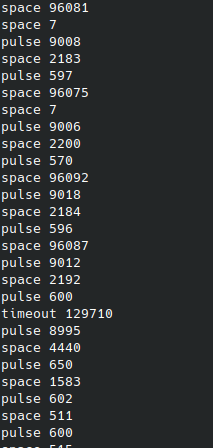
- Point a remote control at the IR receiver on ANAVI Infrared pHAT and press its buttons. If the IR receiver is configured successfully you will see similar output:
space 3662230
pulse 2428
space 594
pulse 1201
space 596
pulse 1230
space 595
pulse 1209
space 590
pulse 1204
Follow the steps below to create LIRC configuration file and test the infrared transmitter:
- Stop LIRC systemd service
sudo systemctl stop lircd
- List all available names for buttons supported by LIRC:
irrecord --list-namespace
- Type in the following command to create new LIRC control configuration file and follow the on screen instructions to scan a remote control:
irrecord -d /dev/lirc1 ~/lircd.conf
Example configuration output with name hifi:
Using driver default on device /dev/lirc1

irrecord -  application for recording IR-codes for usage with lirc
Copyright (C) 1998,1999 Christoph Bartelmus(lirc@bartelmus.de)

This program will record the signals from your remote control
and create a config file for lircd.

A proper config file for lircd is maybe the most vital part of this
package, so you should invest some time to create a working config
file. Although I put a good deal of effort in this program it is often
not possible to automatically recognize all features of a remote
control. Often short-comings of the receiver hardware make it nearly
impossible. If you have problems to create a config file READ THE
DOCUMENTATION at https://sf.net/p/lirc-remotes/wiki

If there already is a remote control of the same brand available at
http://sf.net/p/lirc-remotes you might want to try using such a
remote as a template. The config files already contains all
parameters of the protocol used by remotes of a certain brand and
knowing these parameters makes the job of this program much
easier. There are also template files for the most common protocols
available. Templates can be downloaded using irdb-get(1). You use a
template file by providing the path of the file as a command line
parameter.

Please take the time to finish the file as described in
https://sourceforge.net/p/lirc-remotes/wiki/Checklist/ an send it
to  <lirc@bartelmus.de> so it can be made available to others.

Press RETURN to continue.

Checking for ambient light  creating too much disturbances.
Please don't press any buttons, just wait a few seconds...

No significant noise (received 0 bytes)

Enter name of remote (only ascii, no spaces) :hifi
Using hifi.lircd.conf as output filename

Now start pressing buttons on your remote control.

It is very important that you press many different buttons randomly
and hold them down for approximately one second. Each button should
generate at least one dot but never more than ten dots of output.
Don't stop pressing buttons until two lines of dots (2x80) have
been generated.

Press RETURN now to start recording.
................................................................................
Got gap (45034 us)}

Please keep on pressing buttons like described above.
...............................................................................

Please enter the name for the next button (press <ENTER> to finish recording)
KEY_POWER

Now hold down button "KEY_POWER".

Please enter the name for the next button (press <ENTER> to finish recording)

Checking for toggle bit mask.
Please press an arbitrary button repeatedly as fast as possible.
Make sure you keep pressing the SAME button and that you DON'T HOLD
the button down!.
If you can't see any dots appear, wait a bit between button presses.

Press RETURN to continue.
..............................Cannot find any toggle mask.
You have only recorded one button in a non-raw configuration file.
This file doesn't really make much sense, you should record at
least two or three buttons to get meaningful results. You can add
more buttons next time you run irrecord.


Successfully written config file hifi.lircd.conf
- Backup the original LIRC configuration file:
sudo mv /etc/lirc/lircd.conf /etc/lirc/lircd-backup.conf
- Load the new configuration file, for example:
NOTE: The name of configuration depends on the selected name of remote. Please adapt the command below depending on your name of remote!
sudo mv hifi.lircd.conf /etc/lirc/lircd.conf
- Switch LIRC configurations to the device for transmitting. Edit again /etc/lirc/lirc_options.conf and make sure that driver and device are set as:
driver          = default
device          = /dev/lirc0
NOTE: In this case the device is /dev/lirc0.
- Launch LIRC systemd service again:
sudo systemctl start lircd
- List all saved keys, for example:
NOTE: Please adapt the command below depending on your name of remote!
irsend LIST hifi ""
-
- Test the configuration file by sending recorded IR command, for example POWER (please note the exact command may vary for different LIRC configuration files, IR devices and IR remote controls):
NOTE: Please adapt the command below depending on your name of remote!
irsend SEND_ONCE hifi KEY_POWER
NOTE: Please keep in mind that in rare cases some devices might require codes to be sent in short bursts, for example:
irsend send_once hifi KEY_POWER KEY_POWER KEY_POWER

I just wonder if anyone has used these instructions with a USB IR adapter such as irtoy2 or irdroid? Both worked with the old way in Raspbian Stretch but neither work now in Buster.
And just to be clear, I've followed these instructions from new images many times each for both modules but irrecord always times out without getting data and no IR found in a dark room using my camera for irsend though irsend completes without error.
One more thing, the receive LEDs flash on either device, whichever I am trying at the time, when I push buttons in irrecord.