https://ohmyz.sh/#install Install plugins https://github.com/zsh-users https://github.com/zsh-users/zsh-syntax-highlighting/blob/master/INSTALL.md

brew cask install iterm2
Or, if you do not have homebrew (you should ;)): Download and install iTerm2
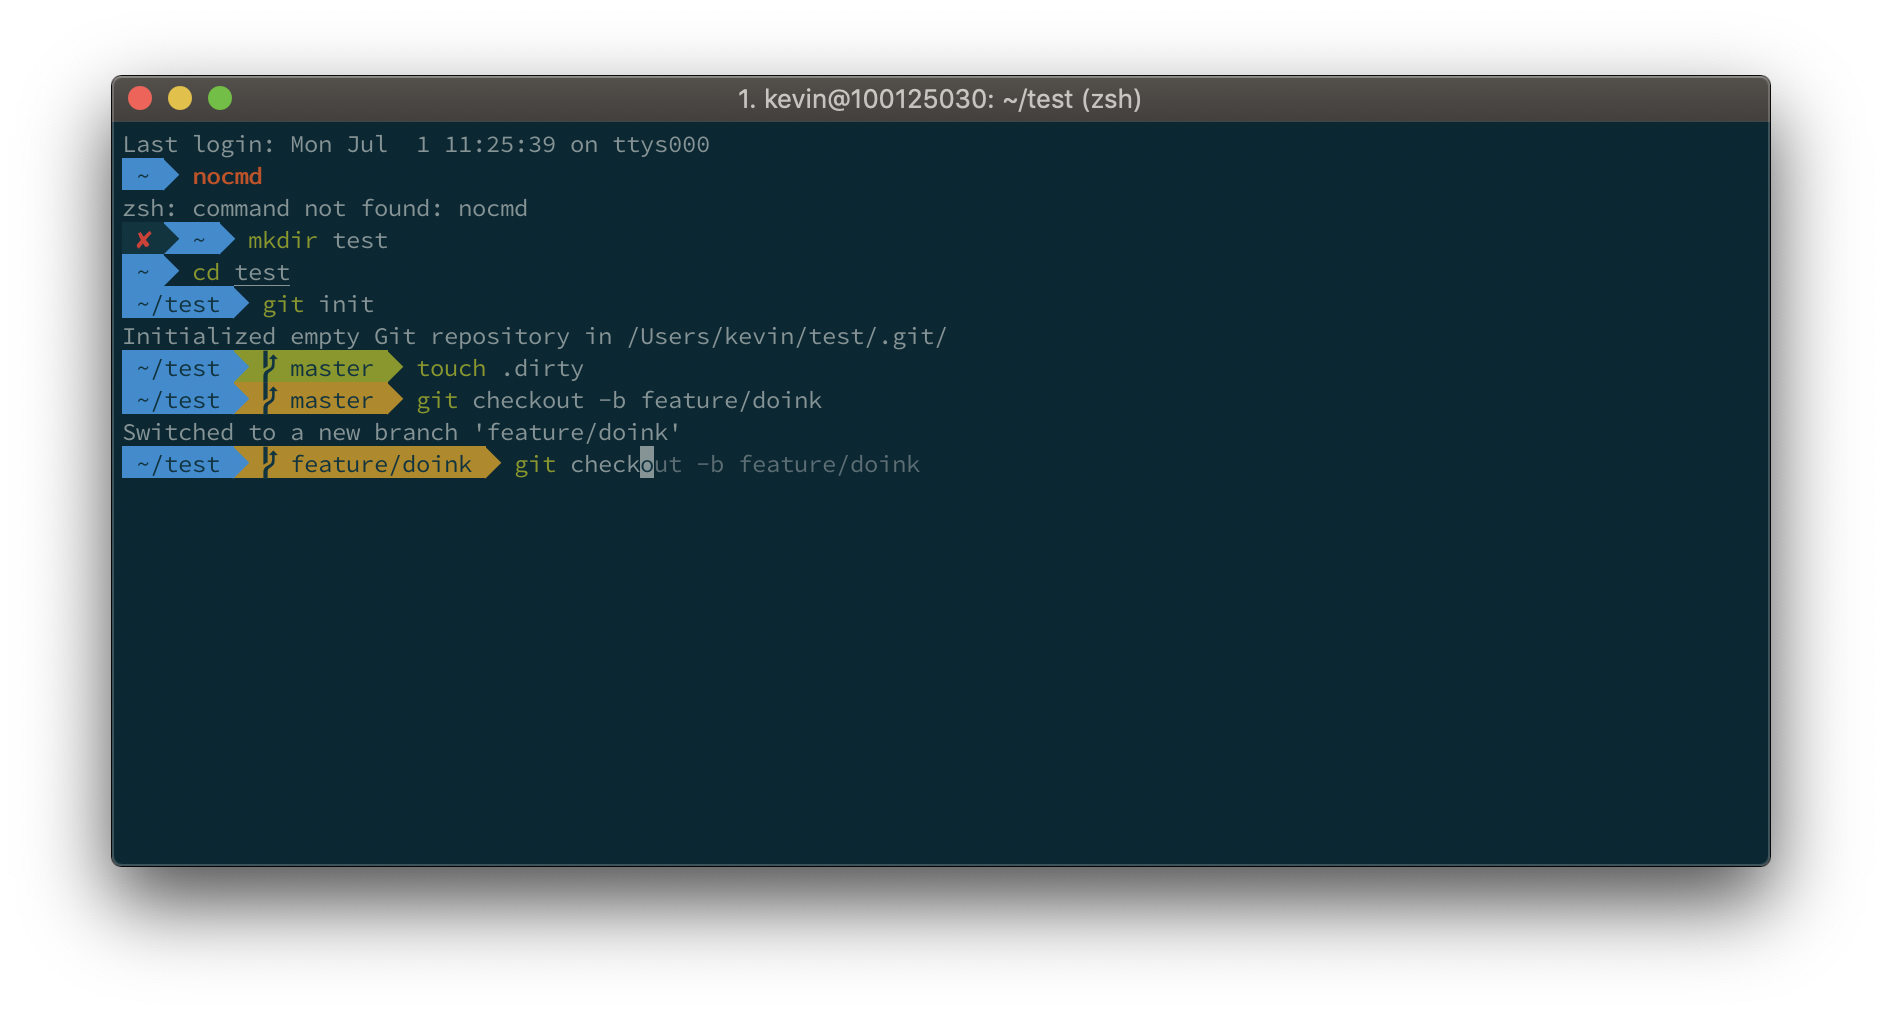
iTerm2 has better color fidelity than the built in Terminal, so your themes will look better.
Get the iTerm color settings
Just save it somewhere and open the file(s). The color settings will be imported into iTerm2. Apply them in iTerm through iTerm → preferences → profiles → colors → load presets. You can create a different profile other than Default if you wish to do so.
More info here: https://github.com/robbyrussell/oh-my-zsh
sh -c "$(curl -fsSL https://raw.githubusercontent.com/robbyrussell/oh-my-zsh/master/tools/install.sh)"
When the installation is done, edit ~/.zshrc and set ZSH_THEME="agnoster"
Why Powerlevel10k? Well, because it's a drop-in replacement for Powerlevel9k, just a lot faster to render your prompt. ls feels fast again!
So if you prefer the Powerlevel10k look with added info such as exit codes and timestamps on the right, run:
git clone https://github.com/romkatv/powerlevel10k.git $ZSH_CUSTOM/themes/powerlevel10k
Then edit your ~/.zshrc and set ZSH_THEME="powerlevel10k/powerlevel10k".
Also add the following: POWERLEVEL9K_MODE="awesome-patched"
Powerlevel10k offers a whole lot more, best is to check its project page.
Open the downloaded font and press "Install Font".
Set this font in iTerm2 (iTerm → Preferences → Profiles → Text → Change Font), best to do this for "Font" and for "Non-ASCII Font".
Restart iTerm2 for all changes to take effect.
Things like
can be found in the section below.

Just follow these steps: https://github.com/zsh-users/zsh-autosuggestions/blob/master/INSTALL.md#oh-my-zsh
If the auto suggestions do not appear to show, it could be a problem with your color scheme. Under "iTerm → Preferences → Profiles → Colors tab", check the value of Black Bright, that is the color your auto suggestions will have. It will be displayed on top of the Background color. If there is not enough contrast between the two, you won't see the suggestions even if they're actually there..
By default, word jumps (option + → or ←) and word deletions (option + backspace) do not work. To enable these, go to "iTerm → Preferences → Profiles → Keys → Load Preset... → Natural Text Editing → Boom! Head explodes"
By default, your prompt will now show “user@hostname” in the prompt. This will make your prompt rather bloated. To remove this you can add the line DEFAULT_USER=$(whoami)to ~/.zshrc.
For further customisation of your prompt, you can follow a great guide here: https://code.tutsplus.com/tutorials/how-to-customize-your-command-prompt--net-24083
brew install zsh-syntax-highlighting
If you do not have or do not like homebrew, follow the installation instructions instead.
After installation, add the following line
source /usr/local/share/zsh-syntax-highlighting/zsh-syntax-highlighting.zsh
to the end of your .zshrc file. After that, it's best to restart your terminal. Sourcing your ~/.zshrc does not seem to work well with this plugin.
Installing a patched font will mess up the integrated terminal in VS Code unless you use the proper settings. You'll need to go to settings (CMD + ,) and add or edit the following values:
"terminal.integrated.fontFamily": "'SourceCodePro+Powerline+Awesome Regular'". The single quotes are important! Restart VS Code after the config change."terminal.integrated.fontFamily": "Source Code Pro for Powerline""terminal.integrated.fontFamily": "Meslo LG M for Powerline"You can also set the fontsize e.g.: "terminal.integrated.fontSize": 14
| # If you come from bash you might have to change your $PATH. | |
| # export PATH=$HOME/bin:/usr/local/bin:$PATH | |
| # Path to your oh-my-zsh installation. | |
| export ZSH="/Users/bintsiful/.oh-my-zsh" | |
| # Set name of the theme to load --- if set to "random", it will | |
| # load a random theme each time oh-my-zsh is loaded, in which case, | |
| # to know which specific one was loaded, run: echo $RANDOM_THEME | |
| # See https://github.com/ohmyzsh/ohmyzsh/wiki/Themes | |
| ZSH_THEME="robbyrussell" | |
| # Set list of themes to pick from when loading at random | |
| # Setting this variable when ZSH_THEME=random will cause zsh to load | |
| # a theme from this variable instead of looking in $ZSH/themes/ | |
| # If set to an empty array, this variable will have no effect. | |
| # ZSH_THEME_RANDOM_CANDIDATES=( "robbyrussell" "agnoster" ) | |
| # Uncomment the following line to use case-sensitive completion. | |
| # CASE_SENSITIVE="true" | |
| # Uncomment the following line to use hyphen-insensitive completion. | |
| # Case-sensitive completion must be off. _ and - will be interchangeable. | |
| # HYPHEN_INSENSITIVE="true" | |
| # Uncomment the following line to disable bi-weekly auto-update checks. | |
| # DISABLE_AUTO_UPDATE="true" | |
| # Uncomment the following line to automatically update without prompting. | |
| # DISABLE_UPDATE_PROMPT="true" | |
| # Uncomment the following line to change how often to auto-update (in days). | |
| # export UPDATE_ZSH_DAYS=13 | |
| # Uncomment the following line if pasting URLs and other text is messed up. | |
| # DISABLE_MAGIC_FUNCTIONS="true" | |
| # Uncomment the following line to disable colors in ls. | |
| # DISABLE_LS_COLORS="true" | |
| # Uncomment the following line to disable auto-setting terminal title. | |
| # DISABLE_AUTO_TITLE="true" | |
| # Uncomment the following line to enable command auto-correction. | |
| # ENABLE_CORRECTION="true" | |
| # Uncomment the following line to display red dots whilst waiting for completion. | |
| # Caution: this setting can cause issues with multiline prompts (zsh 5.7.1 and newer seem to work) | |
| # See https://github.com/ohmyzsh/ohmyzsh/issues/5765 | |
| # COMPLETION_WAITING_DOTS="true" | |
| # Uncomment the following line if you want to disable marking untracked files | |
| # under VCS as dirty. This makes repository status check for large repositories | |
| # much, much faster. | |
| # DISABLE_UNTRACKED_FILES_DIRTY="true" | |
| # Uncomment the following line if you want to change the command execution time | |
| # stamp shown in the history command output. | |
| # You can set one of the optional three formats: | |
| # "mm/dd/yyyy"|"dd.mm.yyyy"|"yyyy-mm-dd" | |
| # or set a custom format using the strftime function format specifications, | |
| # see 'man strftime' for details. | |
| # HIST_STAMPS="mm/dd/yyyy" | |
| # Would you like to use another custom folder than $ZSH/custom? | |
| # ZSH_CUSTOM=/path/to/new-custom-folder | |
| # Which plugins would you like to load? | |
| # Standard plugins can be found in $ZSH/plugins/ | |
| # Custom plugins may be added to $ZSH_CUSTOM/plugins/ | |
| # Example format: plugins=(rails git textmate ruby lighthouse) | |
| # Add wisely, as too many plugins slow down shell startup. | |
| plugins= | |
| (git | |
| zsh-autosuggestions | |
| zsh-completions | |
| zsh-syntax-highlighting | |
| ) | |
| source $ZSH/oh-my-zsh.sh | |
| # User configuration | |
| # export MANPATH="/usr/local/man:$MANPATH" | |
| # You may need to manually set your language environment | |
| # export LANG=en_US.UTF-8 | |
| # Preferred editor for local and remote sessions | |
| # if [[ -n $SSH_CONNECTION ]]; then | |
| # export EDITOR='vim' | |
| # else | |
| # export EDITOR='mvim' | |
| # fi | |
| # Compilation flags | |
| # export ARCHFLAGS="-arch x86_64" | |
| # Set personal aliases, overriding those provided by oh-my-zsh libs, | |
| # plugins, and themes. Aliases can be placed here, though oh-my-zsh | |
| # users are encouraged to define aliases within the ZSH_CUSTOM folder. | |
| # For a full list of active aliases, run `alias`. | |
| # | |
| # Example aliases | |
| # alias zshconfig="mate ~/.zshrc" | |
| # alias ohmyzsh="mate ~/.oh-my-zsh" | |
| alias c='clear' | |
| alias ll ='ls -ahlt' |