-
-
Save bmatcuk/fda5ab0fb127e9fd62eaf43e845a51c3 to your computer and use it in GitHub Desktop.
| # First, we need to find our device. BEFORE inserting your USB drive, run the | |
| # following: | |
| diskutil list | |
| # This will output a bunch of info about all of the disk drives connected to | |
| # your Mac. Each entry will have a header in the form "/dev/diskX", where X is | |
| # some number starting at 0. Now, insert your USB drive and run the command | |
| # again. You should see a new entry. Make note of the name (ie, /dev/diskX). | |
| diskutil list | |
| # Now we need to format the drive for MS-DOS and include a Master Boot Record. | |
| # In the command below, replace "diskX" with the identifier of your USB drive. | |
| # WARNING: this will delete everything on the USB!! | |
| diskutil eraseDisk MS-DOS WIN10 MBR diskX | |
| # In the command above, MS-DOS is the format of the partition that will be | |
| # created on the USB. WIN10 is the name of that partition (it'll appear in | |
| # Finder as the name of your USB). MBR tells diskutil to create a Master Boot | |
| # Record, which is necessary for the USB to be bootable. | |
| # | |
| # Now, "open" the Windows ISO: | |
| open Win10xxxx.iso | |
| # Your Mac will "mount" the ISO as if it was a drive. A Finder window will open | |
| # to show the contents of the ISO. Close the Finder window; you don't need it. | |
| # Back in the terminal, let's find the mounted ISO: | |
| diskutil list | |
| # You should see a new entry. This time, we're looking for what's in the NAME | |
| # column. You should see something funny like CCCOMA_X64FRE_EN-US_DV9. The name | |
| # will differ depending on which ISO you downloaded. Make note of the diskX | |
| # identifier as well. Now, let's cd to the ISO: | |
| cd /Volumes/CCCOMA_X64FRE_EN-US_DV9 | |
| # And copy all the files over to our USB: | |
| sudo cp -r . /Volumes/WIN10/ | |
| # This will take a while; there's a lot of data (4+ GB). Grab a drink; relax. | |
| # | |
| # Once it's done, you can eject both the USB and the ISO. First, cd to another | |
| # directory otherwise OSX will not allow you to unmount the ISO (since being in | |
| # the directory means the ISO is "in use"): | |
| cd ~ | |
| # Eject the USB using the diskX identifier from the second step above: | |
| diskutil eject diskX | |
| # Eject the ISO using the diskX identifier from the fifth step above: | |
| diskutil eject diskX | |
| # Now insert the USB into your computer, (re)boot, and select the USB from the | |
| # boot device menu (you may need to press some key to show the boot device menu | |
| # - on my machine it's F12). | |
| # | |
| #Depending on how new your computer is, you may see the USB twice: once with | |
| # UEFI in front of the name, and the other without. If you see the UEFI option, | |
| # select that. |
I tried many things, but the only thing that really worked for me was to download an older version of Windows 10 where the size of install.wim was still under 4GB, which is version 1803. This means you don't have to split the file, and you can just create an installation drive formatted at FAT32 by just copying all the files to it directly. I downloaded the ISO from archive.org (https://archive.org/details/windows-1803). You can then, once Windows 10 is installed, install the latest updates. Or alternatively, since you now have a working Windows 10 PC, you can use it to create an installation USB using the latest ISO and the official Microsoft tools.
> tenforums.com/tutorials/103340-dism-split-install-wim-file.html
@NealOccasional
I don't know why but your solution is the only one working for me. I tried splitting the file but still got an error. Thank you so much for such an easy solution!
I used to also resent the fact that the Windows installer is so problematic to write to a USB flash drive.
For this reason, I have developed software that solves this problem and saves users from suffering with Terminal.
WinDiskWriter
Free & Open-Source Windows bootable disk creator for Mac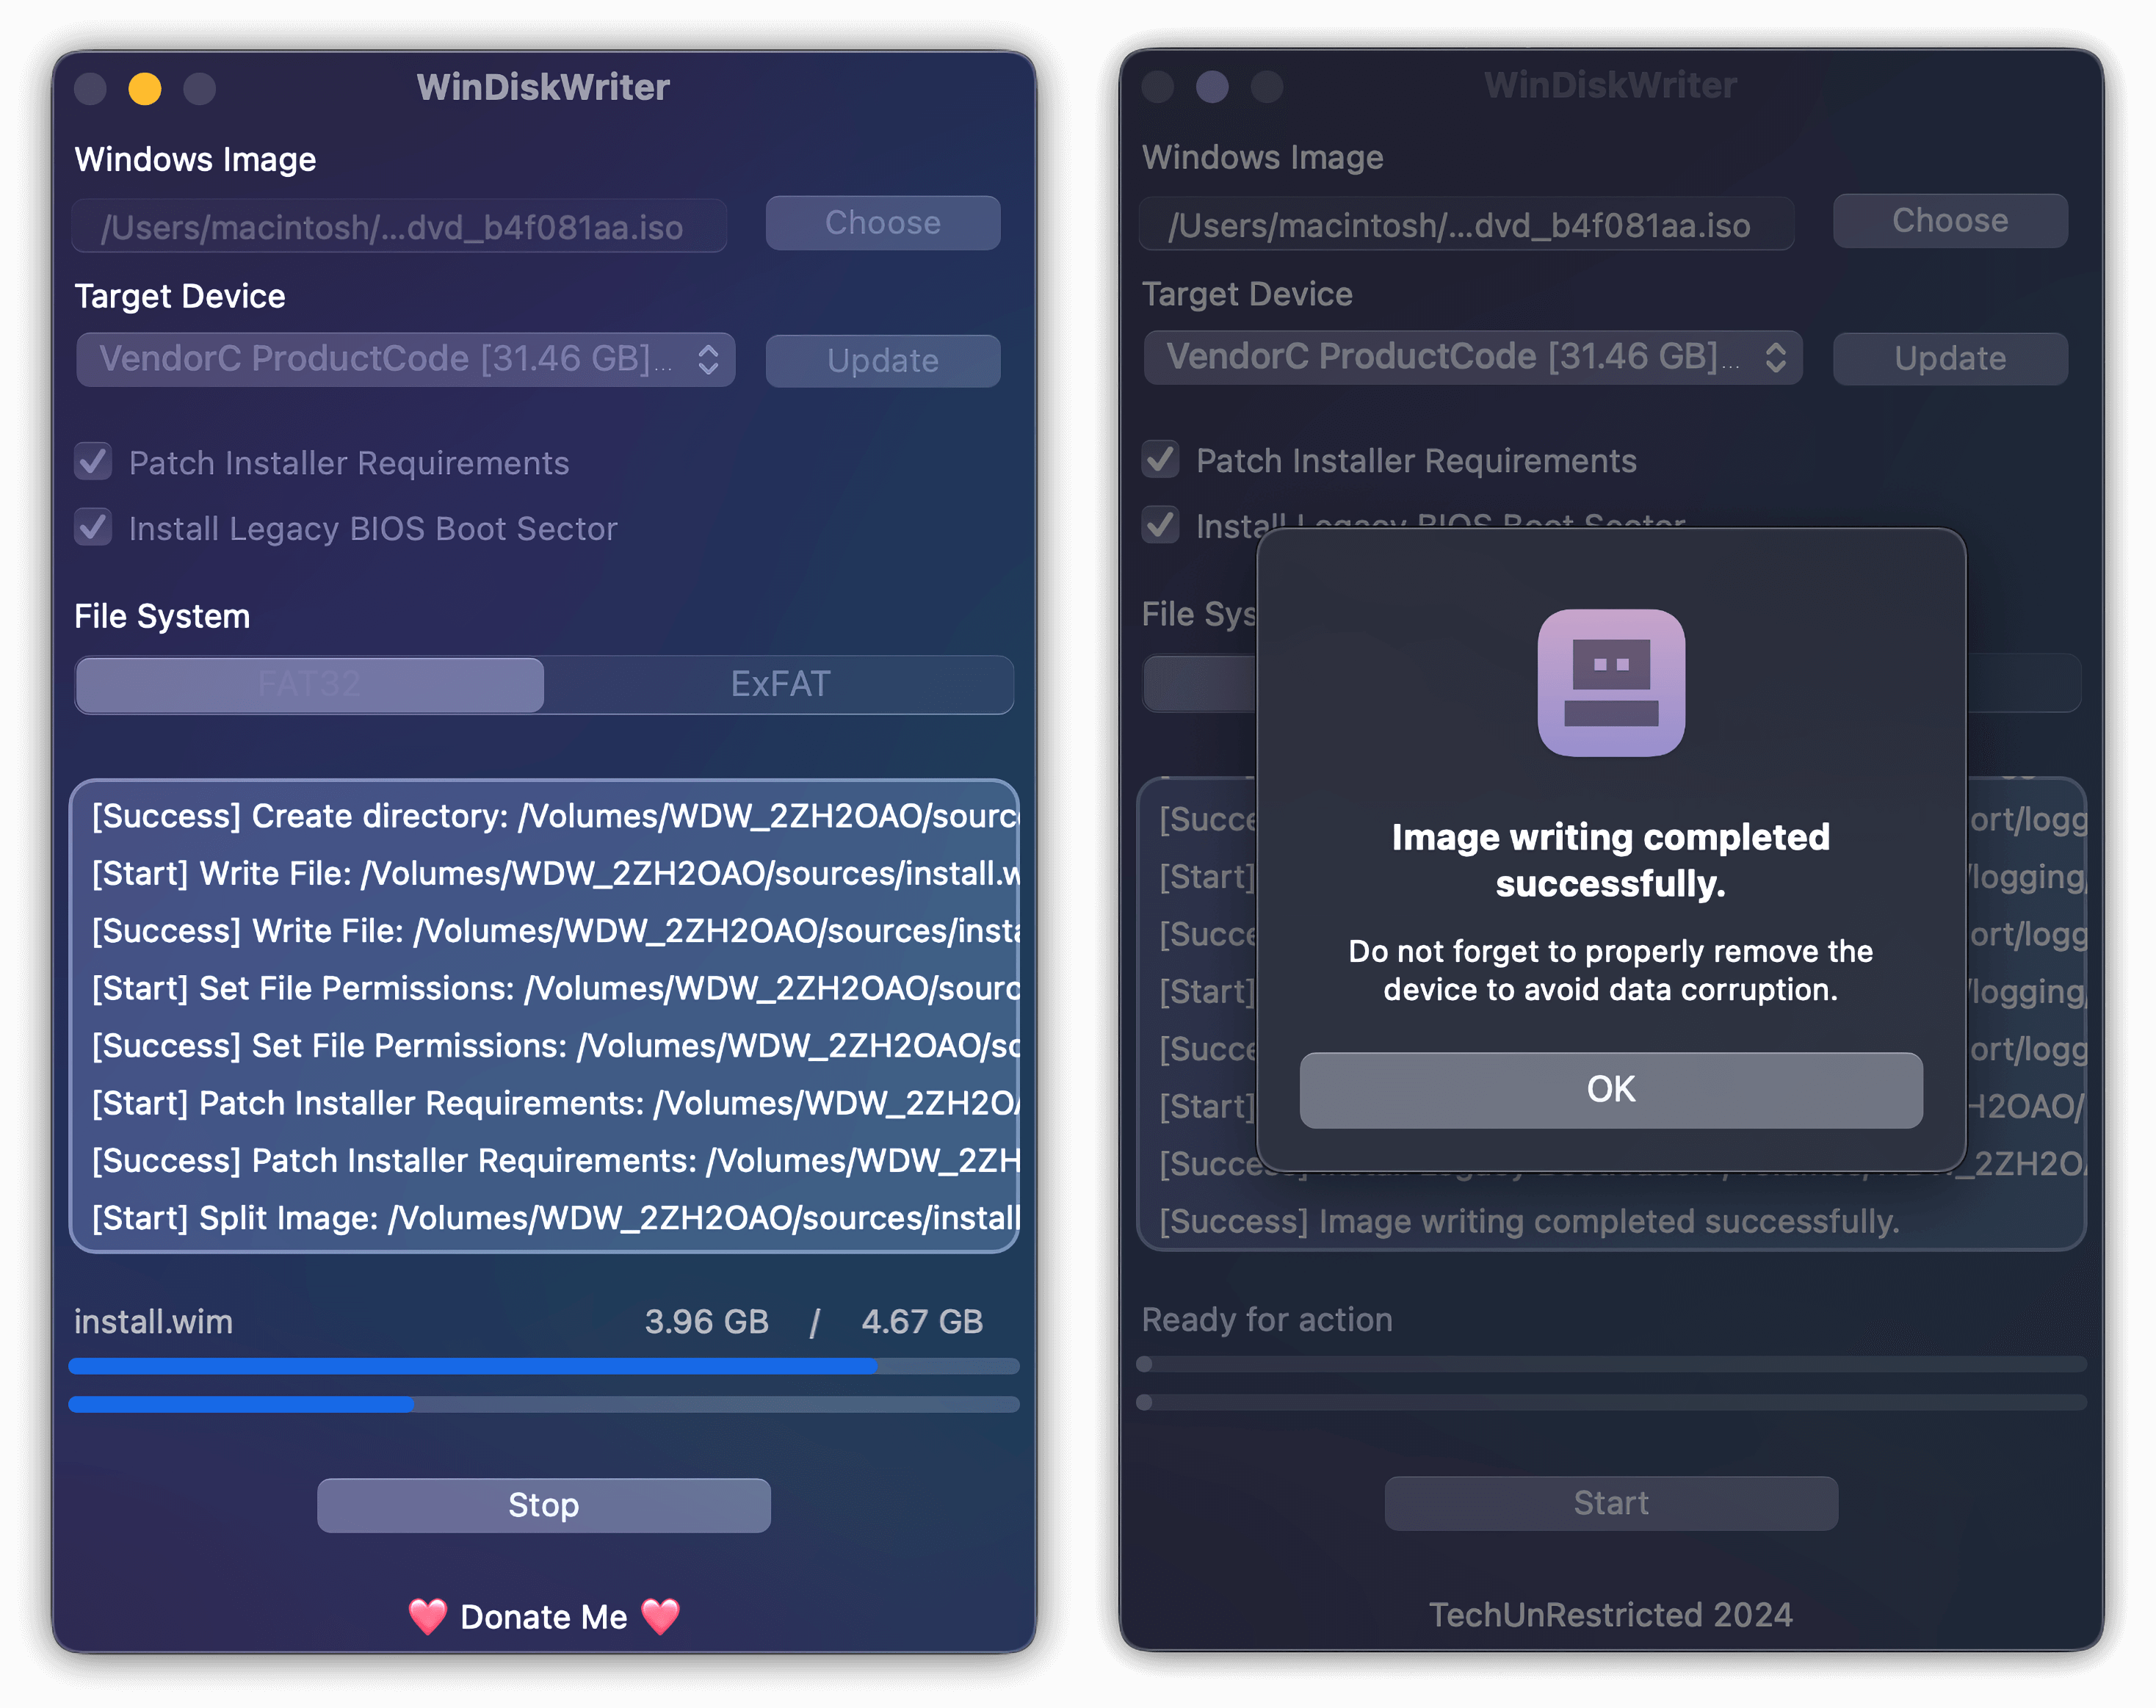
[You can download WinDiskWriter from its GitHub Repo]
Windows Versions Support:
- Windows 11
- Windows 10
- Windows 8.1
- Windows 8
- Windows 7
- Windows Vista
Boot Mode Support:
- UEFI
- Legacy BIOS
Additional Features:
- Windows 11 TPM & Secure Boot Path
- Legacy BIOS Support with grub4dos bootloader
cp: ./sources/install.wim: File too large