multipass from Canoncial is like Docker Desktop, but for getting Ubuntu instead of a Docker daemon. It works on MacOS, Linux, and Windows with the same consistent UX. It's not fully open-source, and uses some proprietary add-ons / binaries, but is free to use.
For Linux using Ubuntu, you can install the packages directly, or use sudo snap install multipass --classic and follow this tutorial. For Raspberry Pi, see my tutorial here.
John McCabe has also tested faasd on Windows with multipass, see his tweet.
Try out faasd in a single command using a cloud-config file to get a VM which has:
- port 22 for administration and
- port 8080 for the OpenFaaS REST API.
The above screenshot is from my tweet, feel free to comment there.
It took me about 2-3 minutes to run through everything after installing multipass.
-
Get multipass.run
-
Get my cloud-config.txt file
curl -sSLO https://raw.githubusercontent.com/openfaas/faasd/master/cloud-config.txt- Update the SSH key to match your own, edit
cloud-config.txt:
Replace the 2nd line with the contents of ~/.ssh/id_rsa.pub:
ssh_authorized_keys:
  - ssh-rsa AAAAB3NzaC1yc2EAAAADAQABAAABAQC8Q/aUYUr3P1XKVucnO9mlWxOjJm+K01lHJR90MkHC9zbfTqlp8P7C3J26zKAuzHXOeF+VFxETRr6YedQKW9zp5oP7sN+F2gr/pO7GV3VmOqHMV7uKfyUQfq7H1aVzLfCcI7FwN2Zekv3yB7kj35pbsMa1Za58aF6oHRctZU6UWgXXbRxP+B04DoVU7jTstQ4GMoOCaqYhgPHyjEAS3DW0kkPW6HzsvJHkxvVcVlZ/wNJa1Ie/yGpzOzWIN0Ol0t2QT/RSWOhfzO1A2P0XbPuZ04NmriBonO9zR7T1fMNmmtTuK7WazKjQT3inmYRAqU6pe8wfX8WIWNV7OowUjUsv alex@alexr.local
- Boot the VM
multipass launch --cloud-init cloud-config.txt --name faasd- Get the VM's IP and connect with
ssh
multipass info faasd
Name:           faasd
State:          Running
IPv4:           192.168.64.14
Release:        Ubuntu 18.04.3 LTS
Image hash:     a720c34066dc (Ubuntu 18.04 LTS)
Load:           0.79 0.19 0.06
Disk usage:     1.1G out of 4.7G
Memory usage:   145.6M out of 985.7M
Set the variable IP:
export IP="192.168.64.14"
You can also try to use jq to get the IP into a variable:
export IP=$(multipass info faasd --format json| jq '.info.faasd.ipv4[0]' | tr -d '\"')Connect to the IP listed:
ssh ubuntu@$IPLog out once you know it works.
- Let's capture the authentication password into a file for use with
faas-cli
ssh ubuntu@$IP "sudo cat /var/lib/faasd/secrets/basic-auth-password" > basic-auth-password
- Login from your laptop (the host)
export OPENFAAS_URL=http://$IP:8080
cat basic-auth-password | faas-cli login -s
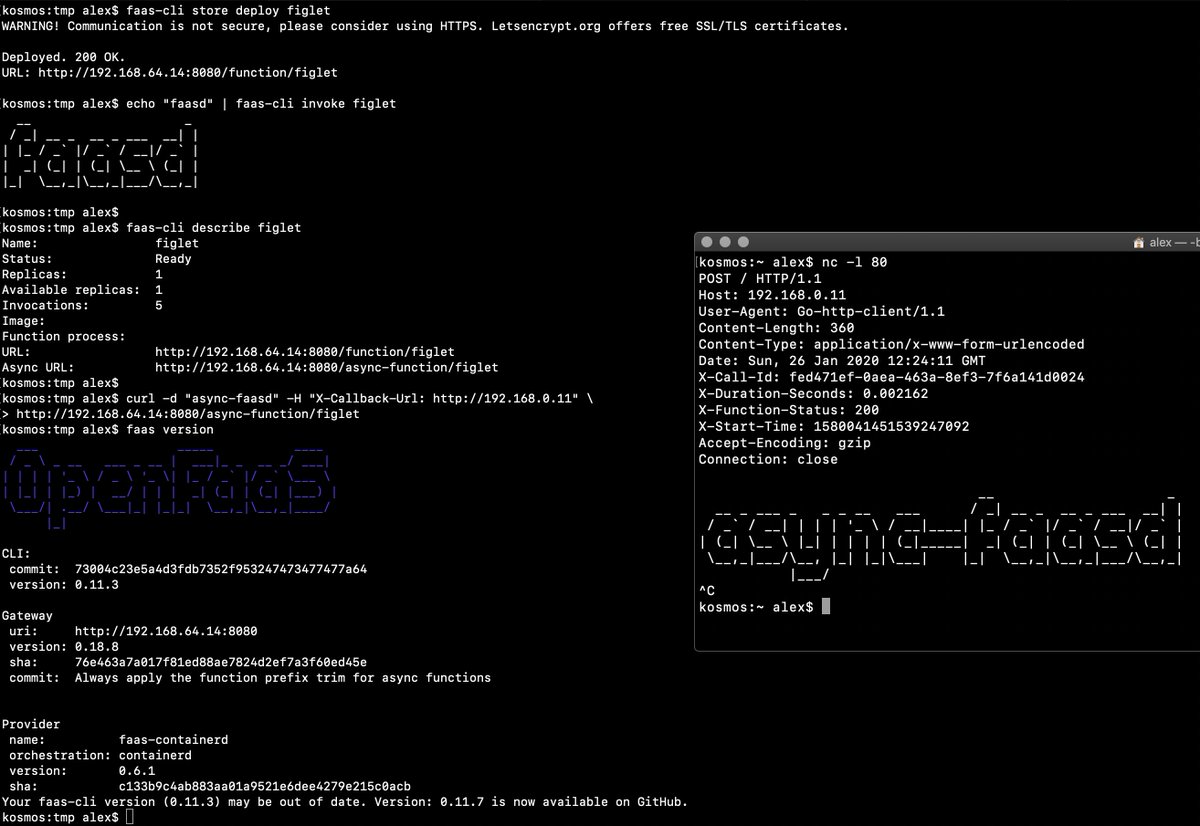
- Deploy a function and invoke it
faas-cli store deploy figlet --env write_timeout=1s
echo "faasd" | faas-cli invoke figlet

faas-cli describe figlet

# Run async
curl -i -d "faasd-async" $OPENFAAS_URL/async-function/figlet

# Run async with a callback

curl -i -d "faasd-async" -H "X-Callback-Url: http://some-request-bin.com/path" $OPENFAAS_URL/async-function/figlet
You can also checkout the other store functions: faas-cli store list
- Try the UI
Head over to the UI from your laptop and remember that your password is in the basic-auth-password file. The username is `admin.:
echo http://$IP:8080
- Stop/start the instance
multipass stop faasd- Delete, if you want to:
multipass delete --purge faasd
That's it, we're done. You now have a faasd appliance on your Mac. You could probably use this cloud-init file with AWS or DigitalOcean too.
- If you want a public IP for your faasd VM, then just head over to inlets.dev
- Try my more complete walk-through / tutorial with Raspberry Pi, or run the same steps on your multipass VM, including how to develop your own functions and services - https://blog.alexellis.io/faasd-for-lightweight-serverless/
- You might also like Building containers without Docker
- Star/fork faasd on GitHub