This is the message you should have received from Heroku in your mailbox some weeks/days ago:
[Shutdown Notice]: mLab MongoDB add-on Dear Heroku customer,
We have identified you as the owner of, or collaborator on, the following apps that have the mLab MongoDB add-on installed:
...list of projects...
The mLab team has chosen to discontinue this add-on. The mLab MongoDB add-on will be removed from all Heroku apps on November > > 10, 2020.
We advise you to remove the mLab MongoDB add-on yourself before September 1, 2020 via the Dashboard or the CLI....
... and if you login to your Heroku dashboard, you will see the following message:
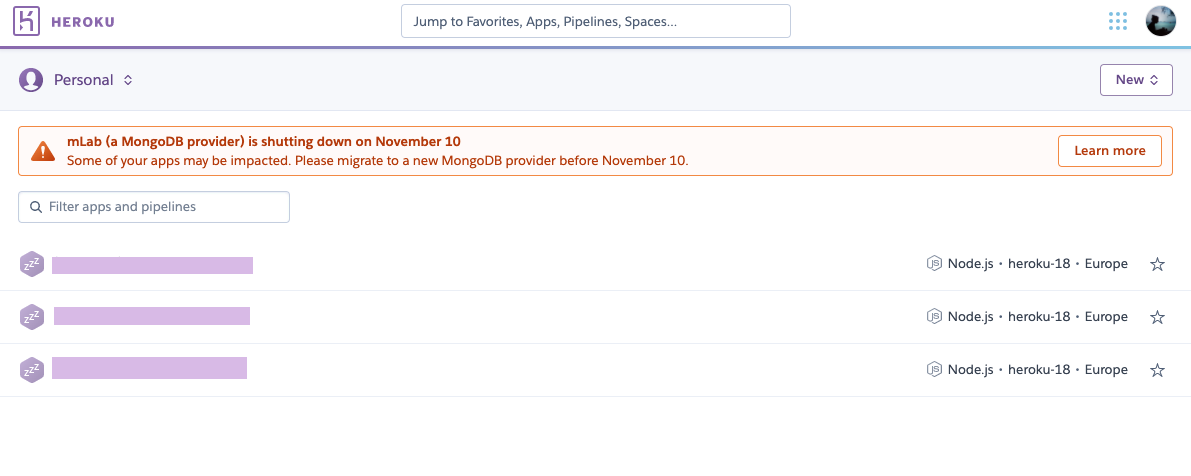
So in order to preserve access to the databases of your different projects and avoid loosing all your data, you'll need to migrate them from mLab (the cloud database service integrated with Heroku that we have been using to host our project databases) to another service called MongoDB Atlas.
MongoDB Atlas is "a fully-managed cloud database developed by the same people that build MongoDB".
More details on the Why and What here
Here is a the official guide on "Migrating a Sandbox Heroku Add-on to Atlas": https://docs.mlab.com/how-to-migrate-sandbox-heroku-addons-to-atlas/
If you like it a bit more simple like me, here is my step-by-step for dummies:
- Pre-migration setup: create and configure a MongoDB Atlas cluster
- Export your project database into json format, from mLab to your computer
- Import the (previously exported) json collections to a MongoDB Atlas database
- Destroy Heroku add-ons via the CLI
If you are a brand new user, register for a free account here (no credit card required).
- Select "Create a cluster" (FREE option)
- Select "AWS" as cloud provider, Europe (Frankfurt) as the region, "Cluster tier" (free) as the solution
- Click on "Create cluster"
You should have been redirected to the console panel:
- Select "Database Access" in the left side menu and click on "Add new user database"
- In the section Password authentication, add a username and click on "augogenerate Secure Password" and copy-paste it in a secure place right away (you will need it for later)
- In the "Database User Privileges", select "Read and write to any database"
- Click on "Create new user"
- Go to "Network Access" in the left side menu
- Once on that page, click on the big "Add IP Address" green button
- In the pop-up that appears, select "Allow Access From Anywhere" and click "Confirm" (it you already had it setup from before, the IP Address should appear already in the IP Whitelist)
- Go to "Clusters" in the left side menu
- In the sandbox, click on "Connect" and in the pop up that opens, click on "Connect your application"
- Select
DRIVER: "Node.js"andVERSION: "3.0 or later" - Copy the "connection string" that has been prepared for you and keep it in a secure place
- Login to Heroku
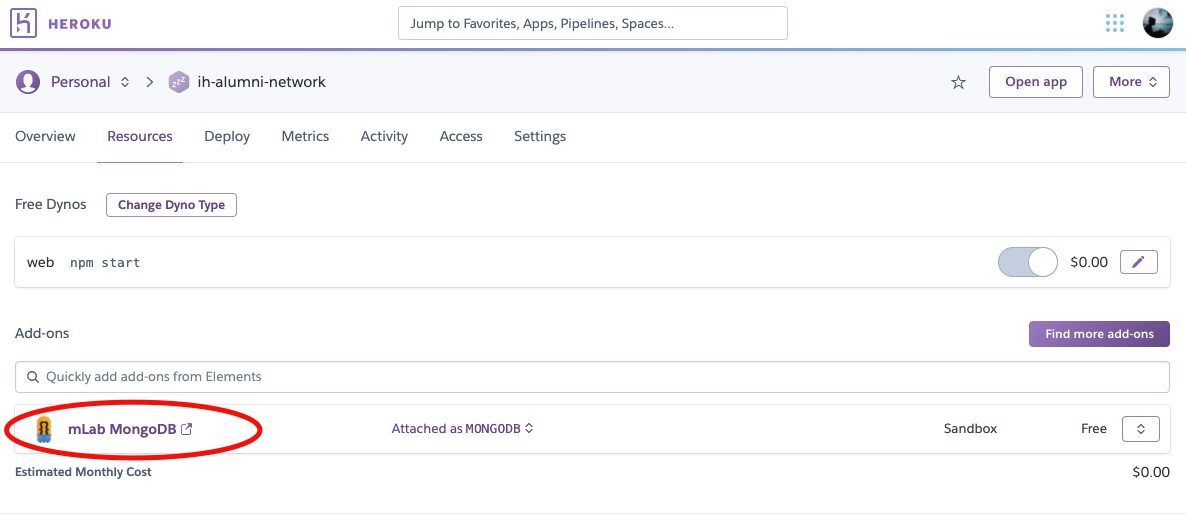
- In your dashboard, select the project with the database you wish to migrate
- On the top menu, select "Resources"
- In Resources, click on "mLab MongoDB" to open the cloud database
You should be redirected to this kind of URL: https://www.mlab.com/databases/heroku_custom-id
Once in mLab.com, first thing you should see are your collections.
- Click on the "Users" tab: if there is no user created yet, create one by clicking on the "Add database user" button on the right (and keep those credentials in a secure place)
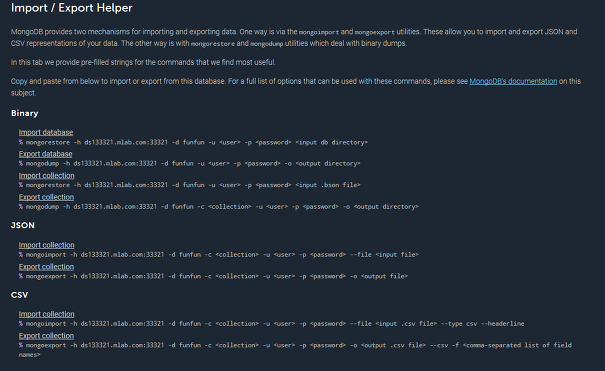
- Click on the "Tools" tab: here you'll find the command you'll need to export your database collections to JSON format
- Copy the command under JSON > Export collection
In your terminal, create a directory where you'll save your DB collections (wherever it makes more sense to you) and access it:
$ mkdir db_backup && cd db_backup
Then, for each collection, enter the command that you copied from mLab "Tools" section, adapting it with the corresponding information (where there are <...>).
It should look like this:
$ mongoexport -h ds111111.mlab.com:22222 -d heroku_33333 -c <collection> -u <user> -p <password> -o <output file>
-h stands for mongodb host to connect to (should be provided directly in the command you copied)
-d stands for the database from which you want to export the data (should be provided directly in the command you copied)
-c stands for collection
-u stands for your database username
-p stands for your database password
-o stands for the output file where you want your data to be exported to (for example users.json if you export the users collection)
Repeat it for each collection, until you have as many json files in your backup directory, as you have database collections.
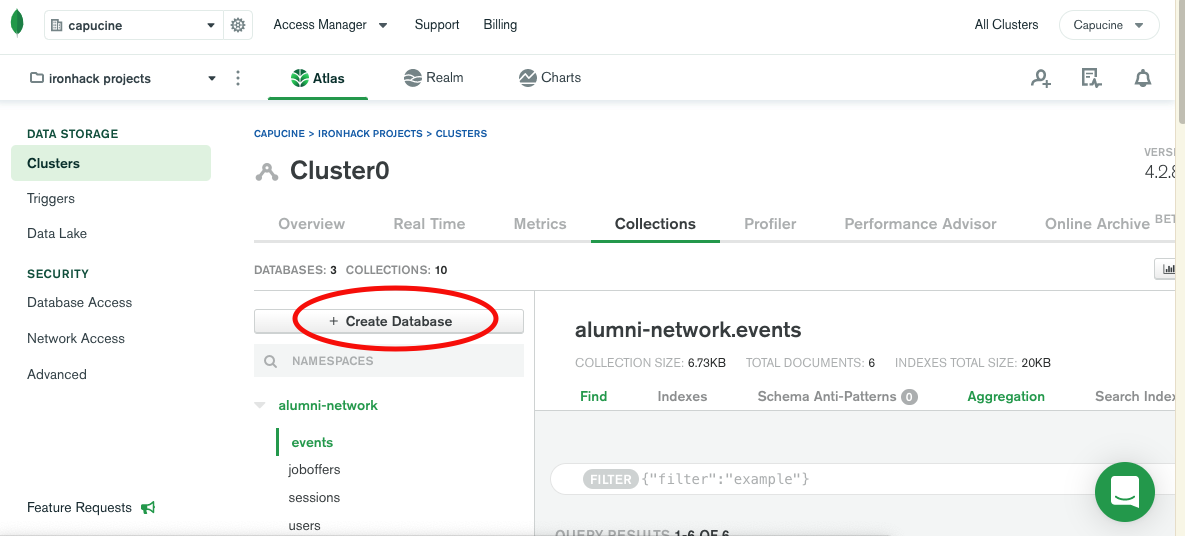
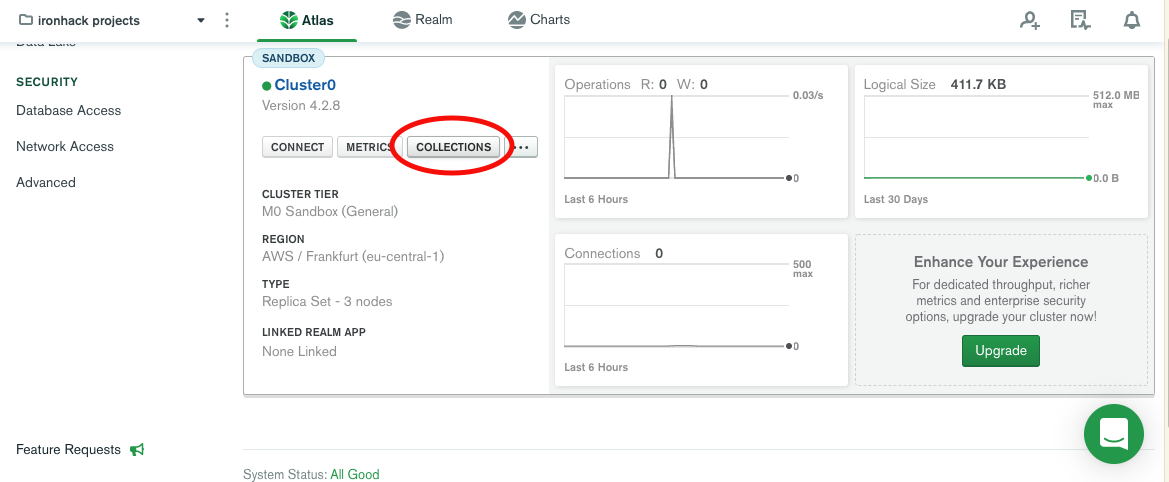
In your MongoDB Atlas account, go to "Clusters" and you'll see the cluster you created during Step 1.
Click on “Collections”:
Then, click on the "+ Create Database" button and give it a meaninful name, as well as one collection name:
Remember the username & password you created in step 1.3., and that connection string you copied at the end of step 1.5.? Now is the moment to use them :)
In your backup directory, enter the following command connection string, replacing the data between <...> with your MongoDB Atlas credentials and the database name you just created:
$ mongoimport --uri mongodb+srv://<user>:<password?@cluster0-kyklv.mongodb.net/<database-name> --collection <collection-you-want-to-import> --type json --file <backup-file-name.json>
Now, check in your cluster that the collections have been properly added!
Back in your Heroku dashboard, on the page of your project, select "Settings" in the top menu and go to the "Config Vars" section.
You will need to edit the value for the MONGODB_URI variable, replacing the mLab string by the connection string you got from your MongoDB Atlas cluster.
Replace something like this:
mongodb://heroku_custom-id:another-weird-number@another-number.mlab.com:63168/heroku_custom-id
by something like that:
mongodb+srv://<user>:<password?@cluster0-kyklv.mongodb.net/<database-name>
You can now remove the mLab add-on via the CLI: This will destroy all associated data and cannot be undone! First, check that your backups are usable, and/or that your MongoDB Atlas databases are properly functioning when browsing your Heroku apps.
$ heroku addons:destroy mongolab
You can run this command from anywhere in your terminal. If you have several databases on mLab, you will get the following message:
▸ Ambiguous identifier; multiple matching add-ons found: mongolab-xxxx-yyyy, mongolab-wwww-ssss, mongolab-tttt-ooooo.
You will be able to destroy each one of them by specifying their name, for example:
$ heroku addons:destroy mongolab-xxxx-yyyy
Finally, you will be asked to confirm deletion by entering the name of the app affected by this deletion.
And that's it!
Thanks for the simplification of the offitial guide! Migrated with success 👍