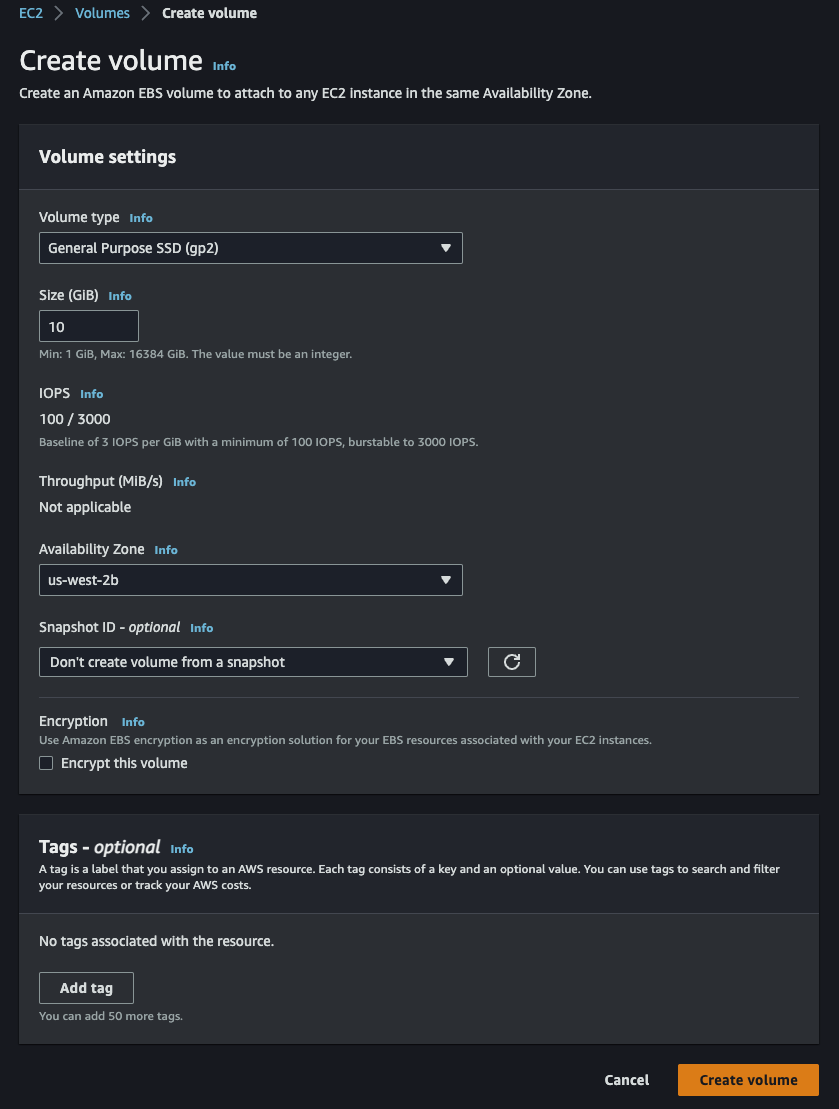
We will use an RHEL9 instance as our server. Additionally, we need to create and attach three 10GB volumes to our instance.

The volume must be in the same Availability Zone as the instance:
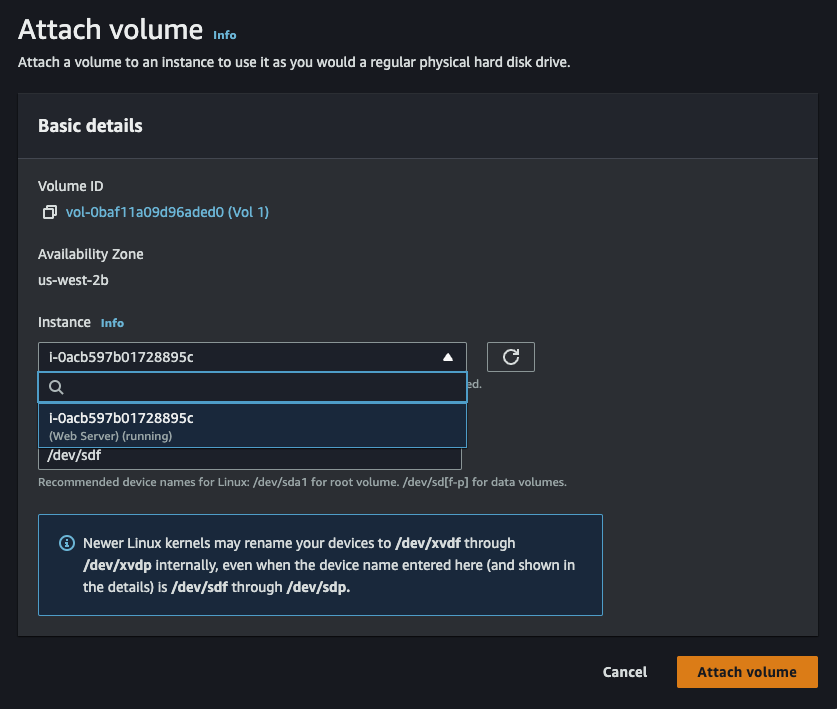
Make sure to select the correct instance for which to attach the volumes:
Use lsblk command to inspect what block devices are attached to the server. The three newly created block devices will likely have names like xvdf, xvdh, and xvdg .
lsblk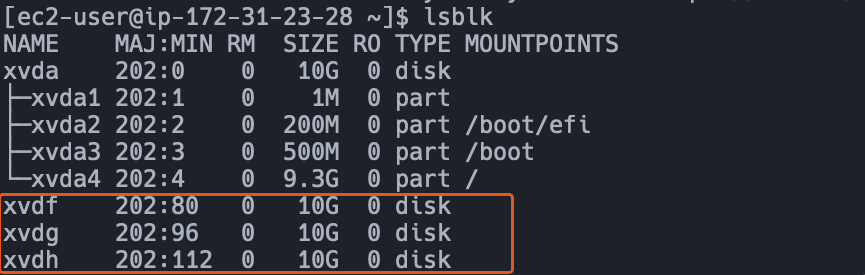
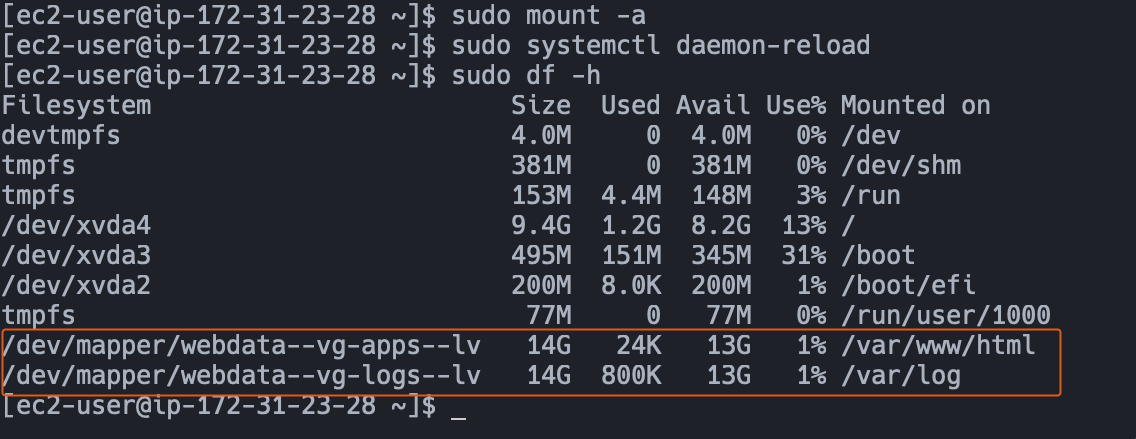
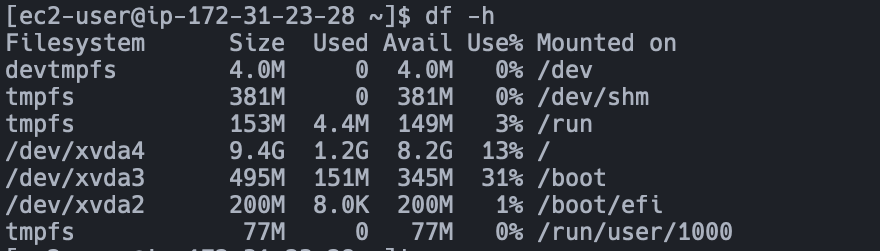
We can use df -h to view all mounts and free space on our instance
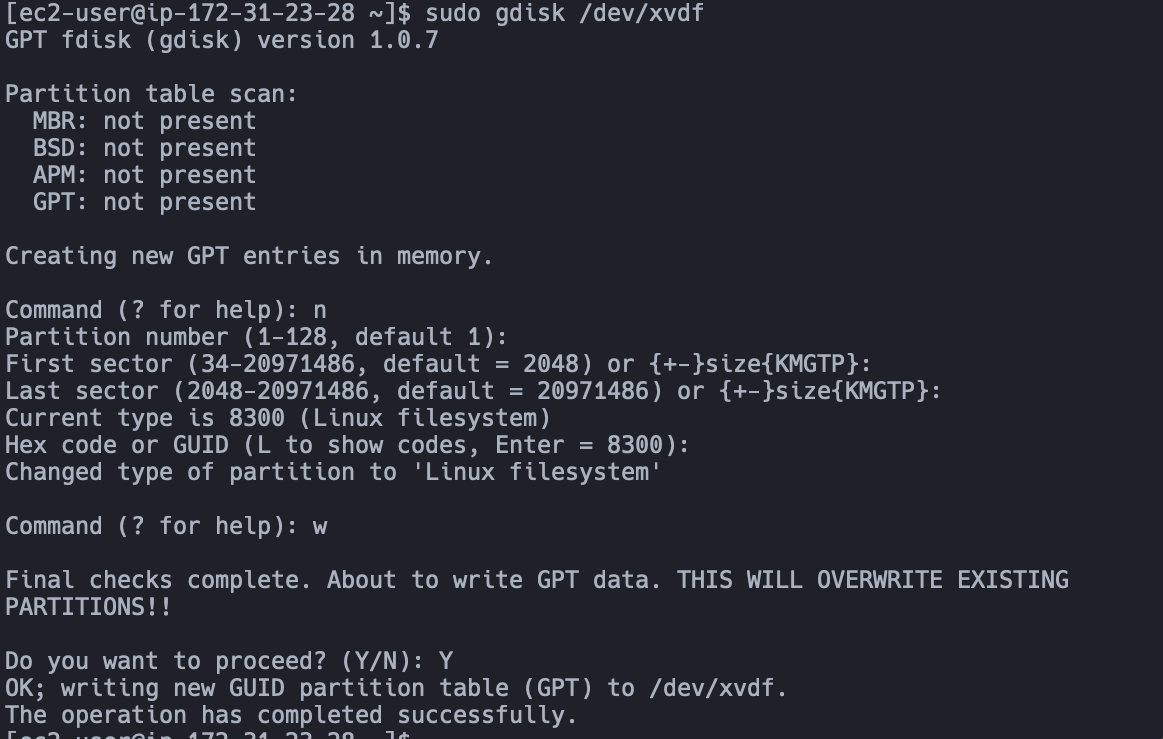
Use gdisk utility to create a single partition on each of the 3 disks. The utility is interactive with some command options. We only need to make use of the n to create a new partition and w to save the new partition to the disk and exit.
# sudo gdisk <disk>
sudo gdisk /dev/xvdf
sudo gdisk /dev/xvdg
sudo gdisk /dev/xvdh
Here's an example of partitioning one of the disks using the default (pressing ENTER/RETURN key):
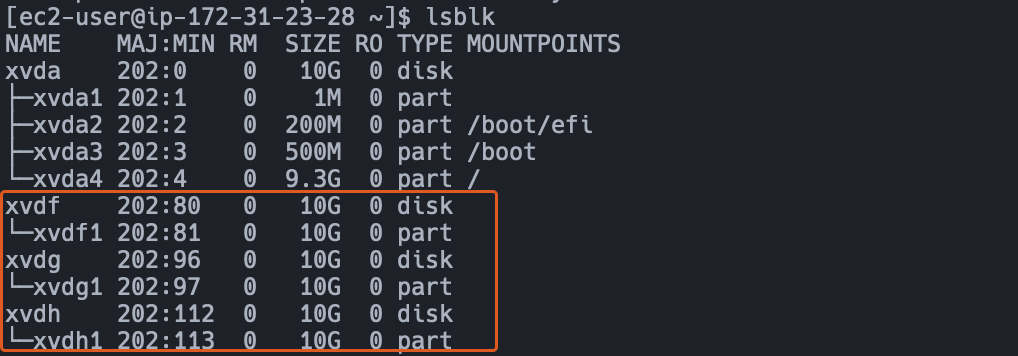
We can now see the partitions we created in each disk now:
Run sudo lvmdiskscan command to check for available partitions and the type of volumes
sudo yum install -y lvm2
sudo lvmdiskscan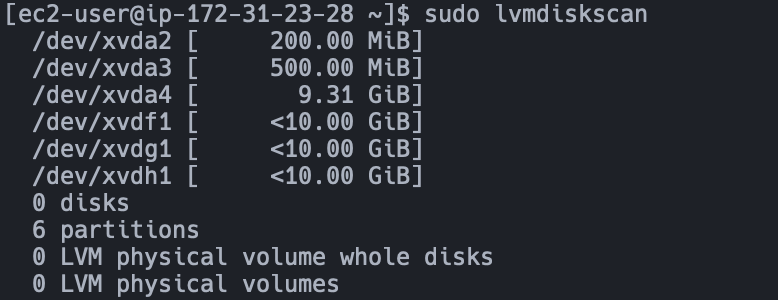
Use pvcreate utility to mark each of the 3 disks as physical volumes (PVs) to be used by LVM.
sudo pvcreate /dev/xvdf1
sudo pvcreate /dev/xvdg1
sudo pvcreate /dev/xvdh1
sudo pvs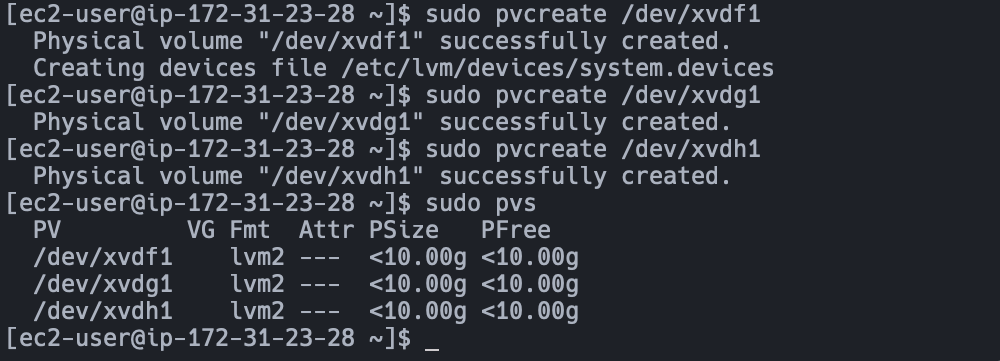
Use vgcreate utility to add all 3 PVs to a volume group (VG). Name the VG webdata-vg. We can verify the creation of the VG using sudo vgs :
sudo vgcreate webdata-vg /dev/xvdf1 /dev/xvdg1 /dev/xvdh1
sudo vgs
Use lvcreate utility to create 2 logical volumes. apps-lv (Use half of the PV size), and logs-lv Use the remaining space of the PV size. NOTE: apps-lv will be used to store data for the Website while logs-lv will be used to store data for logs.
sudo lvcreate -n apps-lv -L 14G webdata-vg
sudo lvcreate -n logs-lv -L 14G webdata-vg
sudo vgs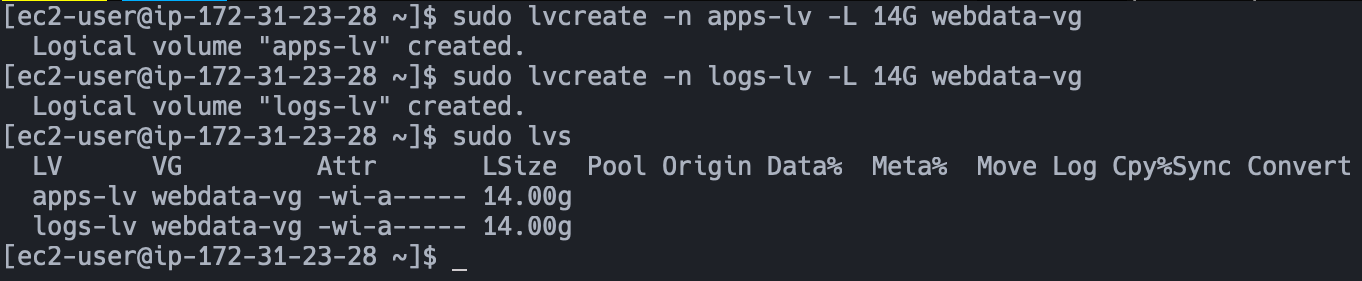
Verify the entire setup:
sudo vgdisplay -v #view complete setup - VG, PV, and LV
sudo lsblk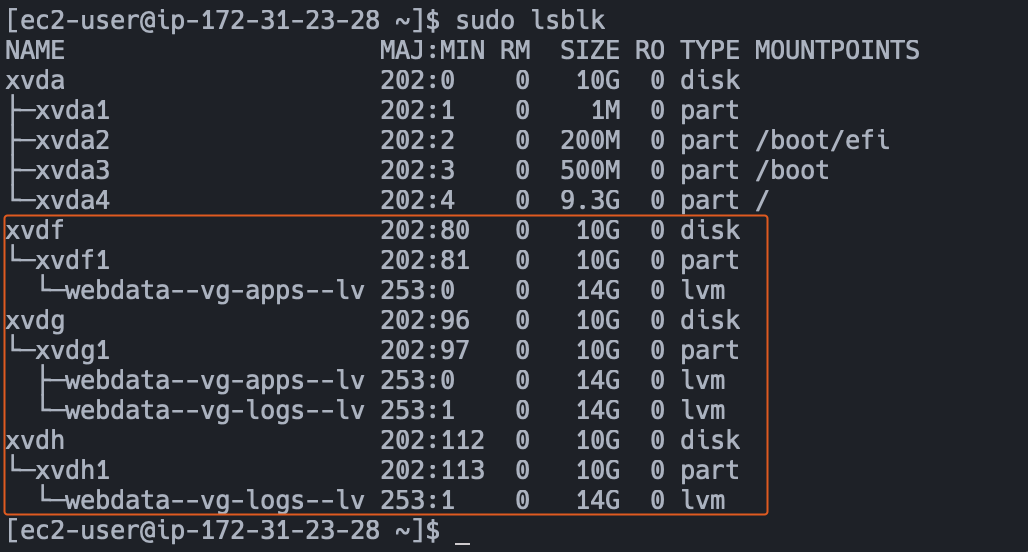
From above we can see that apps-lv and logs-lv are of type lvm, but we want to reformat it to an ext4 filesystem.
sudo mkfs -t ext4 /dev/webdata-vg/apps-lv
sudo mkfs -t ext4 /dev/webdata-vg/logs-lv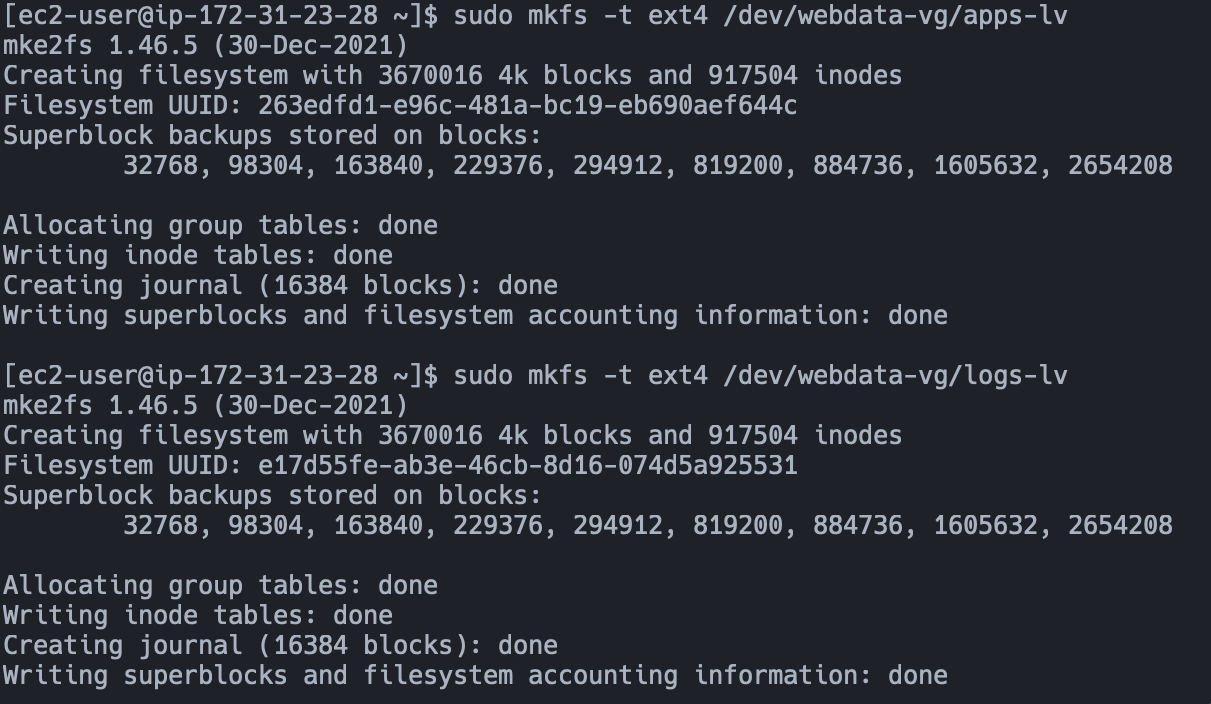
Create /var/www/html directory to store website files and mount them on apps-lv LV.
sudo mkdir -p /var/www/html
sudo mount /dev/webdata-vg/apps-lv /var/www/html
We follow the same step as above for the logs, but first, we need to back up the files in /var/log using rsync before mounting it on the new destination folder:
sudo mkdir -p /home/recovery/logs
sudo rsync -av /var/log/ /home/recovery/logs/
sudo mount /dev/webdata-vg/logs-lv /var/log
sudo rsync -av /home/recovery/logs/. /var/logThe UUID of the device will be used to update the /etc/fstab file.
sudo blkid | grep 'webdata'
The /etc/fstab file stores static information about filesystems, their mount points and mount options. This file is read at boot time to determine the overall file system structure, and thereafter when a user executes the mount command to modify that structure.

Test the configuration, reload the daemon, and verify the setup:
sudo mount -a
sudo systemctl daemon-reload
sudo df -h