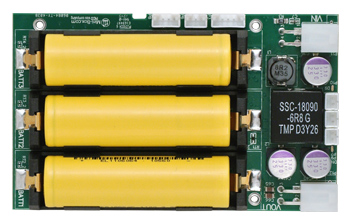
Plug the device in, check the device connection
$ lsusb | grep "d005"
Bus 001 Device 002: ID 04d8:d005 Microchip Technology, Inc.
If no Microchip Technology device shows up, check the usb conection and try again
Install NUT using your prefered package manager
e.g on Ubuntu:
$ sudo apt-get install nut#Step 3 Stop the upsdrvctl service
$ sudo upsdrvctl stopConfigure the driver for the openups2
$ sudo /lib/nut/usbhid-ups -u root -x productid=d005 -a openups2If you get the error "Can’t chdir to /var/run/nut: No such file or directory"
$ sudo mkdir /var/run/nut
$ sudo chown root:nut /var/run/nut
$ chmod 770 /var/run/nutChange the permissions for the USB port
a) Find the bus number and device number for the UPS
$ lsusb | grep "d005"
Bus 001 Device 002: ID 04d8:d005 Microchip Technology, Inc.
b)
$ sudo chmod 0666 /dev/bus/usb/[bus number]/[device number]NOTE: these permissions will need to be reset everytime you restart the computer or unplug the device
OPTIONAL: a UDEV rule can be added to avoid this
$ sudo touch /etc/udev/rules.d/50-usb-openups2.conf
$ echo 'SUBSYSTEM=="usb", ATTR{idProduct}=="d005", MODE="0666"' | sudo tee --append /etc/udev/rules.d/50-usb-openups2.confStart the driver service
$ sudo upsdrvctl startStart UPSD
$ sudo upsdYou can now view the live UPS data using your preffered UPSD Client
e.g with the built in UPSC client
$ upsc openups2@localhost
battery.capacity: 100
battery.charge: 100
battery.charge.low: 5
battery.charge.warning: 20
battery.current: 0.000
battery.mfr.date: ?
battery.runtime: 3932100
battery.temperature: 34.22
battery.type: ?
battery.voltage: 10.22
device.mfr: Mini-Box.Com
device.model: OPEN-UPS2
device.serial: LI-ION
device.type: ups
driver.name: usbhid-ups
driver.parameter.pollfreq: 30
driver.parameter.pollinterval: 2
driver.parameter.port: auto
driver.parameter.productid: d005
driver.version: 2.7.1
driver.version.data: openUPS HID 0.1
driver.version.internal: 0.38
input.current: 0.000
input.voltage: 533.95
output.current: 0.000
output.voltage: 488.36
ups.mfr: Mini-Box.Com
ups.model: OPEN-UPS2
ups.productid: d005
ups.serial: LI-ION
ups.status: OL
ups.vendorid: 04d8
Hi all, a couple of clarifications:
-x productid=d005worked on the driver command line, so you can addproductid=d005to ups.conf to makeupsdrvctl startwork properly.Feel free to raise any other NUT issues at https://github.com/networkupstools/nut/issues or on the nut-upsuser mailing list.
@clungzta, thanks for writing this up!