This gist details how to create or restore a disk image in Mac OSX. There are three methods that are described: Carbon Copy Cloner, Disk Utility, and CommandLine.
- Disclaimer:
- I have no financial incentives to https://bombich.com or Apple.
- Always make a backup of your data, and make 2 separate backups before trying something new.
- The following steps have been tested and are a summary of my personal recommendations, but should be used at your own risk.
- If there is a chance of imminent data loss, contact a professional for assistance, and do not rely on a random person from the Internet for help.
This is by far the recommended method. CCC has been around awhile, and has a simple yet powerful interface that can serve multiple functions, including creating a bootable backup from a disk (like your internal hard disk).
To create a disk image, select the source volume and the destination volume. If you want to create a cloned copy of the source volume, then select a destination disk, but be advised that existing files may be overwritten. If you want to create a disk image on an existing disk, then select a folder instead.
To restore a disk image, follow the above steps in reverse.
This method is fairly straightforward, and Apple has a surprisingly helpful knowledgebase article that provides information as well.
The steps assume you are using Mac OSX High Sierra or later. The above link has information for previous OSX versions.
Step 1:
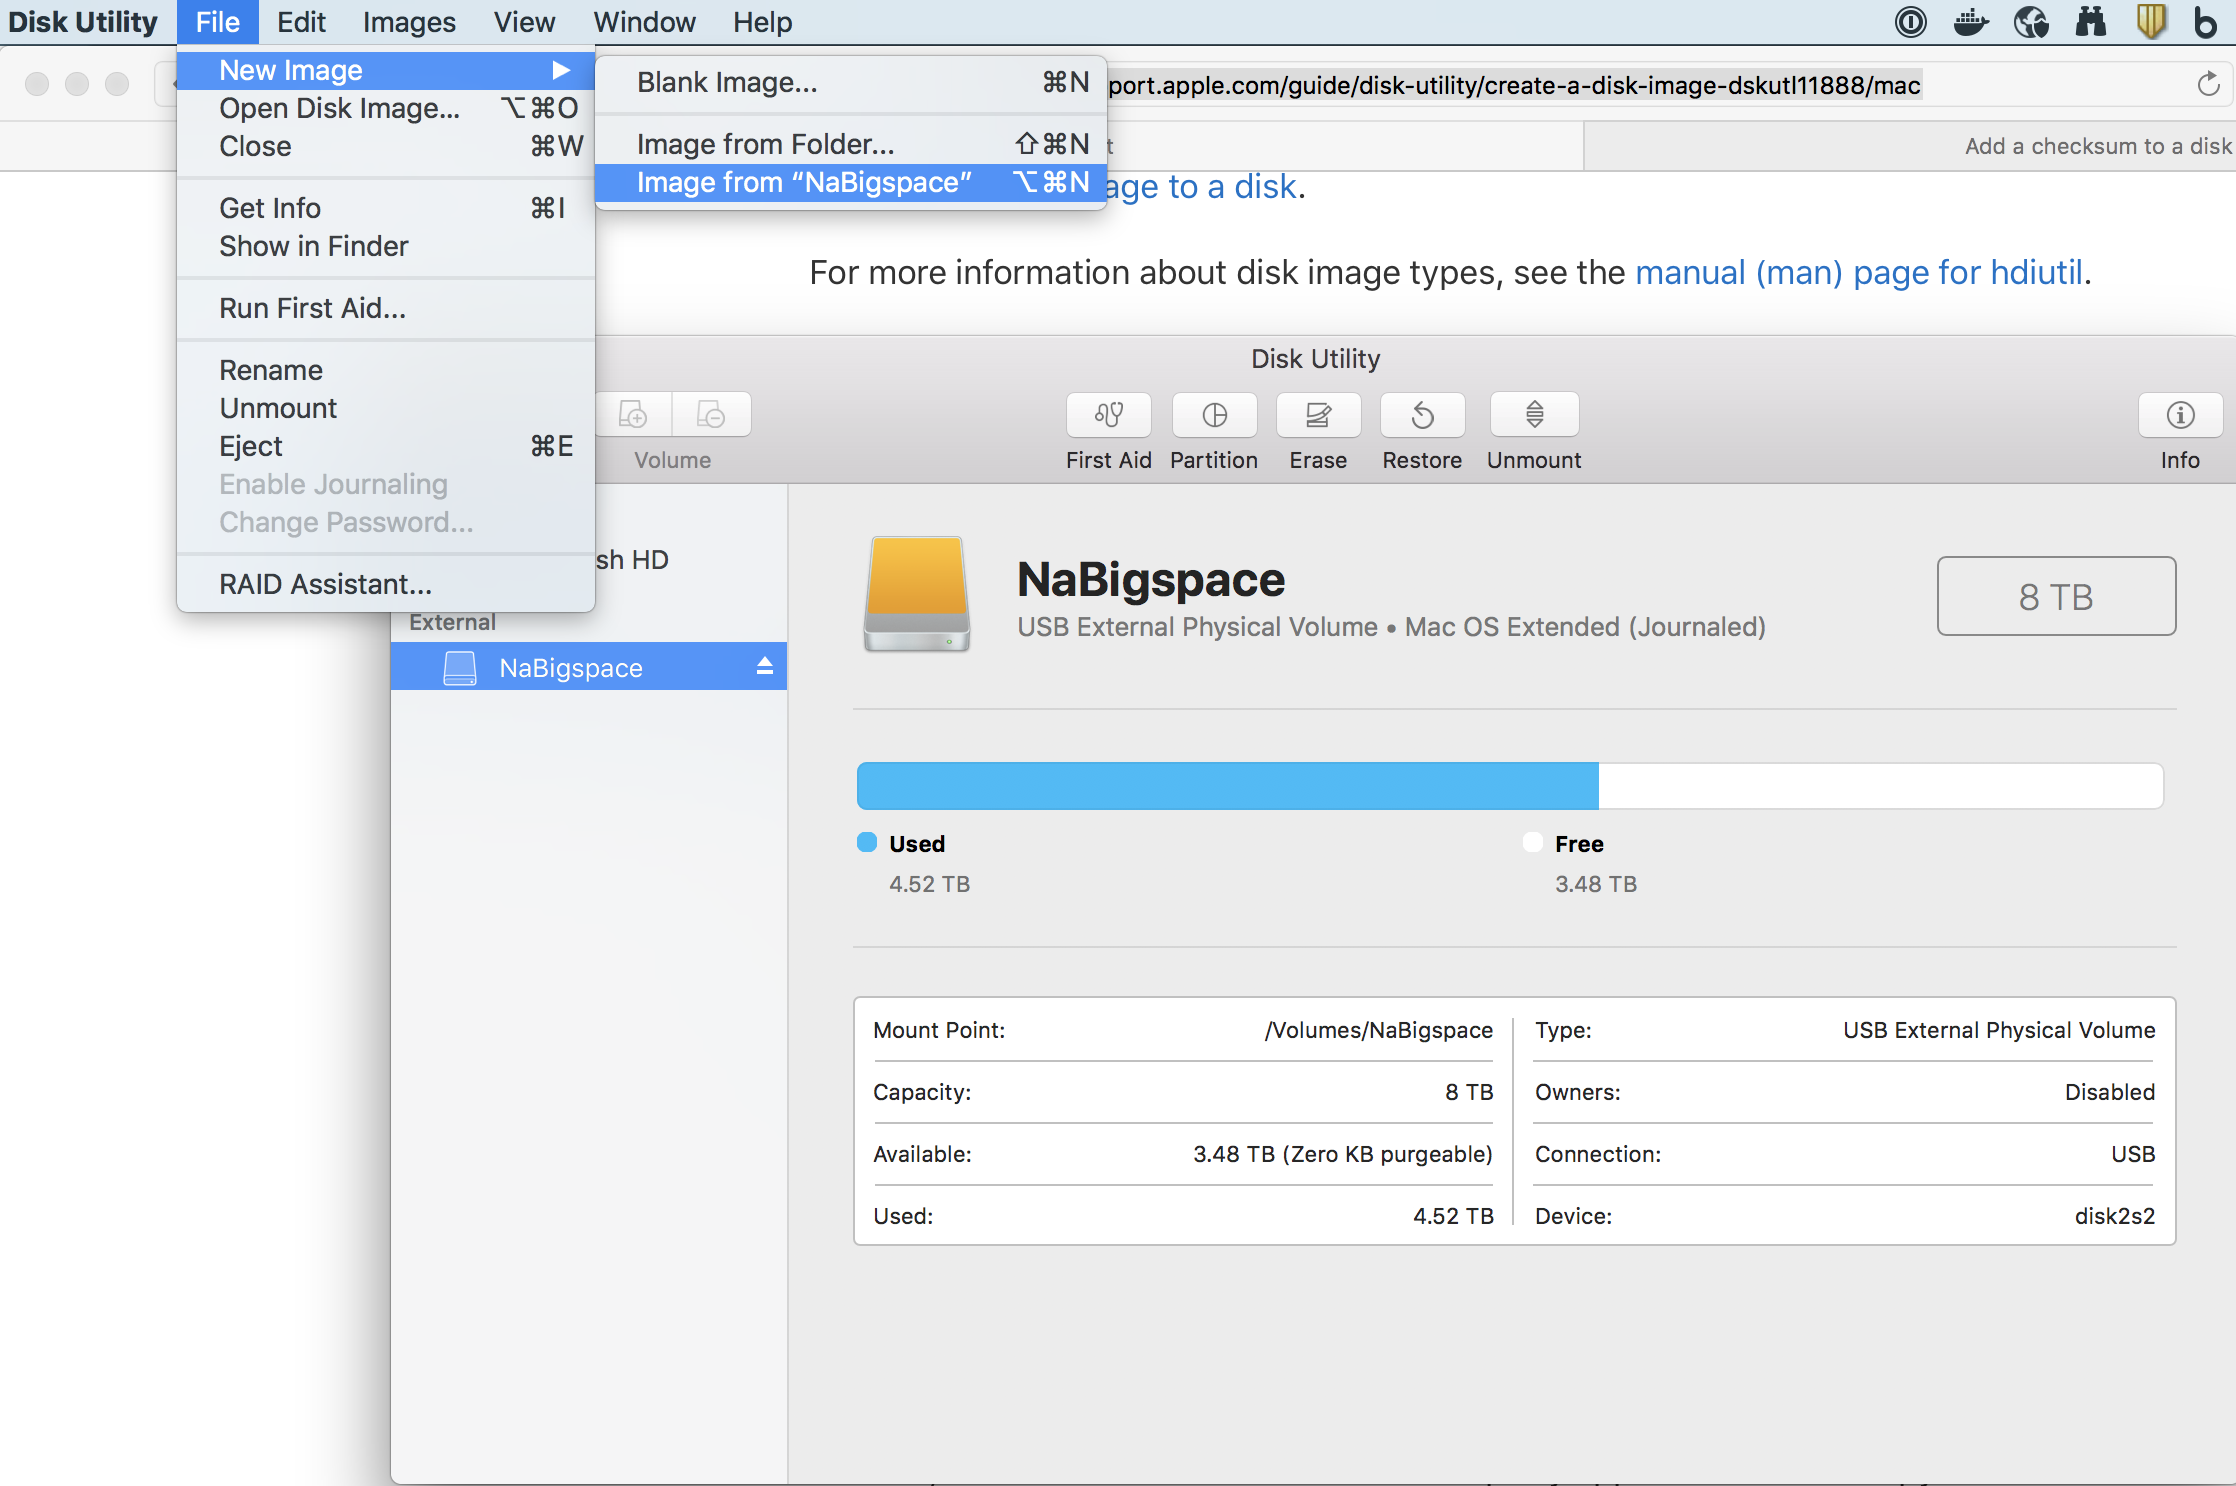
- Open Disk Utility, then click on the external hard disk that you wish to clone (for example, "ExternalHD")
Step 2:
- Then select select File -> New Image -> Image from "ExternalHD"
- Note: If you do not see your disk listed, that means you did not click on it beforehand.
- The options for disk image are:
- read-only: this image will not be modifiable
- compressed: this image will be a compressed version of a read-only image
- read/write: this image will be modifiable, and will have the extension '.dmg'
- DVD/CD Master: this image is compatible with 3rd party apps, and will have the extension '.cdr'
- Unless you have a compelling reason otherwise, select the option 'read/write'

Step 3:
- This process will take awhile. You can also create a checksum of the image by clicking on the image, then selecting Images -> Add Checksum
Apple has another surprisingly helpful knowledgebase article that provides information as well on these steps.
There really is only one tricky step.
Step 1:
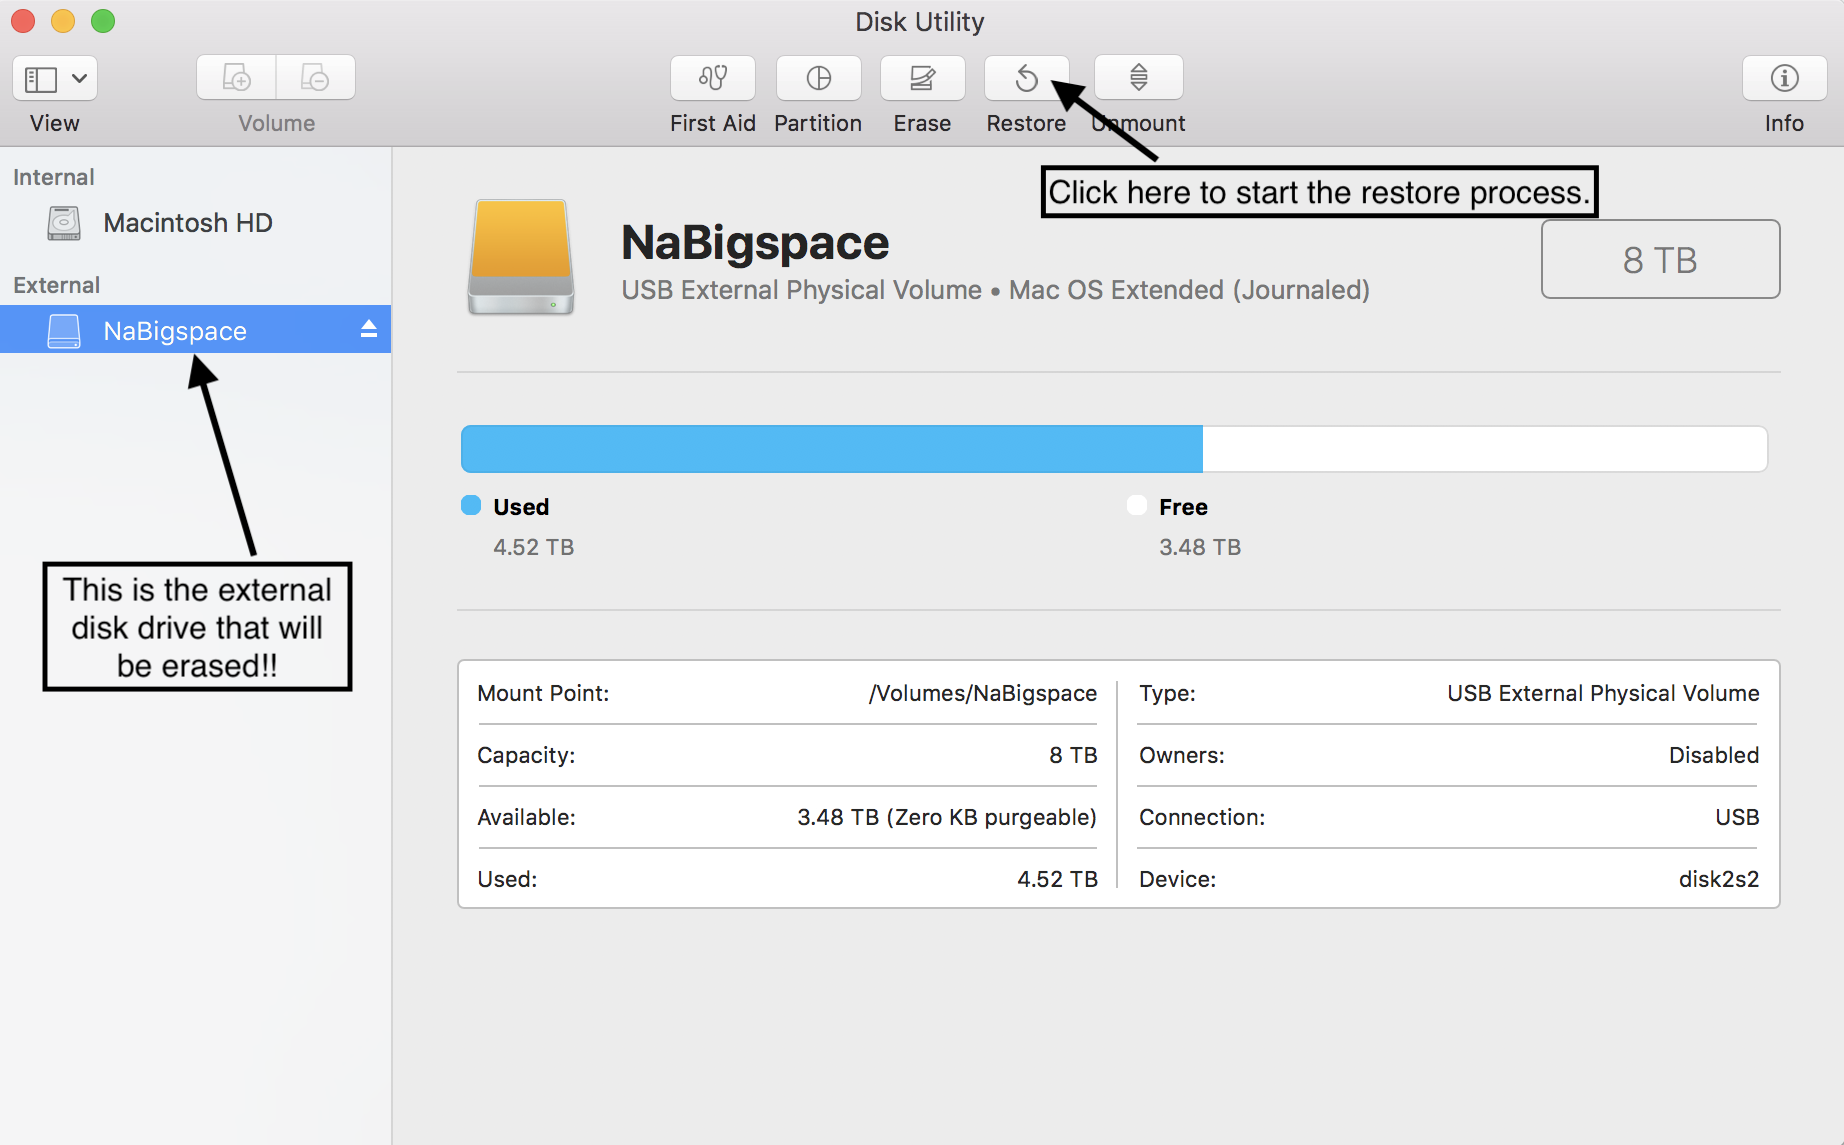
- Connect the external drive that will be erased.
- Then open Disk Utility
Step 2:
- Select the empty drive from Step 1 that will be deleted, then click the restore button.
- This is the tricky step. All data will be (irreversibly) deleted from the drive that you select.
Step 3:
- In the window that opens, select the disk image (it must end in '.dmg') that you will use to restore onto the drive that you just selected to be deleted, then click 'Restore'. This process will take awhile.
This method should only be attempted if you are feeling adventurous, and if Method 1 and Method 2 are unavailable.
-
to erase a disk, use the syntax:
  diskutil list # list all disks
  diskutil eraseDisk FORMAT NEWNAME /dev/identifier
  # example
  diskutil eraseDisk JHFS+ IH8LACIE /dev/disk4
Use either the hdiutil or dd commands
    # create image NEWIMG from folder SRCFOLDER
    # the default format for newly created images is UDZO (read-only, compressed),
    # this is changed below to be Read/Write
    hdiutil create -size 50m -format UDRW -fs HFS+ -srcfolder /path/to/SRCFOLDER /destination/path/for/NEWIMG

    # create image NEWIMG from volume SRCVOL
    # the default format for newly created images is UDZO
    # NOTE: you usually want to copy from a volume, not a source device!
    hdiutil create -size 50m -fs HFS+ -volname /path/to/SRCVOL /destination/path/for/NEWIMG

    # create image NEWIMG from source device SRCDEV
    # the default format for newly created images is UDZO
    hdiutil create -size 50m -srcdevice /path/to/SRCDEV /destination/path/for/NEWIMG

    # dd command to create a disk image OFILE from directory or device IFILE
    # note that this normally requires sudo to run
    # only use dd if you are feeling bold and adventurous and desperate
    # byte size bs is assigned a value of 512K, this may need to be modified as needed
    dd bs=512000 if=IFILE of=OFILE
There are two main methods to restore a disk image: asr (Apple Software Restore) and dd. The dd command can be used as described above, but in the reverse order.
    # restore source image ARCHIVEIMG to target mountable volume TARGETVOL using asr with HFS+ format
    # you may need to determine the source and target /dev identifiers ahead of time using
    diskutil list
    # Keep in mind that normally, the identifier will look something like /dev/disk1
    asr restore --source /dev/ARCHIVEIMG --erase --target /dev/TARGETVOL --format HFS+