
- new operation modes:
- CC: Constant current
- CR: Constant resistance
- CP: Constant power
- CV: Constant voltage (slow regulation due to hardware limitations)
- Easily usable menu system with many configuration options
- Logging and remote control of all operating parameters via UART.
- Much better accuracy than stock firmware.
- Clean firmware structure for easy extendability.
See https://github.com/herm/ZPB30A1_Firmware for more details regarding the custom firmware.
sudo apt install git
sudo apt install sdcc
sudo apt install libusb-1.0-0-dev pkg-config build-essentials
git clone https://github.com/vdudouyt/stm8flash.git
At least for ubuntu 22.04 you have to patch pgm.h in order to find libusb.h (vdudouyt/stm8flash#100):
#if defined(WIN32) || defined(__CYGWIN__)
 #include <libusb-1.0/libusb.h>
#else
 #include </usr/include/libusb-1.0/libusb.h>
#endif
then build and install the stm-flash-tool
make
sudo make install
for an stlink v2 mini programmer (as used bellow) put
# stm32 discovery boards, with onboard st/linkv2
# ie, STM32L, STM32F4.

SUBSYSTEMS=="usb", ATTRS{idVendor}=="0483", ATTRS{idProduct}=="3748", \
    MODE="660", GROUP="plugdev", TAG+="uaccess", \
    SYMLINK+="stlinkv2_%n"
to /etc/udev/rules.d/ as 49-stlinkv2.rules then do a
sudo udevadm control --reload-rules && sudo udevadm trigger
There are many forks of https://github.com/ArduinoHannover/ZPB30A1_Firmware on github. I found this one to be the most recent and well maintained: https://github.com/herm/ZPB30A1_Firmware.git
For V2.8 PCBs
git clone https://github.com/herm/ZPB30A1_Firmware.git
cd software
make
Hint: The fork https://github.com/neonll/ZPB30A1_Firmware has V2.9 support (but untested because it does not work with my 2.8 board)
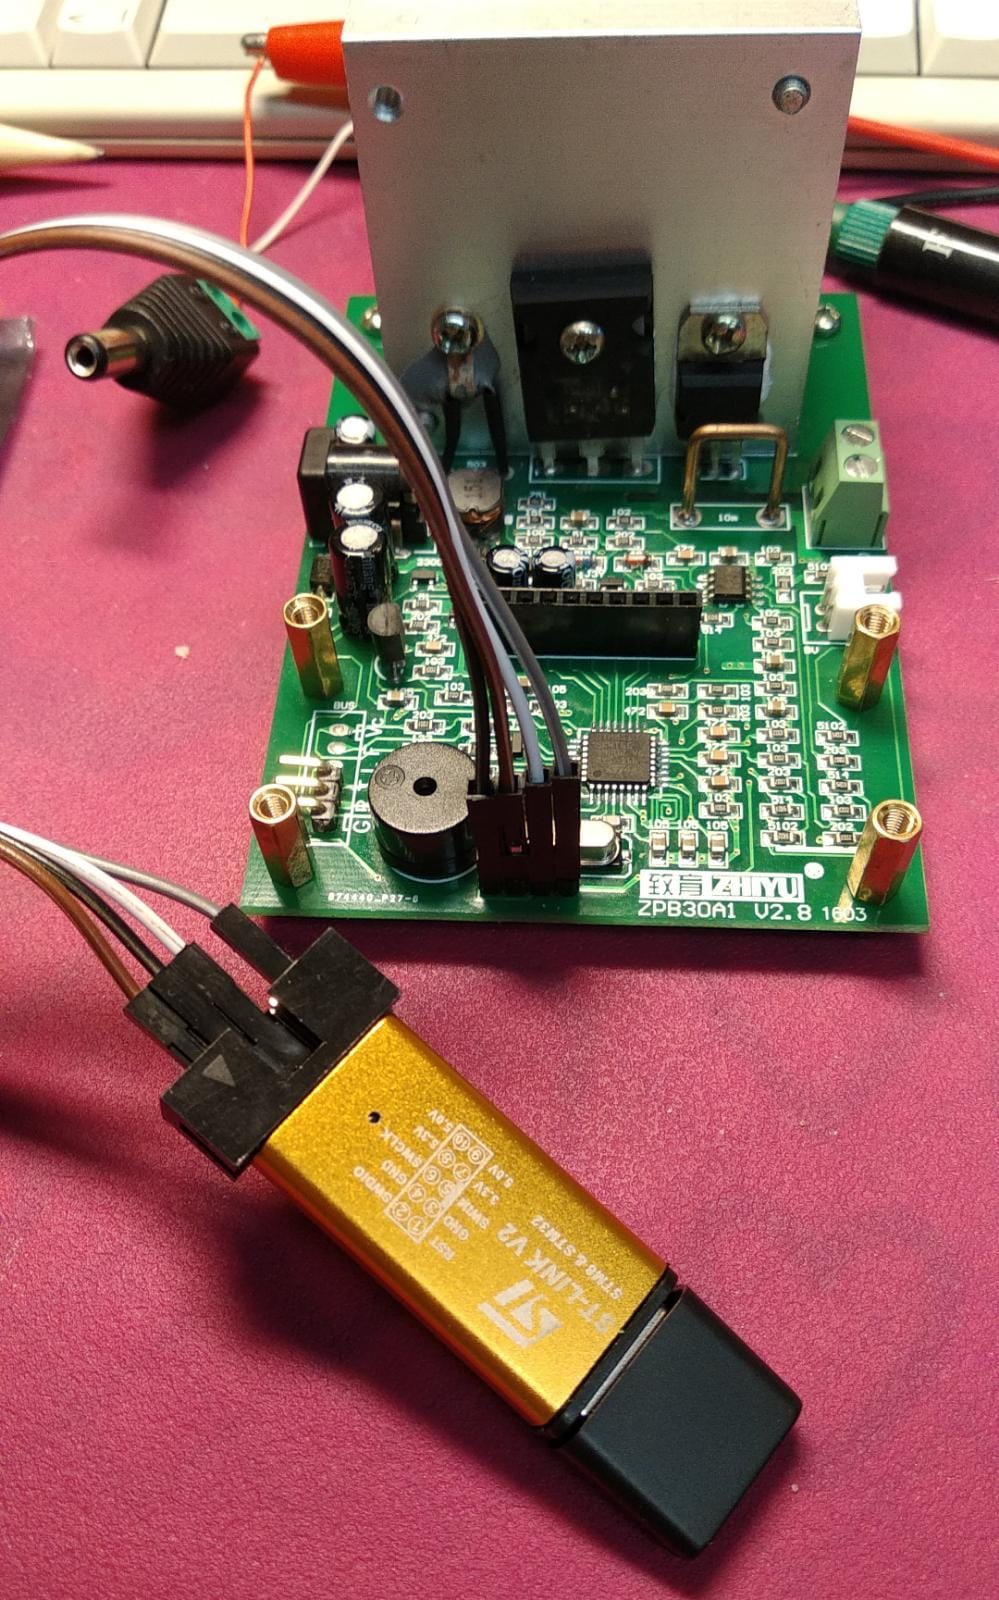
The cheapest alternative to both official ST options is a Chinese ST-LINK/V2 clone. This clone offers the same connectivity when it comes to SWD. It does not expose a full JTAG interface. However, it does feature some additional power pins, both +5V and +3.3V. This debugger has a 10-pin IDC connector. The pinout of this connector can be found below.

(from https://stm32-base.org/guides/connecting-your-debugger.html)
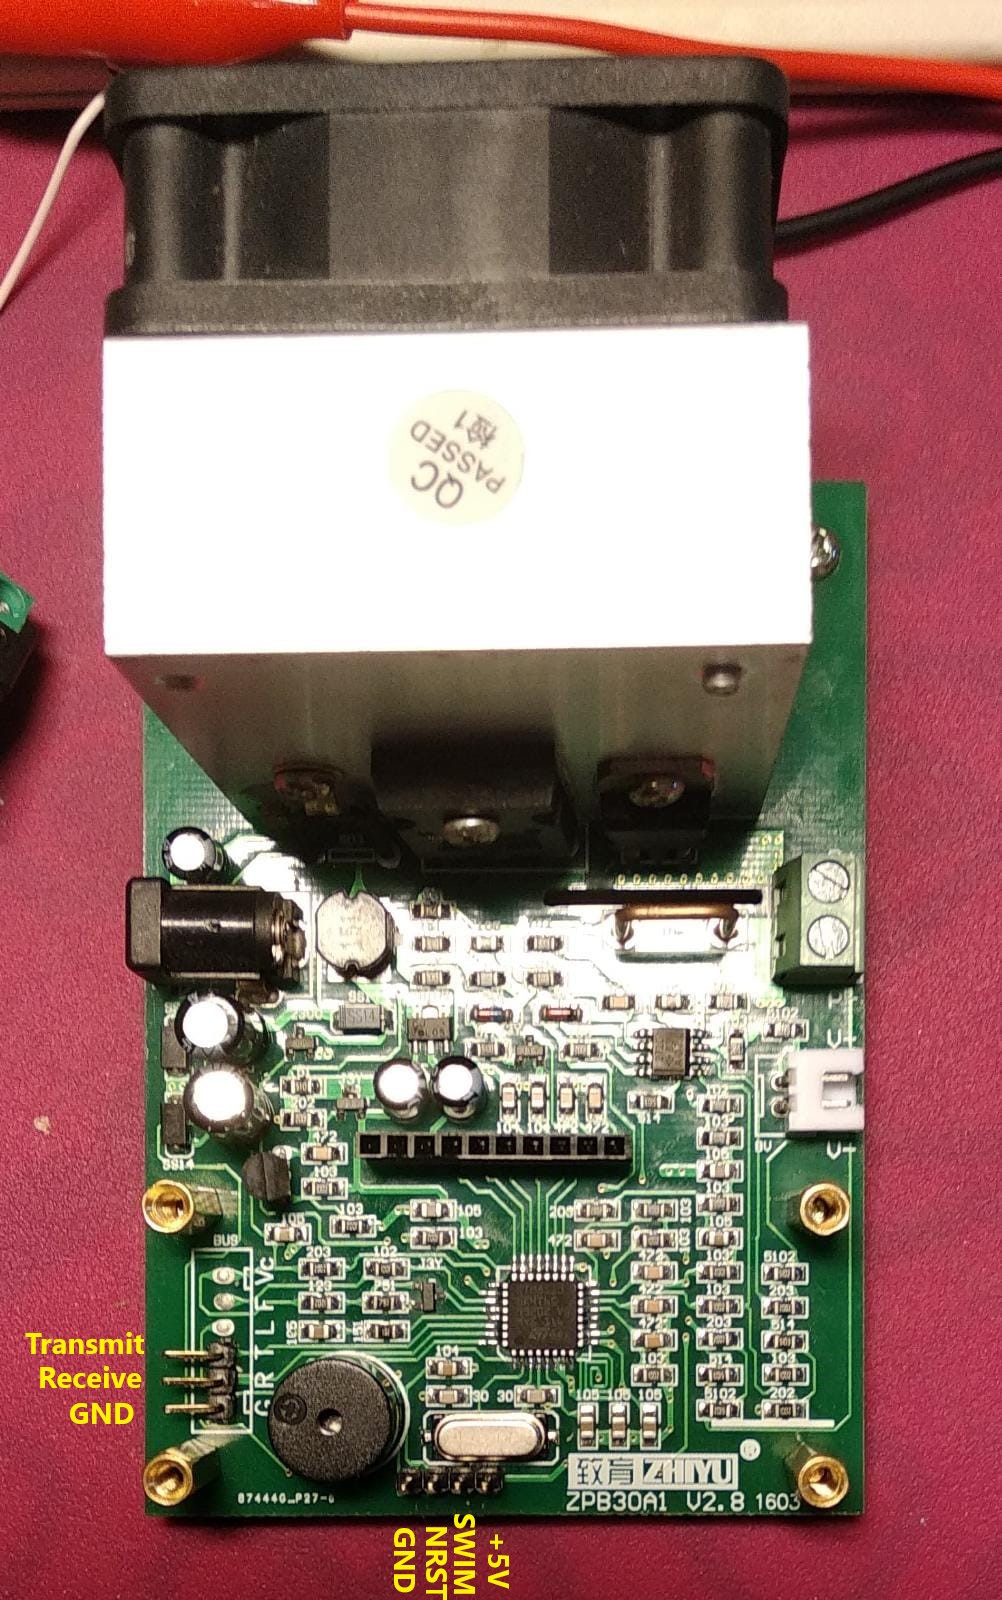
| ST-LINK/V2 Clone Pin | ZPB30A1 pin |
|---|---|
| 1 RST | 2 NRST |
| 2 GND | 1 GND |
| 3 SWIM | 3 SWIM |
| 5 5V | 4 +5V |
- remove 7-Segment daughter board, don't power the board via 12V connector!
cd ZPB30A1_Firmware/software
make flash
make clear_eeprom
- remove the programmer,
- put the 7-segment board back again
- and power up the el. load
-
Either you replace the installed STM8S005
 MCU with an new STM8S105
  Which is the preferred way because you can go back to the original firmware when ever you want.
 -
Or you go with the existing one - but you have to clear it in order to flash your fresh compiled firmware...
ZPB30A1_Firmware/software$ make unlock
Warning: This irreversibly deletes the original firmware.
- see this video from @voltlog for details about the UART
- 5V
- BoudRate: 115k
- connect to any TTL2USB Uart Adapter (switch to 5V) e.g. this one https://www.amazon.de/AZDelivery-UART-TTL-Konverter-Jumperkabel-inklusive/dp/B08T24NML9
- Protocol description https://github.com/herm/ZPB30A1_Firmware/blob/master/serial%20protocol.md
stty -F /dev/ttyUSB0 115200  raw -clocal -echo
cat /dev/ttyUSB0

VAL: D 1 T 191 Vi    44 Vl   101 Vs     0 I     0 mWs          0 mAs          0
VAL: D 1 T 191 Vi    44 Vl   101 Vs     0 I     0 mWs          0 mAs          0
...
more to be come ;-)