Navigation Menu

Skip to content

Instantly share code, notes, and snippets.

@docPhil99
Last active April 13, 2024 15:48
Show Gist options
  • Star 87 You must be signed in to star a gist
  • Fork 12 You must be signed in to fork a gist
  • Save docPhil99/ca4da12c9d6f29b9cea137b617c7b8b1 to your computer and use it in GitHub Desktop.
Save docPhil99/ca4da12c9d6f29b9cea137b617c7b8b1 to your computer and use it in GitHub Desktop.
How to display opencv video in pyqt apps

The code for this tutorial is here

Opencv provides are useful, but limited, method of building a GUI. A much more complete system could be acheived using pyqt. 
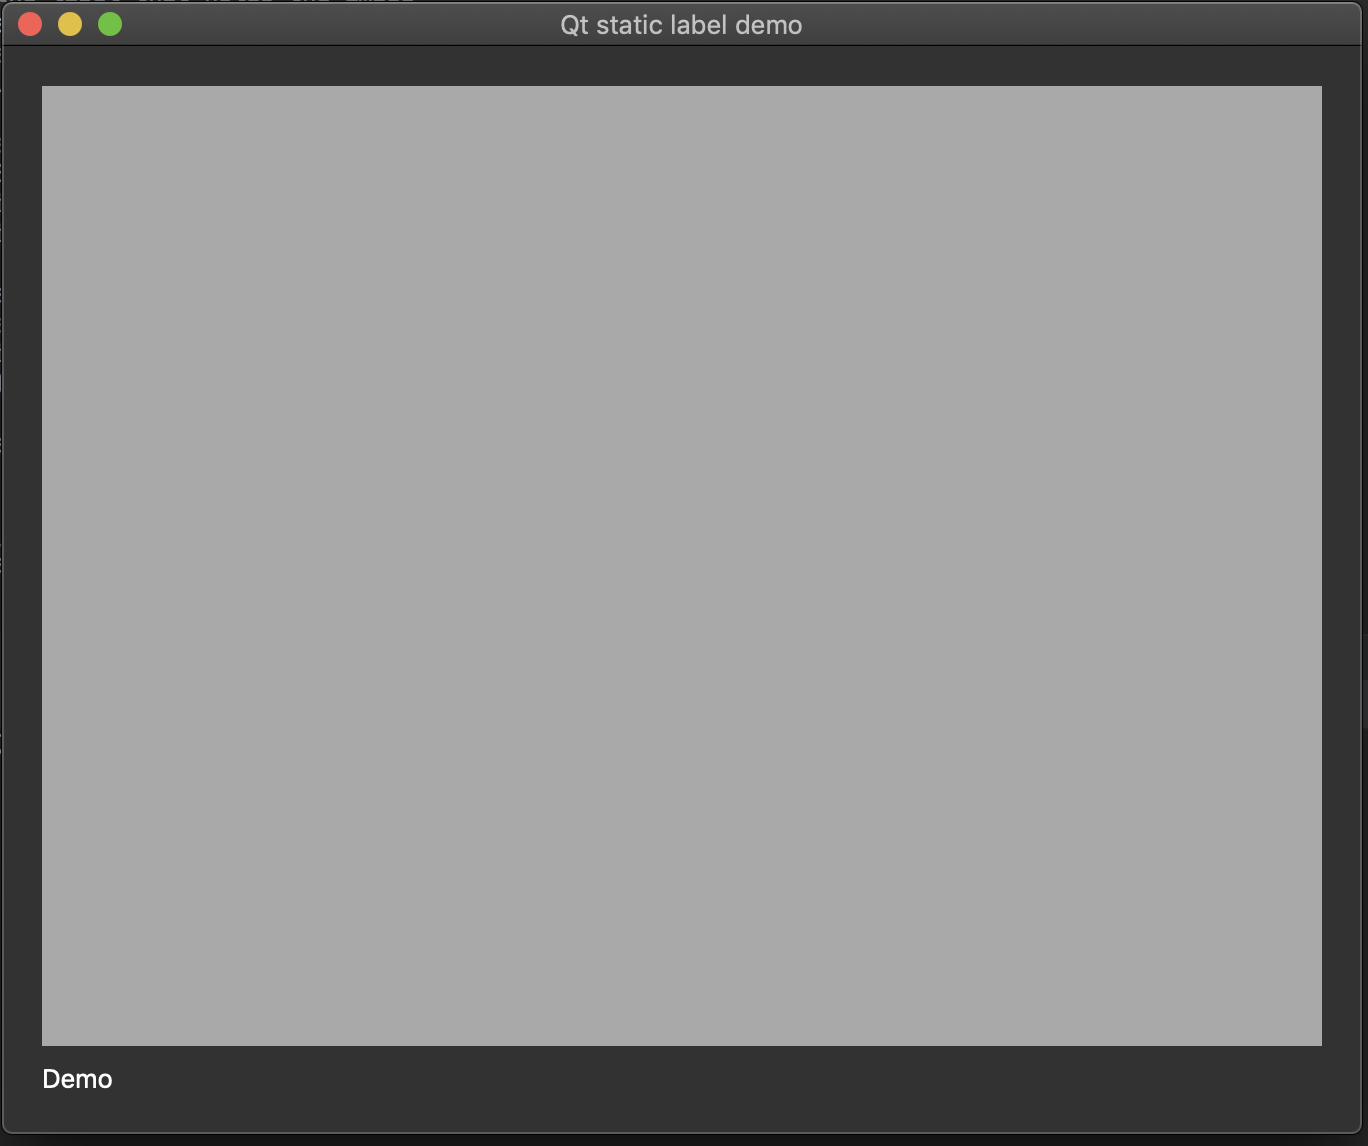
The question is, how do we display images. There are quite a few possible routes but perhaps the easiest is to use QLabel since it has a setPixmap function. Below is some code that creates two labels. It then creates a grey pixmap and displays it one of the labels. code: staticLabel1.py

from PyQt5.QtWidgets import QWidget, QApplication, QLabel, QVBoxLayout
from PyQt5.QtGui import QPixmap, QColor
import sys


class App(QWidget):
    def __init__(self):
        super().__init__()
        self.setWindowTitle("Qt static label demo")
        width = 640
        height = 480
        # create the label that holds the image
        self.image_label = QLabel(self)
        # create a text label
        self.textLabel = QLabel('Demo')

        # create a vertical box layout and add the two labels
        vbox = QVBoxLayout()
        vbox.addWidget(self.image_label)
        vbox.addWidget(self.textLabel)
        # set the vbox layout as the widgets layout
        self.setLayout(vbox)
        # create a grey pixmap
        grey = QPixmap(width, height)
        grey.fill(QColor('darkGray'))
        # set the image image to the grey pixmap
        self.image_label.setPixmap(grey)


if __name__ == "__main__":
    app = QApplication(sys.argv)
    a = App()
    a.show()
    sys.exit(app.exec_())

It should look like this:

static grey

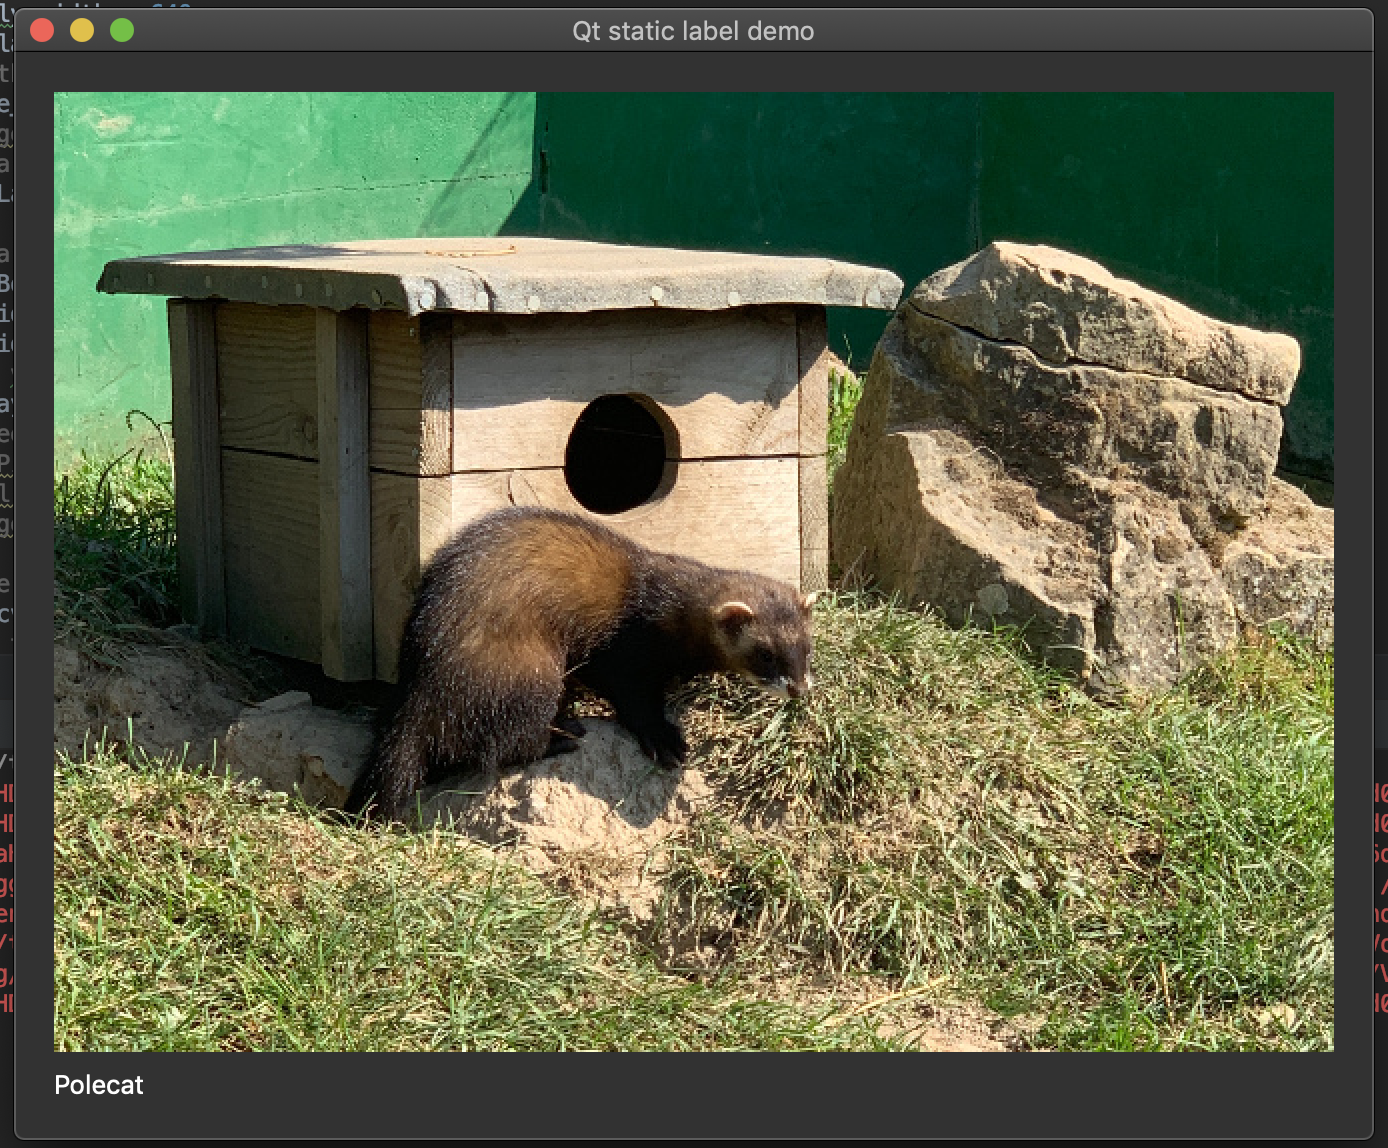
Ok, so how do with display an image. Well we could us Qt to load the image directly, but I want to do this with opencv so it can be integrated into a computer vision app. To do this load the image with cv2.imread and then we convert this to a QPixmap and rescale. Here is an example

 def convert_cv_qt(self, cv_img):
        """Convert from an opencv image to QPixmap"""
        rgb_image = cv2.cvtColor(cv_img, cv2.COLOR_BGR2RGB)
        h, w, ch = rgb_image.shape
        bytes_per_line = ch * w
        convert_to_Qt_format = QtGui.QImage(rgb_image.data, w, h, bytes_per_line, QtGui.QImage.Format_RGB888)
        p = convert_to_Qt_format.scaled(self.disply_width, self.display_height, Qt.KeepAspectRatio)
        return QPixmap.fromImage(p)

This is part of a class that defines self.disply_width and self.display_height. The full code is here (staticLabel2.ppy). The result should look like

static image

Video

So can we now use this to display video? We could open the webcam and update our image every frame. liveLabel1.py attempts to do this - but it does not work. The problem is the video capture loop is blocking the processing. This means the message system that Qt uses to do things like draw the widgets never gets called. We need to fix this by capturing the webcam in a seperate thread. Here's the code:

from PyQt5 import QtGui
from PyQt5.QtWidgets import QWidget, QApplication, QLabel, QVBoxLayout
from PyQt5.QtGui import QPixmap
import sys
import cv2
from PyQt5.QtCore import pyqtSignal, pyqtSlot, Qt, QThread
import numpy as np


class VideoThread(QThread):
    change_pixmap_signal = pyqtSignal(np.ndarray)

    def run(self):
        # capture from web cam
        cap = cv2.VideoCapture(0)
        while True:
            ret, cv_img = cap.read()
            if ret:
                self.change_pixmap_signal.emit(cv_img)


class App(QWidget):
    def __init__(self):
        super().__init__()
        self.setWindowTitle("Qt live label demo")
        self.disply_width = 640
        self.display_height = 480
        # create the label that holds the image
        self.image_label = QLabel(self)
        self.image_label.resize(self.disply_width, self.display_height)
        # create a text label
        self.textLabel = QLabel('Webcam')

        # create a vertical box layout and add the two labels
        vbox = QVBoxLayout()
        vbox.addWidget(self.image_label)
        vbox.addWidget(self.textLabel)
        # set the vbox layout as the widgets layout
        self.setLayout(vbox)

        # create the video capture thread
        self.thread = VideoThread()
        # connect its signal to the update_image slot
        self.thread.change_pixmap_signal.connect(self.update_image)
        # start the thread
        self.thread.start()


    @pyqtSlot(np.ndarray)
    def update_image(self, cv_img):
        """Updates the image_label with a new opencv image"""
        qt_img = self.convert_cv_qt(cv_img)
        self.image_label.setPixmap(qt_img)
    
    def convert_cv_qt(self, cv_img):
        """Convert from an opencv image to QPixmap"""
        rgb_image = cv2.cvtColor(cv_img, cv2.COLOR_BGR2RGB)
        h, w, ch = rgb_image.shape
        bytes_per_line = ch * w
        convert_to_Qt_format = QtGui.QImage(rgb_image.data, w, h, bytes_per_line, QtGui.QImage.Format_RGB888)
        p = convert_to_Qt_format.scaled(self.disply_width, self.display_height, Qt.KeepAspectRatio)
        return QPixmap.fromImage(p)
    
if __name__=="__main__":
    app = QApplication(sys.argv)
    a = App()
    a.show()
    sys.exit(app.exec_())

Note, we send a numpy array using PyQt's signal slot mechanism to ensure thread saftey. This should now display live images for your webcam. There might, however, be a error created when you close the app. This is because the capture device has not been shutdown correctly. (On my mac this does not happen, but on my Linux machine it does). To solve this we need to override App's closeEvent function and single to the thread to shut down.

from PyQt5 import QtGui
from PyQt5.QtWidgets import QWidget, QApplication, QLabel, QVBoxLayout
from PyQt5.QtGui import QPixmap
import sys
import cv2
from PyQt5.QtCore import pyqtSignal, pyqtSlot, Qt, QThread
import numpy as np


class VideoThread(QThread):
    change_pixmap_signal = pyqtSignal(np.ndarray)

    def __init__(self):
        super().__init__()
        self._run_flag = True

    def run(self):
        # capture from web cam
        cap = cv2.VideoCapture(0)
        while self._run_flag:
            ret, cv_img = cap.read()
            if ret:
                self.change_pixmap_signal.emit(cv_img)
        # shut down capture system
        cap.release()

    def stop(self):
        """Sets run flag to False and waits for thread to finish"""
        self._run_flag = False
        self.wait()


class App(QWidget):
    def __init__(self):
        super().__init__()
        self.setWindowTitle("Qt live label demo")
        self.disply_width = 640
        self.display_height = 480
        # create the label that holds the image
        self.image_label = QLabel(self)
        self.image_label.resize(self.disply_width, self.display_height)
        # create a text label
        self.textLabel = QLabel('Webcam')

        # create a vertical box layout and add the two labels
        vbox = QVBoxLayout()
        vbox.addWidget(self.image_label)
        vbox.addWidget(self.textLabel)
        # set the vbox layout as the widgets layout
        self.setLayout(vbox)

        # create the video capture thread
        self.thread = VideoThread()
        # connect its signal to the update_image slot
        self.thread.change_pixmap_signal.connect(self.update_image)
        # start the thread
        self.thread.start()

    def closeEvent(self, event):
        self.thread.stop()
        event.accept()


    @pyqtSlot(np.ndarray)
    def update_image(self, cv_img):
        """Updates the image_label with a new opencv image"""
        qt_img = self.convert_cv_qt(cv_img)
        self.image_label.setPixmap(qt_img)
    
    def convert_cv_qt(self, cv_img):
        """Convert from an opencv image to QPixmap"""
        rgb_image = cv2.cvtColor(cv_img, cv2.COLOR_BGR2RGB)
        h, w, ch = rgb_image.shape
        bytes_per_line = ch * w
        convert_to_Qt_format = QtGui.QImage(rgb_image.data, w, h, bytes_per_line, QtGui.QImage.Format_RGB888)
        p = convert_to_Qt_format.scaled(self.disply_width, self.display_height, Qt.KeepAspectRatio)
        return QPixmap.fromImage(p)
    
if __name__=="__main__":
    app = QApplication(sys.argv)
    a = App()
    a.show()
    sys.exit(app.exec_())
@docPhil99
Copy link
Author

What should we add if we want to add a button to start and stop cam?

That really depends on what you exactly want to do. The simplest case is you can create a button and add it to vbox. You then connect it's clicked signal to some slot that you have to write in VideoThread which will toggle the capturing of the video.

@ArlenisChS
Copy link

Really helpful!! Thanks!!

@ssamouhos
Copy link

Very helpful, thanks so much!

@sndsh7
Copy link

sndsh7 commented Nov 28, 2020

I used this code but following problem occurs please get me out of this

connect() failed between VideoThread.change_pixmap_signal[numpy.ndarray] and update_image()

https://stackoverflow.com/questions/40674940/why-does-pyqtslot-decorator-cause-typeerror-connect-failed

@kenipooja
Copy link

kenipooja commented Dec 5, 2020

hello, i take the video path input from QFileDialog() in the main GUI window. do you know how to feed this path to be captured in the separate Qthread.

https://stackoverflow.com/questions/65162524/i-take-the-video-path-input-from-qfiledialog-in-the-main-gui-window-do-you-kn

@docPhil99
Copy link
Author

docPhil99 commented Dec 6, 2020

Hi @kenipooja

hello, i take the video path input from QFileDialog() in the main GUI window. do you know how to feed this path to be captured in the separate Qthread.

https://stackoverflow.com/questions/65162524/i-take-the-video-path-input-from-qfiledialog-in-the-main-gui-window-do-you-kn

There are a few ways to do this, some better than others.

  1. You could just wait for the QFileDialog() to return the file name before creating the Thread and then start it.
  2. You could add a slot to VideoThread that takes the file name and change VideoThread.run() so that waits until the filename is set.
  3. You could redesign the code so VideoThread no longer is a subclass of QThread, but QObject. Create a thread in the main App and use moveToThread() to move your class to the new thread. Your class will then run with an affinity to the new thread.

The problem with the first two methods overriding run() is only really useful for fire and forget type thread designs (such as reading an entire video file and then quitting). There is no easy way to signal the thread because the event loop isn’t processed inside run() and run() is blocking. The advantage method 3 is that it allows for easy two way comminication between the two threads. You can add as many signals and slots and have proper two communications so you can start, stop, pause, rewind, play an new file etc.

@kenipooja
Copy link

Hi @kenipooja

hello, i take the video path input from QFileDialog() in the main GUI window. do you know how to feed this path to be captured in the separate Qthread.
https://stackoverflow.com/questions/65162524/i-take-the-video-path-input-from-qfiledialog-in-the-main-gui-window-do-you-kn

There are a few ways to do this, some better than others.

  1. You could just wait for the QFileDialog() to return the file name before creating the Thread and then start it.
  2. You could add a slot to VideoThread that takes the file name and change VideoThread.run() so that waits until the filename is set.
  3. You could redesign the code so VideoThread no longer is a subclass of QThread, but QObject. Create a thread in the main App and use moveToThread() to move your class to the new thread. Your class will then run with an affinity to the new thread.

The problem with the first two methods overriding run() is only really useful for fire and forget type thread designs (such as reading an entire video file and then quitting). There is no easy way to signal the thread because the event loop isn’t processed inside run() and run() is blocking. The advantage method 3 is that it allows for easy two way comminication between the two threads. You can add as many signals and slots and have proper two communications so you can start, stop, pause, rewind, play an new file etc.

Hello again,
Thank you very much. I am gonna try this out.

@AntonioDomenech
Copy link

Hi @docPhil99,

I keep trying to add the button but I just manage to start the video. Whenever I close it, it just freezes the video and never starts again

I'm working on Linux with PyQt5 version 12 and latest version to date of opencv

from PyQt5 import QtGui, QtWidgets
from PyQt5.QtWidgets import QWidget, QApplication, QLabel, QVBoxLayout
from PyQt5.QtGui import QPixmap
from PyQt5.QtWidgets import *
import sys
import cv2
from PyQt5.QtCore import pyqtSignal, pyqtSlot, Qt, QThread
import numpy as np


class VideoThread(QThread):
    change_pixmap_signal = pyqtSignal(np.ndarray)

    def __init__(self):
        super().__init__()
        self._run_flag = True

    def run(self):
        # capture from web cam
        cap = cv2.VideoCapture(0)
        while self._run_flag:
            ret, cv_img = cap.read()
            if ret:
                self.change_pixmap_signal.emit(cv_img)
        # shut down capture system
        cap.release()

    def stop(self):
        """Sets run flag to False and waits for thread to finish"""
        self._run_flag = False

        #self.wait()


class App(QWidget):
    def __init__(self):
        super().__init__()
        self.setWindowTitle("Qt live label demo")
        self.disply_width = 640
        self.display_height = 480
        # create the label that holds the image
        self.image_label = QLabel(self)
        self.image_label.resize(self.disply_width, self.display_height)
        # create a text label
        self.textLabel = QLabel('Webcam')

        self.button = QtWidgets.QPushButton(self)
        self.button.move(800, 500)
        self.button.setText('Stop')
        self.button.clicked.connect(self.activate_thread)

        # # create a vertical box layout and add the two labels
        # vbox = QVBoxLayout()
        # vbox.addWidget(self.image_label)
        # vbox.addWidget(self.textLabel)
        # # set the vbox layout as the widgets layout
        # self.setLayout(vbox)

    def closeEvent(self):
        self.thread.stop()
        self.__init__()
        self.button.clicked.connect(self.activate_thread)
        #event.accept()

    def activate_thread(self):
        # create the video capture thread
        self.thread = VideoThread()
        # connect its signal to the update_image slot
        self.thread.change_pixmap_signal.connect(self.update_image)
        # start the thread
        self.thread.start()

        self.button.clicked.connect(self.thread.stop)

    @pyqtSlot(np.ndarray)
    def update_image(self, cv_img):
        """Updates the image_label with a new opencv image"""
        qt_img = self.convert_cv_qt(cv_img)
        self.image_label.setPixmap(qt_img)

    def convert_cv_qt(self, cv_img):
        """Convert from an opencv image to QPixmap"""
        rgb_image = cv2.cvtColor(cv_img, cv2.COLOR_BGR2RGB)
        h, w, ch = rgb_image.shape
        bytes_per_line = ch * w
        convert_to_Qt_format = QtGui.QImage(rgb_image.data, w, h, bytes_per_line, QtGui.QImage.Format_RGB888)
        p = convert_to_Qt_format.scaled(self.disply_width, self.display_height, Qt.KeepAspectRatio)
        return QPixmap.fromImage(p)


if __name__ == "__main__":
    app = QApplication(sys.argv)
    a = App()
    a.show()
    sys.exit(app.exec_())

@docPhil99
Copy link
Author

@AntonioDomenech I'm not sure what you what you are trying to do but the closeEvent function is called by QT when the the window is closed (by the user normally). This is your shutdown code where you clean up resources like threads. You don't normally call the class constructor in there or start connecting signals and slots.

@AntonioDomenech
Copy link

I finally managed to do it like this:

class VideoThread(QThread):
    change_pixmap_signal = pyqtSignal(np.ndarray)

    def __init__(self):
        super().__init__()
        self._run_flag = True

    def run(self):
        # capture from web cam
        self._run_flag = True
        self.cap = cv2.VideoCapture(0)
        while self._run_flag:
            ret, cv_img = self.cap.read()
            if ret:
                self.change_pixmap_signal.emit(cv_img)
        # shut down capture system
        self.cap.release()

    def stop(self):
        """Sets run flag to False and waits for thread to finish"""
        self._run_flag = False


class MyWindow(QMainWindow):
    def __init__(self):
        super(MyWindow, self).__init__()
        self.available_cameras = QCameraInfo.availableCameras()  # Getting available cameras

        cent = QDesktopWidget().availableGeometry().center()  # Finds the center of the screen
        self.setStyleSheet("background-color: white;")
        self.resize(1400, 800)
        self.frameGeometry().moveCenter(cent)
        self.setWindowTitle('S L A I T')
        self.initWindow()

########################################################################################################################
#                                                   Windows                                                            #
########################################################################################################################
    def initWindow(self):
        # create the video capture thread
        self.thread = VideoThread()

        # Label with the name of the co-founders
        self.label = QtWidgets.QLabel(self)  # Create label
        self.label.setText('By Evgeny Fomin and Antonio Domènech')  # Add text to label
        self.label.move(30, 550)  # Allocate label in window
        self.label.resize(300, 20)  # Set size for the label
        self.label.setAlignment(Qt.AlignCenter)  # Align text in the label

        # Button to start video
        self.ss_video = QtWidgets.QPushButton(self)
        self.ss_video.setText('Start video')
        self.ss_video.move(769, 100)
        self.ss_video.resize(300, 100)
        self.ss_video.clicked.connect(self.ClickStartVideo)

        # Status bar
        self.status = QStatusBar()
        self.status.setStyleSheet("background : lightblue;")  # Setting style sheet to the status bar
        self.setStatusBar(self.status)  # Adding status bar to the main window
        self.status.showMessage('Ready to start')

        self.image_label = QLabel(self)
        self.disply_width = 669
        self.display_height = 501
        self.image_label.resize(self.disply_width, self.display_height)
        self.image_label.setStyleSheet("background : black;")
        self.image_label.move(0, 0)

########################################################################################################################
#                                                   Buttons                                                            #
########################################################################################################################
    # Activates when Start/Stop video button is clicked to Start (ss_video
    def ClickStartVideo(self):
        # Change label color to light blue
        self.ss_video.clicked.disconnect(self.ClickStartVideo)
        self.status.showMessage('Video Running...')
        # Change button to stop
        self.ss_video.setText('Stop video')
        self.thread = VideoThread()
        self.thread.change_pixmap_signal.connect(self.update_image)

        # start the thread
        self.thread.start()
        self.ss_video.clicked.connect(self.thread.stop)  # Stop the video if button clicked
        self.ss_video.clicked.connect(self.ClickStopVideo)

    # Activates when Start/Stop video button is clicked to Stop (ss_video)
    def ClickStopVideo(self):
        self.thread.change_pixmap_signal.disconnect()
        self.ss_video.setText('Start video')
        self.status.showMessage('Ready to start')
        self.ss_video.clicked.disconnect(self.ClickStopVideo)
        self.ss_video.clicked.disconnect(self.thread.stop)
        self.ss_video.clicked.connect(self.ClickStartVideo)

########################################################################################################################
#                                                   Actions                                                            #
########################################################################################################################

    def update_image(self, cv_img):
        """Updates the image_label with a new opencv image"""
        qt_img = self.convert_cv_qt(cv_img)
        self.image_label.setPixmap(qt_img)

    def convert_cv_qt(self, cv_img):
        """Convert from an opencv image to QPixmap"""
        rgb_image = cv2.cvtColor(cv_img, cv2.COLOR_BGR2RGB)
        h, w, ch = rgb_image.shape
        bytes_per_line = ch * w
        convert_to_Qt_format = QtGui.QImage(rgb_image.data, w, h, bytes_per_line, QtGui.QImage.Format_RGB888)
        p = convert_to_Qt_format.scaled(self.disply_width, self.display_height, Qt.KeepAspectRatio)
        #p = convert_to_Qt_format.scaled(801, 801, Qt.KeepAspectRatio)
        return QPixmap.fromImage(p)


if __name__ == '__main__':
    app = QApplication(sys.argv)
    win = MyWindow()
    win.show()
    sys.exit(app.exec())

@BharSat
Copy link

BharSat commented Feb 4, 2021

hello when I use np.zeros((640, 480, 3)) to create he image then I get strange images like:
image

@docPhil99
Copy link
Author

hello when I use np.zeros((640, 480, 3)) to create he image then I get strange images like:

@BharSat the code doesn't check the dtype of the numpy array, it assumes it's 8 bit unsigned but numpy defaults to floatI think this is you problem, try adding dtype=np.unit8 to your np.zeros

@vinuraj-ign
Copy link

I am getting below error while running the code. Any idea why ?

`qt.qpa.plugin: Could not load the Qt platform plugin "xcb" in "/home/ign/PycharmProjects/sample1/venv/lib/python3.6/site-packages/cv2/qt/plugins" even though it was found.
This application failed to start because no Qt platform plugin could be initialized. Reinstalling the application may fix this problem.

Available platform plugins are: xcb, eglfs, linuxfb, minimal, minimalegl, offscreen, vnc, wayland-egl, wayland, wayland-xcomposite-egl, wayland-xcomposite-glx, webgl.

Process finished with exit code 134 (interrupted by signal 6: SIGABRT)`

@docPhil99
Copy link
Author

docPhil99 commented Apr 16, 2021

@vinuraj-ign Try this https://forum.qt.io/post/599583

I am getting below error while running the code. Any idea why ?

`qt.qpa.plugin: Could not load the Qt platform plugin "xcb" in "/home/ign/PycharmProjects/sample1/venv/lib/python3.6/site-packages/cv2/qt/plugins" even though it was found.
This application failed to start because no Qt platform plugin could be initialized. Reinstalling the application may fix this problem.

Available platform plugins are: xcb, eglfs, linuxfb, minimal, minimalegl, offscreen, vnc, wayland-egl, wayland, wayland-xcomposite-egl, wayland-xcomposite-glx, webgl.

Process finished with exit code 134 (interrupted by signal 6: SIGABRT)`

@arnoutdekimo
Copy link

arnoutdekimo commented Apr 19, 2021

Thanks for the snippet.
By the way, I ran into the issue that the camera (producer thread) was producing faster than the QT thread could draw. It would emit too many signals, which got queued, and eventually froze procsssing. I ended up adding a simple sempahore, which unblocked the producer thread once the consumer thread (QT drawing) was able to catch up.

@docPhil99
Copy link
Author

Thanks @arnoutdekimo I didn't think of that and I'll add to the code when I get chance.

@vinuraj-ign
Copy link

How can I save these images to a given path. That is, I want to save all the images that is being captured in a given time frame or I can add start stop button to it. Any help would be deeply appreciated as I am very new to this.

@Khufos
Copy link

Khufos commented Oct 30, 2021

Ei guys , do you know how to display camera in pyqt6?

@borisrunakov
Copy link

Thank you very much for this!
Can you please explain why you have put the convert_cv_qt method into the main thread? Would it make a difference if we make it a method of VideoThread?

@docPhil99
Copy link
Author

@borisrunakov it could go in either thread.

@borisrunakov
Copy link

@borisrunakov it could go in either thread.

Thanks!

@diablo02000
Copy link

Great example, it's really helpfull.

Thanks !!

@sndsh7
Copy link

sndsh7 commented Mar 26, 2022 via email

Copy link

ghost commented Nov 7, 2022

for those of you trying to do this in pyqt6:

from PyQt6 import QtGui
from PyQt6.QtWidgets import QWidget, QApplication, QLabel, QVBoxLayout
from PyQt6.QtGui import QPixmap
import sys
import cv2
from PyQt6.QtCore import pyqtSignal, pyqtSlot, Qt, QThread
import numpy as np


class VideoThread(QThread):
    change_pixmap_signal = pyqtSignal(np.ndarray)

    def __init__(self):
        super().__init__()
        self._run_flag = True

    def run(self):
        # capture from web cam
        cap = cv2.VideoCapture(0)
        while self._run_flag:
            ret, cv_img = cap.read()
            if ret:
                self.change_pixmap_signal.emit(cv_img)
        # shut down capture system
        cap.release()

    def stop(self):
        """Sets run flag to False and waits for thread to finish"""
        self._run_flag = False
        self.wait()


class App(QWidget):
    def __init__(self):
        super().__init__()
        self.setWindowTitle("Qt live label demo")
        self.disply_width = 640
        self.display_height = 480
        # create the label that holds the image
        self.image_label = QLabel(self)
        self.image_label.resize(self.disply_width, self.display_height)
        # create a text label
        self.textLabel = QLabel('Webcam')

        # create a vertical box layout and add the two labels
        vbox = QVBoxLayout()
        vbox.addWidget(self.image_label)
        vbox.addWidget(self.textLabel)
        # set the vbox layout as the widgets layout
        self.setLayout(vbox)

        # create the video capture thread
        self.thread = VideoThread()
        # connect its signal to the update_image slot
        self.thread.change_pixmap_signal.connect(self.update_image)
        # start the thread
        self.thread.start()

    def closeEvent(self, event):
        self.thread.stop()
        event.accept()


    @pyqtSlot(np.ndarray)
    def update_image(self, cv_img):
        """Updates the image_label with a new opencv image"""
        qt_img = self.convert_cv_qt(cv_img)
        self.image_label.setPixmap(qt_img)
    
    def convert_cv_qt(self, cv_img):
        """Convert from an opencv image to QPixmap"""
        rgb_image = cv2.cvtColor(cv_img, cv2.COLOR_BGR2RGB)
        h, w, ch = rgb_image.shape
        bytes_per_line = ch * w
        convert_to_Qt_format = QtGui.QImage(rgb_image.data, w, h, bytes_per_line, QtGui.QImage.Format.Format_RGB888)
        p = convert_to_Qt_format.scaled(self.disply_width, self.display_height, Qt.AspectRatioMode.KeepAspectRatio)
        return QPixmap.fromImage(p)
    
if __name__=="__main__":
    app = QApplication(sys.argv)
    a = App()
    a.show()
    sys.exit(app.exec())

@Ashok12698
Copy link

Ashok12698 commented Jan 13, 2023

@docPhil99 thanks for sharing this. its really helpful and understandable.
@AntonioDomenech Hi, thanks for your post. I am testing it with adding buttons in it. Could you please share the 'form.ui' file so that I can understand the frame window/button structure you designed?
I want to add a new button which should support the functionality in this manner:

  • new button add
  • On-click new button; defined the On-click new button in 'Button' section.
  • Inside this call a new_button_function; where I should define this 'new_button_function()'?

Please help me to understand where should I define this new button function which should work in this manner:

  • reading frame from videoCapture
  • do some operation on frames
  • sending back frames to video window
    Thanks.

@yusufpraditya
Copy link

@arnoutdekimo can you share the code?

@gusarg81
Copy link

gusarg81 commented Sep 8, 2023

Hi, how can achieve this by capturing RTSP feed instead of a webcam? Thanks.

EDIT 1: never mind, just using RTSP url in VideoCapture works. I wonder how to Stop/Play the video.
EDIT 2: again, never mind. I saw the code that @AntonioDomenech wrote.

@gusarg81
Copy link

gusarg81 commented Sep 8, 2023

Is there any less CPU consuming method to achieve this? (again, by capturing RTSP feed).

Thanks.

@gusarg81
Copy link

gusarg81 commented Sep 8, 2023

for those of you trying to do this in pyqt6:

from PyQt6 import QtGui
from PyQt6.QtWidgets import QWidget, QApplication, QLabel, QVBoxLayout
from PyQt6.QtGui import QPixmap
import sys
import cv2
from PyQt6.QtCore import pyqtSignal, pyqtSlot, Qt, QThread
import numpy as np


class VideoThread(QThread):
    change_pixmap_signal = pyqtSignal(np.ndarray)

    def __init__(self):
        super().__init__()
        self._run_flag = True

    def run(self):
        # capture from web cam
        cap = cv2.VideoCapture(0)
        while self._run_flag:
            ret, cv_img = cap.read()
            if ret:
                self.change_pixmap_signal.emit(cv_img)
        # shut down capture system
        cap.release()

    def stop(self):
        """Sets run flag to False and waits for thread to finish"""
        self._run_flag = False
        self.wait()


class App(QWidget):
    def __init__(self):
        super().__init__()
        self.setWindowTitle("Qt live label demo")
        self.disply_width = 640
        self.display_height = 480
        # create the label that holds the image
        self.image_label = QLabel(self)
        self.image_label.resize(self.disply_width, self.display_height)
        # create a text label
        self.textLabel = QLabel('Webcam')

        # create a vertical box layout and add the two labels
        vbox = QVBoxLayout()
        vbox.addWidget(self.image_label)
        vbox.addWidget(self.textLabel)
        # set the vbox layout as the widgets layout
        self.setLayout(vbox)

        # create the video capture thread
        self.thread = VideoThread()
        # connect its signal to the update_image slot
        self.thread.change_pixmap_signal.connect(self.update_image)
        # start the thread
        self.thread.start()

    def closeEvent(self, event):
        self.thread.stop()
        event.accept()


    @pyqtSlot(np.ndarray)
    def update_image(self, cv_img):
        """Updates the image_label with a new opencv image"""
        qt_img = self.convert_cv_qt(cv_img)
        self.image_label.setPixmap(qt_img)
    
    def convert_cv_qt(self, cv_img):
        """Convert from an opencv image to QPixmap"""
        rgb_image = cv2.cvtColor(cv_img, cv2.COLOR_BGR2RGB)
        h, w, ch = rgb_image.shape
        bytes_per_line = ch * w
        convert_to_Qt_format = QtGui.QImage(rgb_image.data, w, h, bytes_per_line, QtGui.QImage.Format.Format_RGB888)
        p = convert_to_Qt_format.scaled(self.disply_width, self.display_height, Qt.AspectRatioMode.KeepAspectRatio)
        return QPixmap.fromImage(p)
    
if __name__=="__main__":
    app = QApplication(sys.argv)
    a = App()
    a.show()
    sys.exit(app.exec())

And in case of PySide6, pyqtSignal and pyqtSlot must be replaced by Signal and Slot (just like Qt).

@IceZoey
Copy link

IceZoey commented Nov 14, 2023

@AntonioDomenech Thank you ~ , great helpful !

Sign up for free to join this conversation on GitHub. Already have an account? Sign in to comment