Skip to content

Instantly share code, notes, and snippets.

@ericpardee
Forked from tomdaley92/README.md
Created May 28, 2022 22:48
Show Gist options
  • Save ericpardee/a28f97647fce367c15333fff4eb40e6b to your computer and use it in GitHub Desktop.
Save ericpardee/a28f97647fce367c15333fff4eb40e6b to your computer and use it in GitHub Desktop.
Proxmox - SPICE Client setup for MacOS

Proxmox - SPICE client setup for MacOS

  1. Install a working (and compiled) version of virt-viewer. You may view the homebrew package's upstream source on GitHub.

    brew tap jeffreywildman/homebrew-virt-manager
    brew install virt-viewer
  2. Once that's installed should be able make a call remote-viewer with a pve-spice.vv file downloaded from proxmox web interface

    remote-viewer pve-spice.vv

    Check out this useful script for debugging. There are also several other cli tools like this one on GitHub that can be used to test the same sort of thing.

Improving Quality of Life

We want remote-viewer to automatically start and open the session when we double click the VM entry in proxmox. To do that we need to first create a small helper application.

  1. Launch Automator and select Application from the dropdown list, when prompted.
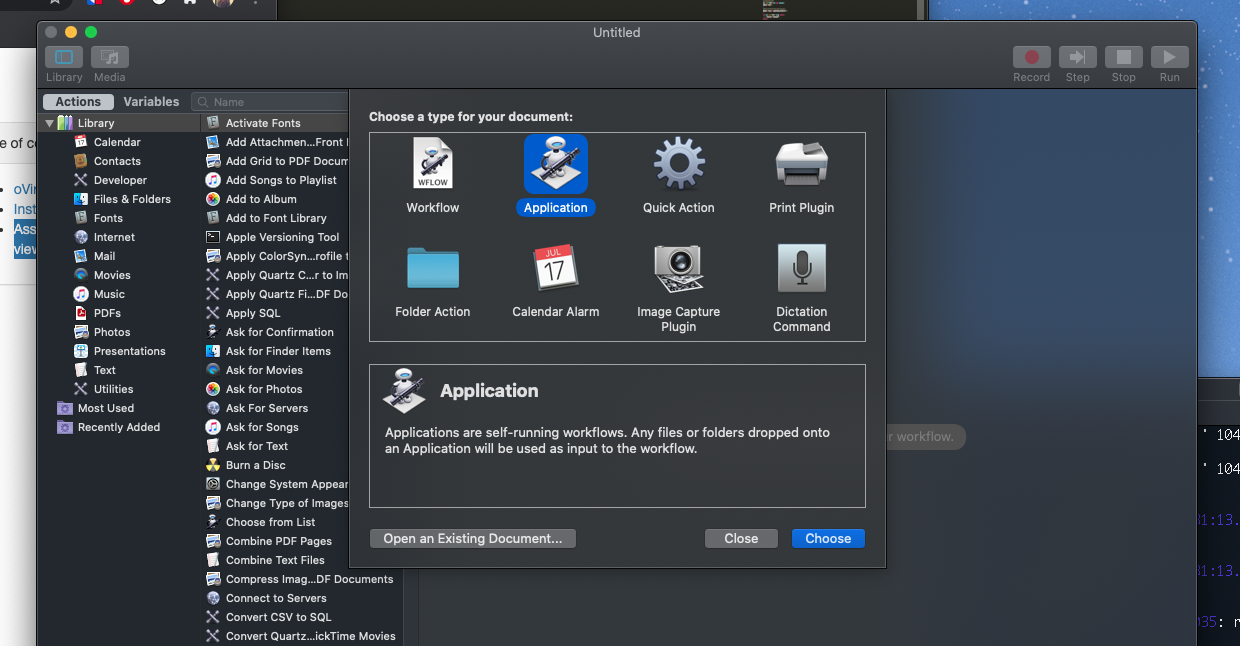
    Screen Shot 2021-07-15 at 1 39 31 PM

  2. Search for shell and drag to the right. The contents:

    /usr/local/bin/remote-viewer "$@"

    Make sure to select as arguments for passing the input. Save as ~/Applications/pve-spice-launcher.app.

    Screen Shot 2021-07-15 at 2 13 01 PM

  3. Locate a pve-spice.vv file or any file with .vv extension, and right click, and go to Get Info -> Open With -> Change All, look for the .app file you just made.

    Screen Shot 2022-02-16 at 11 26 22 AM

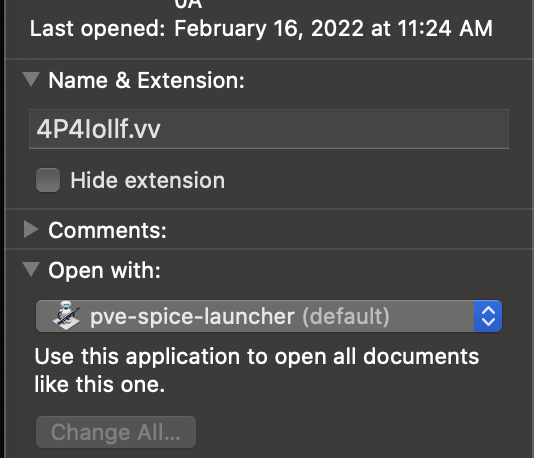
  4. In Chrome, click on the small arrow on the list of downloads at the bottom, and select "Always open files of this type"

    Screen Shot 2021-07-15 at 2 02 46 PM

  5. If everything is set up correctly you should be able to double-click on the VM in the left pane of Proxmox and remote-viewer should start up and take care of the rest.

    Note: the pve-spice.vv files will be automatically deleted by remote-viewer

    Screen Shot 2021-07-15 at 2 05 57 PM

    Screen Shot 2021-07-15 at 4 42 21 PM

Enjoy!

#!/usr/bin/env bash
set -e
# needs pve-manager >= 3.1-44
usage() {
echo "Usage: $0 [-u <string>] [-p <string>] vmid [node [proxy]]"
echo
echo "-u username. Default root@pam"
echo "-p password. Default ''"
echo
echo "vmid: id for VM"
echo "node: Proxmox cluster node name"
echo "proxy: DNS or IP (use <node> as default)"
exit 1
}
PASSWORD=""
USERNAME=""
while getopts ":u:p:" o; do
case "${o}" in
u)
USERNAME="${OPTARG}"
;;
p)
PASSWORD="${OPTARG}"
;;
*)
usage
;;
esac
done
shift $((OPTIND-1))
if [[ -z "$PASSWORD" ]]; then
PASSWORD=""
fi
if [[ -z "$USERNAME" ]]; then
USERNAME='root@pam'
fi
DEFAULTHOST="$(hostname -f)"
# select VM
[[ -z "$1" ]] && usage
VMID="$1"
#[[ -z "$2" ]] && usage
NODE="${2:-$DEFAULTHOST}"
if [[ -z "$3" ]]; then
PROXY="$NODE"
else
PROXY="$3"
fi
NODE="${NODE%%\.*}"
DATA="$(curl -f -s -S -k --data-urlencode "username=$USERNAME" --data-urlencode "password=$PASSWORD" "https://$PROXY:8006/api2/json/access/ticket")"
echo "AUTH OK"
TICKET="${DATA//\"/}"
TICKET="${TICKET##*ticket:}"
TICKET="${TICKET%%,*}"
TICKET="${TICKET%%\}*}"
CSRF="${DATA//\"/}"
CSRF="${CSRF##*CSRFPreventionToken:}"
CSRF="${CSRF%%,*}"
CSRF="${CSRF%%\}*}"
curl -f -s -S -k -b "PVEAuthCookie=$TICKET" -H "CSRFPreventionToken: $CSRF" "https://$PROXY:8006/api2/spiceconfig/nodes/$NODE/qemu/$VMID/spiceproxy" -d "proxy=$PROXY" > $NODE-$VMID.vv
exec remote-viewer $NODE-$VMID.vv
Sign up for free to join this conversation on GitHub. Already have an account? Sign in to comment