We will learn how to install from scratch, ownCloud, and OnlyOffice using Let's Encrypt certificates on this how-to into an Ubuntu 20 box.
- One Ubuntu 20 box.
- Linux knowledge
- One pubic address or public IP address
- Public opened ports:
- 443: for ownCloud
- 13281: for OnlyOffice
Replace the address owncloud.mycompany.com wit your ownCloud public address
NOTE: We assume that you will follow these steps in a blank ubuntu box
Before beginning is a good idea to open the firewall ports into the Ubuntu box to avoid connection issues related to closed ports.
sudo ufw allow https comment 'HTTPS ownCloud Service'
sudo ufw allow 13281 comment 'HTTPS port for OnlyOffice Service'
Additionally, you can open the ssh port for remote configuration.
sudo ufw allow ssh comment 'SSH Service'If the Ubuntu box is behind a corporate firewall as PFSense, CiscoASA, PulseSecure, etc., consider creating the rules in your appliance for the 2 services, 443 and 13281 / TCP. Because there are many firewall appliances products and services, the rules configuration is out of this document's scope.
So, let's get started!
Update pip and phyton Ansible using the following commands.
apt install python3.8-venv python3-pip -y
python3 -m venv ~/ansible && source ~/ansible/bin/activate && pip3 install ansible
pip install --upgrade pipFirst of all, we proceed to Install ownCloud, and the easiest way is via Ansible.
Install Ansible with the command.
apt-get update && apt-get install ansible git -yClone the playground repository
git clone https://github.com/owncloud-ansible/playground.gitAnd let's install the requirementes.
cd playground
ansible-galaxy install -r roles/requirements.yml
Edit the file inventories/ubuntu-minimal/hosts using your favorite editor and add the following
[all:vars]
ansible_connection=local
ansible_user=root
Edit the file inventories/ubuntu-minimal/group_vars/owncloud.yml and adjust the following:
owncloud_version: "10.8.0"
owncloud_fqdn: owncloud.mycompany.com
owncloud_deploy_path: /var/www/owncloud
# if you want, you can setup a especial php version with the parameter php_default_version: "7.4"Into the same file, inventories/ubuntu-minimal/group_vars/owncloud.yml type your desired credentials for the services.
Replace the string <secure_password> for your own secure password.
# Adjust these variable to the same values defined in
# group_vars/database.yml
owncloud_db_name: owncloud    # <can stay the same>
owncloud_db_user: owncloud    # <can stay the same>
owncloud_db_password: <secure_owncloud_db_password>

# You can also adjust the default ownCloud user.
# For security reasons you should set a strong password!
owncloud_admin_username: admin
owncloud_admin_password: <secure_owncloud_admin_password>
Edit the file inventories/ubuntu-minimal/group_vars/database.yml and adjust:
mariadb_root_password: <secure_mariadb_root_password>
mariadb_users:
password: <secure_owncloud_db_password> # Use the same from owncloud.yml file, variable owncloud_db_passwordAnd then run the following command
ansible-playbook playbooks/setup.yml -i inventories/ubuntu-minimal/hostsJust open the site https://owncloud.mycompany.com; if everything is ok, you will see the ownCloud login page. Access into the ownCloud using the credentials that you have established before.
I have based this guide using the instruction from ubuntufocal-apache
You'll need to install snapd and make sure you follow any instructions to enable classic snap support.
apt install snapd -yRun this command on the command line on the machine to install Certbot.
sudo snap install --classic certbot && sudo ln -s /snap/bin/certbot /usr/bin/certbotRun this command to get a certificate and have Certbot edit your Apache configuration automatically to serve it, turning on HTTPS access in a single step.
sudo certbot --apacheNote: This will work in a test installation, but if you need to automatically renew the certificates, you will have to do this step every time you are renewing the certificate (at least every 3 months).
Restart the apache web server.
service apache2 restartTo confirm that your site is set up properly, visit https://owncloud.mycompany.com/ in your browser and look for the lock icon in the URL bar.
TODO: Add Image
One more time, the easiest way to install OnlyOffice is via Docker Image. For more information about options and parameters, read the official documentation. (Install OnlyOffice with docker)[https://helpcenter.onlyoffice.com/installation/docs-community-install-docker.aspx]
- CPU dual core 2 GHz or better
- RAM 2 GB or more
- HDD at least 40 GB of free space
- Additional requirements at least 4 GB of swap
- OS amd64 Linux distribution with kernel version 3.10 or later
Additional requirements
Docker: version 1.10 or later (this guide does not include instructions about installing docker. Here is an excellent how-to document where you will be able to have a successful docker installation) Install Docker Engine on Ubuntu
You need to install the onlyoffice.key, onlyoffice.crt at the onlyoffice server.
The default path that the onlyoffice application is configured to look for the SSL certificates is at /var/www/onlyoffice/Data/certs, this can however be changed using the SSL_KEY_PATH and SSL_CERTIFICATE_PATH and configuration options.
The /var/www/onlyoffice/Data/ path is the path of the data store, which means that you have to create a folder named certs inside /app/onlyoffice/DocumentServer/data/ and copy the files into it and as a measure of security you will update the permission on the onlyoffice.key file to only be readable by the owner.
mkdir -p /app/onlyoffice/DocumentServer/data/certs
cp /etc/letsencrypt/archive/owncloud.mycompany.com/privkey1.pem /app/onlyoffice/DocumentServer/data/certs/onlyoffice.key
cp /etc/letsencrypt/archive/owncloud.mycompany.com/fullchain1.pem /app/onlyoffice/DocumentServer/data/certs/onlyoffice.crt
chmod 400 /app/onlyoffice/DocumentServer/data/certs/onlyoffice.keyDue to the ownCloud HTTPS service runs on port 443, we will change the default listening port from 443 to 13281 with the parameter -p 13281:443
sudo docker run -i -t -d -p 13281:443 --restart=always \
-v /app/onlyoffice/DocumentServer/data:/var/www/onlyoffice/Data onlyoffice/documentserverOpen your favorite browser and then type https://owncloud.mycompany:13281
- Login into the ownCloud instance as ownCloud Administrator
- Click on the up corner menu Settings->Market
- On the left panel, navigate until Categories-->Tool
- Search the ONLYOFFICE add on and cick on the Button Install
- Click on the Right upper corner menu, Admin-->Settings.
- On the left panel, click on ... Additional.
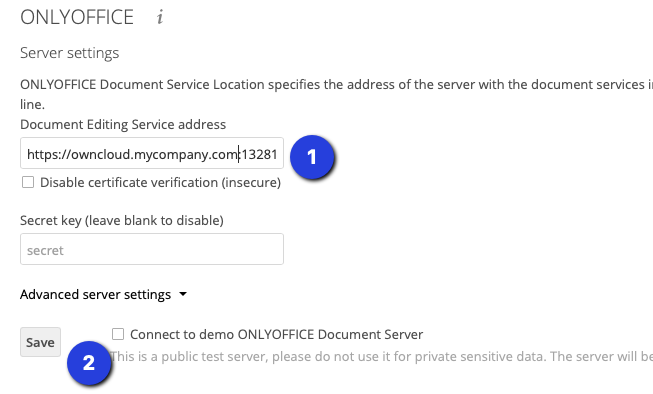
- Into the text box "Document Editing Service address," write your "EXTERNAL ONLYOFFICE ADDRESS."
- And click on the button Save.
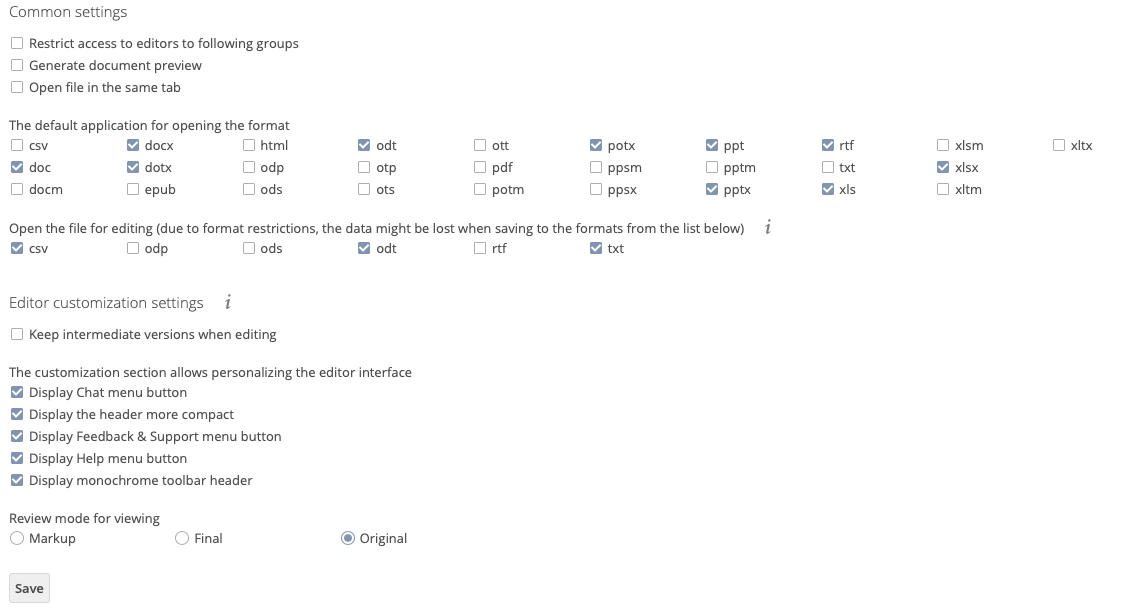
If everything goes well, you can see the OnlyOffice options, then select your desired file associations.
- Installing ONLYOFFICE Docs for Docker on a local server - ONLYOFFICE. (n.d.). Helpcenter.Onlyoffice. Retrieved February 22, 2021, from https://helpcenter.onlyoffice.com/installation/docs-community-install-docker.aspx
- nixCraft, N. (2020, May 17). How To Ubuntu Linux Firewall Open Port Command. Linuxconfig.Org. https://www.cyberciti.biz/faq/how-to-open-firewall-port-on-ubuntu-linux-12-04-14-04-lts/
- ONLYOFFICE, O. (n.d.). ONLYOFFICE/Docker-DocumentServer. GitHub-ONLYOFFICE. Retrieved February 23, 2021, from https://github.com/ONLYOFFICE/Docker-DocumentServer
- Certbot - Ubuntufocal Apache. (n.d.). Cerbot. Retrieved February 23, 2021, from https://certbot.eff.org/lets-encrypt/ubuntufocal-apache
- Install Docker Engine on Ubuntu. (n.d.). Docker Documentation. Retrieved February 23, 2021, from https://docs.docker.com/engine/install/ubuntu/
- Installing snapd. (n.d.). Canonical. Retrieved February 23, 2021, from https://snapcraft.io/docs/installing-snapd