Prequities:
Have Windows installed
Have Bootstrap enabled see here - Note only the preperation steps are required
Have copied your EFI to your EFI partition on you PC - https://dortania.github.io/OpenCore-Post-Install/universal/oc2hdd.html#grabbing-opencore-off-the-usb
Step 1. Boot into Windows
Step 2. Download EasyBCD
Step 3. Install and open EasyBCD - Note you may get a warning saying about UEFI ignore this we are only using this to view info not edit it
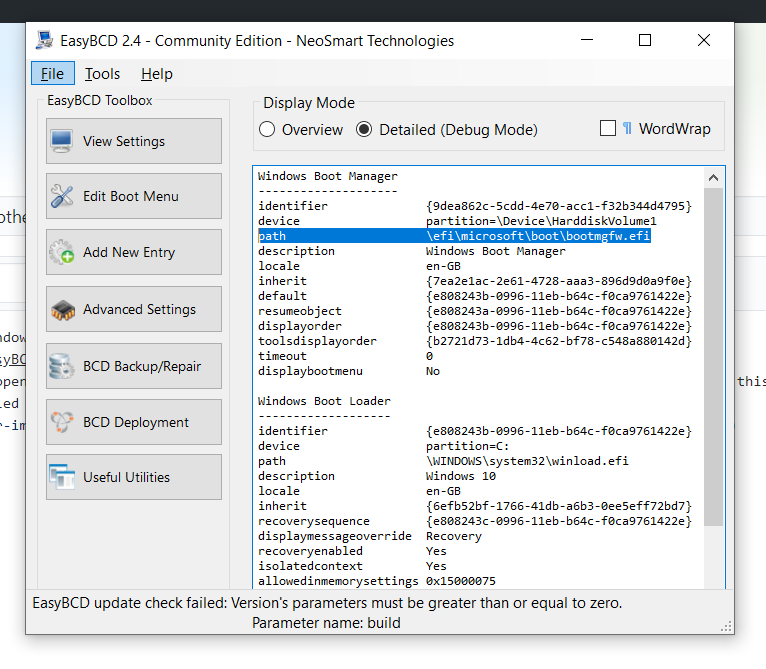
Step 4. Select Detailed (Debug Mode):

Step 4. Make note of the path:
Step 5. Open CMD as admin and paste this command Bcdedit /set {bootmgr} path \EFI\Boot\BOOTX64.efi - Adjust as needed e.g. if your a 32 bit bios
Step 6. Reboot and enter your bios
Step 7. Go to BOOT then you should see a list of boot options as well UEFI Hard Disk Properties e.g.

Step 8. After you've entered the properties window you should be greeted with something a little strange you'll notice you have 2 "Windows Boot Manager" options you want to select the one that doesn't have the name your harddrive and make it the first option e.g.

Step 9. Save and Exit and be greeted with OpenCore 🎉 - Now u could stop here personally i do as this works for me however if u want it to have the correct name and use bootstrap and everything then continue
Step 10. Boot to windows then shutdown and re-enter your BIOS then go to BOOT and then hard drive properties again an you'll see the proper OpenCore Option was added! Make this the default/1st boot option:

Step 11. Almost done! Now save and exit the BIOS boot back into windows and open the CMD as admin and run the following command Bcdedit /set {bootmgr} path EasyBCD_path - REPLACE EasyBCD_path with the path you got from EasyBCD in step 4 e.g for me it would be: Bcdedit /set {bootmgr} path \efi\microsoft\boot\bootmgfw.efi
And thats it finally your done! OpenCore should now be fully functional!