Previously, in Beginners’ crash course to build apps for Teams using Teams Toolkit for Visual Studio Code, Rabia and Zhidi explained new feaatures in Teams Toolkit and how the tool simplifies your experience.
In this tutorial, I will show you a practical example by walking you through how to build a command bot. Here, we are going to build a dice bot, which returns a random number between 1 and 6, when a user sends a command, "dice".
So let's get started! 🎲
If this is the first time using Teams Toolkit, please go to this tutorial, Using VS Code Teams Toolkit Extension for Teams App Development first, and follow the Prerequisites then, Installing Teams Toolkit section. The tutorial was written for the earlier version of Toolkit, but the initial setup process is the same.
I have created a YouTube video this time, so check it out!
{% embed https://www.youtube.com/embed/BSxanVdealA %}
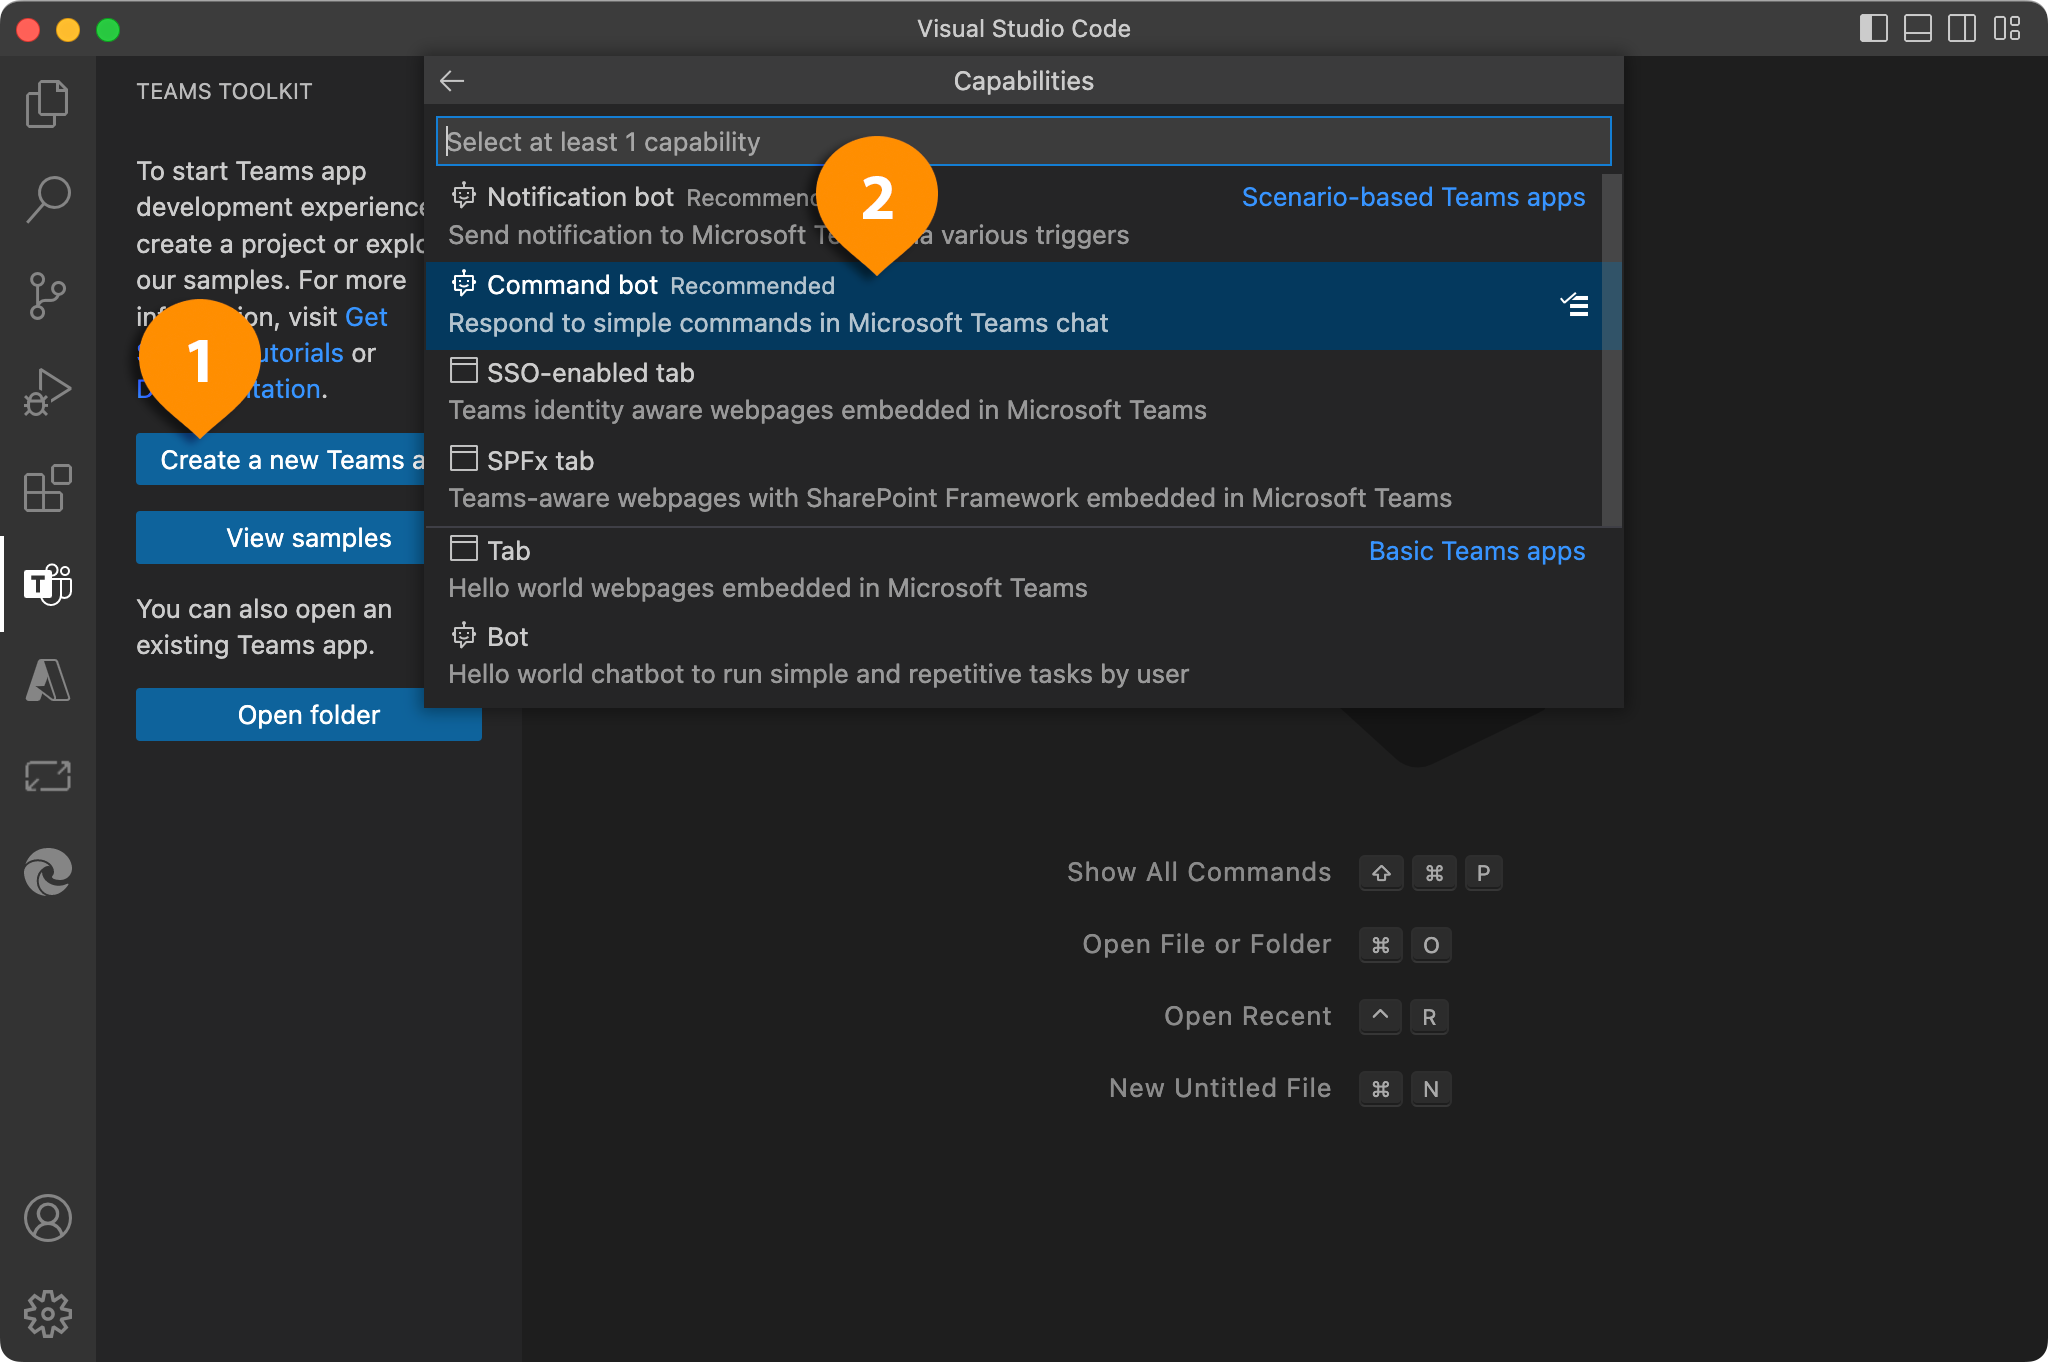
In Teams Toolkit extension in VS Code, click Create a new Teams app then select the Command bot from the menu. See the screenshot below:
Follow the Teams Toolkit by choosing a language, well, let's choose JavaScript for this tutorial, then, where in your local folder to create the project. Now give the app a name. Let's name it "RollADice".
After you are done, Teams Toolkit will generate the scaffolding for you. Take a look around the code structure and familiarize yourself with the files!
Now, let's try running the scaffolded code on Teams client and see how the bot user-experience is like.
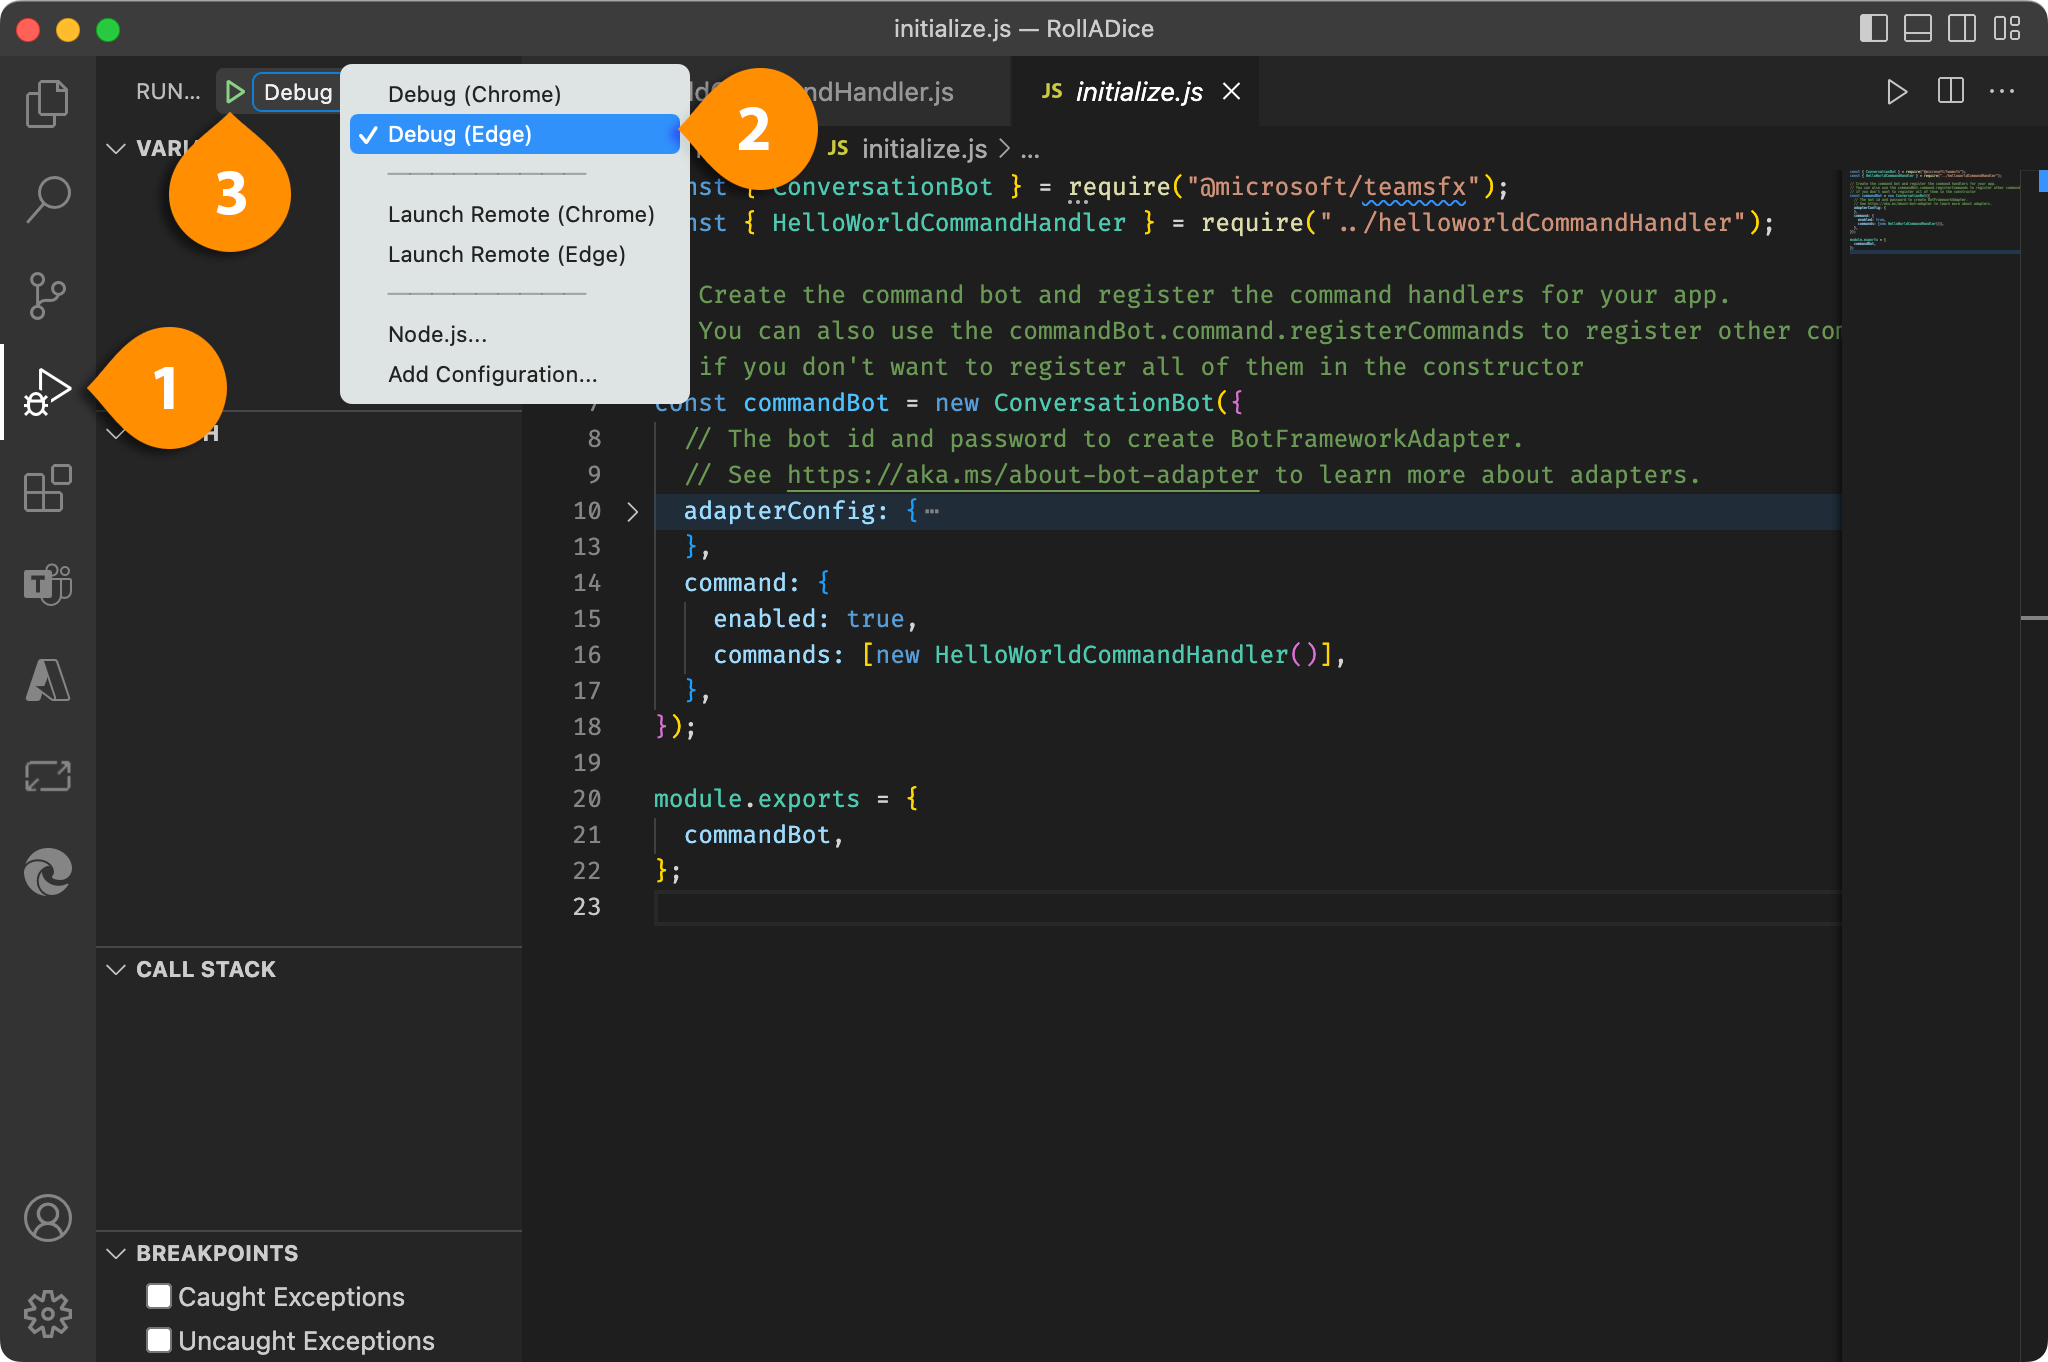
From the Run and Debug menu, choose Debug (Edge) (Chrome is fine, if you prefer!), and run by clicking the Start debugging green triangle. Or alternatively, press F5 key on your keyboard.
Teams Toolkit will do some works for you, including checking prerequisites, Azure provision and bot registration, running ngrok to tunnel your local server, etc. You will be asked to sign in to your M365 account if this is your first time. Just follow the Toolkit instructions.
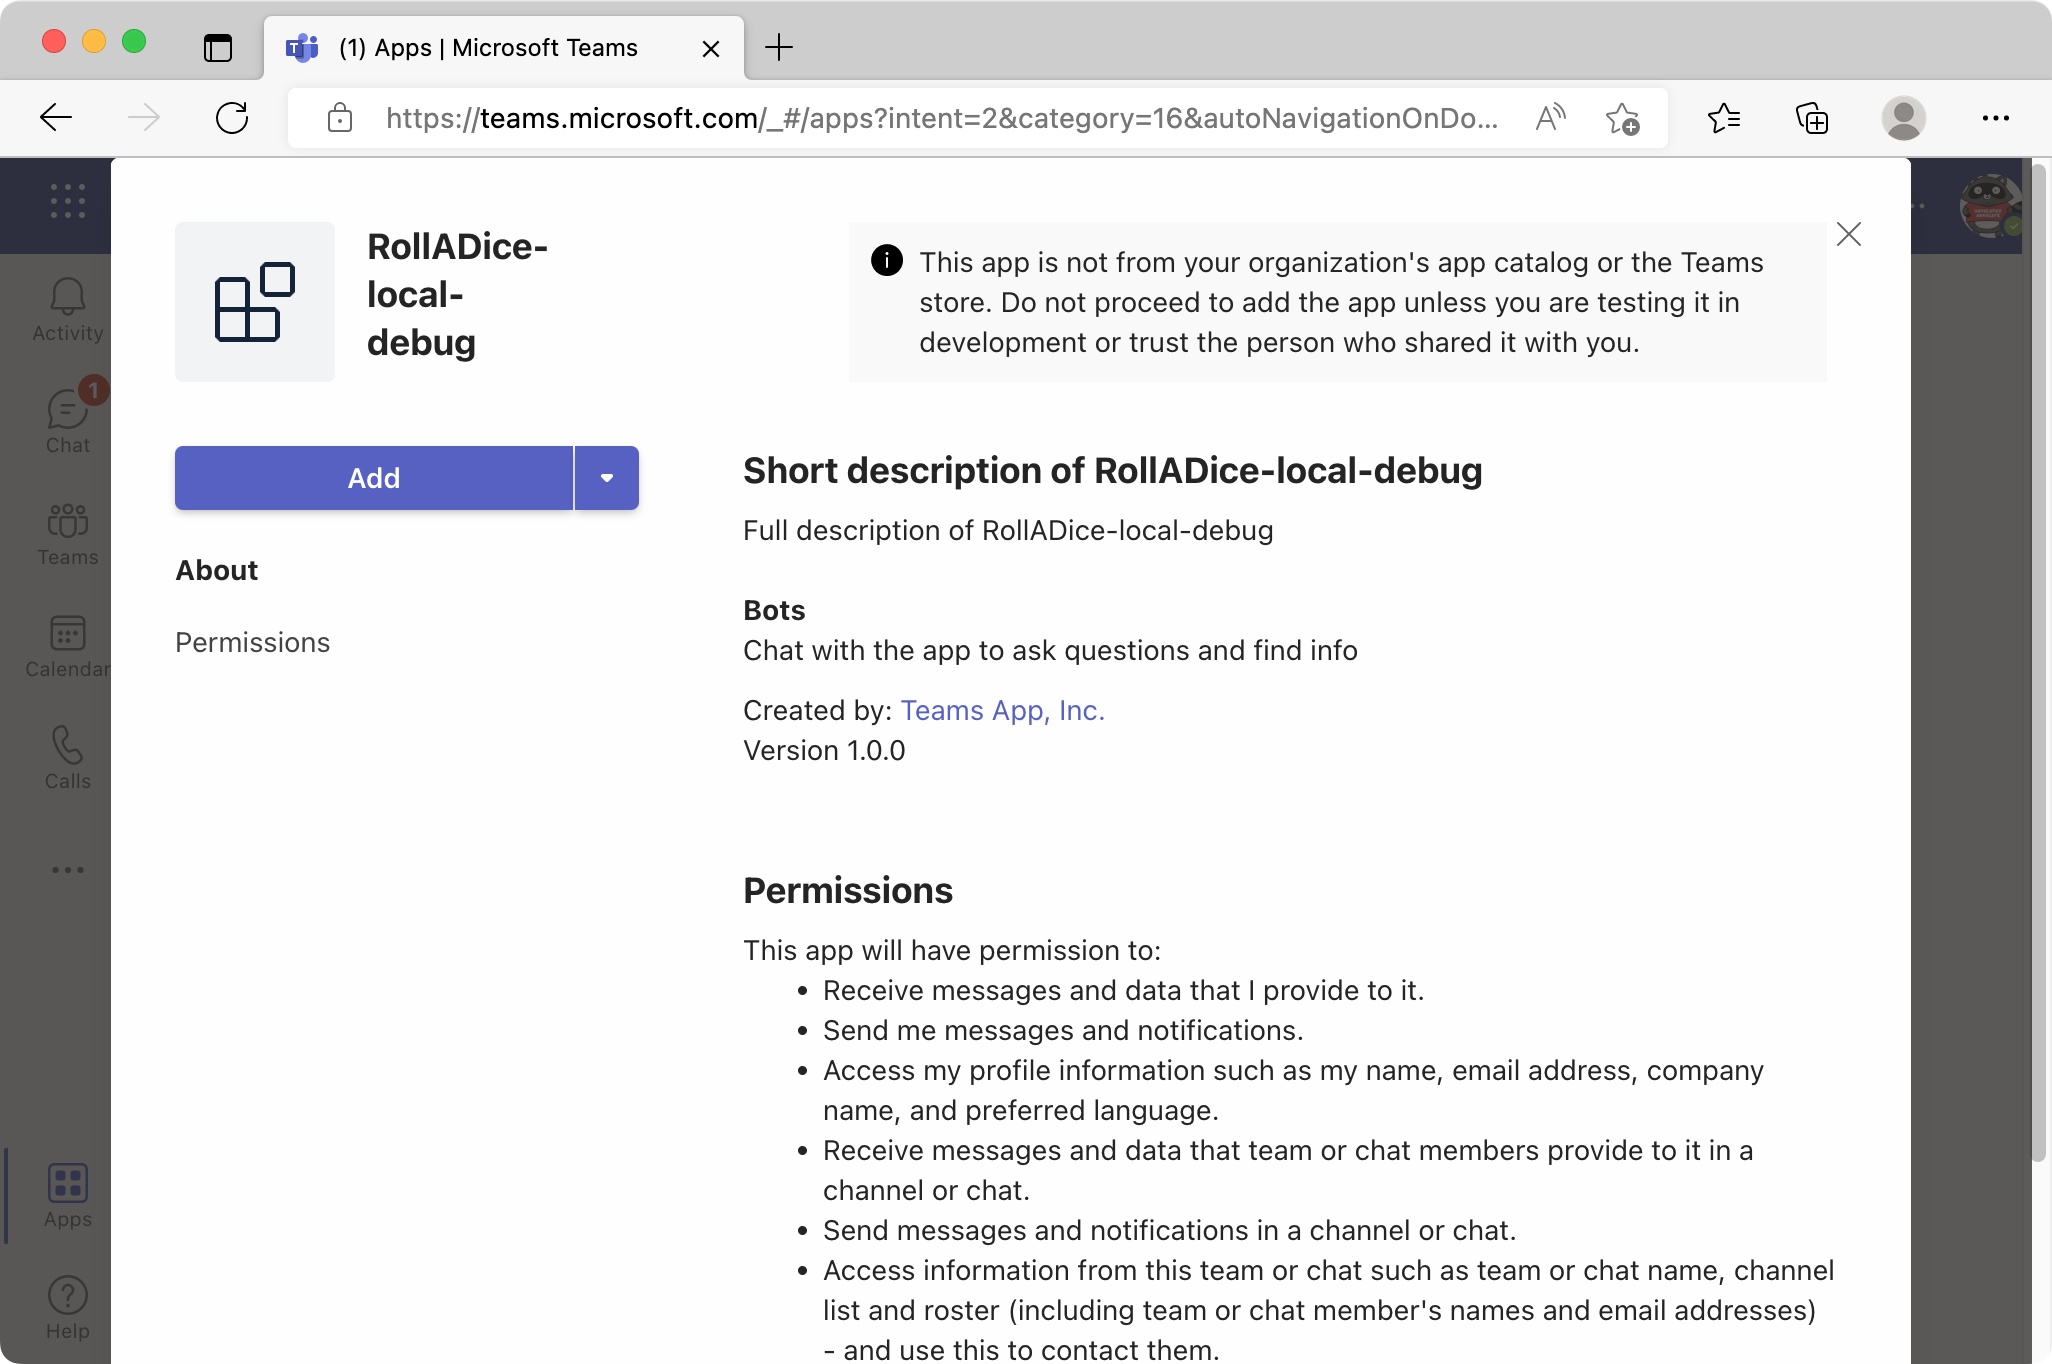
It will take a while, but when it is done, a browser will load Teams client, then ask you to install the bot. So, go ahead and click Add to install your bot:
Once you add the bot, play around and see how it works. Notice that the command suggestions box pops up, like the screenshot below. This is a hint for the users what commands are available for the bot. Try clicking it to send the command to the bot.
Now, let's go back to VS Code and modify the code to turn it into a dice bot.
We are going to edit the suggestions content first, and this is the result of what we are going to do here:
Go to the file, templates > appPackage > manifest.template.json.
This is the file where the suggestions UI content is defined. Find the commands in commandLists in the JSON and change the title and description to:
"commands": [
  {
    "title": "dice",
    "description": "Roll a dice!"
  }
]
and save the file.
Now, go to bot > src > helloWorldCommandHandler.js.
In the HelloWorldCommandHandler class, find the line, where the triggerPatterns is defined and edit the command to "dice":
triggerPatterns = 'dice';You don't need to worry about the case of the command. Users can type "dice", "Dice", "DICE", "DiCe", and they are all valid commands!
Then, define the bot reply message. In the handleCommandReceived function, let's create a message content with a generate random number:
async handleCommandReceived(context, message) {
  // Generate a random number between 1 and 6
  const result = Math.floor(Math.random() * 6) + 1;

  // Images of dice faces (Using creative commons images from Wikimedia)
  const images = [
  'https://upload.wikimedia.org/wikipedia/commons/thumb/6/62/Kismet-Ace.png/240px-Kismet-Ace.png',
 'https://upload.wikimedia.org/wikipedia/commons/thumb/6/6d/Kismet-Deuce.png/240px-Kismet-Deuce.png',
 'https://upload.wikimedia.org/wikipedia/commons/thumb/f/f2/Kismet-Trey.png/240px-Kismet-Trey.png',
 'https://upload.wikimedia.org/wikipedia/commons/thumb/1/11/Kismet-Four.png/240px-Kismet-Four.png',
 'https://upload.wikimedia.org/wikipedia/commons/thumb/8/8e/Kismet-Five.png/240px-Kismet-Five.png',
 'https://upload.wikimedia.org/wikipedia/commons/thumb/4/4e/Kismet-Six.png/240px-Kismet-Six.png',
    ];

  // Reply message - rendered in an Adaptive Card
    const cardData = {
      title: 'Roll a Dice 🎲',
      body: `You've got ${result}!`,
      thumbnail: images[result - 1],
    };

  return MessageBuilder.attachAdaptiveCard(helloWorldCard, cardData);
}Here, I want to display a dice image along with the result in a reply message nicely, so we are going to use Adaptive Cards to customize the message UI layout.
The layout is defined in JSON in the file at bot > src > adaptiveCards > helloworldCommand.json. But let's hold on to it and we'll come back to the file later because we are going to use a visual tool to create the JSON first.
In a browser, go to Adaptive Cards Editor tool section in Developer Portal at dev.teams.microsoft.com/cards, create a new card by clicking Create new card.
Let's use the Thumbnail card template as a starting point. In the preview pane, delete the buttons and text in the template and leave only a thumbnail, title, and subtitle, to create a simple UI.
The edit I made for the tutorial are:
- Remove buttons and text from the template
- Set the thumbnail layout property for size to "medium"
- Double-click the title and change to a variable, "${title}"
- Set the title style property for weight to "bolder"
- Change the subtitle to "${body}"
But feel free to customize in the way you want!
Now, copy the generated JSON into the helloworldCommand.json.
In the YouTube tutorial, you can follow the instruction at 4:46 and watch me how to use the tool. In the video, I copy & paste the JSON first then modify some content manually, instead of editing all properties in the visual tool. You can do in either way.
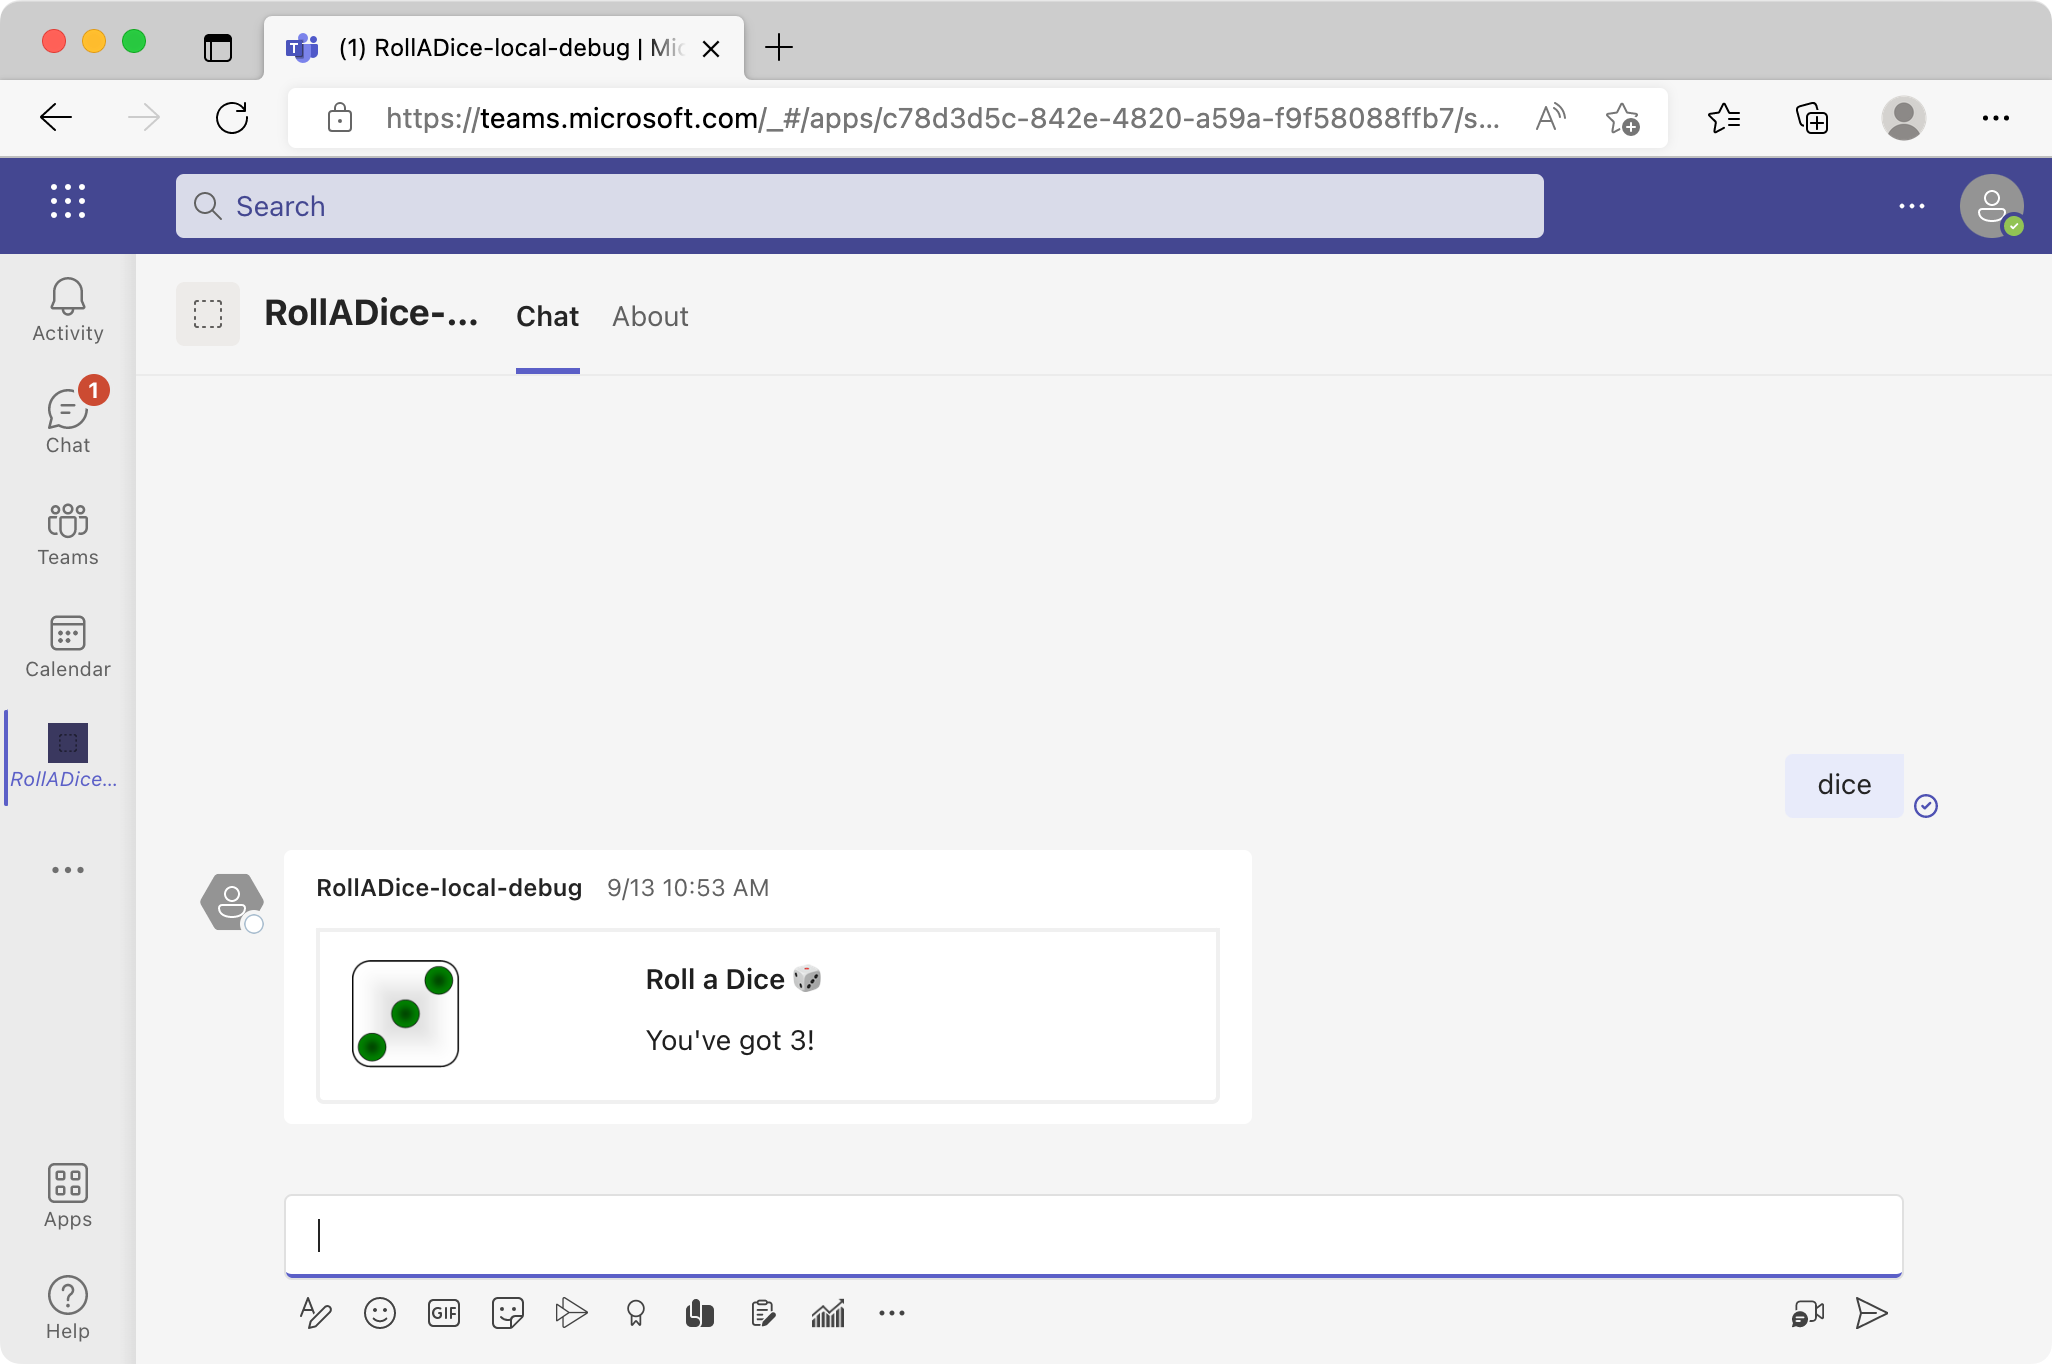
Let's run the code in Teams client again, using the "F5" tool and see how it works. Once added the bot, try sending the "dice" command.
I hope your bot works as it should 🎲
Now, you know the basics of command bots for Teams, so I suggest you to tweak the bot further to make it more interesting.
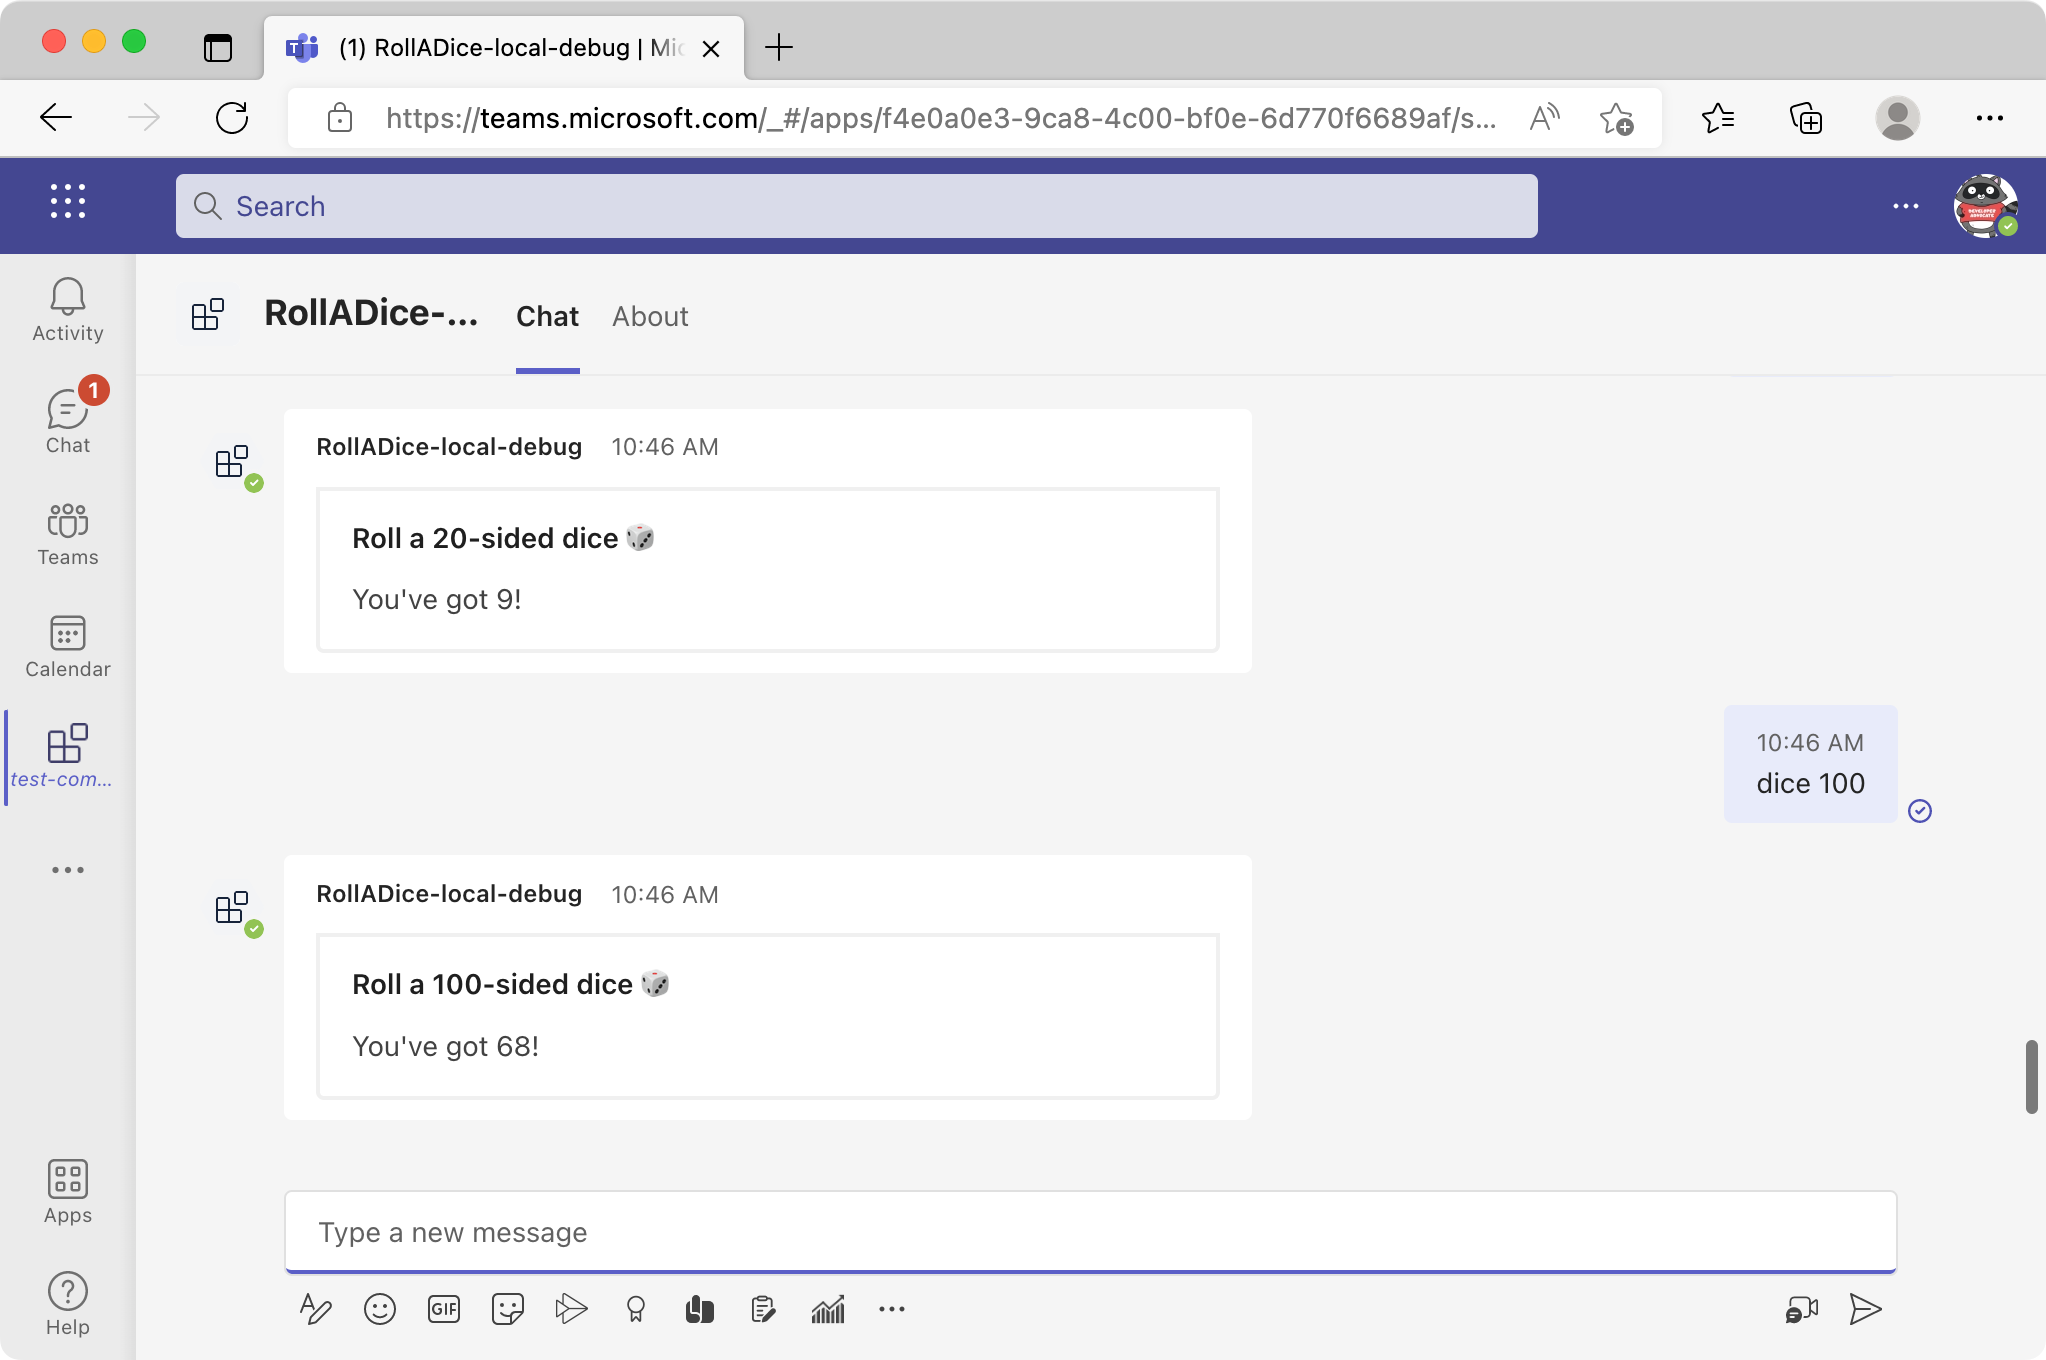
The bot we just created is a 6-faced dice and only replies you with a number between 1 and 6. But it would be more interesting if each user can decide the type of dice, such as, 12 sided dodecahedron, 20 sided icosahedron, chiliagon with 1000 sides, or any n-sided theroritical dice.
So we can make the bot to take a parameter along with the command, such as dice 12 so that the dice bot can return a number between 1 and 12. Or between 1 and 1000 for dice 1000 command.
You can tweak the code to read a parameter like this:
const strs = message.text.split(' ');

const max = strs[1] ? parseInt(strs[1]) : 6;
if (isNaN(max)) {
  return MessageBuilder.attachHeroCard(`Invalid number: ${strs[1]}`);
}
const result = Math.floor(Math.random() * max) + 1;

const cardData = {
  title: `Roll a ${max}-sided dice 🎲`,
  body: `You've got ${result}!`,
};
Don't forget to modify the command suggestion UI content too. I totally encourage you to modify the code more and add features to create your own dice bot!
Or Use your imagination to build something else, like weather bot, cryptocurrency bot, dad joke bot... The ideas are endless.
If you build some interesting bots, please let me know! Mahalo, and see you in the next blog post 🤙


Please grab the assets from: https://microsoft-my.sharepoint.com/:f:/p/timura/Evhupc3cFY1BjfrkuTR1ZfgBwfMrh_T0mY4t1GOVPYVyCw?e=kxnwkv