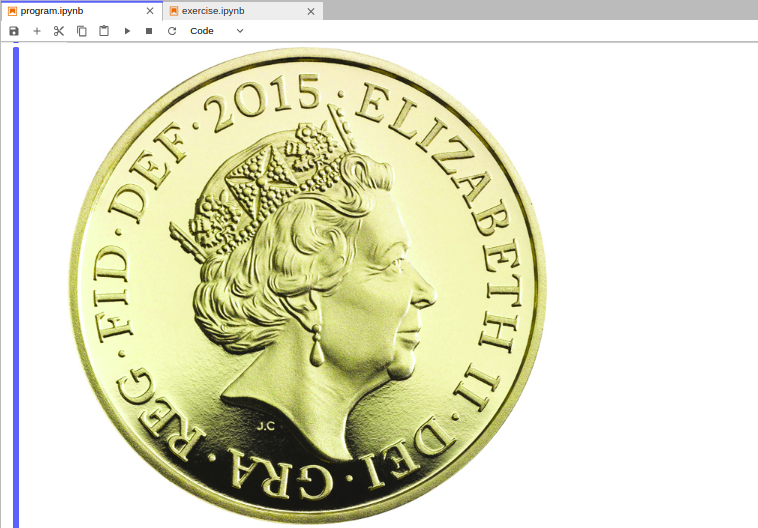
One simple program using Python for detecting edges.
The following gist offers a program scaled in seven parts:
- Import
Numpyand related packages - Load image remotely and define scaling variables
- Create output image
- Convert image to grayscale
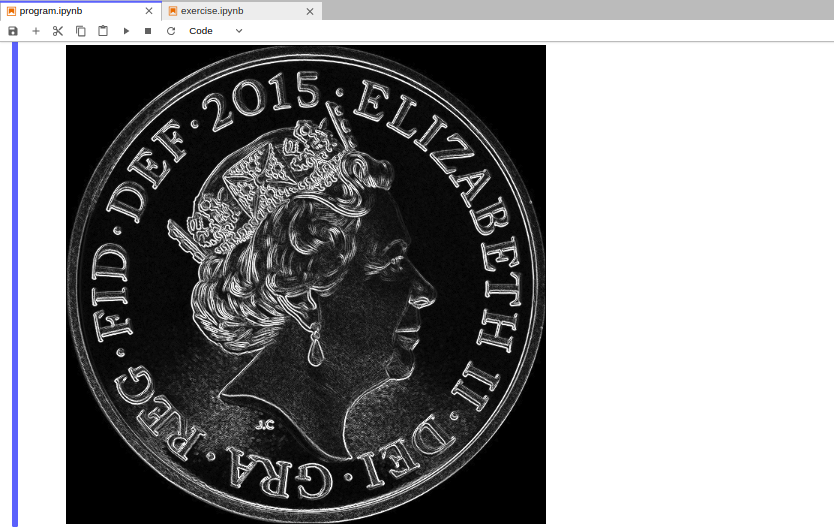
- Compute intensity convolution using a for
loop - Draw magnitude in black and white
- Print out input and output images
This Python program built in 21 lines helps you render edges from a given image.
The below instructions will help you run this Python program on your local machine for development and testing purposes, as well as in third party sites hosted in the cloud.
- (#) and (''') are used to comment the following gist.
I am using Jupyter Notebook on localhost (Ubuntu 18.04 bionic).
You can use Python IDEs and code editors on remote servers (see Tips).
If you are not using Linux/Unix and still want to try this simple Python program:
- use https://www.cloud9.gg/ (recommended if you are an historic Cloud9 user)
- use https://colab.research.google.com/ (recommended if you have a Gmail account)
- use https://dataplatform.ibm.com (recommended for IBM Coders)
- you may not want to use
Pycharmto avoid some issues while usingmathpackage.
- Note that in
Jupyteryou add new lines by typing "b" from your keyboard whilst the notebook is opened. - Avoid runing the entire code in a single cell in order to understand the steps.
- Use "ctrl + enter" to execute each line if you want to get the output.
- Use "dd" outside a cell to delete it.
- Use "a" outside a cell to add a new cell above it.
- Use "b" outside as cell to add a new cell below it.
- Running the last cell should execute the permutations as program output.
- I used Ubuntu (18.04 bionic) to launch Jupyter Notebook on localhost.
- Localhost instantiates while using $ jupyter notebook in the terminal.
- Check if Jupyter is correctly installed: $ jupyter --version
- Jupyter - An open source software for creating notebooks
- Numpy - The fundamental package for scientific computing with Python
- Math - Mathematical functions defined by the C standar
- PIL - Create images, annotate, retouch existing ones
- Requests - A non-GMO HTTP library for Python, safe for human consumption
I used no vesioning system for this gist, which repos status is flagged as concept because it is intended to be a demo or POC (proof-of-concept).
- Isaac Arnault - Suggesting a way to render edges for specific images such as: coins, architecture images.
Store the below image remotely (on your IDE / PC) and try to detect edges using Python.
parking.png