Skip to content

Instantly share code, notes, and snippets.

@isaacarnault
Last active February 13, 2021 12:14
Show Gist options
  • Save isaacarnault/2c7b0b8a4f9122d28f2f29d7cf7eb0ac to your computer and use it in GitHub Desktop.
Save isaacarnault/2c7b0b8a4f9122d28f2f29d7cf7eb0ac to your computer and use it in GitHub Desktop.
Infrastructure as Code (IaC) with Terraform

Use the following steps to get started with Terraform.

I perform the installation on a Ubuntu 20.04 LTS on AWS.
Create a Virtual Compute Machine as follows: . go to https://console.aws.amazon.com/ and create an account or login to your account
. go to EC2 > Launch Instance
. in the Search Bar, search for ubuntu
. select Ubuntu 20.04 LTS

πŸ”΄ See hint

isaac-arnault-terraform.png

. choose a General purpose t2 micro instance
. Add tags : vmi - terraform

πŸ”΄ See hint

isaac-arnault-terraform-3.png

. Review and Launch
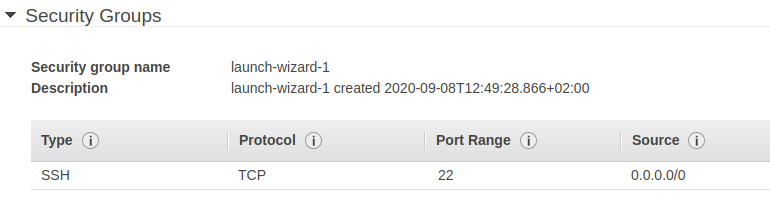
As you can see, by default your instance is reachable from anywhere ovet the Internet using SSH on Port 22.

πŸ”΄ See hint

isaac-arnault-terraform-4.png

. click 'Launch' > Create a new key pair (key pair name : terraform_aws)
. Download Key pair. Make sure you save the key pair locally before .
. Save the key pair to a folder called 'terraform' using '$ mkdir terraform'
. Click on 'Launch Instances'
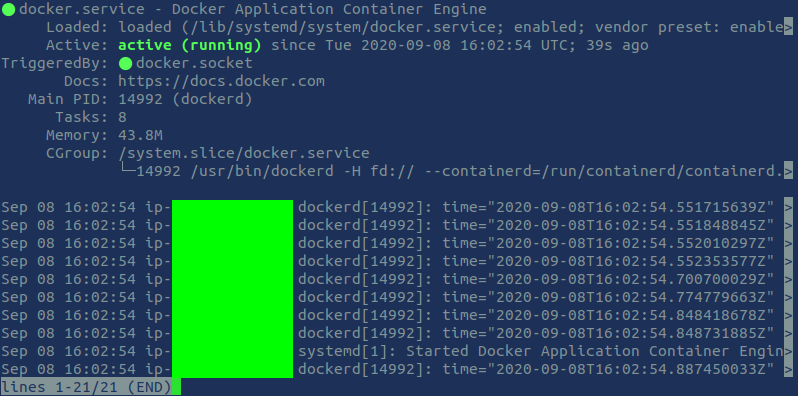
. Wait until your EC2 instance is up and running.

πŸ”΅ See output

isaac-arnault-terraform-5.png

Use your Command Line Interface to connect to your EC2 instance

Now that the instance is running on AWS, we will connect to it remotely from our laptop.
Open your Terminal (my OS is Ubuntu 18.04 LTS) :

Ctrl + Alt  +T
$ sudo su
$ cd /home/zaki/Desktop/terraform // go to the folder where you saved the key pair

. Change the permissions to .pem file, ie: $ chmod 400 EC2KP.pem.

$ chmod 400 terraform_aws.pem
πŸ”΄ See hint

isaac-arnault-terraform-6.png

Before we connect to our instance, we will perform an ping to check if the instance is reachable.

$ ping ipv4-public-address_of-the-instance

If you receive packets, this means the EC2 instance is reachable. If not, you may tune the Security group, Internet Gateway, Route table, in order to allow them to be reachable from the Internet. Consider the following resource https://docs.aws.amazon.com/AWSEC2/latest/UserGuide/TroubleshootingInstancesConnecting.html if connection issues to your EC2 instance persist.

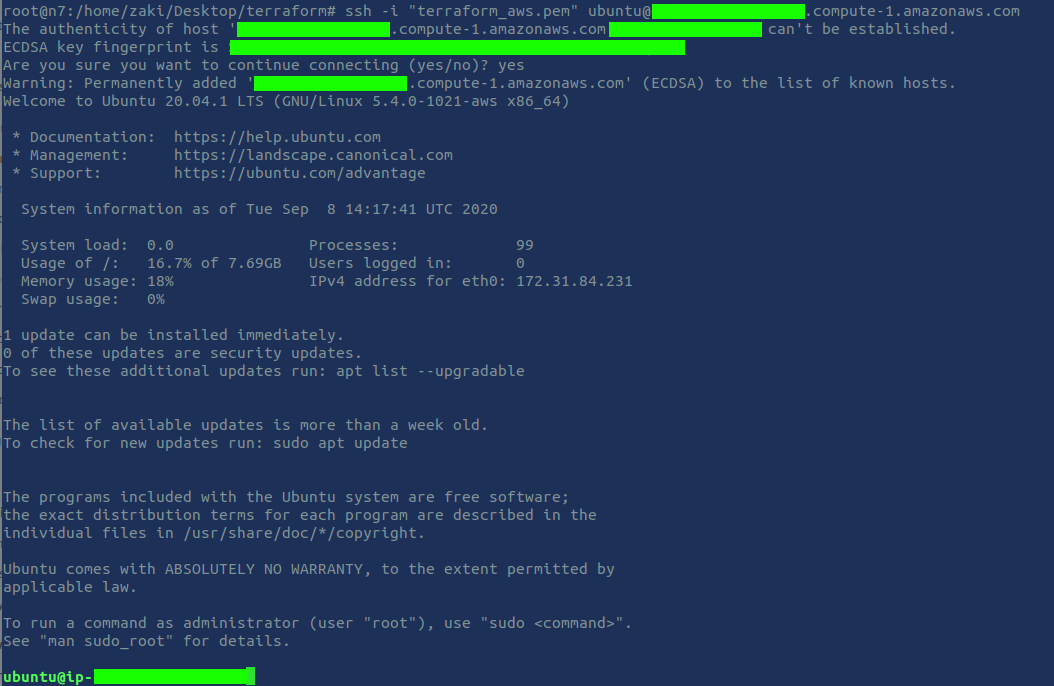
Connect to your EC2 instance remotely using your CLI

Use : $ ssh -i "terraform_aws.pem" ubuntu@ec2-ipv4address.compute-1.amazonaws.com.

Type "yes" when prompted by the CLI

πŸ”΅ See output

isaac-arnault-aws-terraform.png

Let's install Terraform

$ sudo su
$ wget https://releases.hashicorp.com/terraform/0.13.2/terraform_0.13.2_linux_amd64.zip // download the latest available package
$ unzip terraform_0.13.2_linux_amd64.zip
$ mkdir downloads // create a folder named 'downloads' and move the binary in that folder
$ mv terraform downloads

Update your path so you can call Terraform binary from anywhere in the machine
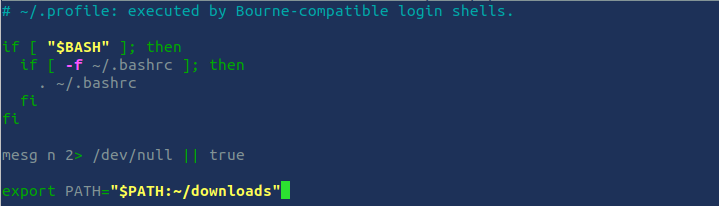
$ nano ~/.profile

Add the following code at the end of the codeblock

export PATH="$PATH:~/downloads"
πŸ”΄ See hint

isaac-arnault-terraform-7.png

To save the file and get back to the CLI, use Ctrl + s then Ctrl + x.

To update your path to the current session, use :

$ source ~/.profile

Let's check Terraform version to see if it was correctly installed and that we can call it from anywhere on the machine:

$ terraform --version
πŸ”΅ See output

isaac-arnault-terraform-8.png

Let's finalize the installation of Terraform
Print a colon-separated list of locations in your PATH.

$ echo $PATH

Move the Terraform binary to one of the listed locations. Here we use the following location: usr/local/bin.

$ mv ~/Downloads/terraform /usr/local/bin/

Close your Terminal window, relaunch a new window (Ctrl + T), go to your terraform folder and reconnect to your EC2 instance once again.
Use the following commands to check if terraform was correctly installed and initialized:
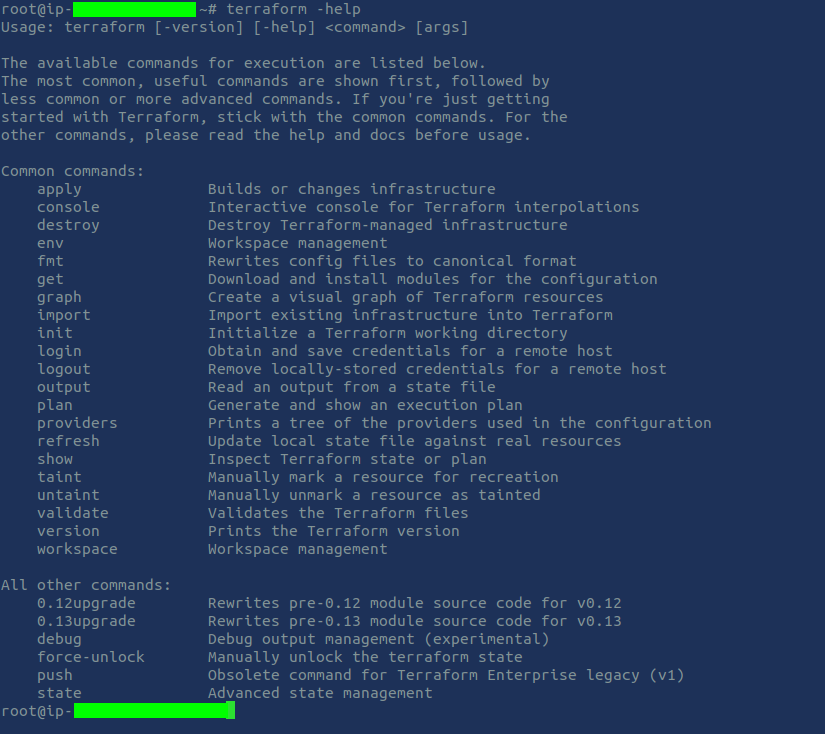
$ terraform -help
πŸ”΄ See hint

isaac-arnault-terraform-9.png

Enable tab completion

If you use either bash or zsh you can enable tab completion for Terraform commands. To enable autocomplete, run the following command and then restart your shell.

$ terraform -install-autocomplete

Here you are! You are ready to use Terraform for your IaC projects.

Tutorial 1 - Let's provision a NGINX server using Docker and Terraform

Please take this part after completing the Installation part and make sure Terraform is installed on your EC2 instance.

First we need to install Docker on our EC2 instance

We need first to update our existing list of packages.

$ sudo apt update

Let's install a few packages which let apt use packages over HTTPS

$ sudo apt install apt-transport-https ca-certificates curl software-properties-common

Then we add the GPG key for the official Docker repository to our system

$ curl -fsSL https://download.docker.com/linux/ubuntu/gpg | sudo apt-key add -

Once done, we add the Docker repository to APT sources

$ sudo add-apt-repository "deb [arch=amd64] https://download.docker.com/linux/ubuntu focal stable"

Next, we update the package database with the Docker packages from the newly added repo

$ sudo apt update

Let's check if the Docker repository was already installed on the instance

$ apt-cache policy docker-ce

'Installed (none)' means you can perform a new installation of Docker.

Now we are ready to install Docker

πŸ”΅ See output

Selection-012.png

Check if Docker was correctly installed

$ sudo systemctl status docker
πŸ”΅ See output

isaac-arnault-terraform-13.png

Now that we have Docker up and running on our EC2 instance, let's get back to Terraform.

Now, we can create our NGINX server using Docker and Terraform

Create a directory named terraform-docker.

$ mkdir terraform-docker && cd $_

Let's create a HCL (Terraform programming language) configuration file for our NGINX server for Terraform to interract with Docker.
We will call the file 'main.tf'.

$ touch main.tf
$ nano main.tf

Copy paste the codeblock below and save the file:

⚫ See codeblock

terraform { required_providers { docker = { source = "terraform-providers/docker" } } }

provider "docker" {}

resource "docker_image" "nginx" { name = "nginx:latest" keep_locally = false }

resource "docker_container" "nginx" { image = docker_image.nginx.latest name = "tutorial" ports { internal = 80 external = 8000 } }

Chmod the file:

$ chmod 400 main.tf

Initialize the project, which downloads a plugin that allows Terraform to interact with Docker.

$ terraform init
πŸ”΅ See output

isaac-arnault-terraform-14.png

Provision the NGINX server container with apply. When prompted to 'Enter a value', type 'yes' and press 'Enter'.

πŸ”΅ See output

isaac-arnault-terraform-15.png

Verify that NGINX server is up and running

You can first run a $ docker ps to get some info related to your container.

πŸ”΅ See output

isaac-arnault-terraform-16.png

Verify that your NGINX web server was successfully installed and is working.
As you can see, the container is set to use port 8000 by default. if you've made this tutorial from your local terminal, you'll launch localhost:8000 on your browser. Here you have to use the DNS of the EC2 instance since this turorial is performed on a remote virtual machine and not locally. You should use instead in your web browser:

i.e: http://ec2-*-*-*-*.compute-1.amazonaws.com:8000/

This is what you should see:

πŸ”΅ See output

isaac-arnault-terraform-17.png

You can supress anytime the NGINX web server using $ terraform destroy command.
When prompted to 'Enter a value', type 'yes' and press 'Enter'.

πŸ”΅ See output

isaac-arnault-terraform-18-2.png

This ends up this tutorial. Now you can move on tutorial-2.

Now we are reay to start this second tutorial since we have Terraform installed.
We will provision a single Amazon Machine Image (AMI) which means that we will deploy a single EC2 instance.

First, create new folder.

$ cd
$ mkdir terraform_aws_ami
$ cd terrafom_aws_ami
$ touch ami.tf

Open the file ami.tf, copy paste the codeblock below and save the file:

$ nano ami.tf
terraform {
  required_providers {
    aws = {
      source = "hashicorp/aws"
    }
  }
}

provider "aws" {
  profile = "default"
  region  = "us-west-2"
}

resource "aws_instance" "example" {
  ami           = "ami-830c94e3"
  instance_type = "t2.micro"
}

When you create a new configuration β€” or check out an existing configuration from version control β€” you need to initialize the directory with $ terraform init.

$ terraform init

Format and validate the configuration. Terraform will return the names of the files it formatted.

$ terraform fmt

Validate your configuration. If your configuration is valid, Terraform will return a success message.

$ terraform fmt
πŸ”΅ See output

isaac-arnault-terraform-19.png

Sign up for free to join this conversation on GitHub. Already have an account? Sign in to comment