You signed in with another tab or window. Reload to refresh your session.You signed out in another tab or window. Reload to refresh your session.You switched accounts on another tab or window. Reload to refresh your session.Dismiss alert
This file contains bidirectional Unicode text that may be interpreted or compiled differently than what appears below. To review, open the file in an editor that reveals hidden Unicode characters.
Learn more about bidirectional Unicode characters
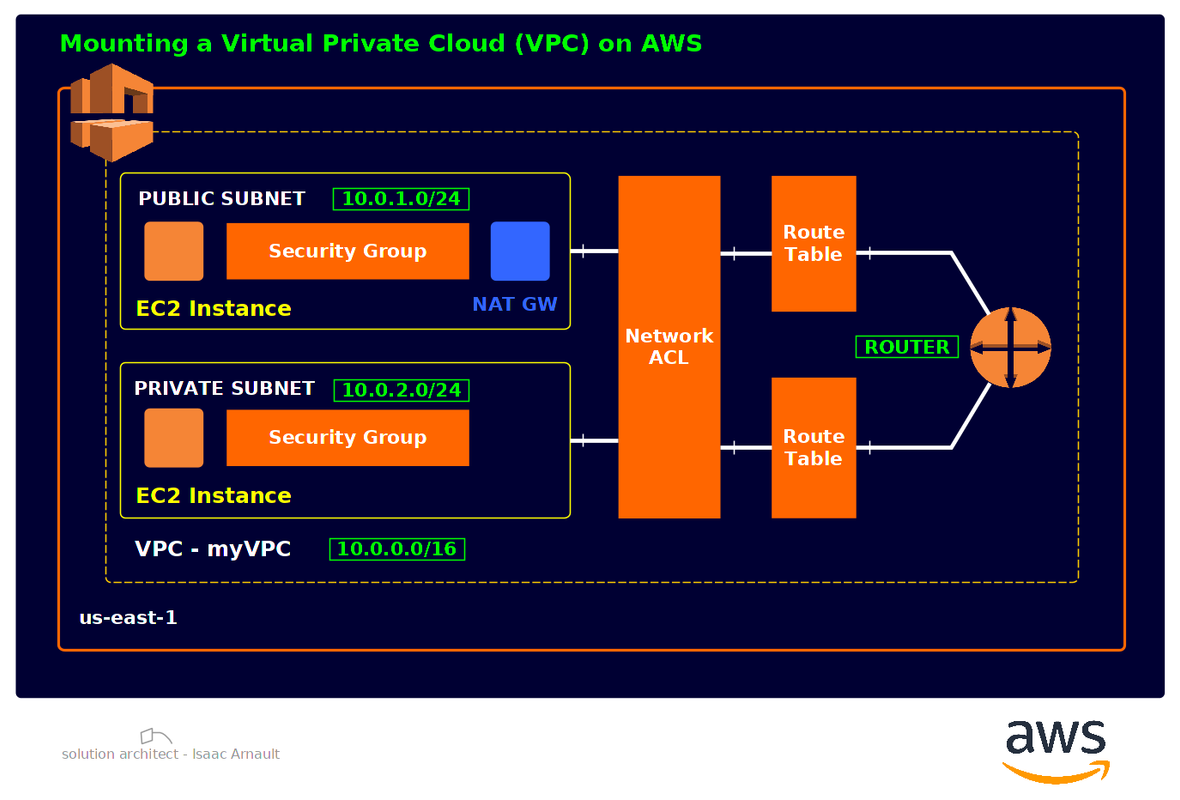
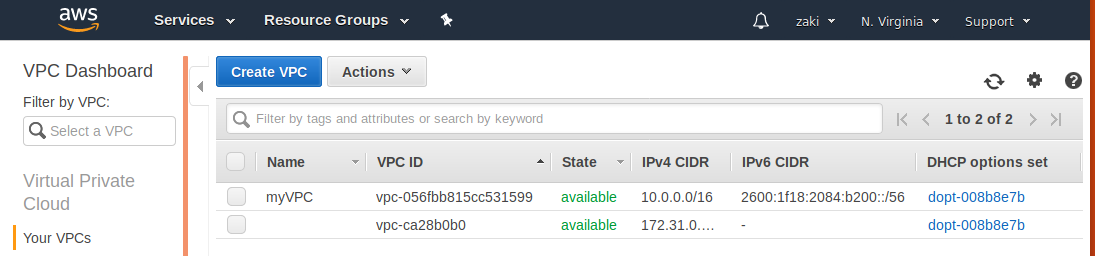
A Virtual Private Cloud `VPC` is a virtual network dedicated to your AWS account. It is logically isolated from other virtual networks in the AWS Cloud. You can launch your AWS resources, such as Amazon EC2 instances, into your VPC. You can specify an IP address range for the VPC, add subnets, associate security groups, and configure route tables.</li>
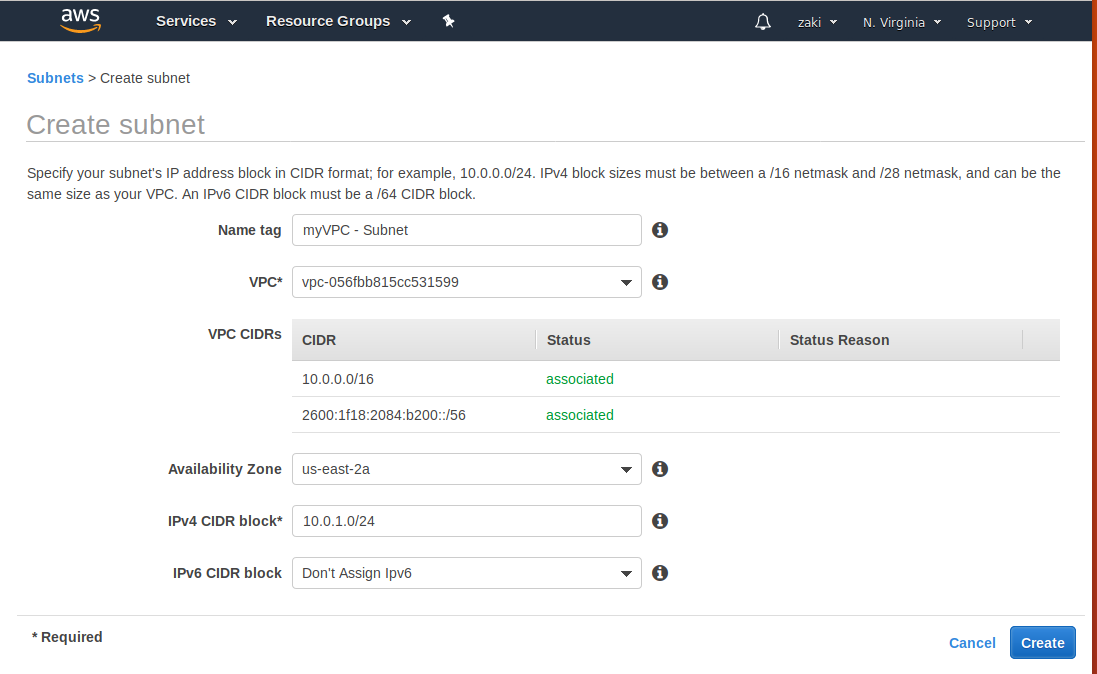
A subnet is a range of IP addresses in your VPC. You can launch AWS resources into a specified subnet. Use a public subnet for resources that must be connected to the internet, and a private subnet for resources that won't be connected to the internet. For more information about public and private subnets, see VPC and Subnet Basics.
To protect the AWS resources in each subnet, you can use multiple layers of security, including security groups and network access control lists (ACL).
Creating Virtual Private Cloud on AWS an enabling Flow logs - Hands-on
I'm currently preparing AWS Certified Solution Architect - Associate certificate.
The following gist is intended to anyone looking to create a VPC and see it's associated logs on AWS.
We're going to be using Amazon VPC as well as an Amazon Flow Logs.
I performed this setup on my Ubuntu 18.04.2 LTS.
To check your OS version, execute $ lsb_release -a in your Terminal.
Installations
None. Just log into your AWS management console, https://console.aws.amazon.com.
You'll need to perform several tasks in your CLI regarding SSH keygen, so make sure you check the following prerequisites.
Prerequisites
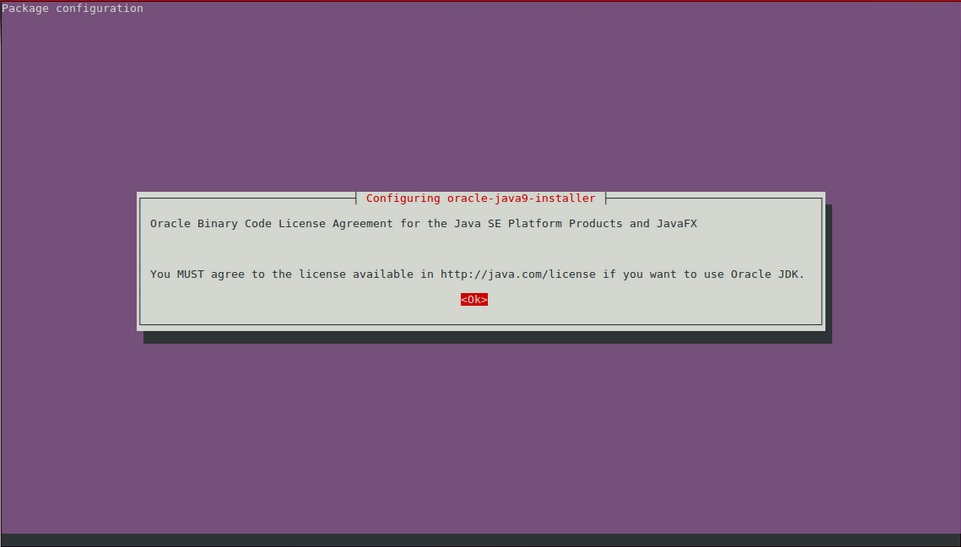
First, make sure Oracle jdk is installed. I recommend java 1.8.0
To uninstall effectively your current jdk, perform this: $ sudo apt-get remove openjdk* $ sudo apt-get remove --auto-remove openjdk* $ sudo apt-get purge openjdk* $ sudo apt-get purge --auto-remove openjdk*
To install java 1.8.0, open Terminal Ctrl+Alt+T and run the command: $ sudo add-apt-repository ppa:webupd8team/java // adds PPA repository $ sudo apt-get update // updates package list $ sudo apt-get install openjdk-8-jdk // installs openjdk
$ javmyDataBaseServermyDataBaseServerac -version // shows your new java version
Author
Isaac Arnault - AWS Cloud series - Related tags: #EC2 #EFS #AWSCLI #Linux
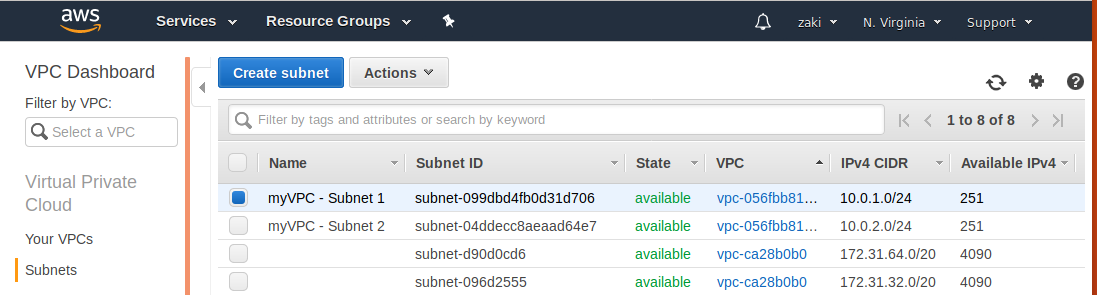
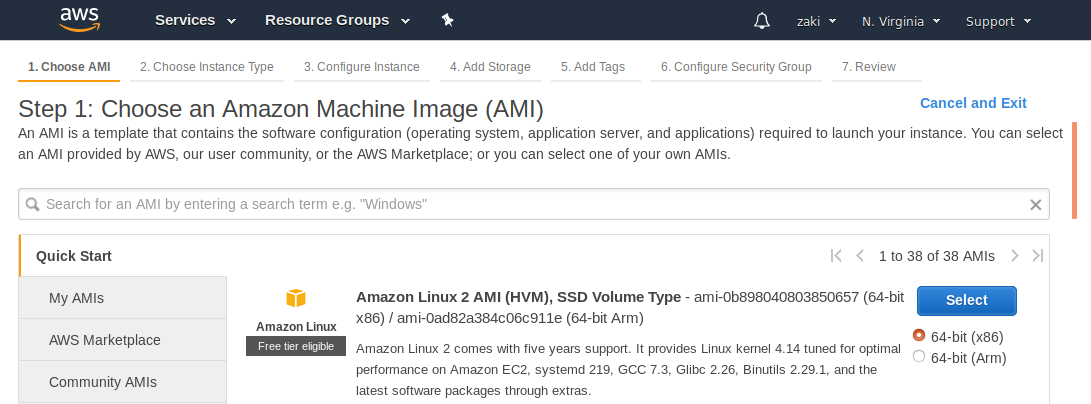
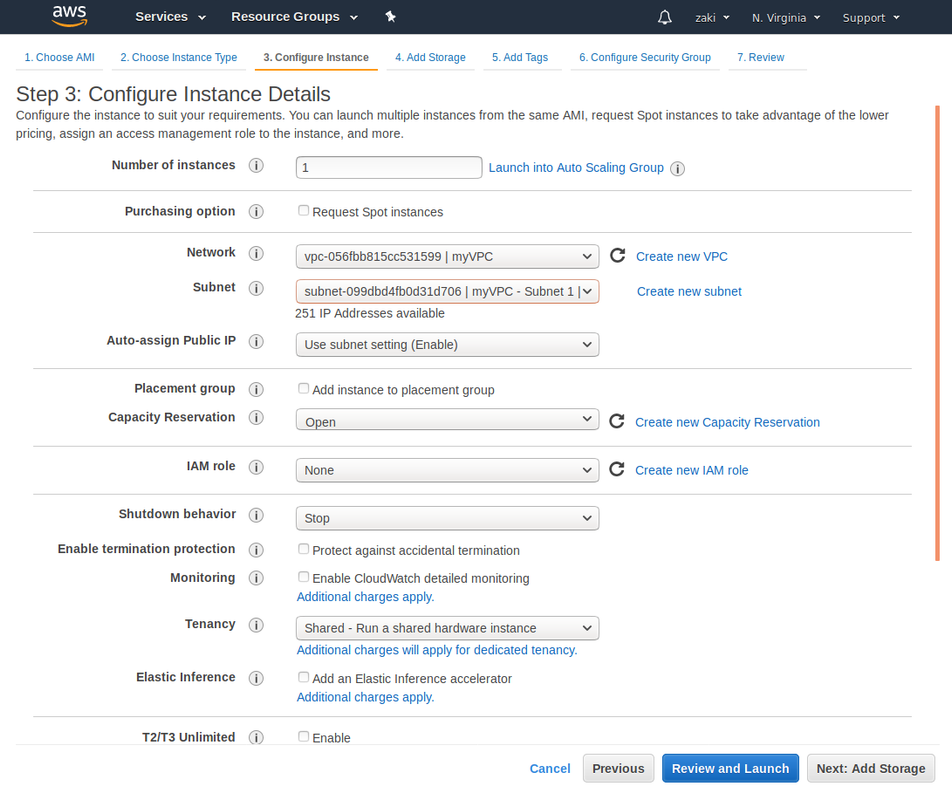
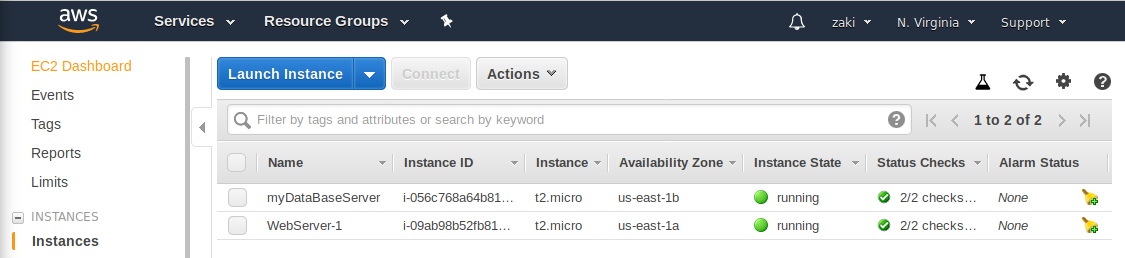
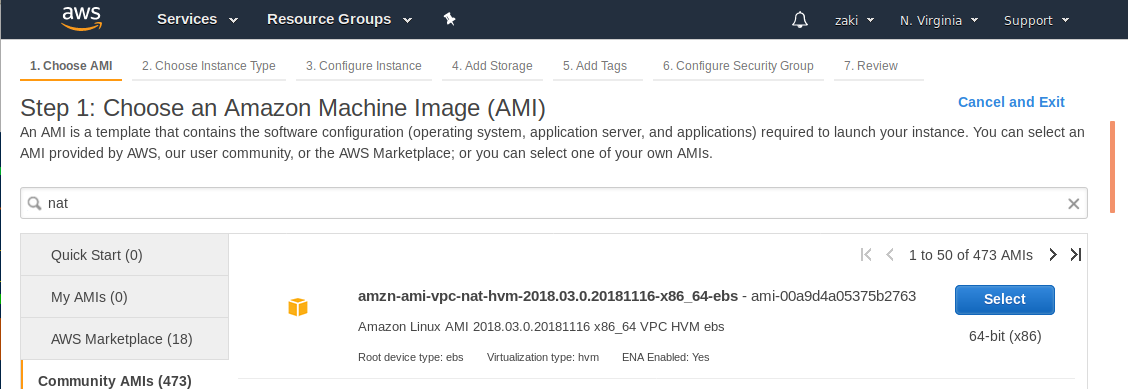
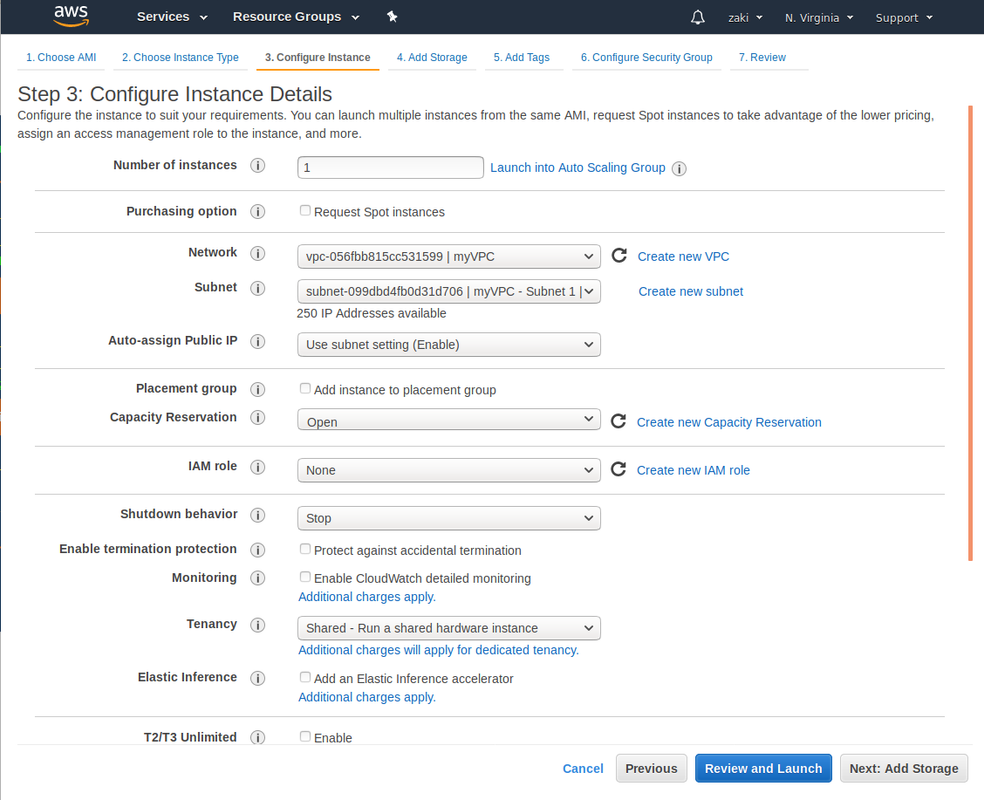
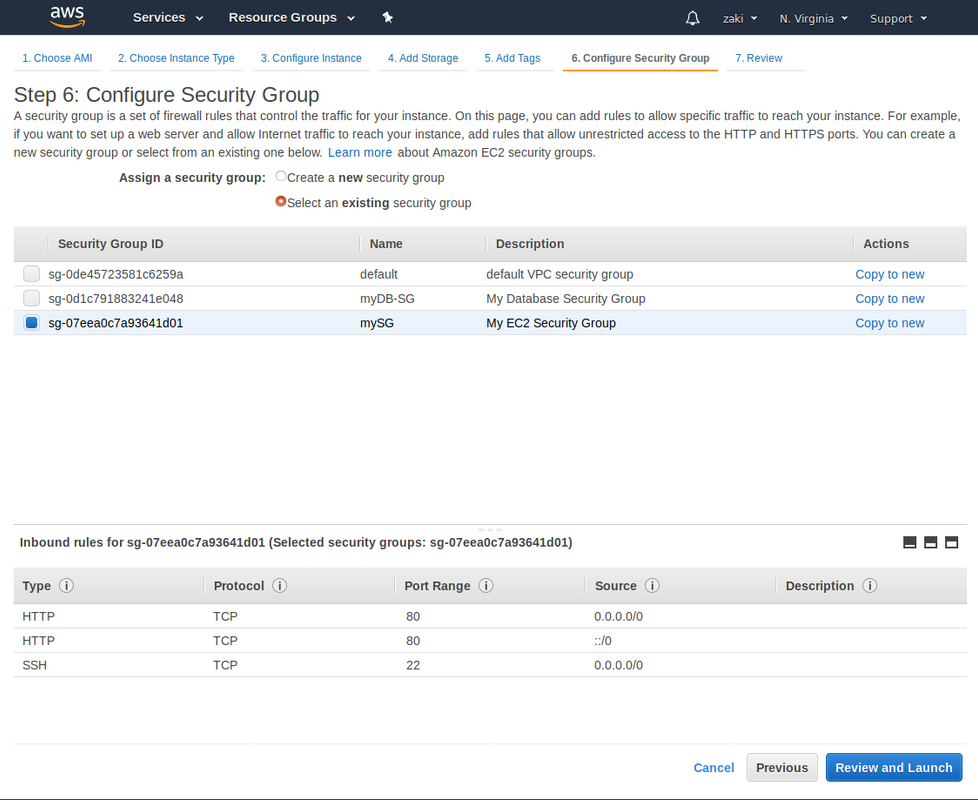
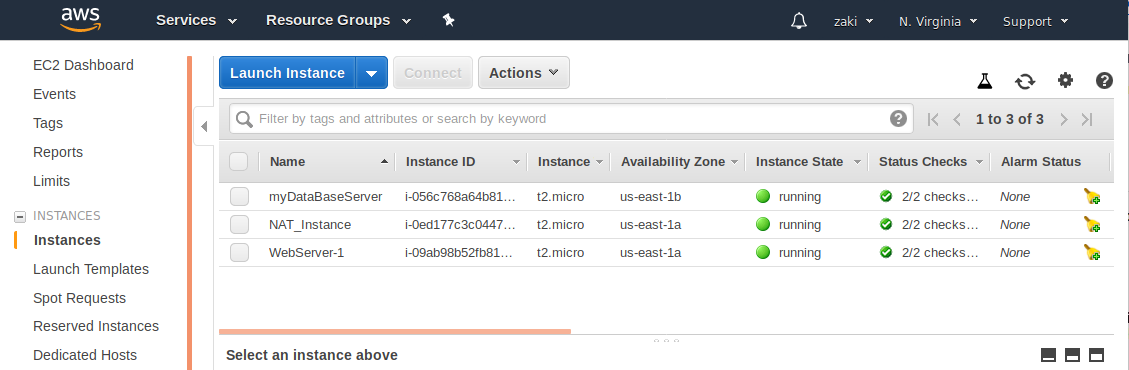
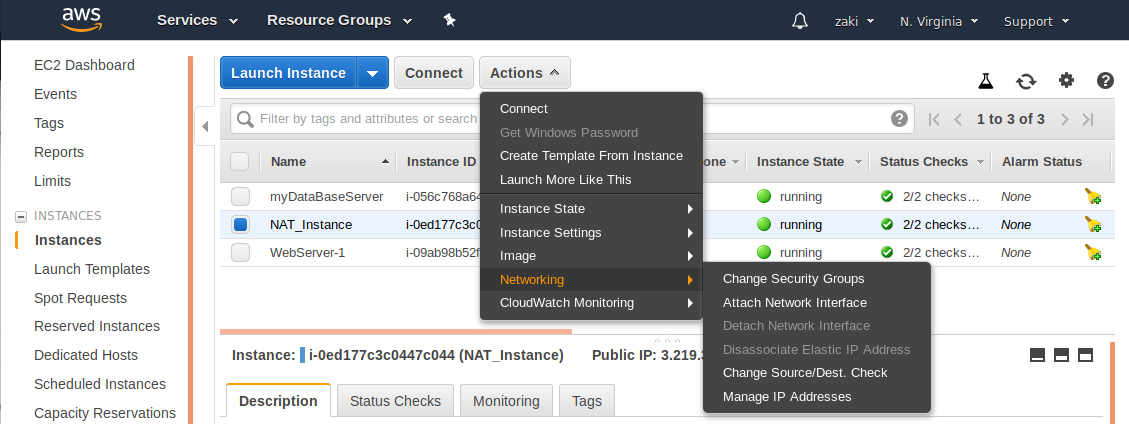
.EC2 instances x2: one deployed on a Public Subnet, the other on a Private Subnet
.Subnets x2 : Public, Private
.NAT gateway x1
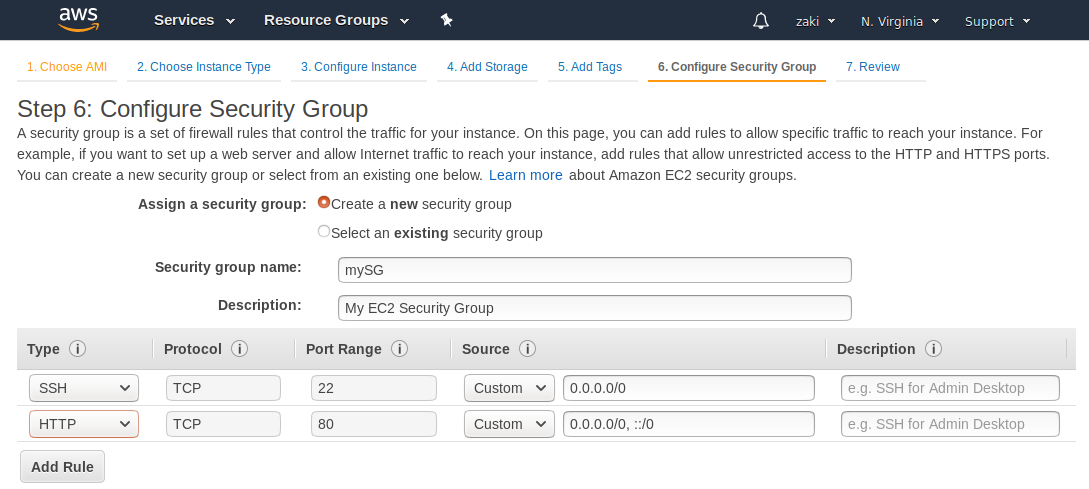
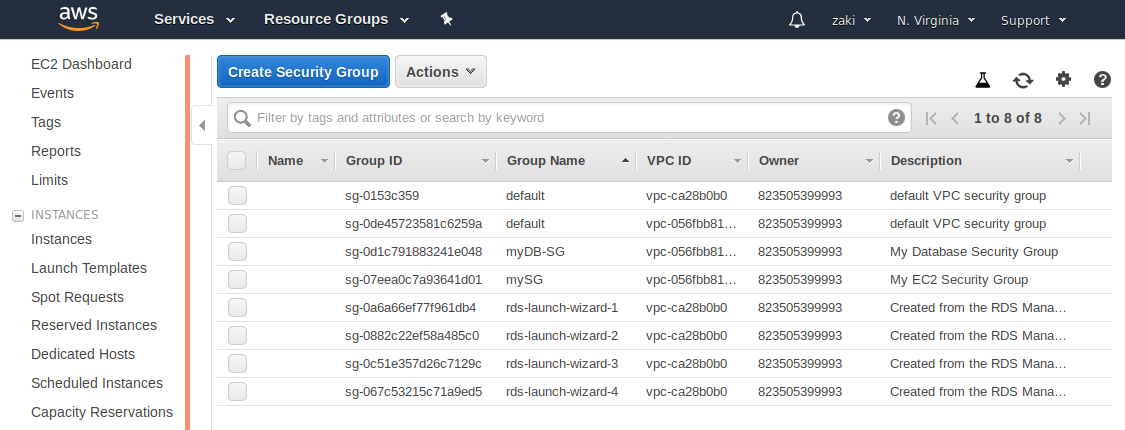
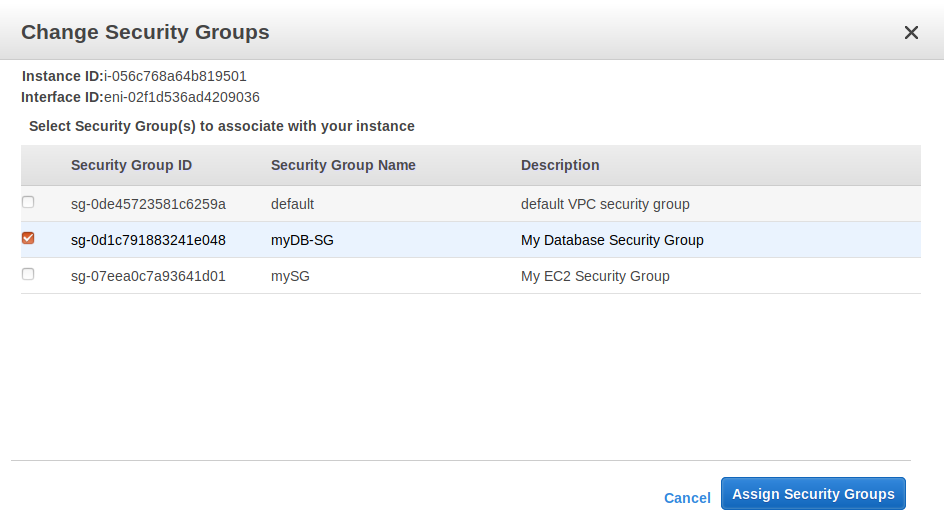
.ACL network x1
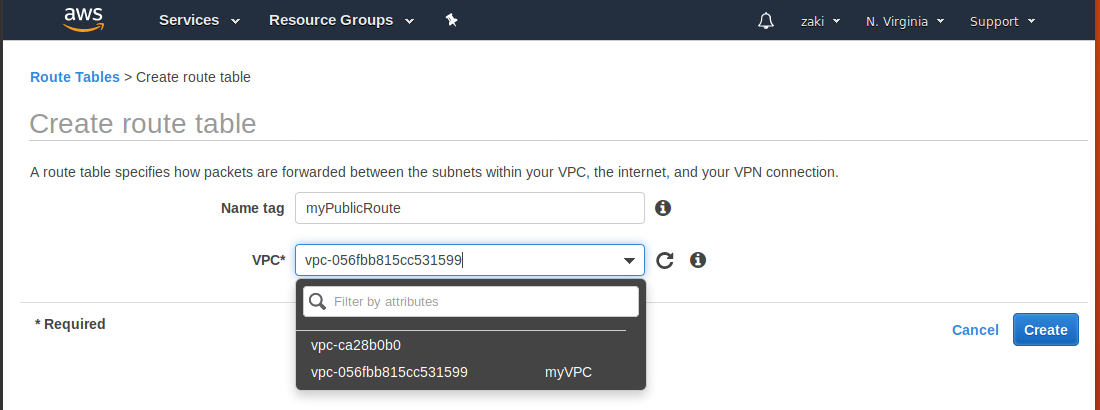
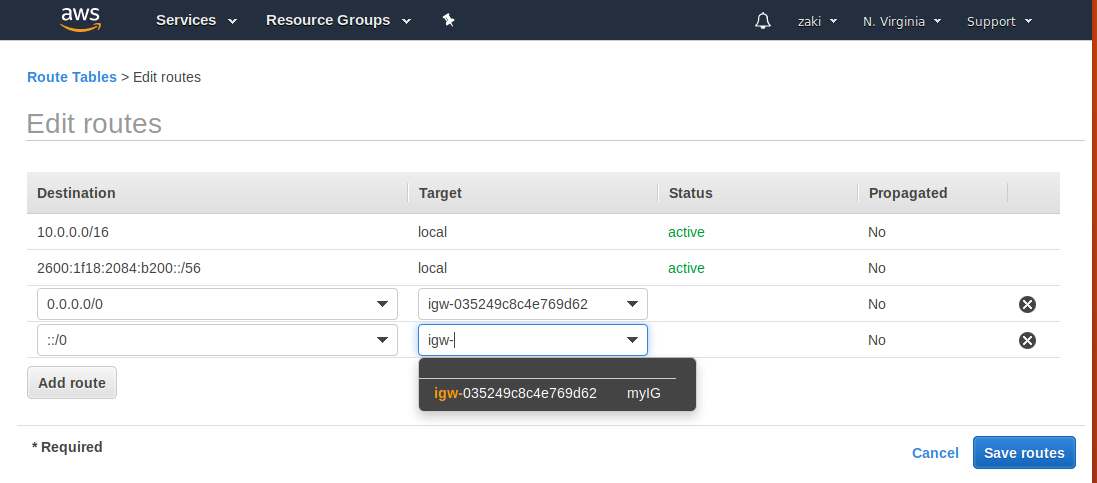
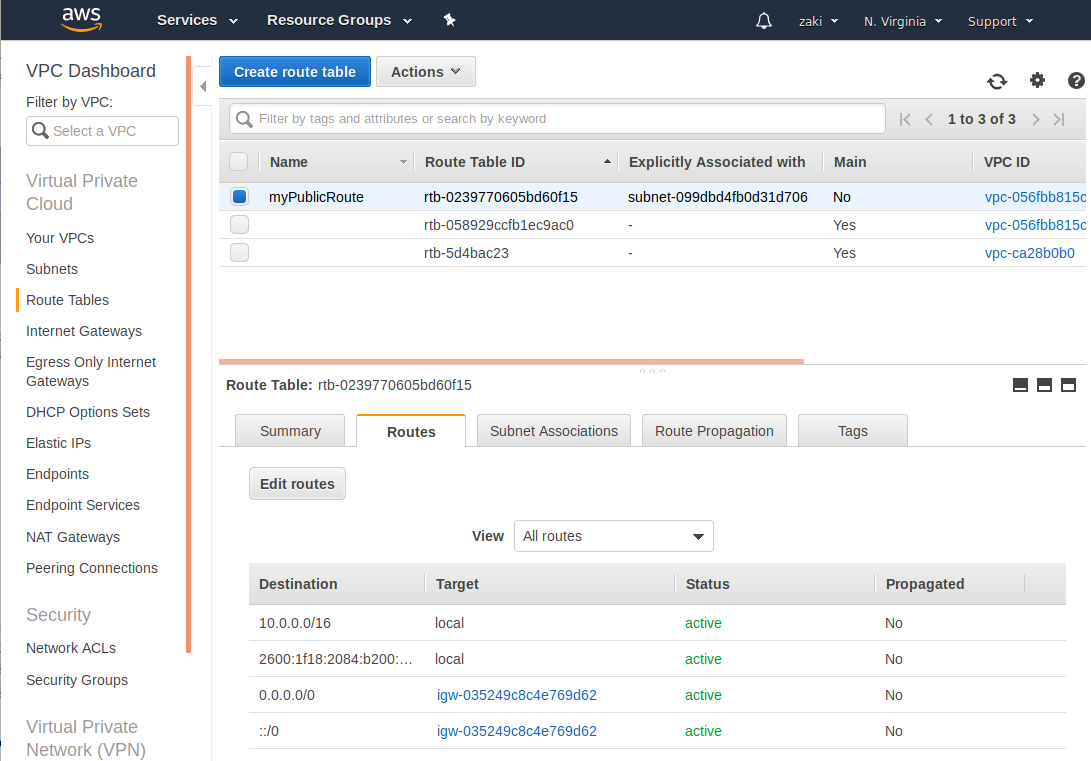
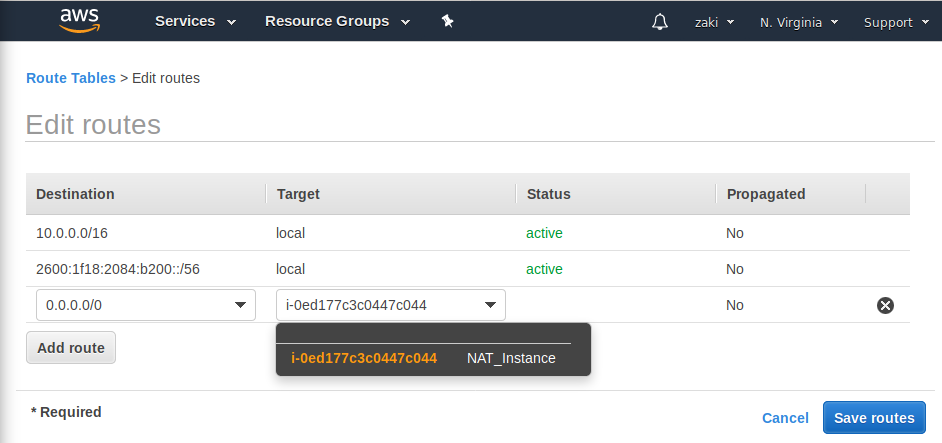
.Route Tables x2
.VPC x1
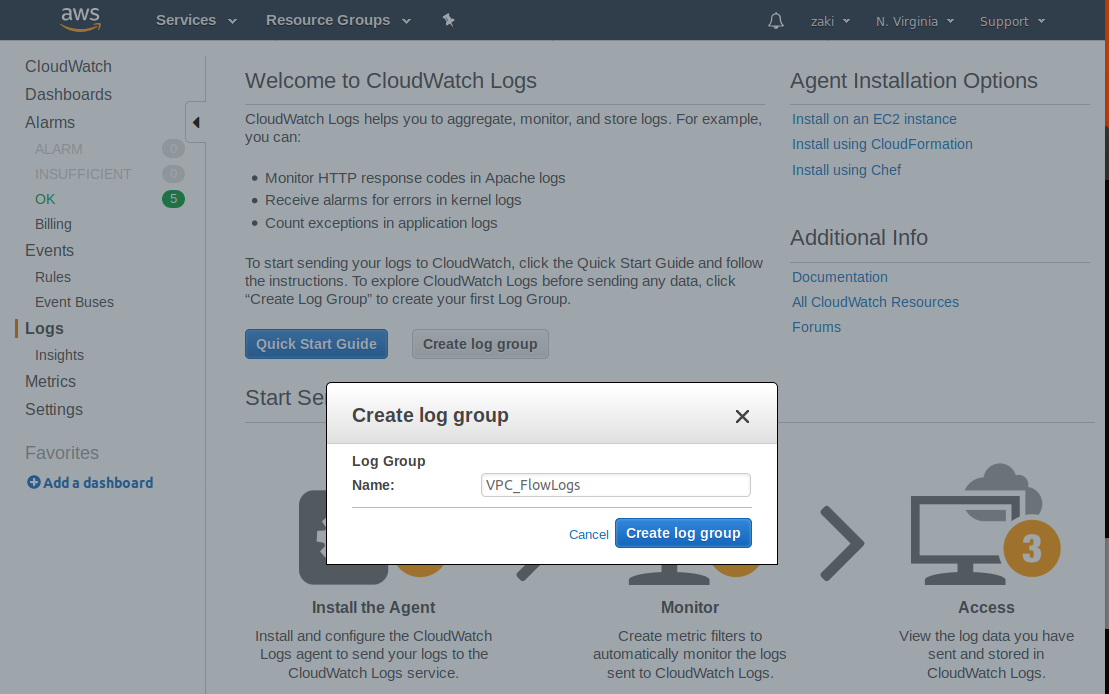
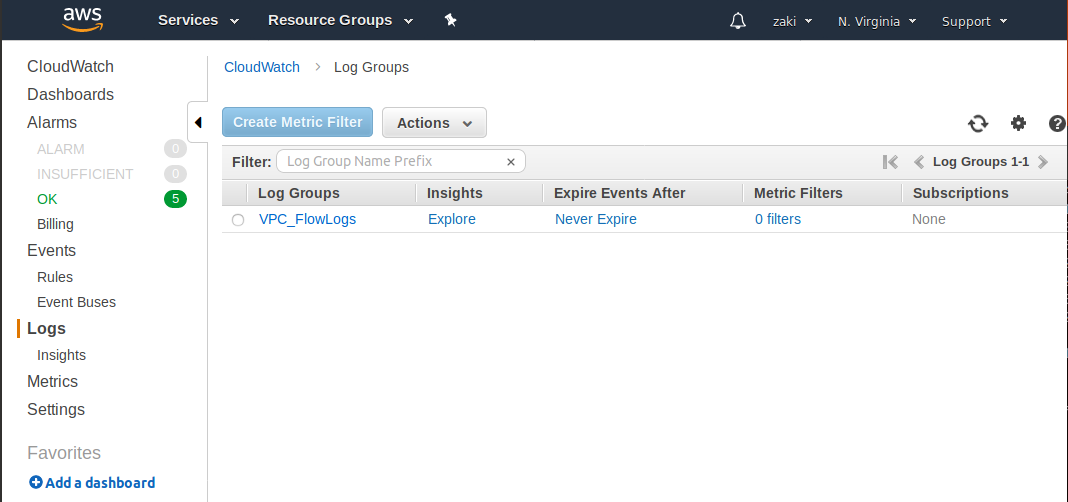
Go to Services > Under Management & Governance click "CloudWatch" > Logs > Let's get started
Create log group > Log Group name: VPC_FlowLogs
🔴 See output
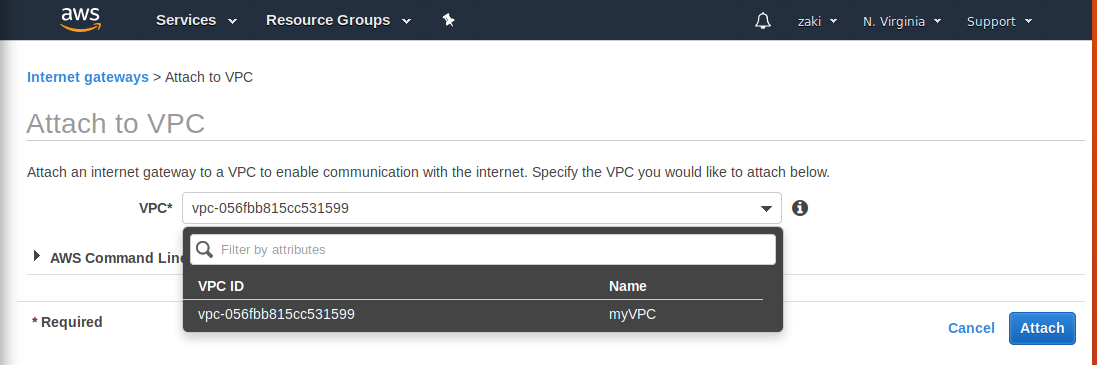
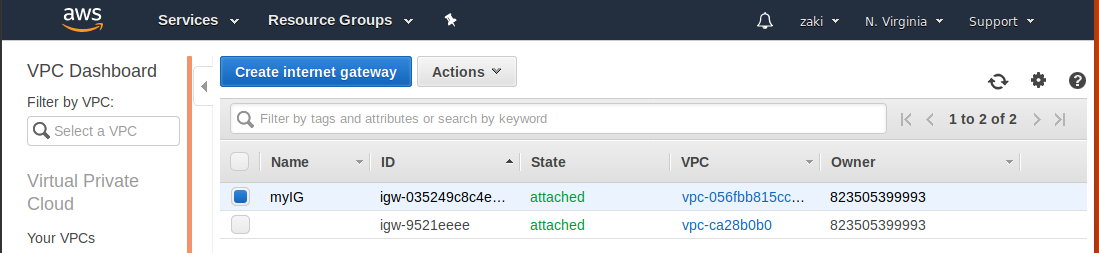
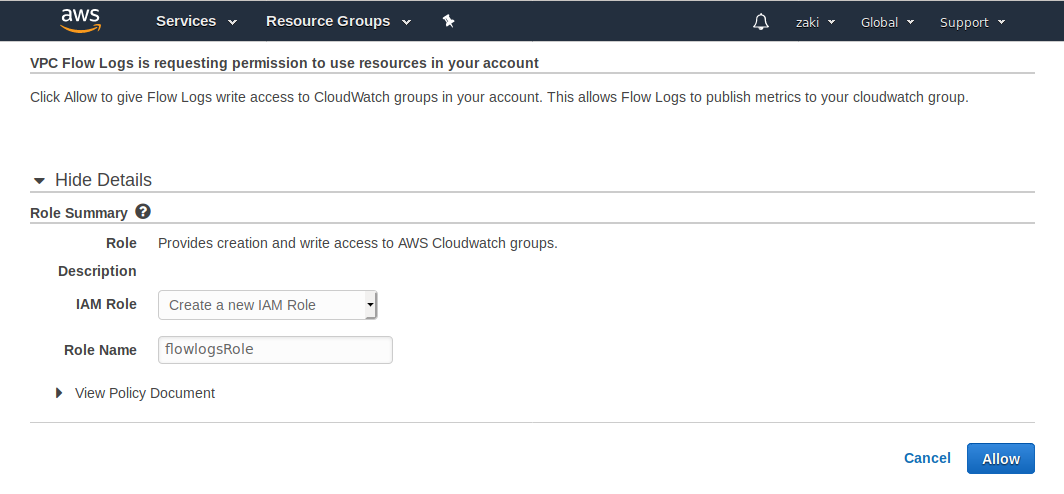
Go to Services > VPC > Click on VPCs > Select our Custom VPC (myVPC) > Actions > Create flow log
Filter: select "All" > Destination log group: VPC_FlowLogs > to inform a IAM role click "Setup permissions"
Leave everything as it is by default and click "Allow"
🔴 See output
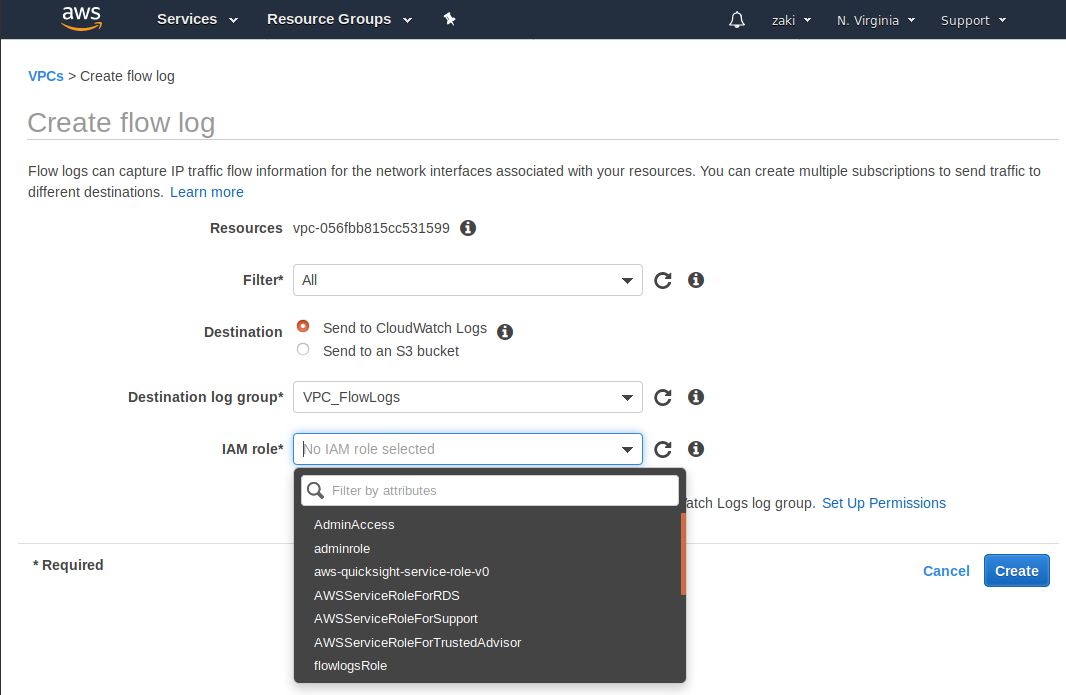
Let's go back to our Flow Logs setup tools and select flowlogsRole.
🔴 See output
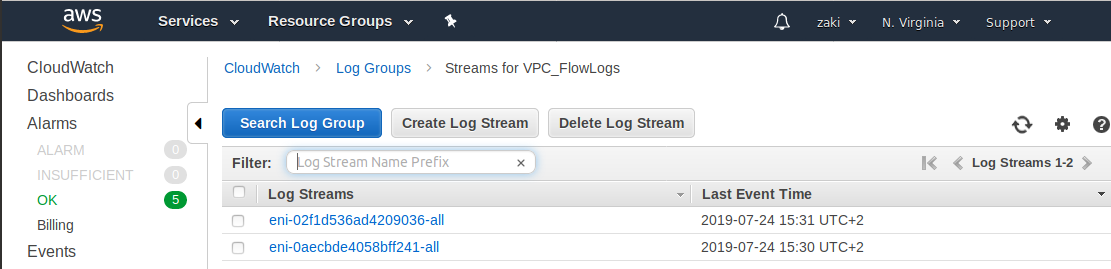
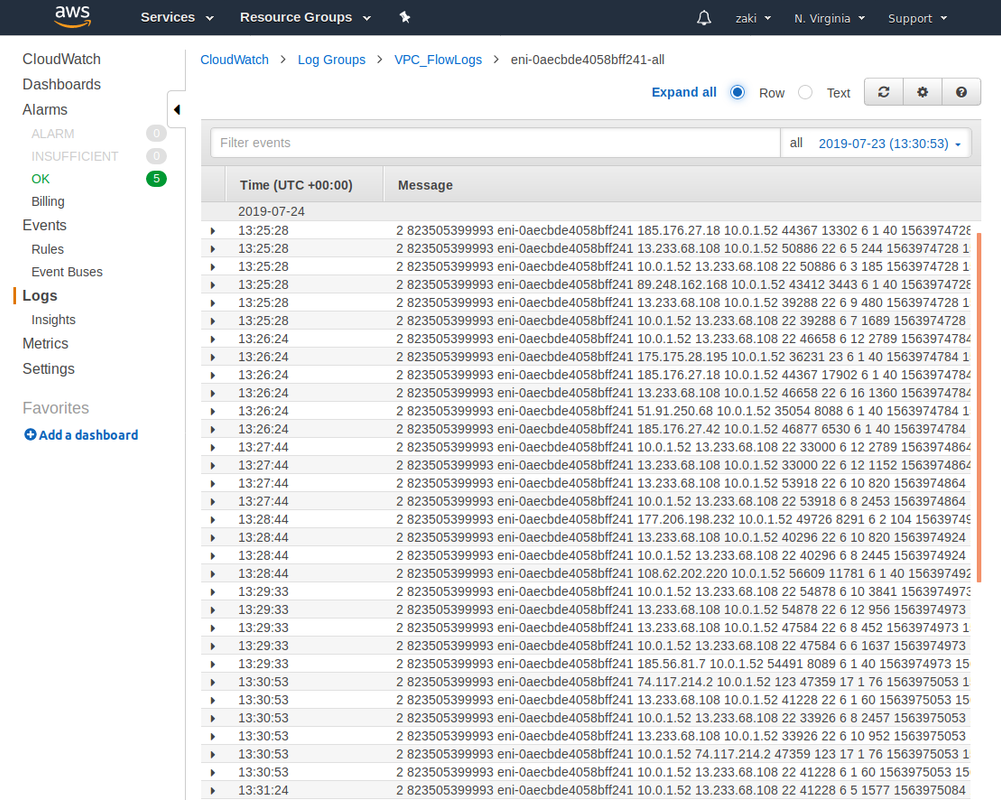
Go to Management & Governance, click on "CloudWatch" > Logs > VPC_FlowLogs
🔴 See output
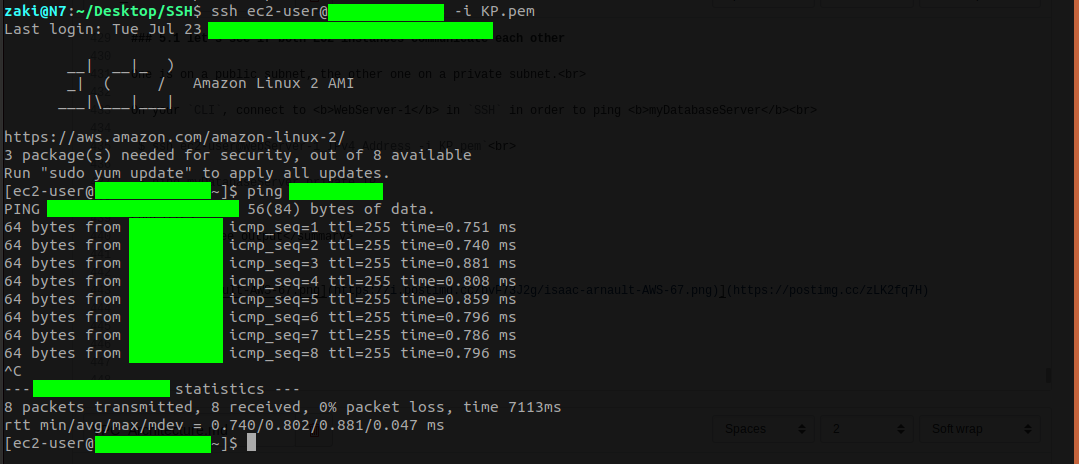
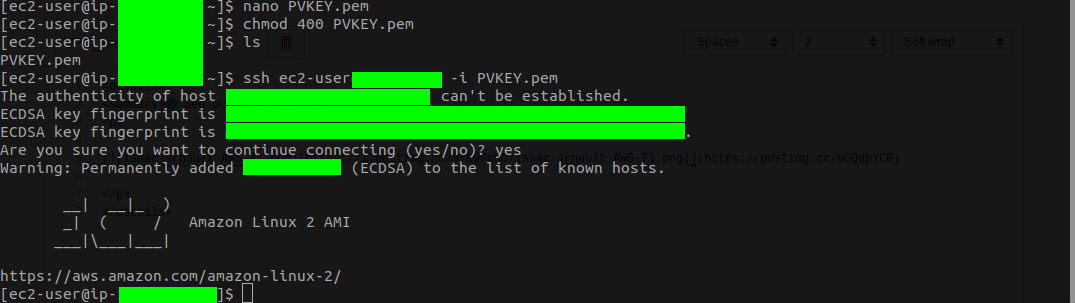
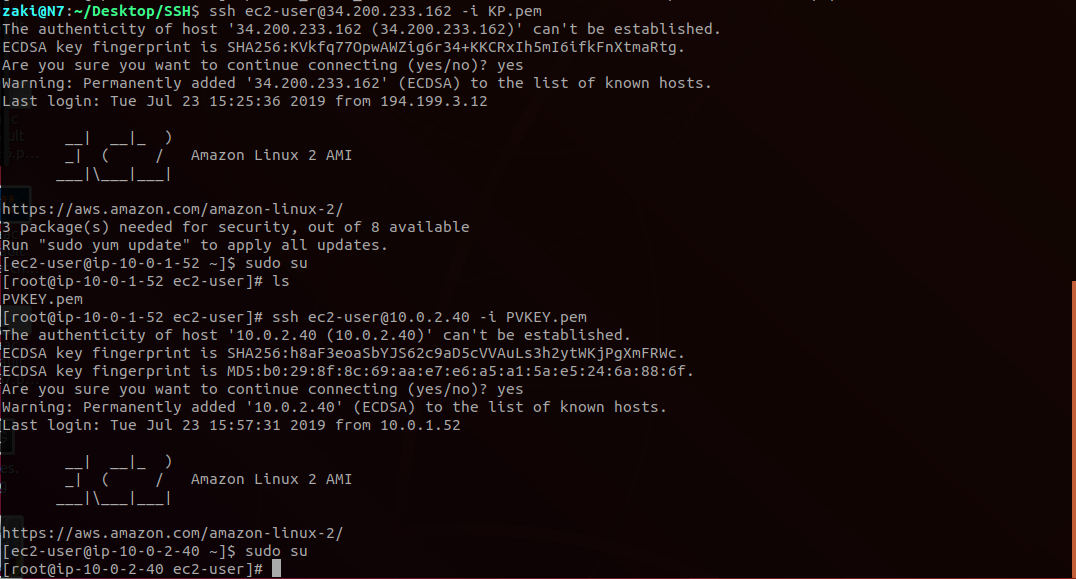
If you have no events appearing in Log Streams, you should wait until they appear or you can try opening WebServer-1 IPv4 in your browser. This will generate logs and they should appear in your console.