
A. Cloud platform: 1 AWS account
B. Tools used: 1 EC2 instance on AWS (Ubuntu 18.04 LTS)
C. Containerization: 1 Docker image (Cloudera Quickstart)
D. Programming language: Bourne Shell (bash)
Some of you asked me to make a gist that helps beginners with Hadoop.
Is Hadoop going to die as many claim?
If yes, then let's run a Hadoop cluster before it's too late :)!
This gist will help you launch a Hadoop cluster easily.
We'll be using AWS as Compute and Storage platform.
We'll also use Docker in order to launch Cloudera QuickStart.
At the end of this gist, you'll have a Hadoop cluster up and running for basic purposes.
I recommend you to use a regular or enterprise version of Cloudera for dev and prod purposes.
Before you start
Create an account on
AWSand log intoAWS Management Console.
Check PREREQUISITES section of this gist
This section must be considered before taking the README.md section of this gist.
We'll first set up a security group, a user and assign an IAM role before proceeding to the concrete installation of Hadoop.
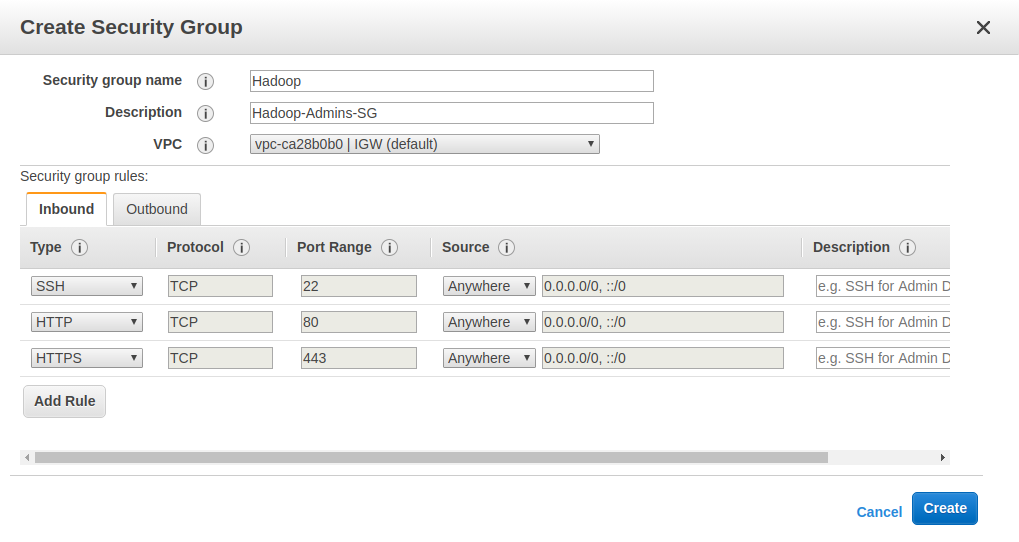
Go to Services > EC2, in NETWORK AND SECURITY, click on Security Groups > Create Security Group
Security group name: Hadoop
Description: Hadoop-Admins-SG
VPC: select default VPC
Security Group Rules (Inbound and Outbound): allow SSH, HTTP, HTTPS from anywhere.
Click on Create.
🔴 See configuration
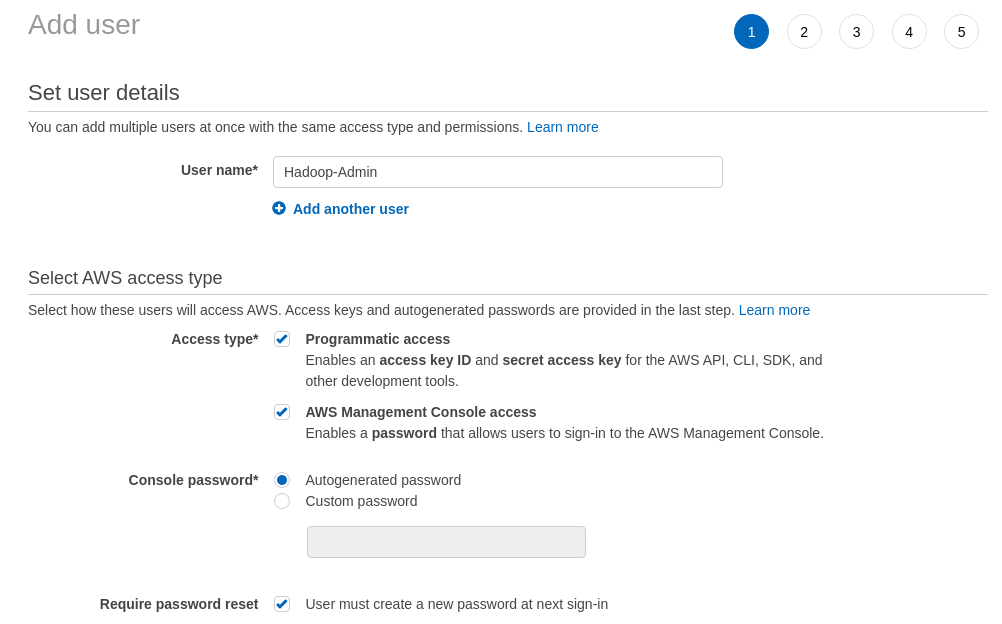
Go to Services, in Security, Identity and Compliance section, click on IAM.
Click on Users > Add user and configure as follows:
🔴 See configuration
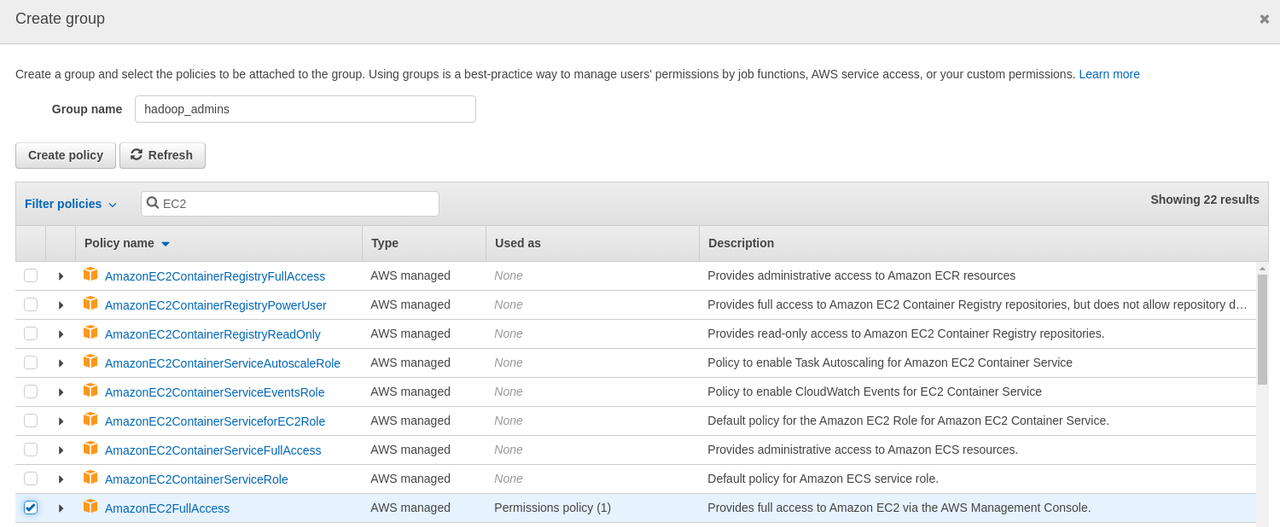
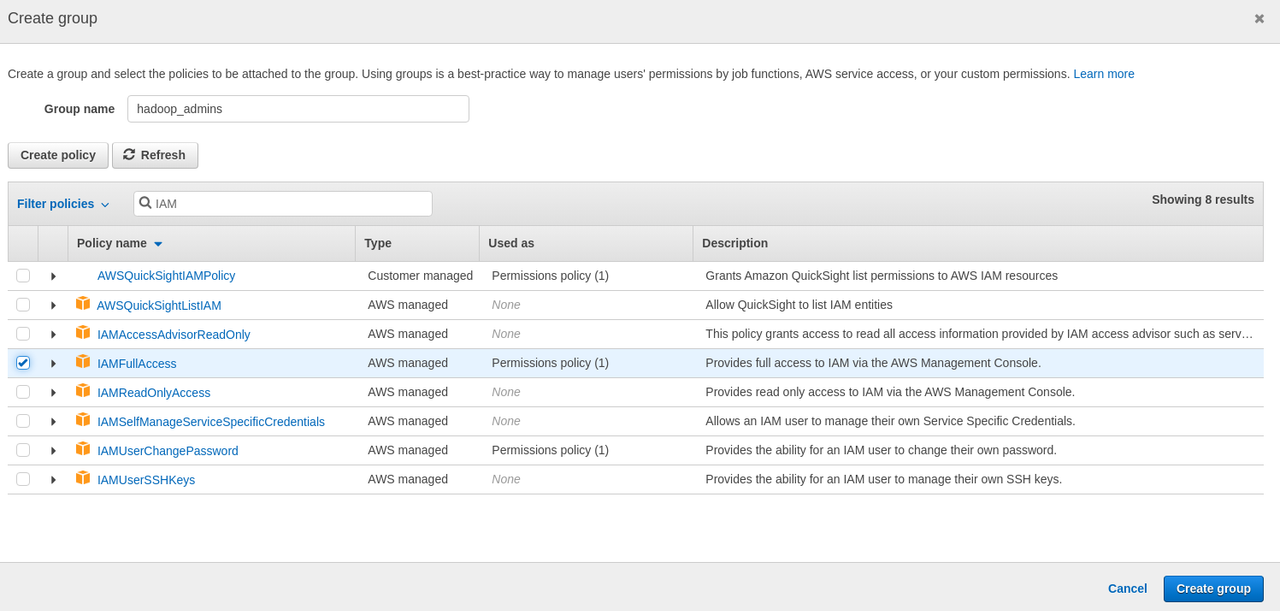
Click on Next: Permissions > Add user to group > Create group > Group Name: hadoop_admins
Search for EC2: select AmazonEC2FullAccess, Search for IAM: select AmazonIAMFullAccess
🔴 See configuration
🔴 See configuration
In IAM go to Roles > Create role > click on EC2 > Next: Permissions > select AdministratorAccess
🔴 See configuration

Key: name > Value: hadoop-cluster > Next: Review > Role name: AdminAccess > Create role. By clicking on IAM, you can have a summary of the role you've created.
🔴 See configuration
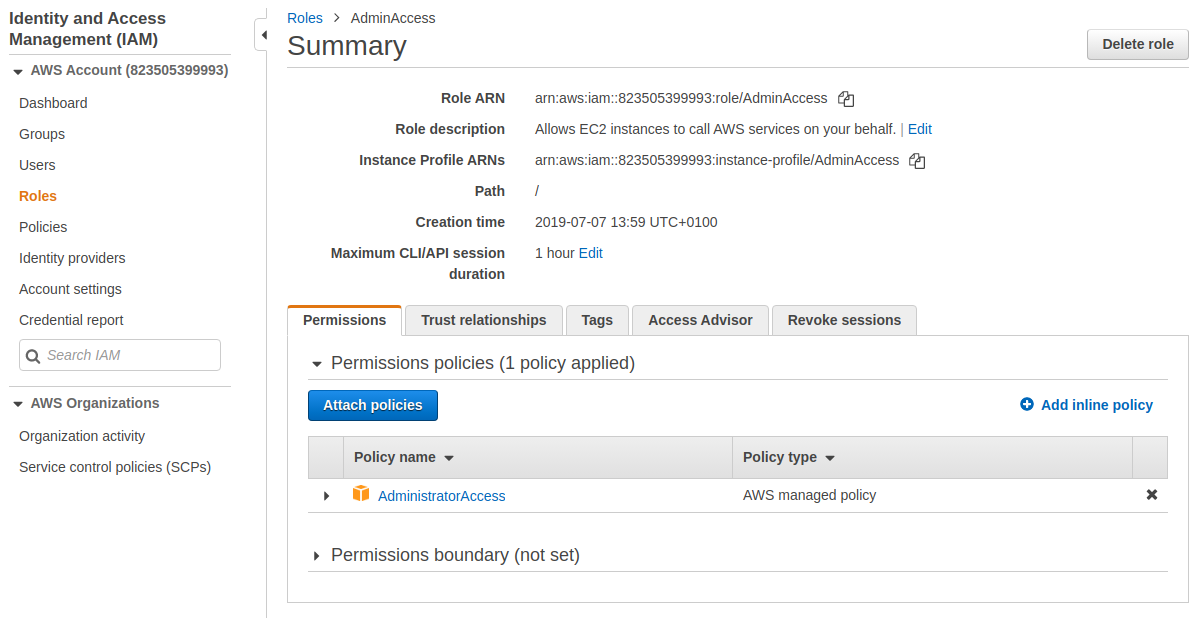
At this stage you should have a user, a group and a role attached to your AWS account before proceeding to step 2.
Please note: having all check marks on IAM green is great, but it is not mandatory by AWS.
🔴 See configuration

Steps to be covered: 3
Go to Services > EC2, click on Launch Instance.
Select Ubuntu server 18.04 LTS as AMI.
🔴 See configuration

Choose a t2.xlarge instance type. Choosing a lower instance may lead to latency.
🔴 See configuration

Click on Configure Instance Details and tune as follows:
Number of instances: 1 > IAM role: AdminAccess > Next: Add Storage, set storage size to 30 Gibibytes.
🔴 See configuration

Next: Add tags > Key: name, Value: hadoop-cluster > Next: Configure Security Group > select an existing security group:
choose the one you've created with the above commands. You can also select your default security group.
Review and Launch > Launch.
You'll be prompted by AWS to create a Key Pair file, create a new key pair file and Download it.
Save it on a repository called hadoop:
mkdir hadoopGo to Services > EC2, wait for your instance to be running and for the health checks to pass.
When your instance is running, select your instance name, and click "Connect".
Copy the link provided by the EC2 instance and use it in your Terminal:
ssh -i "MyKeyPairFile.pem" ubuntu@ec2-*-*-*-*.compute-1.amazonaws.comOpen your Terminal and go the the repository where you've stored the Key Pair file.
Perform as follows:
chmod 400 MyKeyPairFile.pemNow execute the given ssh command by your EC2 instance:
ssh -i "MyKeyPairFile.pem" ubuntu@ec2-3-90-136-245.compute-1.amazonaws.comYou are now logged into your EC2 instance's terminal and ready to install Docker and Cloudera Quickstart.
sudo apt-get remove docker docker-engine docker.iocurl -fsSL https://download.docker.com/linux/ubuntu/gpg | sudo apt-key add -sudo apt-key fingerprint 0EBFCD88sudo add-apt-repository \
"deb [arch=amd64] https://download.docker.com/linux/ubuntu \ $(lsb_release -cs) \ stable"sudo apt-get updateapt-cache madison docker-cesudo apt install docker.iosudo systemctl start dockersudo systemctl enable dockerdocker --versionsudo sudocker imagesdocker psdocker pull cloudera/quickstart:latestdocker run -m 4G --memory-reservation 2G --memory-swap 8G --hostname=quickstart.cloudera --privileged=true -t -i -v $(pwd):/CDH --publish-all=true -p8888 -p8088 cloudera/quickstart /usr/bin/docker-quickstart🔵 See output
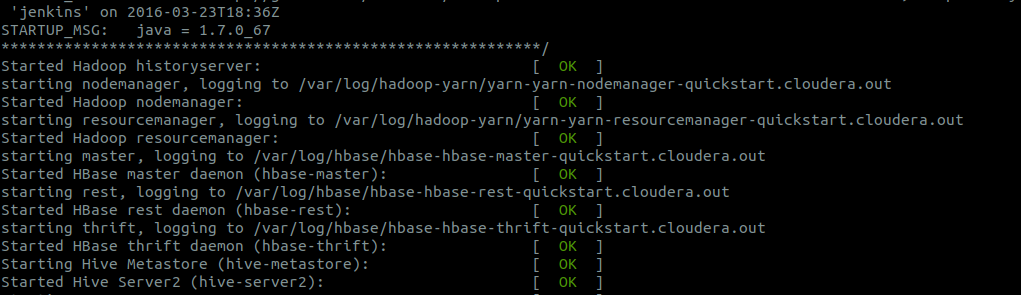
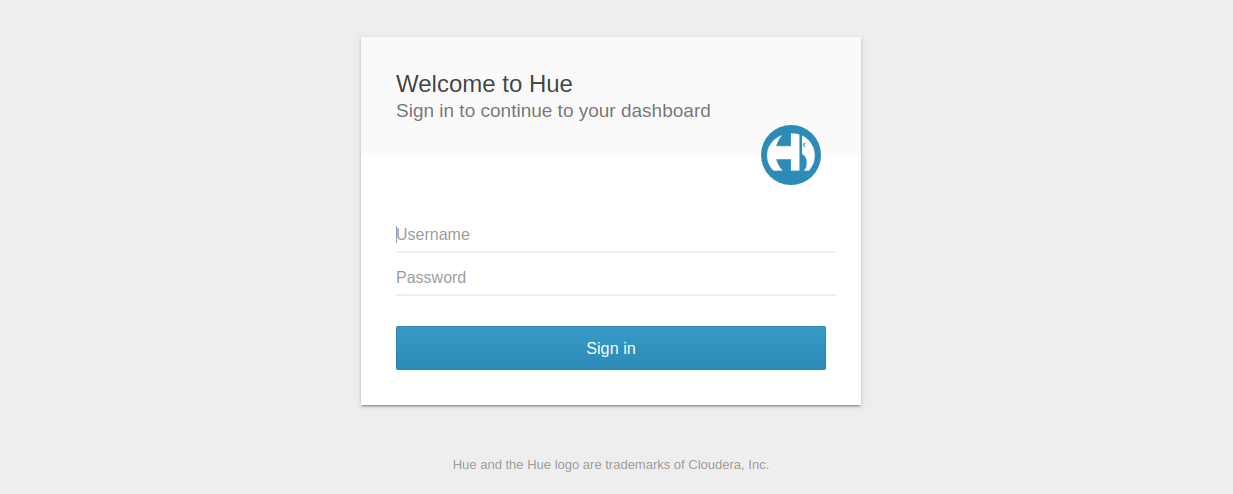
If all services are launched on your EC2 Terminal, open your web browser and type the following :
my-EC2-instance-DNS:32768
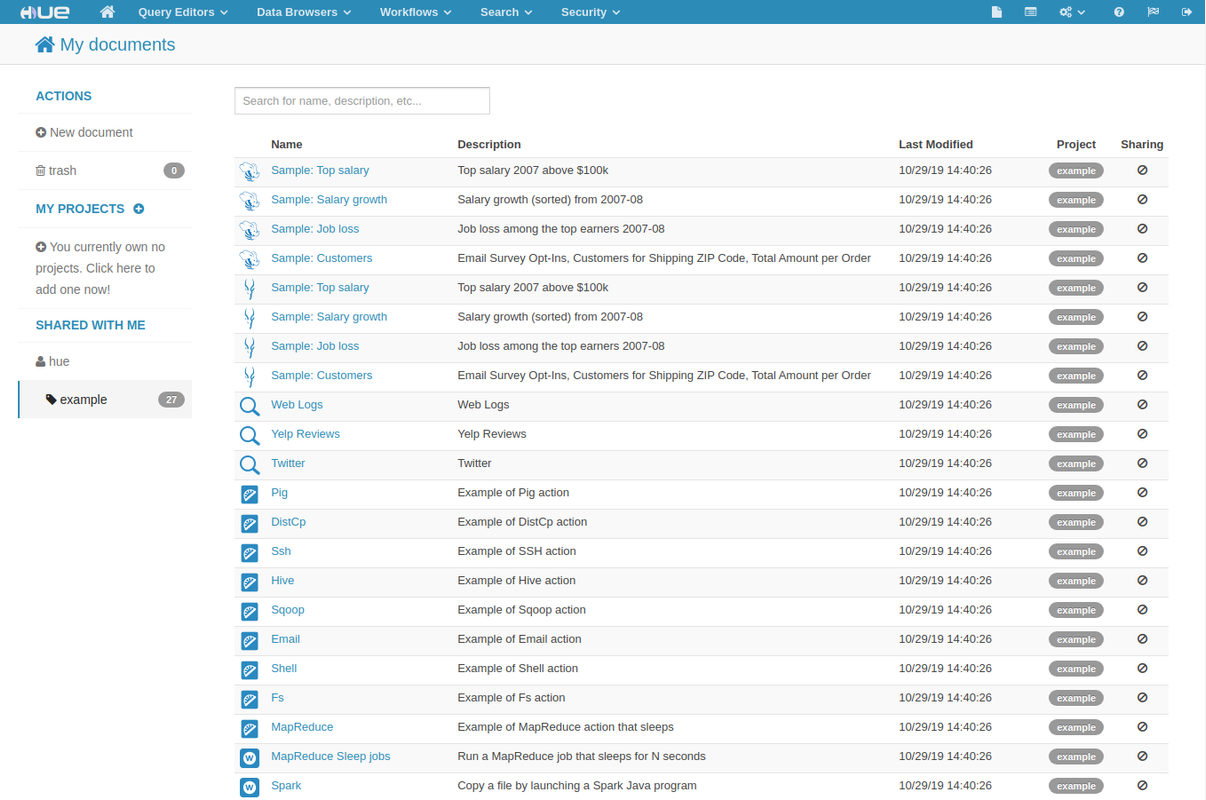
You should land to the login form, use cloudera / cloudera as login and password.
Here you go! You can now start using Hadoop for testing purposes.
🔵 See output
my-EC2-instance-DNS:32769 for cluster overview
🔵 See output

You can install other applications directly from the panel and have your cluster ready for action!
- Isaac Arnault - Helping devs install Hadoop in a more effective way, cheaply, effortlessly and timelessly.