You signed in with another tab or window. Reload to refresh your session.You signed out in another tab or window. Reload to refresh your session.You switched accounts on another tab or window. Reload to refresh your session.Dismiss alert
This file contains bidirectional Unicode text that may be interpreted or compiled differently than what appears below. To review, open the file in an editor that reveals hidden Unicode characters.
Learn more about bidirectional Unicode characters
The following gist is intended to DevOps Engineers and Data Architects and is part of my cloud series.
It will help you start with Terraform Cloud using GitHub and AWS.
Thanks for forking this gist if you find it useful.
How this gist is structured
This gist is structured into 6 parts.
Part 1. Get started with Terraform Cloud UI Part 2. Plan an apply a configuration Part 3. Update variables Part 4. Cost estimation and mitigation Part 5. Sentinel Policies and Policy Sets.md
Part 6. Destroy Infrastructure
Terraform is a freemium Infrastructure as Code tool which can help you deploy IT infrastructures from configuration files rather than interracting with your tools UIs.
Terraform is mainly dedicated to CI/CD projects and to DevOps Engineers, Cloud Engineers, Data Architects.
You can use Terraform locally in your Shell or in the Cloud (scope of this gist).
Before diving deeper into Terraform, I recommend having prior knowledge of programming in any language, or in Cloud computing.
This file contains bidirectional Unicode text that may be interpreted or compiled differently than what appears below. To review, open the file in an editor that reveals hidden Unicode characters.
Learn more about bidirectional Unicode characters
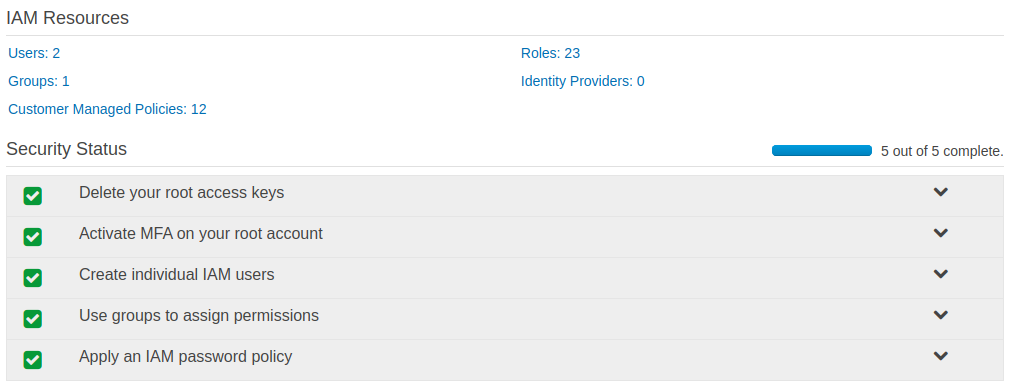
Once logged into your AWS console, go to IAM.
If you are new to AWS, please bypass all user configuration (green ticked marks below) for the sake of simplicity.
🔵 See output
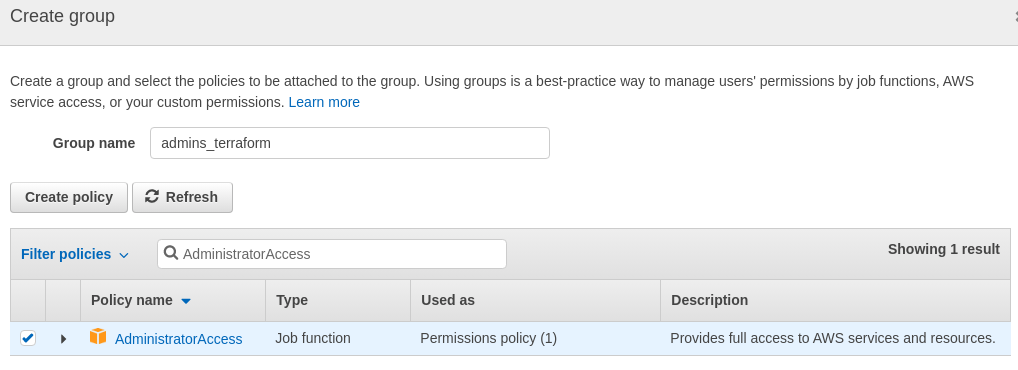
. Click on Users > Add user
. Next: permissions > Create group: call it admins_terraform.
. Filter policies: search for AdministratorAccess in the search bar.
. Select the AdministratorAccess policy and click on 'Create group'.
🔵 See output
. Next: tags. Use as key: resources and as Value: terraform
. Next: review > create user > download the .csv file which contains security credentials for the user '
terraform_user'
Access key ID and a Secret access key were provided to you by AWS.
Be sure to keep these values in a secure location; you will use them in the next step.
You can keep this window opened and open a new AWS console window from your browser.
Important
Follow `AWS` security best practices by deleting this user and the group created after completing this gist, since all security parameters for this user weren't fulfilled for the sake of simplicity.
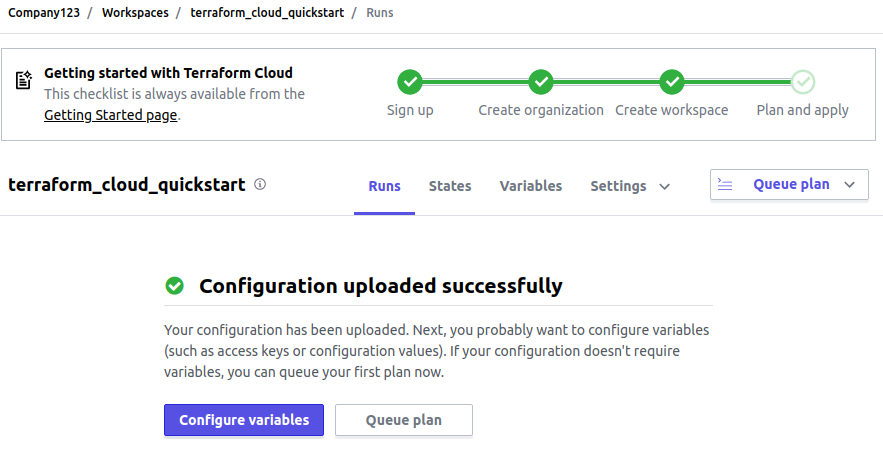
Step 2 - Configure workspace variables
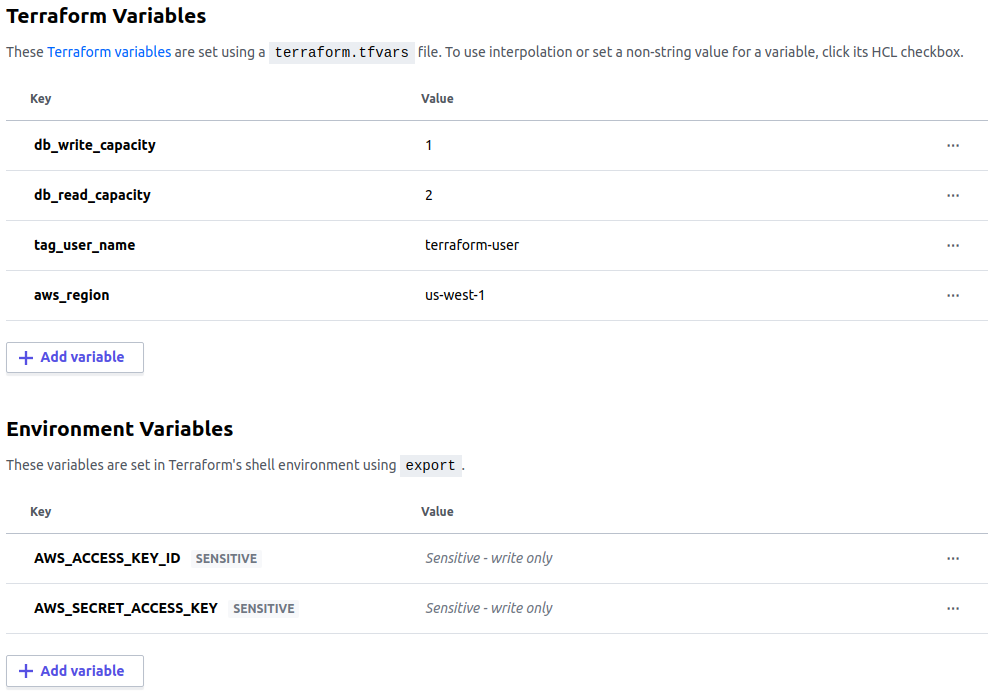
Go back to your Terraform Cloud window and click on 'Configure variables'
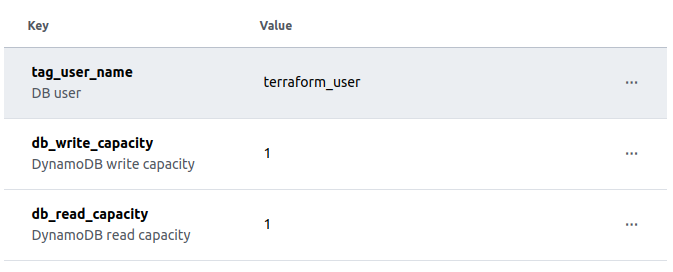
. Scroll down to Terraform variables > Add variables: here you'll create three (3) variables, one related to a user, and two related to the DynamoDB database: 'tag_user_name', 'db_write_capacity', 'db_read_capacity'.
. Do the same for Environment variables > Ass variables: create 2 variables 'AWS_ACCESS_KEY_ID' and 'AWS_SECRET_ACCESS_KEY'.
🔵 See output
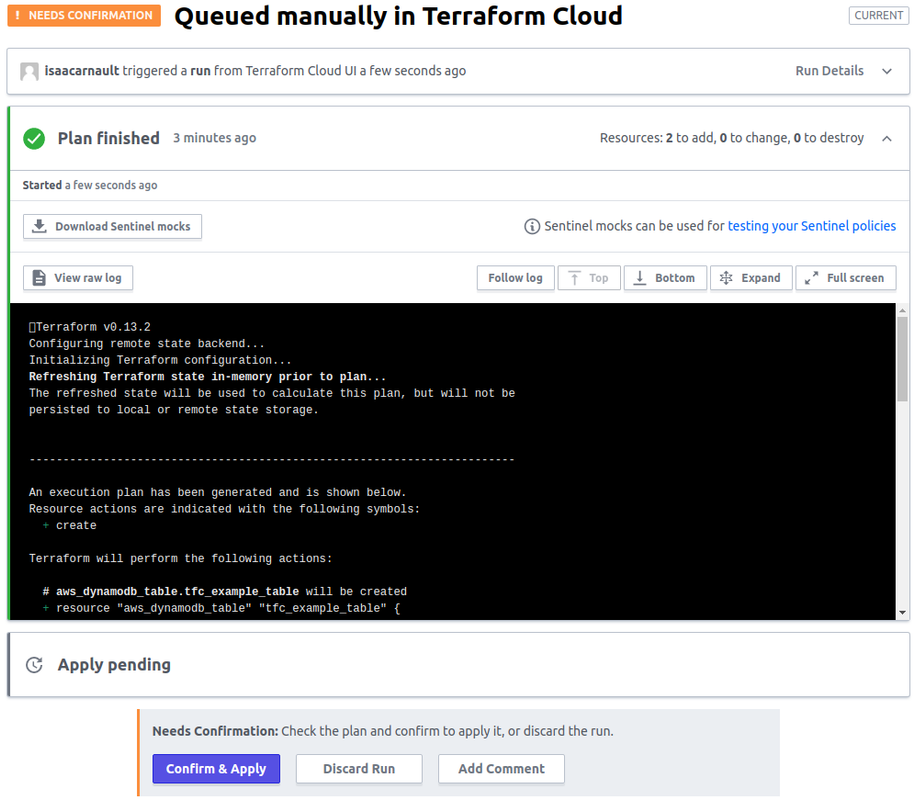
Step 3 - Queue and apply plan
. Click on Queue plan. When prompted, click on 'Confirm & Apply'.
🔴 See hint
If everything is set up correctly, you should have this:
🔵 See output
If you get an error, make sure you've followed the prerequisites (Get_Started section of this gist) and that you've set the 5 requested variables correctly.
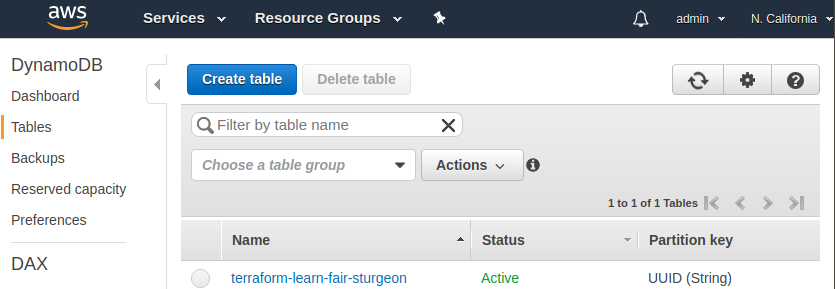
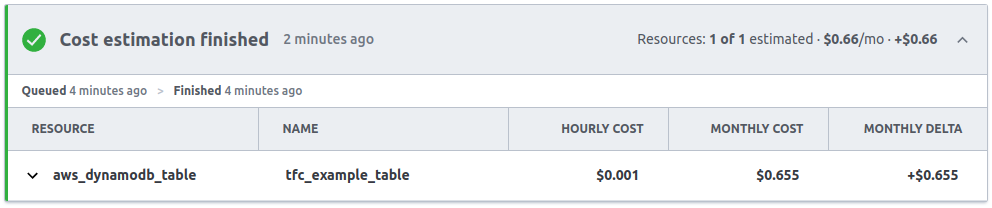
You can go to your AWS console and check that the DynamoDB table was provisioned successfully.
🔵 See output
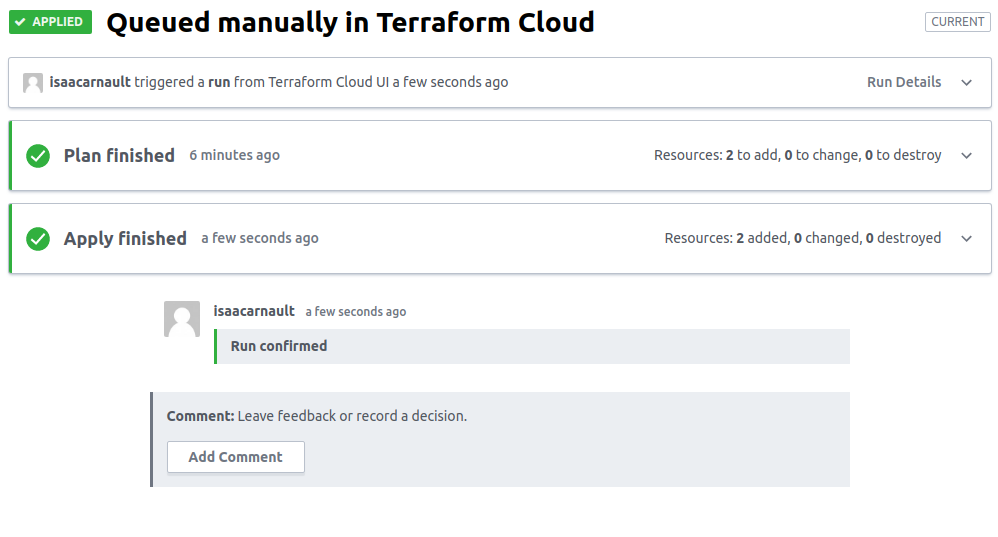
At the end of this part, you've configured your workspace and provisioned a `DynamoDB` instance using `Terraform Cloud`.
Step 1 - Change Infrastructure via Version Control
There are two (2) ways to update our workspace deployments on Terraform Cloud:
change the configuration in VCS. or
update variables in the Terraform Cloud UI.
Important - tools of our Workspace
Runs - shows a list of all of the plan and apply actions you have taken with this workspace. States - shows a list of the entire tfstate file of your workspace after each successful run. Variables - let you configure Terraform variables and environment variables. Settings - contain all of the other configuration for your workspace. Queue plan - lets you start a new plan.
Step 2 - Changing variables
In your Terraform Cloud UI, go to 'Variables'.
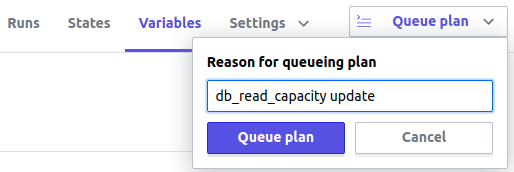
You can try changing your 'db_read_capacity' value from 2 to 1.
🔵 See output
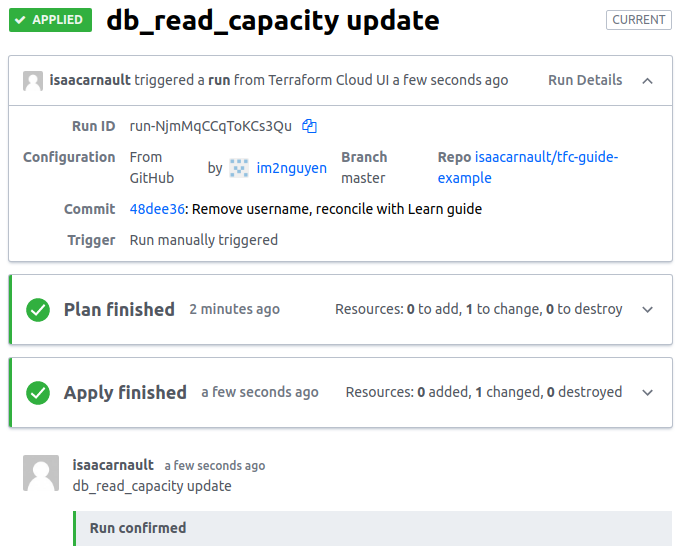
Click on 'Queue plan' and you can set as reason: 'db_read_capacity update' (not mendatory).
🔴 See hint
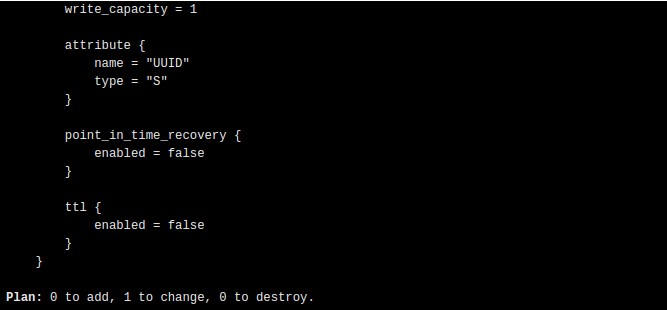
You'll notice once queuing the plan that the log indicates that there are "0 to add, 1 to change, 0 to destroy", which corresponds to your update.
🔵 See output
Then 'Confirm & update' and wait for the update confirmation:
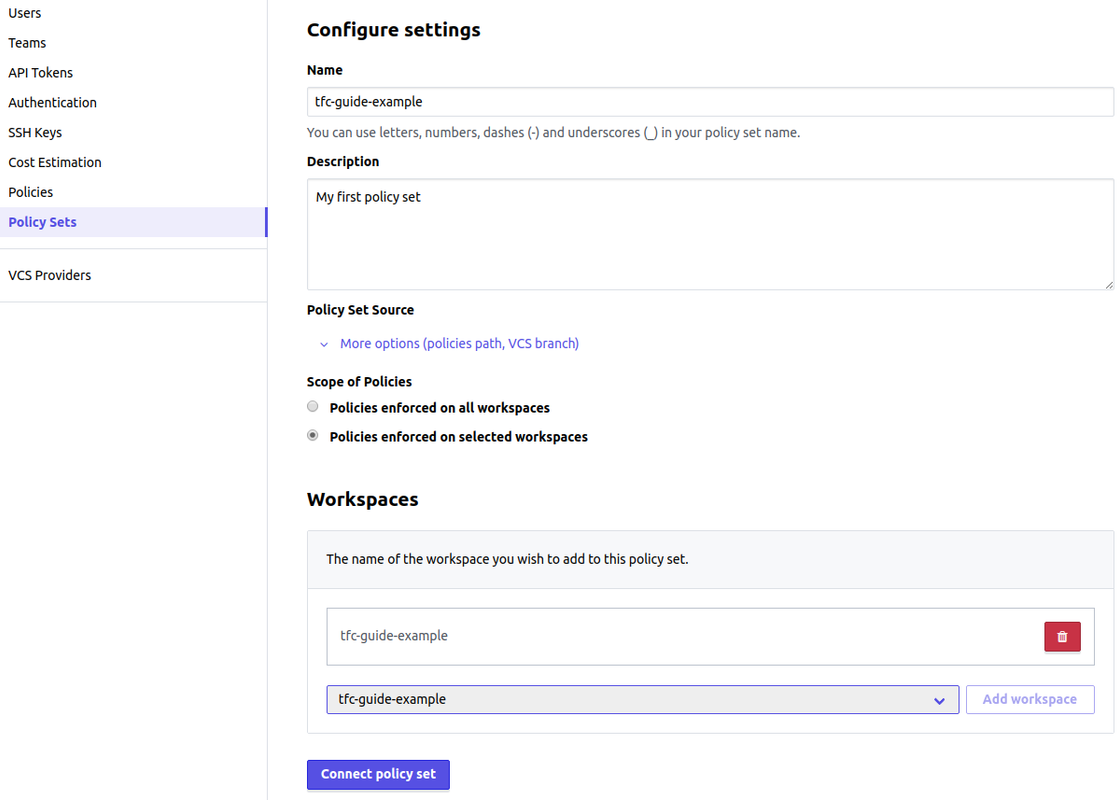
Scope of policies > select Policies enforced on selected workspaces.
In the Workspaces box, select tfc-guide-example workspace, then Add workspace.
Next: click on connect policy set
🔴 See hint
Step 2 - Update GitHub repository
Now that we have a new Sentinel policy and a Policy Set, we should add one file into our GitHub repository otherwise we'll get some error while queueing our plan.
We go to tfc-guide-example repository that we've forked.
Click on Add file, then Create new file
🔴 See hint
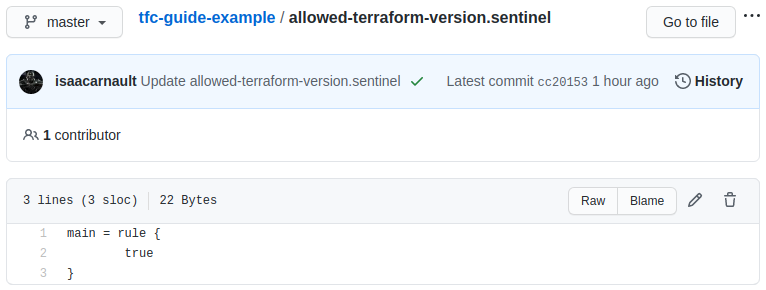
Call the file allowed-terraform-version.sentinel and pass the following code onto it, then click on Commit
main=rule {
true
}
Our newly created file should look like this:
🔵 See output
We have one Sentinel policy and one Policy Set configured as well as a new file created in our GitHub repository.
We are now ready to run a 'Queue plan'.
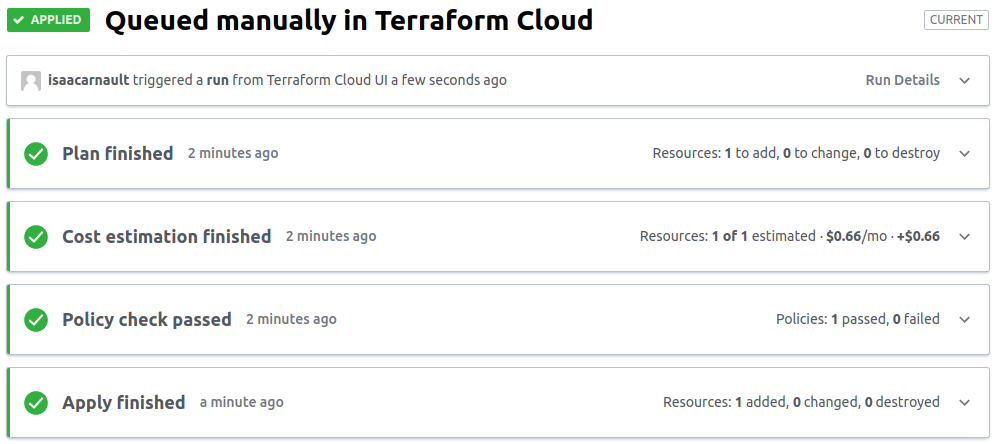
Step 3 - Queue plan to apply your policies
We go to our tfc-guide-example workspace and click on 'Queue plan'.
Upon completion, a new tab Policy check should appear in our UI.
If we have properly configured our Sentinel policy and Policy Set as well as our repository file, Policy check should pass.
Destroying the infrastructure is part of Terraform normal workflow.
Destroy infrastructure
Go to your workspace in the Terraform Cloud UI.
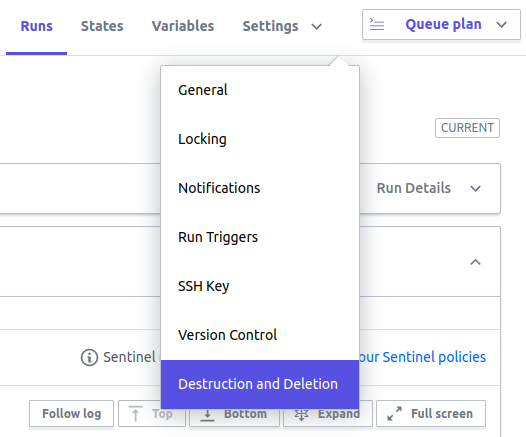
From the top menu select "Settings -> Destruction and Deletion".
🔵 See output
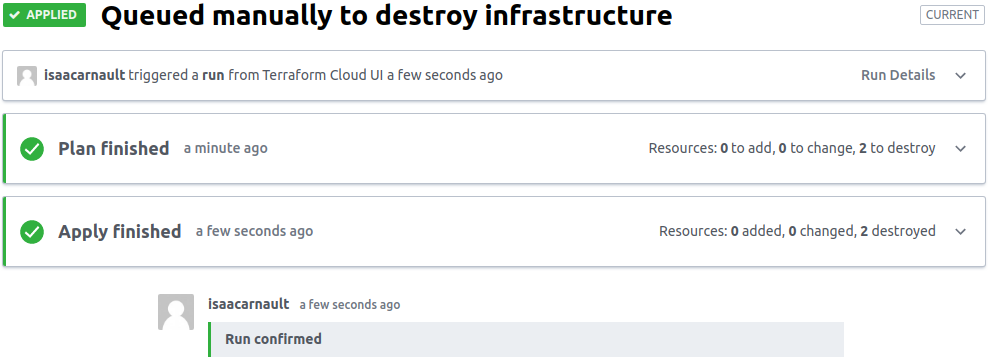
. Queue destroy plan:
🔵 See output
Confirm and apply when prompted and wait for the destruction:
🔵 See output
You'll notice that you've destroyed the plan but your workspace is still alive.
🔵 See output
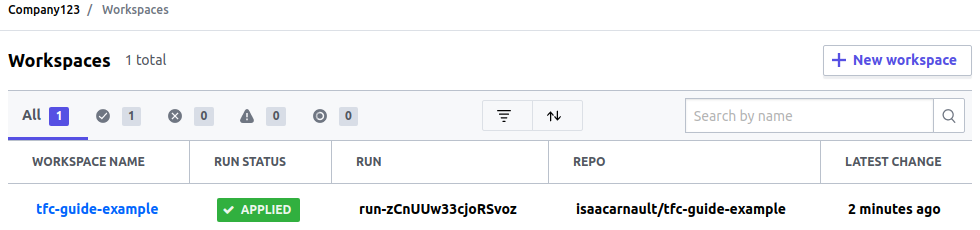
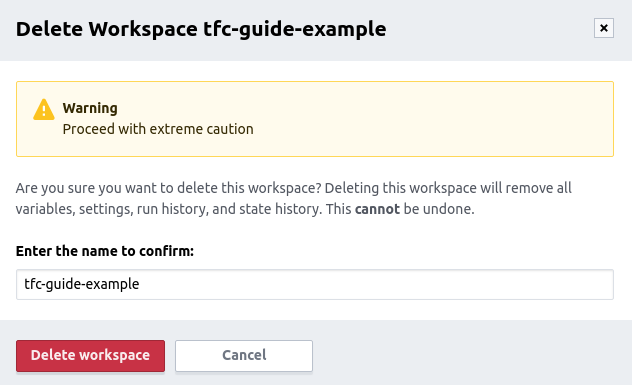
Go back to 'Settings' and proceed to the workspace deletion.
🔵 See output
Confirm Workspace deletion when prompted and wait for the destruction.
🔵 See output
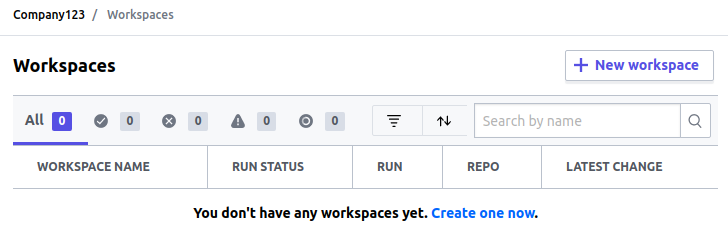
In your Organization's workspace, you'll see that your tf-guide-example workspace was deleted.
🔵 See output
Important
Deleting a workspace does not destroy infrastructure that has been provisioned by that workspace.
This means that your AWS DynamoDB table you provisioned isn't destroyed after destroying the plan and infrastructure on Terraform Cloud.
Mitigating the cost of the Infrastructure, especially if you are a Data Architect / Solution Architect is quite important.
Please bear in mind that running costs may occure if you do not delete the resources provided by your Terraform actions.
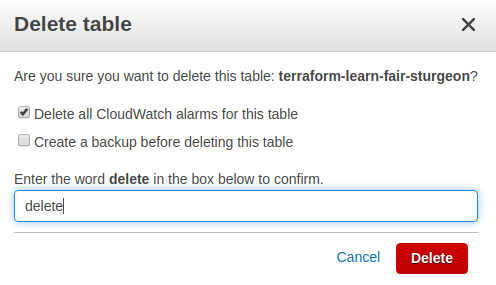
Thus, feel free to go to your `AWS` console and delete the User, Group, DynamoDB table created upon this gist completion.
This gist is now completed. We have successfully completed parts 1 to 6.
We have learnt how to implement an Infrastructure as Code using Terraform Cloud and GitHub which helped us provision a DynamoDB table on AWS.
If you enjoyed this gist, thanks for forking it and do not hesitate to ask questions.