Skip to content

Instantly share code, notes, and snippets.

@jagdeepsingh
Last active May 29, 2018 07:12
Show Gist options
  • Star 2 You must be signed in to star a gist
  • Fork 0 You must be signed in to fork a gist
  • Save jagdeepsingh/52d2d8cc4a08f2566cdeeaa88f88a383 to your computer and use it in GitHub Desktop.
Save jagdeepsingh/52d2d8cc4a08f2566cdeeaa88f88a383 to your computer and use it in GitHub Desktop.
React

1 Installation

Contents:

1.1 nvm

We will use nvm (Node Version Manager) to support multiple versions of node across applications. Lets install it first.

$ curl -o- https://raw.githubusercontent.com/creationix/nvm/v0.33.4/install.sh | bash

$ command -v nvm
nvm

1.2 node

$ nvm install node

$ npm -v
5.5.1
$ node -v
v9.1.0

See all installed versions of node.

$ nvm list
         v8.5.0
         v8.6.0
->       v9.1.0
         system
default -> node (-> v9.1.0)
node -> stable (-> v9.1.0) (default)
stable -> 9.1 (-> v9.1.0) (default)
iojs -> N/A (default)
lts/* -> lts/carbon (-> N/A)
lts/argon -> v4.8.6 (-> N/A)
lts/boron -> v6.12.0 (-> N/A)
lts/carbon -> v8.9.1 (-> N/A)

1.3 create-react-app

Now, to create an application, we will install create-react-app. It provides a basic directory structure with zero configuration ready to run.

$ npm install -g create-react-app

$ create-react-app --version
1.4.3

Back to File

Back to Top

2 Create application and intro to JSX

Contents:

2.1 Basic app setup

$ create-react-app hello-world

Now go to the app directory and run the server.

$ cd hello-world

$ npm start

It will run the server and open the homepage (http://localhost:3000/) in your default browser.

Back to File

Back to Top

2.2 Getting started with JSX

// src/App.js
import React, { Component } from 'react';

function formatName(user) {
  return user.firstName + ' ' + user.lastName;
}

const user = {
  firstName: 'Harper',
  lastName: 'Perez'
};

class App extends Component {
  render() {
    return (
      <h1>
        Hello, {formatName(user)}!
      </h1>
    );
  }
}

export default App;
// src/index.js
import React from 'react';
import ReactDOM from 'react-dom';
import './index.css';
import App from './App';
import registerServiceWorker from './registerServiceWorker';

ReactDOM.render(<App />, document.getElementById('root'));
registerServiceWorker();

Back to File

Back to Top

2.3 Set HTML attributes in JSX

We will modify our application to show a different message ("Hello, Stranger.") if the user is not defined. Also, we will show an image for the user from the JSON object.

// src/App.js
import React, { Component } from 'react';

const defaultUserImage = 'http://www.rebantaacademy.com/images/no-image.png';

const user = {
  firstName: 'Harper',
  lastName: 'Perez',
  imageUrl: 'https://openclipart.org/image/2400px/svg_to_png/211821/matt-icons_preferences-desktop-personal.png'
};

function formatName(user) {
  return user.firstName + ' ' + user.lastName;
}

function getGreeting(user) {
  if (user) {
    return (
      <div>
        <h1>Hello, {formatName(user)}!</h1>
        <br />
        <img src={user.imageUrl} width="10%" />
      </div>
    );
  } else {
    return (
      <div>
        <h1>Hello, Stranger.</h1>
        <br />
        <img src={defaultUserImage} width="10%" />
      </div>
    );
  }
}

class App extends Component {
  render() {
    return getGreeting(user);
  }
}

export default App;

Now, replace getGreeting(user) with getGreeting(undefined) to see the other message.

Back to File

Back to Top

3 Components

Components let you split the UI into independent, reusable pieces, and think about each piece in isolation. They accept arbitrary inputs (called "props") and return React elements.

Contents:

3.1 Functional components

// src/Welcome.js
import React from 'react';

function Welcome(props) {
  return <h1>Hello, {props.name}</h1>;
}

export default Welcome;
// src/index.js
import Welcome from './Welcome';

const element = <Welcome name='Jagdeep Singh' />;

ReactDOM.render(
  element,
  document.getElementById('root')
);

Back to File / Back to Top

3.2 Class components and props

You can access the arguments passed to Component via this.props object.

// src/Welcome.js
import React, { Component } from 'react';

class Welcome extends React.Component {
  render() {
    return <h1>Hello, {this.props.name}</h1>;
  }
}

export default Welcome;

The default value of any prop is true if not passed. These two JSX expressions are equivalent:

<Foo autocomplete />

<Foo autocomplete={true} />

3.2.1 Spread operator

If you already have a props object and want to pass it in JSX, you can use ... as a spread operator.

const props = {firstName: 'Ben', lastName: 'Hector', gender: 'male'};
<Greeting {...props} />;

You can also pick specific props from the object while passing others using spread operator.

const { gender, ...other } = props;

Here, gender will be "male" and other contains firstName and lastName both.

3.2.2 props.children

In JSX expressions that contain both an opening tag and a closing tag, the content between those tags is passed as a special prop: props.children.

Back to File / Back to Top

3.3 Local state

// src/Clock.js
import React, { Component } from 'react';

class Clock extends React.Component {
  constructor(props) {
    super(props);         // This should always be called
    this.state = { date: new Date() };
  }

  render() {
    return (
      <div>
        <h1>Hello, world!</h1>
        <h2>It is {this.state.date.toLocaleTimeString()}.</h2>
      </div>
    );
  }
}

export default Clock;

The only place where you can assign this.state is the constructor.

// src/index.js
import Clock from './Clock';

ReactDOM.render(<Clock />, document.getElementById('root'));

setState()

Now, We want to set up a timer whenever the Clock is rendered to the DOM for the first time. This is called "mounting" in React.

// src/Clock.js
class Clock extends React.Component {
  componentDidMount() {
    this.timerId = setInterval(
      () => this.tick(),
      1000
    );
  }

  tick() {
    this.setState({
      date: new Date()
    });
  }
}

The componentDidMount() hook runs after the component output has been rendered to the DOM.

When you call setState(), React merges the object you provide into the current state.

setState() also accepts a function instead of an object where you can access previous state. See documentation.

If the name of key to set is a variable, you can call setState() like below:

this.setState({
  [key]: value
});

While this.props is set up by React itself and this.state has a special meaning, you are free to add additional fields (like this.timerId) to the class manually if you need to store something that is not used for the visual output.

If you don't use something in render(), it shouldn't be in the state.

NOTE: Do NOT set state by calling this.state.date = new Date();. This will not re-render the component.

Back to File / Back to Top

3.4 Lifecycle methods

// src/App.js
class App extends React.Component {
  constructor(props) {
    super(props);

    this.state = { number: Math.random() };
    this.refreshNumber = this.refreshNumber.bind(this);
  }

  refreshNumber() {
    this.setState({
      number: Math.random()
    });
  }

  render() {
    return (
      <div>
        <button onClick={this.refreshNumber}>Refresh</button>
        <NumberDecorator number={this.state.number} />
      </div>
    );
  }
}
  
class NumberDecorator extends React.Component {
  componentWillMount() {
    console.log('Componet WILL MOUNT!');
  }

  componentDidMount() {
    console.log('Componet DID MOUNT!');
  }

  componentWillReceiveProps(newProps) {
    console.log('Componet WILL RECEIVE PROPS!');
  }

  shouldComponentUpdate(newProps, newState) {
    return true;
  }

  componentWillUpdate(newProps, newState) {
    console.log('Componet WILL UPDATE!');
  }

  componentDidUpdate(prevProps, prevState) {
    console.log('Componet DID UPDATE!');
  }

  componentWillUnmount() {
    console.log('Componet WILL UNMOUNT!');
  }

  render() {
    return (
      <p><b>Random number: </b>{this.props.number}</p>
    );
  }
}

Now, on rendering the page for first time, you will see componentWillMount and componentDidMount getting called.

When you click "Refresh" button, it will generate a new random number and pass it to NumberDecorator, and the hooks componentWillReceiveProps, componentWillUpdate, and componentDidUpdate will be called in order.

Now, lets add code to unmount the App component after 5 seconds.

// src/index.js
setTimeout(() => {
  ReactDOM.unmountComponentAtNode(document.getElementById('root'));
}, 5000);

You will see that after 5 seconds, your screen gets blank and the hook componentWillUnmount is called.

If you don't want a component to re-render after its state is changed, you can return false from shouldComponentUpdate hook.

Back to File / Back to Top

3.5 Force update a component

You can use function forceUpdate to re-render a component even if the state hasn't changed.

// src/App.js
class App extends React.Component {
  forceUpdateHandler() {
    this.forceUpdate();
  }
}

Back to File / Back to Top

3.6 Advanced

Nested components

You can have a component that contains multiple nested components.

const MyComponents = {
  DatePicker: function(props) {
    return <div>Imagine a {props.color} datepicker here.</div>;
  }
}

Use dot notation to render the nested ones.

ReactDOM.render(
  <MyComponents.DatePicker color='blue' />,
  document.getElementById('root')
);

Back to File / Back to Top

4 Events

// src/Toggle.js
import React from 'react';

class Toggle extends React.Component {
  constructor(props) {
    super(props);

    this.handleClick = this.handleClick.bind(this);
  }

  handleClick(e) {
    console.log('The link was clicked.');
    console.log(this);
  }

  render() {
    return (
      <a href='#' onClick={this.handleClick}>
        Click me
      </a>
    );
  }
}

export default Toggle;

You have to be careful about the meaning of this inside JSX callbacks. In JavaScript, class methods are not bound by default. If you forget to bind this.handleClick and pass it to onClick, this will be undefined when the function is actually called.

Another way to define this callback for onClick can be:

<a href='#' onClick={() => this.handleClick()}>

And if the callback function contains only one statement, you can do:

<a href='#' onClick={() => console.log('Clicked')}>

Now, render the Toggle component.

// src/index.js
import Toggle from './Toggle';

ReactDOM.render(<Toggle />, document.getElementById('root'));

On cicking the link, check the browser console:

When using React you should generally not need to call addEventListener to add listeners to a DOM element after it is created. Instead, just provide a listener when the element is initially rendered.

Let us complete the toggle functionality.

// src/Toggle.js
class Toggle extends React.Component {
  constructor(props) {
    super(props);
    this.state = {isToggleOn: true};

    this.handleClick = this.handleClick.bind(this);
  }

  handleClick(e) {
    this.setState(prevState => ({
      isToggleOn: !prevState.isToggleOn
    }));
  }

  render() {
    return (
      <a href='#' onClick={this.handleClick}>
        {this.state.isToggleOn ? 'ON' : 'OFF'}
      </a>
    );
  }
}

Back to File / Back to Top

5 Lists and Keys

Contents:

5.1 Lists

You can build collections of elements and include them in JSX using curly braces {}.

// src/index.js
const numbers = [1, 2, 3, 4, 5];
const listItems = numbers.map((number) =>
  <li>Item #{number}</li>
);

ReactDOM.render(
  <ul>{listItems}</ul>,
  document.getElementById('root')
);

Back to File / Back to Top

5.2 Keys

Keys help React identify which items in the list have changed, are added, or are removed. Keys should be given to the elements inside the array to give the elements a stable identity.

If you don't set a key for each list item, you will see below warning in the browser console:

Warning: Each child in an array or iterator should have a unique "key" prop.

Lets modify our code to include key assignment.

src/index.js
const listItems = numbers.map((number) =>
  <li key={number.toString()}>
    Item #{number}
  </li>
);

Keys only make sense in the context of the surrounding array. See example here.

Back to File / Back to Top

6 Forms

Contents:

6.1 Controlled components

Form

<form onSubmit={handleSubmit}>
</form>

Textfield

<label>
  Name:
  <input type='text' value={value} onChange={handleChange} />
</label>

Textarea

<textarea value={value} onChange={handleChange} />

Select

<select value={value} onChange={handleChange}>
  <option value='grapefruit'>Grapefruit</option>
  <option value='lime'>Lime</option>
  <option value='coconut'>Coconut</option>
</select>

Submit

<input type='submit' value='Submit' />

Back to File / Back to Top

7 Containment

Some components don't know their children ahead of time. Such components should use the special children prop to pass children elements directly into their output:

// src/FancyBorder.js
import React from 'react';

function FancyBorder(props) {
  return (
    <div>
      {props.children}
    </div>
  );
}

export default FancyBorder;
// src/WelcomeDialog.js
import React from 'react';
import FancyBorder from './FancyBorder';

function WelcomeDialog() {
  return (
    <FancyBorder>
      <h1>
        Welcome
      </h1>
      <p>
        Thank you for visiting our spacecraft!
      </p>
    </FancyBorder>
  );
}

export default WelcomeDialog;
// src/index.js
import React from 'react';
import ReactDOM from 'react-dom';
import WelcomeDialog from './WelcomeDialog';

ReactDOM.render(<WelcomeDialog />, document.getElementById('root'));

Back to File / Back to Top

8 prop-types

You can add a few validations to props being passed to React components using npm module prop-types.

Contents:

8.1 Install package

$ npm install --save prop-types
...
└── prop-types@15.6.0

8.2 Create components

// src/App.js
import React from 'react';
import PropTypes from 'prop-types';

function PropDecorator(props) {
  return (
    <div>
      <b>{props.name}:</b> {props.value}
    </div>
  );
}

class App extends React.Component {
  render() {
    return (
      <div>
        <PropDecorator name='Array' value={this.props.arrayValue} />
        <PropDecorator name='Boolean' value={this.props.booleanValue ? 'True' : 'False'} />
        <PropDecorator name='Function' value={this.props.functionValue(5)} />
        <PropDecorator name='Number' value={this.props.numValue} />
        <PropDecorator name='String' value={this.props.stringValue} />
      </div>
    );
  }
}

export default App;

8.3 Add validations

// src/App.js
App.propTypes = {
  arrayValue: PropTypes.array.isRequired,
  booleanValue: PropTypes.bool,
  functionValue: PropTypes.func,
  numValue: PropTypes.number,
  stringValue: PropTypes.string
}

Set default values for props.

// src/App.js
App.defaultProps = {
  booleanValue: true,
  functionValue: function(e) { return e; },
  numValue: 10
}

8.4 Render components

// src/index.js
import React from 'react';
import ReactDOM from 'react-dom';
import App from './App';

ReactDOM.render(
  <App
    arrayValue={[5, 4, 3, 2, 1]}
    numValue={20}
    stringValue='Hi There!' />,
  document.getElementById('root')
);

Notice how we are overriding the default value for numValue.

Run npm start and visit http://localhost:3000.

If you pass a value of wrong type to a prop, you will see following warning in browser console:

And if a prop is required and you don't pass its value, then you will see:

8.5 More

For more options, see home.

Back to Top / File

9 react-router-dom

Contents:

9.1 Install package

$ npm install --save react-router-dom
└─┬ react-router-dom@4.2.2 
  ├─┬ history@4.7.2 
  │ ├── resolve-pathname@2.2.0 
  │ └── value-equal@0.4.0 
  ├─┬ react-router@4.2.0 
  │ └── hoist-non-react-statics@2.3.1 
  └── warning@3.0.0

Back to Top / File

9.2 Define routes

// src/AppRouter.js
import React from 'react';
import {
  BrowserRouter as Router,
  Route,
  Link
} from 'react-router-dom';

We imported BrowserRouter from the package and created an alias Router to use it.

Now, create the navigation bar using the imported components.

// src/AppRouter.js
const AppRouter = () => (
  <Router>
    <div>
      <ul>
        <li><Link to='/'>Home</Link></li>
        <li><Link to='/about'>About</Link></li>
        <li><Link to='/topics'>Topics</Link></li>
      </ul>

      <hr />

      <Route exact path='/' component={Home} />
      <Route path='/about' component={About} />
      <Route path='/topics' component={Topics} />
    </div>
  </Router>
);

Route is used to tell what component should be rendered at what path.

Now, lets define the components.

// src/AppRouter.js
const Home = () => (
  <div>
    <h2>Home</h2>
  </div>
)

const About = () => (
  <div>
    <h2>About</h2>
  </div>
)

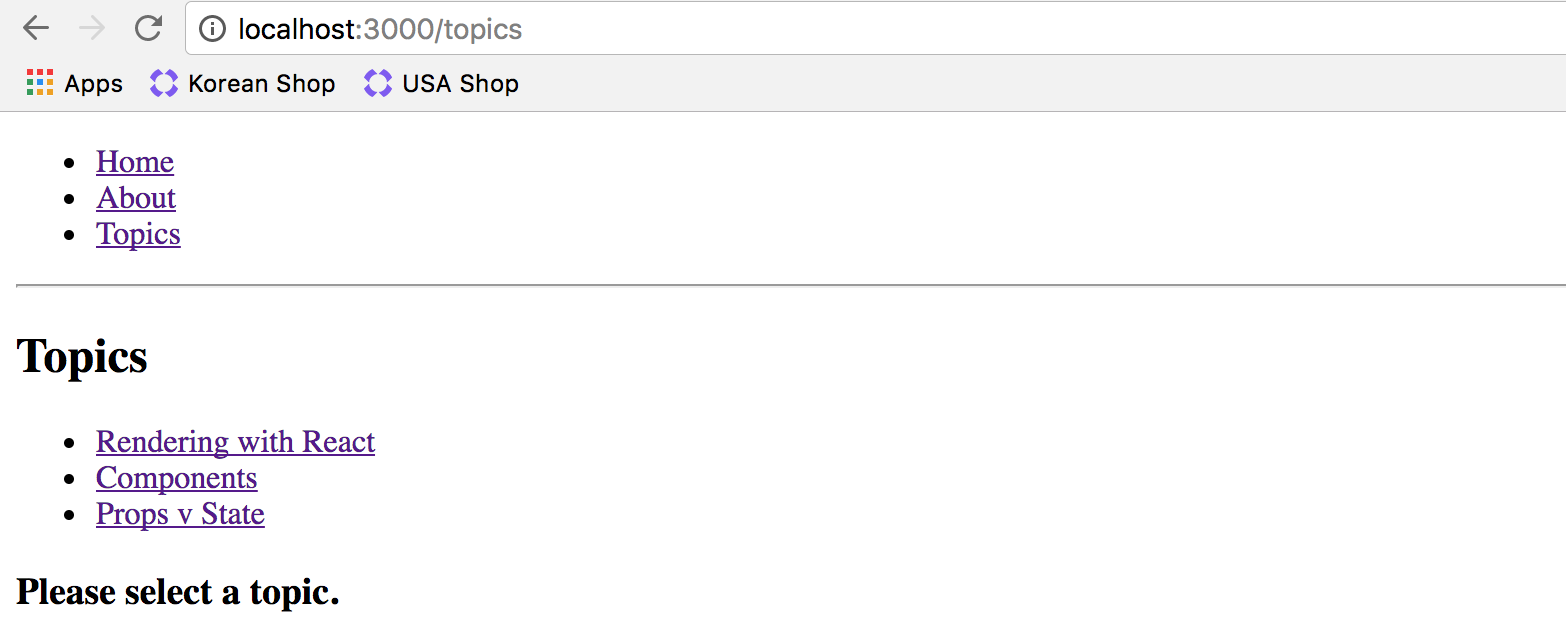
Our third component Topics is a bit complex as it contains topics and links to each one of them.

// src/AppRouter.js
const Topics = ({match}) => (
  <div>
    <h2>Topics</h2>

    <ul>
      <li>
        <Link to={`${match.url}/rendering`}>
          Rendering with React
        </Link>
      </li>
      <li>
        <Link to={`${match.url}/components`}>
          Components
        </Link>
      </li>
      <li>
        <Link to={`${match.url}/props-v-state`}>
          Props v State
        </Link>
      </li>
    </ul>

    <Route path={`${match.url}/:topicId`} component={Topic} />
    <Route exact path={match.url} render={() => (
      <h3>Please select a topic.</h3>
    )} />
  </div>
)

const Topic = ({match}) => (
  <div>
    <h3>{match.params.topicId}</h3>
  </div>
)

Note, how we can do interpolation using ${} and define dynamic components of a route using colon (:) e.g. :topicId.

Also, instead of specifying the component in call to Route, we can directly pass the content to render like we did for when no topic is selected.

Now, render the AppRouter.

// src/AppRouter.js
export default AppRouter;
// src/index.js
import React from 'react';
import ReactDOM from 'react-dom';
import AppRouter from './AppRouter';

ReactDOM.render(<AppRouter />, document.getElementById('root'));
  1. Home page


  1. Click on "Topics".


  1. Click on a topic.

Back to Top / File

9.3 Redirect

<Redirect to={{
  pathname: '/login',
  state: { from: 'protected-content' }
}} />

Say, we have some protected paths which can be accessed only after user logs in to his account. Then, we can define a common component for all such paths which will redirect the user to 'login' path if he is not authenticated.

<Router>
  <ProtectedRoute path='/protected' component={ProtectedView} />
</Router>

const ProtectedRoute = ({ component: Component, ...rest }) => (
  <Route {...rest} render={(props) => (     // call `Route` with `render` and all props for `ProtectedRoute` other than `component` prop
    auth.isAuthenticated ? (
      <Component {...props} />              // If user is authenticated, render component given in props
    ) : (
      <Redirect to={{                       // Else redirect user to login path
        pathname: '/login',
        state: { from: props.location }
      }} />
    )
  )} />
)

Back to Top / File

9.4 withRouter

const AuthButton = withRouter(({ history }) => (
  auth.isAuthenticated ? (
    <p>
      Welcome Jagdeep Singh!                  // If user is logged in, show a message and a "Sign out" button
      <button onClick={() => {
        auth.signout();                       // Signs out the user
        history.push('/');                    // Pushes path '/' into browser history
      }}>Sign out</button>
    </p>
  ) : (
    <p>You are not logged in.</p>
  )
));

See a detailed example of Redirects and auths here.

Back to Top / File

9.5 Prompt

You can prevent transition from a component to some other path by rendering a (conditional) Prompt in the component.

render() {
  const needsBlocking = true;

  return (
    <Prompt when={needsBlocking} message={location => (
      `Are you sure you want to go to ${location.pathname}?`
    )} />
  );
}

As you can see, you can access the location inside Prompt where user will be transitioning to after clicking "OK".

Read more here.

Back to Top / File

9.6 No match (404)

Import Switch from react-router-dom. A <Switch> renders the first child <Route> that matches.

import {
  BrowserRouter as Router,
  Route,
  Link,
  Switch,
  Redirect
} from 'react-router-dom';

A <Route> with no path always matches. So, it should be placed last in the list.

<Router>
  <div>
    <ul>
      <li><Link to='/'>Home</Link></li>
      <li><Link to='/old-match'>Old Match, to be redirected</Link></li>
      <li><Link to='/will-match'>Will Match</Link></li>
      <li><Link to='/will-not-match'>Will Not Match</Link></li>
      <li><Link to='/also/will/not/match'>Also Will Not Match</Link></li>
    </ul>
    <Switch>
      <Route path='/' exact component={Home} />             // This will match for home path '/'
      <Redirect from='/old-match' to='/will-match' />       // Will redirect to '/will-match' from '/old-match'
      <Route path='/will-match' component={WillMatch} />    // Will match path '/will-match'
      <Route component={NoMatch} />                         // Will match all other paths e.g. '/will-not-match'
    </Switch>
  </div>
</Router>

Back to Top / File

9.7 More

For more options, see home and API documentation.

Back to Top / File

Redux is predictable state container for JavaScript apps.

Contents:

10.1 Core concepts

10.1.1 state

Imagine your app’s state is described as a plain object e.g. for a todo app:

{
  todos: [{
    text: 'Eat food',
    completed: true
  }, {
    text: 'Exercise',
    completed: false
  }],
  visibilityFilter: 'SHOW_COMPLETED'
}

10.1.2 action

To change something in the state, you need to dispatch an action. An action is a plain JavaScript object. Here are a few example actions:

{ type: 'ADD_TODO', text: 'Go to swimming pool' }
{ type: 'TOGGLE_TODO', index: 1 }
{ type: 'SET_VISIBILITY_FILTER', filter: 'SHOW_ALL' }

Actions must have a type property that indicates the type of action being performed. Types should typically be defined as string constants.

Action creators

Action creators simply return an action.

function addTodo(text) {
  return {
    type: ADD_TODO,
    text
  }
}

This makes them portable and easy to test.

To actually initiate a dispatch, pass the result to the dispatch() function: dispatch(addTodo(text)).

Alternatively, you can create a bound action creator that automatically dispatches:

const boundAddTodo = text => dispatch(addTodo(text))

The dispatch() function can be accessed directly from the store as store.dispatch().

10.1.3 reducer

Finally, to tie state and actions together, we write a function called a reducer. It’s just a function that takes state and action as arguments, and returns the next state of the app.

(previousState, action) => newState

It would be hard to write such a function for a big app, so we write smaller functions managing parts of the state:

function visibilityFilter(state = 'SHOW_ALL', action) {
  if (action.type === 'SET_VISIBILITY_FILTER') {
    return action.filter
  } else {
    return state
  }
}
function todos(state = [], action) {
  switch (action.type) {
    case 'ADD_TODO':
      return state.concat([{ text: action.text, completed: false }])
    case 'TOGGLE_TODO':
      return state.map(
        (todo, index) =>
          action.index === index
            ? { text: todo.text, completed: !todo.completed }
            : todo
      )
    default:
      return state
  }
}

And we write another reducer that manages the complete state of our app by calling those two reducers for the corresponding state keys:

function todoApp(state = {}, action) {
  return {
    todos: todos(state.todos, action),
    visibilityFilter: visibilityFilter(state.visibilityFilter, action)
  }
}

Redux provides a utility called combineReducers() that does the same boilerplate logic that the todoApp above currently does. With its help, we can rewrite todoApp like this:

import { combineReducers } from 'redux'

const todoApp = combineReducers({
  visibilityFilter,
  todos
})

Things you should never do inside a reducer:

  • Mutate its arguments
  • Perform side effects like API calls and routing transitions
  • Call non-pure functions, e.g. Date.now() or Math.random()

To summarize:

  • The whole state of your app is stored in an object tree inside a single store.
  • The only way to change the state tree is to emit an action, an object describing what happened.
  • To specify how the actions transform the state tree, you write pure reducers.

Back to Top / File

10.2 Principles

Read about three principles here:

Back to Top / File

10.3 Store

The store has the following responsibilities:

  • Holds application state
  • Allows access to state via getState()
  • Allows state to be updated via dispatch(action)
  • Registers listeners via subscribe(listener)
  • Handles unregistering of listeners via the function returned by subscribe(listener)

Creating a store:

import { createStore } from 'redux'

let store = createStore(todoApp)

You may optionally specify the initial state as the second argument to createStore().

let store = createStore(todoApp, window.STATE_FROM_SERVER)

Back to Top / File

10.4 Container components

Technically, a container component is just a React component that uses store.subscribe() to read a part of the Redux state tree and supply props to a presentational component it renders. To generate a container component using connect(), you need to define a special function called mapStateToProps that tells how to transform the current Redux store state into the props you want to pass to a presentational component you are wrapping.

const getVisibleTodos = (todos, filter) => {
  switch (filter) {
    case 'SHOW_COMPLETED':
      return todos.filter(t => t.completed)
    case 'SHOW_ACTIVE':
      return todos.filter(t => !t.completed)
    case 'SHOW_ALL':
    default:
      return todos
  }
}

const mapStateToProps = state => {
  return {
    todos: getVisibleTodos(state.todos, state.visibilityFilter)
  }
}

In addition to reading the state, container components can dispatch actions. In a similar fashion, you can define a function called mapDispatchToProps() that receives the dispatch() method and returns callback props that you want to inject into the presentational component.

const mapDispatchToProps = dispatch => {
  return {
    onTodoClick: id => {
      dispatch(toggleTodo(id))
    }
  }
}

Finally, we create the VisibleTodoList by calling connect() and passing these two functions:

import { connect } from 'react-redux'

const VisibleTodoList = connect(
  mapStateToProps,
  mapDispatchToProps
)(TodoList)

Back to Top / File

10.5 Passing the store

All container components need access to the Redux store so they can subscribe to it. We recommend using a special React Redux component called <Provider> to magically make the store available to all container components in the application without passing it explicitly.

import React from 'react'
import { render } from 'react-dom'
import { Provider } from 'react-redux'
import { createStore } from 'redux'
import todoApp from './reducers'
import App from './components/App'

let store = createStore(todoApp)

render(
  <Provider store={store}>
    <App />
  </Provider>,
  document.getElementById('root')
)

Back to Top / File

References

Back to Top / File

Sign up for free to join this conversation on GitHub. Already have an account? Sign in to comment