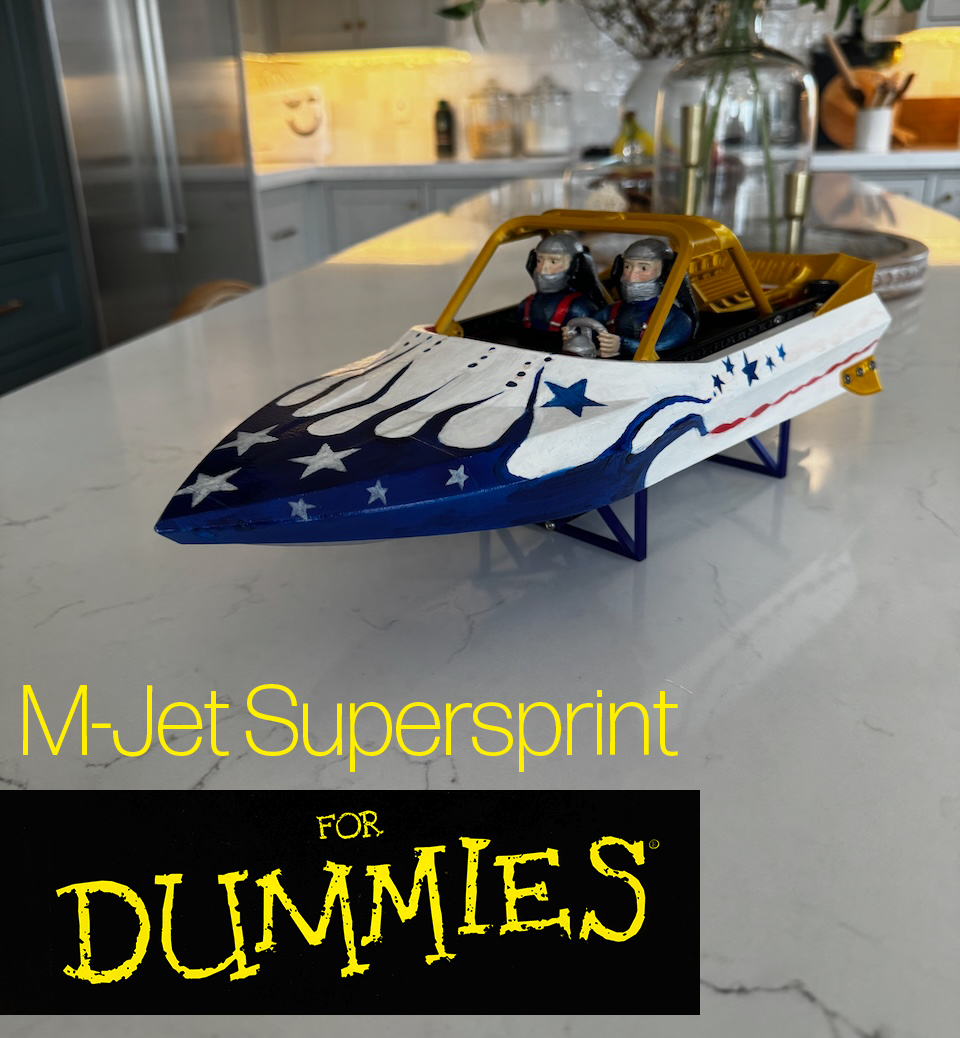
This page provides a few details that will help you build an M-Jet Supersprint 3D Printed RC Jetboat. When you purchase the 3D model files, there is an excellent guide. The aim of this page is not to replace that guide, but rather to supplement it with a few details that make life easier for those coming into the RC hobby for the first time, or who simply want to get going quickly.

- Purchase the 3D models and guide.
- Join the M-Jet RC Jetboats Facebook group. This is invaluable if you have questions or want to be inspired by what others have done.
- Order the non-3d-printed parts you'll need. See Shopping List.
- Obtain tools, as needed.
- Read the manual and watch the Full Build video.
- Check out my tips.
- 3D print the parts. Take inventory of all the parts you need to print, and plan the filament colors depending on how you want the boat to look.
- Prime, Paint and Clear coat. (Priming and painting is optional, but clear coat is recommended to waterproof.)
- Assemble.
- Make your boat fly!
I spent countless hours diving deep into the various parts I needed and where to get them. Since I'm new to the RC hobby, I had a lot to learn regarding motors, electronic speed controllers (ESC), and batteries. But rather than share all my learnings here, I thought it would be useful to simply share the parts I obtained. That way, newcomers can skip the research (if desired) and jump straight to building a jet boat. These parts are all based on the manual and guidance from the FB group. The purchase links and prices will be especially useful for US based hobbyists. But the details listed here will still be useful to international hobbyists sourcing materials in their region.
| Item | Description | Purchase Link | USD |
|---|---|---|---|
| Transmitter and Receiver | The transmitter is the remote control you use to drive the boat. The receiver is a small component that goes in the boat that receives the input from the transmitter so you can drive. | Amazon | $38 |
| 4S Lipo Battery | 4S 14.8V 2200mAh 50C Lipo Battery Hard Case Pack with XT60 Connector | Amazon | $45 |
| Battery Charger | If you aren't already into the RC hobby, you will need a charger to charge your batteries. When charging use these settings: Type: LIPO, Voltage: 4.2V, Current 2.2A | Amazon | $40 |
| Brushless Motor | KingVal 3660 1800KV Brushless Motor 5mm Shaft with Water Cooling Jacket | Amazon | $46 |
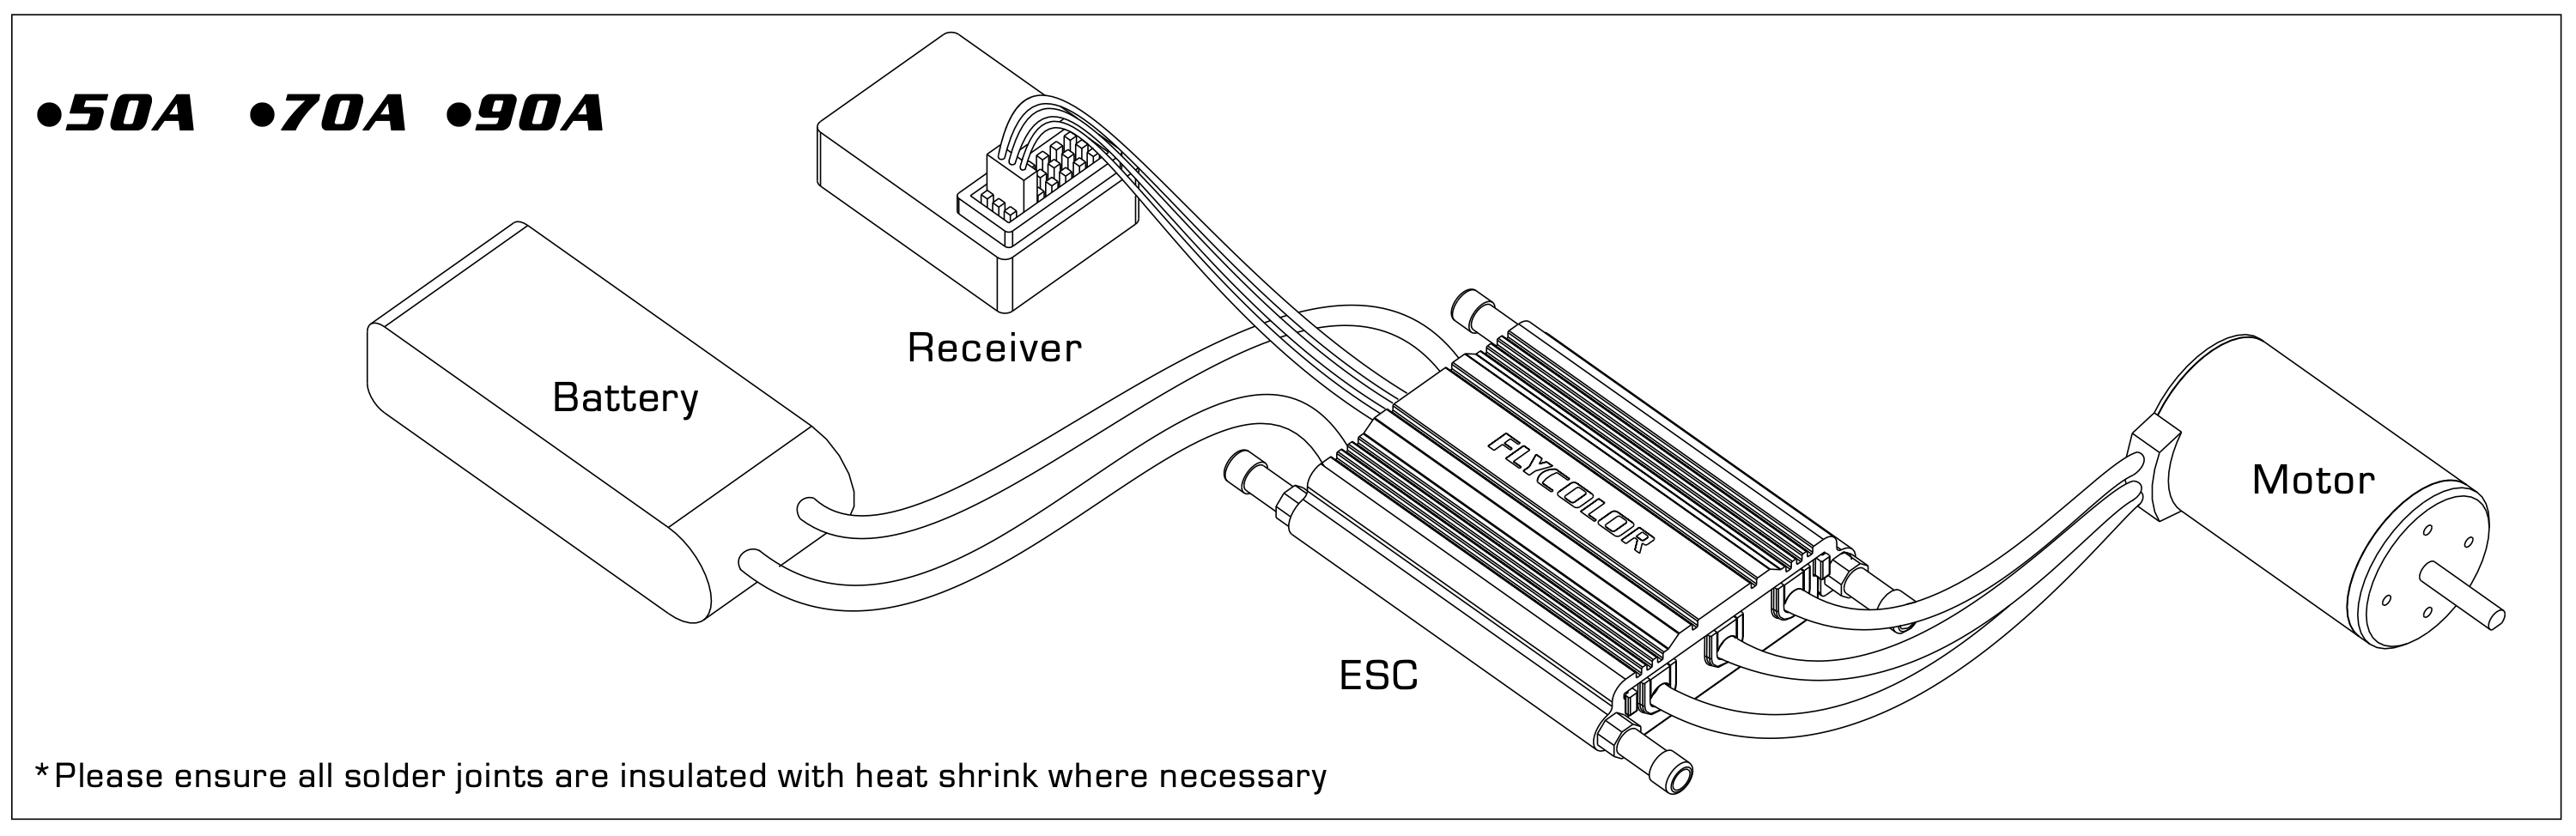
| ESC | Flycolor 90A Waterproof Brushless ESC (Electronic Speed Controller) | AliExpress | $32 |
| ESC Programming Card | Flycolor ESC Controller Programming Card. This is not mandatory, but comes in handy if you want to modify the ESC settings. I used it to reverse the default direction of the motor, for example. | AliExpress | $6 |
| Servo | POWER HD TR-4 Micro Waterproof Metal Gear Servo | AliExpress | $18 |
| Servo Extension cables | Optional, but recommended for putting the ESC in a drybox. | AliExpress | $3 |
| XT60 Connector for ESC | XT60 Bullet Connector Plug Female & Male Pairs, Gold Plated. You will need to solder one of these onto your ESC so the battery can connect. | Amazon | $9 |
| Butt Splice | Utilitech 12-10 Butt Splice Yellow (14-Count). I used 3 of these to connect the motor to the ESC. | Lowes | $4 |
The electronics I chose fall within the recommended options from the manual.
- Brushless Motor size 3660
- Brushless Motor 1800KV, falls within maximum recommendation of 2100.
- ESC Flycolor 90A, not exceeding 90 as recommended.
- 4S 14,8V Lipo Battery with Capacity 2200mAh 50C (slightly above recommended).

| Item | Description | Purchase Link | USD |
|---|---|---|---|
| 5mm Stainless Steel rod | Used for driveshaft and steering shaft. You need a minimum length of 235mm | AliExpress | $3 |
| 3mm Stainless Steel rod | Needed for motor mounts and steering pin. You need a minimum length of 105mm | AliExpress | $1 |
| Circular Servo horn | Circular Servo Arm approx. 20mm diameter | AliExpress | $3 |
| Flexible Silicone Tubing | Flexible Silicone Tubing, Clear, Inner Diameter (ID) of 3mm, Outer Diameter (OD) of 4mm, 1 meter length. Used for water cooling the electrical components and waterproofing the receiver antenna. | AliExpress | $1 |
| Brass tube | Brass tube Outer Diameter (OD) of 4mm, Inner Diameter (ID) of 3mm. Minimum 80mm length. Used for water inlet and outlet, as well as drybox antenna port. | AliExpress | $5 |
| Velcro Strap | Velcro strap for battery | Amazon | $10 |
| Velcro strips Adhesive | For battery | Amazon | $5 |
| Zip Ties | Used to secure tubes and cables inside the boat | Amazon | $7 |
| Shaft Coupler | Shaft Coupler 5mm to 5mm. Used to connect the drive shaft to the motor. | AliExpress | $3 |
| FKM Oil Seal | FKM Rotary Shaft Oil Seal 5x15x6mm 2pcs. | AliExpress | $5 |
| Bearings | 5x13x4 Ceramic Rubber Sealed Bearing 695-2RSC (buy 2) | Fast Eddy Bearings | $10 |
| O-Ring | 29mm x 33mm x 2mm Rubber O-Rings, , Pack of 10. Used for seal on drybox. | Amazon | $6 |
| Item | Description | Count | Purchase Link | USD |
|---|---|---|---|---|
| M3 Threaded Inserts | ruthex M3 Threaded Inserts - 100 Pieces RX-M3x5.7 Brass Heat Set Insert for Plastic Parts. There are cheaper options, but these ones are great quality. | 100 | Amazon | $11 |
| M5 Washer | Marine Grade Stainless Steel Flat Washer, A4 (316) - DIN 125A (125 A) | 10 | Monster Bolts | $0.79 |
| M5 Nut | Metric Hex Nuts, Stainless Steel DIN 934 A2 / 18-8 | 10 | Monster Bolts | $0.91 |
| M5 Locking Nut | Metric Nylon Insert Hex Lock Nuts - Stainless Steel DIN 985 18-8 / A2 | 10 | Monster Bolts | $1.06 |
| M2x8 Socket Cap Head Screw | M2 Socket Head Cap screws, Stainless Steel A2 (18-8) | 10 | Monster Bolts | $1.40 |
| M3x6 Socket Cap Head Screw | M3 Socket Head Cap screws, Stainless Steel A2 (18-8) | 10 | Monster Bolts | $1.00 |
| M3x10 Socket Cap Head Screw | M3 Socket Head Cap screws, Stainless Steel A2 (18-8) | 50 | Monster Bolts | $3.18 |
| M3x20 Socket Cap Head Screw | M3 Socket Head Cap screws, Stainless Steel A2 (18-8) | 10 | Monster Bolts | $1.25 |
| M3x40 Socket Cap Head Screw | M3 Socket Head Cap screws, Stainless Steel A2 (18-8) | 10 | Monster Bolts | $1.95 |
| M5x20 Grub Screw | M5 Cup Point Socket Set screws, Stainless Steel A2 (18-8) | 10 | Monster Bolts | $2.40 |
| M3x6 Flat Head Countersunk Screw | M3 Flat Head Socket Cap screws, Stainless Steel A2 (18-8) | 10 | Monster Bolts | $0.85 |
| M3x8 Flat Head Countersunk Screw | M3 Flat Head Socket Cap screws, Stainless Steel A2 (18-8) | 10 | Monster Bolts | $0.89 |
These tools will make it easier to assemble your boat, and make the Handmade parts. You may not need to buy all of them, but I listed all the tools I ended up using to complete the project.
| Item | Description | Purchase Link | USD |
|---|---|---|---|
| Vice | CENTRAL MACHINERY 2-3/4 in. Articulated Vacuum Vise. Vital for making the handmade parts. | Harbor Freight | $20 |
| Hack saw | PITTSBURGH 12 in. 360° Adjustable Hacksaw. Vital for making the handmade parts. | Harbor Freight | $7 |
| Utility Knife | GORDON Folding Lock-Back Utility Knife. Useful for cutting tubes, trimming 3d prints, etc. | Harbor Freight | $6 |
| File | PITTSBURGH 8 In. Flat File. Vital for making the handmade parts. | Harbor Freight | $4 |
| Wire crimper | PITTSBURGH 3-in-1 Multipurpose Stripper, Crimper, and Cutter. Used to crimp wires from motor to ESC. | Harbor Freight | $6 |
| Soldering Iron | CHICAGO ELECTRIC 30 Watt Lightweight Soldering Iron. Used to solder XT60 connector to the ESC. Also used to insert threaded inserts into 3d printed parts. | Harbor Freight | $6 |
| Compact Bit Set | Compact precision bit set for everyday repair. Used for tightening bolts/fasteners. | iFixIt | $20 |
| Digital Calipers | Digital Calipers, DITRON 6" Vernier Caliper- Electronic Micrometer with Large LCD Screen, Stainless Steel, Auto-Off Feature, Inch/Fraction/Millimeter. Used to measure handmade parts. | Amazon | $30 |
| Drill | RYOBI ONE+ 18V Cordless 1/2 in. Drill/Driver Kit with (1) 1.5 Ah Battery and Charger. Used when making handmade parts. | Home Depot | $79 |
| Needle nose Pliers | PITTSBURGH 8 in. Needle Nose Pliers. Used to attach and tighten zip ties around inlet and outlet ports. | Harbor Freight | $4 |
| Item | Description | Purchase Link | USD |
|---|---|---|---|
| Electrical Tape | STIKTEK 60 ft. x 3/4 in. Industrial Grade Electrical Tape. Used around wire connections from motor to ESC. | Harbor Freight | $2 |
| White Lithium Grease | Permatex 80345 White Lithium Grease, 1.5 oz. | Amazon | $6 |
| Sand Paper | 220 grit and 400 grit. Used to sand boat exterior and handmade rods. | Lowes, Lowes | $7 |
| Clear Coat | Rust-Oleum Universal High-gloss Clear Spray Paint | Lowes | $10 |
| Painters Tape | ScotchBlue Original Multi-Surface 0.94-in x 60 Yard(s) Painters Tape | Lowes | $5 |
| Epoxy Glue | J-B WELD Clearweld Syringe Epoxy Adhesive - 25 mL, Ultra-Clear Formula, Quick-Setting | Lowes | $8 |
| Silicone Caulk | GE Advanced Silicone 2.8-oz Clear Silicone Caulk | Lowes | $8 |
| Loctite Blue Thread-locker | LOCTITE 248 Blue Threadlocker Glue Stick: All-Purpose, Medium-Strength, Anaerobic, No Drip | Amazon | $14 |
-
Filaments used. There's nothing particularly special about these, they're just the ones I had.
-
OVERTURE PLA Matte 3D Printer Filament 1.75mm, Matte PLA 1kg Cardboard Spool
-
OVERTURE Silk Filament PLA 1.75mm Clog-Free Shiny 3D Printer Filament, 1kg Spool
-
OVERTURE 3D Filament Clear PETG Filament 1.75mm, PETG 3D Printer Filament, 1kg Filament
-
Polymaker TPU Filament 1.75 Black, 750g Shore 95A Flexible Filament 1.75mm, Cardboard Spool
-
-
When printing the lid, I used the soft version. I found that the other models made it much harder to attach and detach the lid. If you use the same TPU as I did, you may want to do the same.
- I found that 5 minute epoxy provided more than enough time to glue all the pieces together.
- I let each joint dry for 1 hour before glueing the next.
- I let the boat dry for 24 hours prior to painting
- Painting and clear coat
- I decided to paint my boat. I first sprayed it with 2 coats of primer, Sanding it a little (with 220 and 400 grit sandpaper) in between coats.
- After priming I painted the boat with acrylic paint.
- After painting I applied 2 coats of clear coat.
- When you print the
Supersprint Handmade Partspage, make sure it is not scaled in any way. Printers often scale to fit the page, which is fine for most documents. But in this case you want the dimensions to be perfectly accurate so it should be scaled at 100%. I used my caliper to measure the lengths on the printed page to verify accuracy. - I recommend using a digital caliper to measure the rod width as you file it down.
- Be patient and take your time making these parts. You want to get them as close to the measurements as possible.
Rather than use styrofoam, I cut up a pool noodle in to small sections and stuffed them into the hull of the boat. It was a bit more convenient for me and no mess.
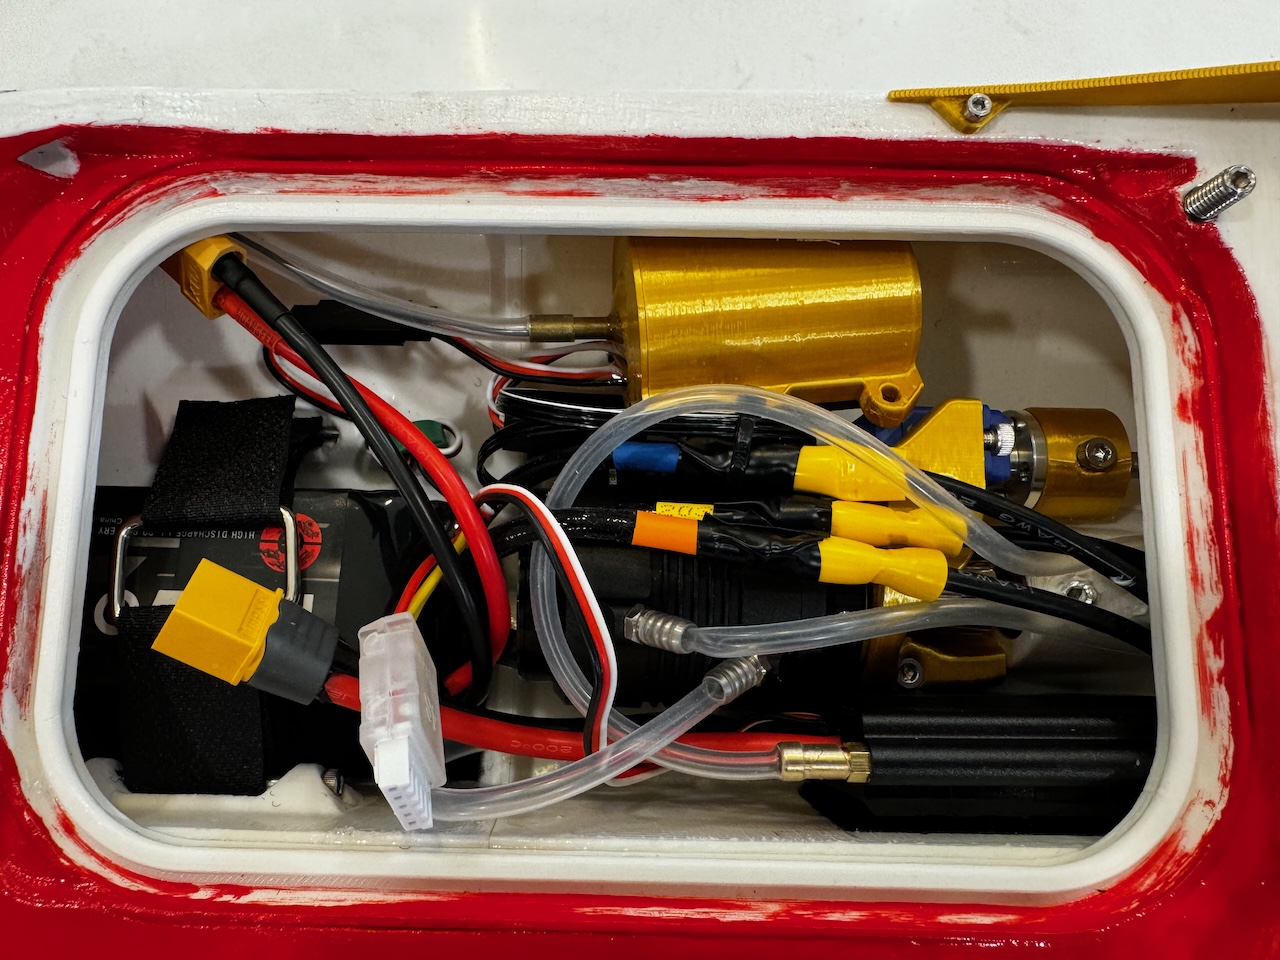
- I built the drybox, but opted not to mount it to the boat. Instead I zip tied it to one of the motor cables to keep it from moving around.
- You can use epoxy to seal the drybox, but I recommend using silicone caulk instead. It's easier to use and doesn't make a mess.
- I squeezed a little caulk into the end of the antenna tube to seal it as well.
- I found that the Circular Servo horn did not easily slide onto my servo. But lining it up and tightening the screw pushed it into place.
- I recommend powering on the ESC and transmitter, then setting the steering trim to the middle on your transmitter. Then position the servo horn with the bolt pointing straight up on the servo. This will allow you to have plenty of adjustment range if you need it later.
When installing the drive shaft adjust the Shaft Coupler so that one end is resting against the FKM Oil Seal. Originally mine was positioned a little away from the seal and the seal came loose while driving. This caused water to come into the hull. With the shaft coupler positioned close to the seal, it will prevent it from coming out and you can avoid leaks.
- Solder a XT60 Connector onto the two power wires. Make note of the red and black wires on the battery and be sure that when the battery is plugged in the red lines up with red and black with black.
- I used 3 Butt Splices to connect the 3 motor wires to the ESC. No soldering required. Just push in the wires and use the wire crimper to affix on each side. The Banana plugs were a little exposed for me, so i wrapped the exposed parts with Electrical tape. This worked fine for me, but if I was to do it all over again I might use Banana Bullet Connector Plugs instead.
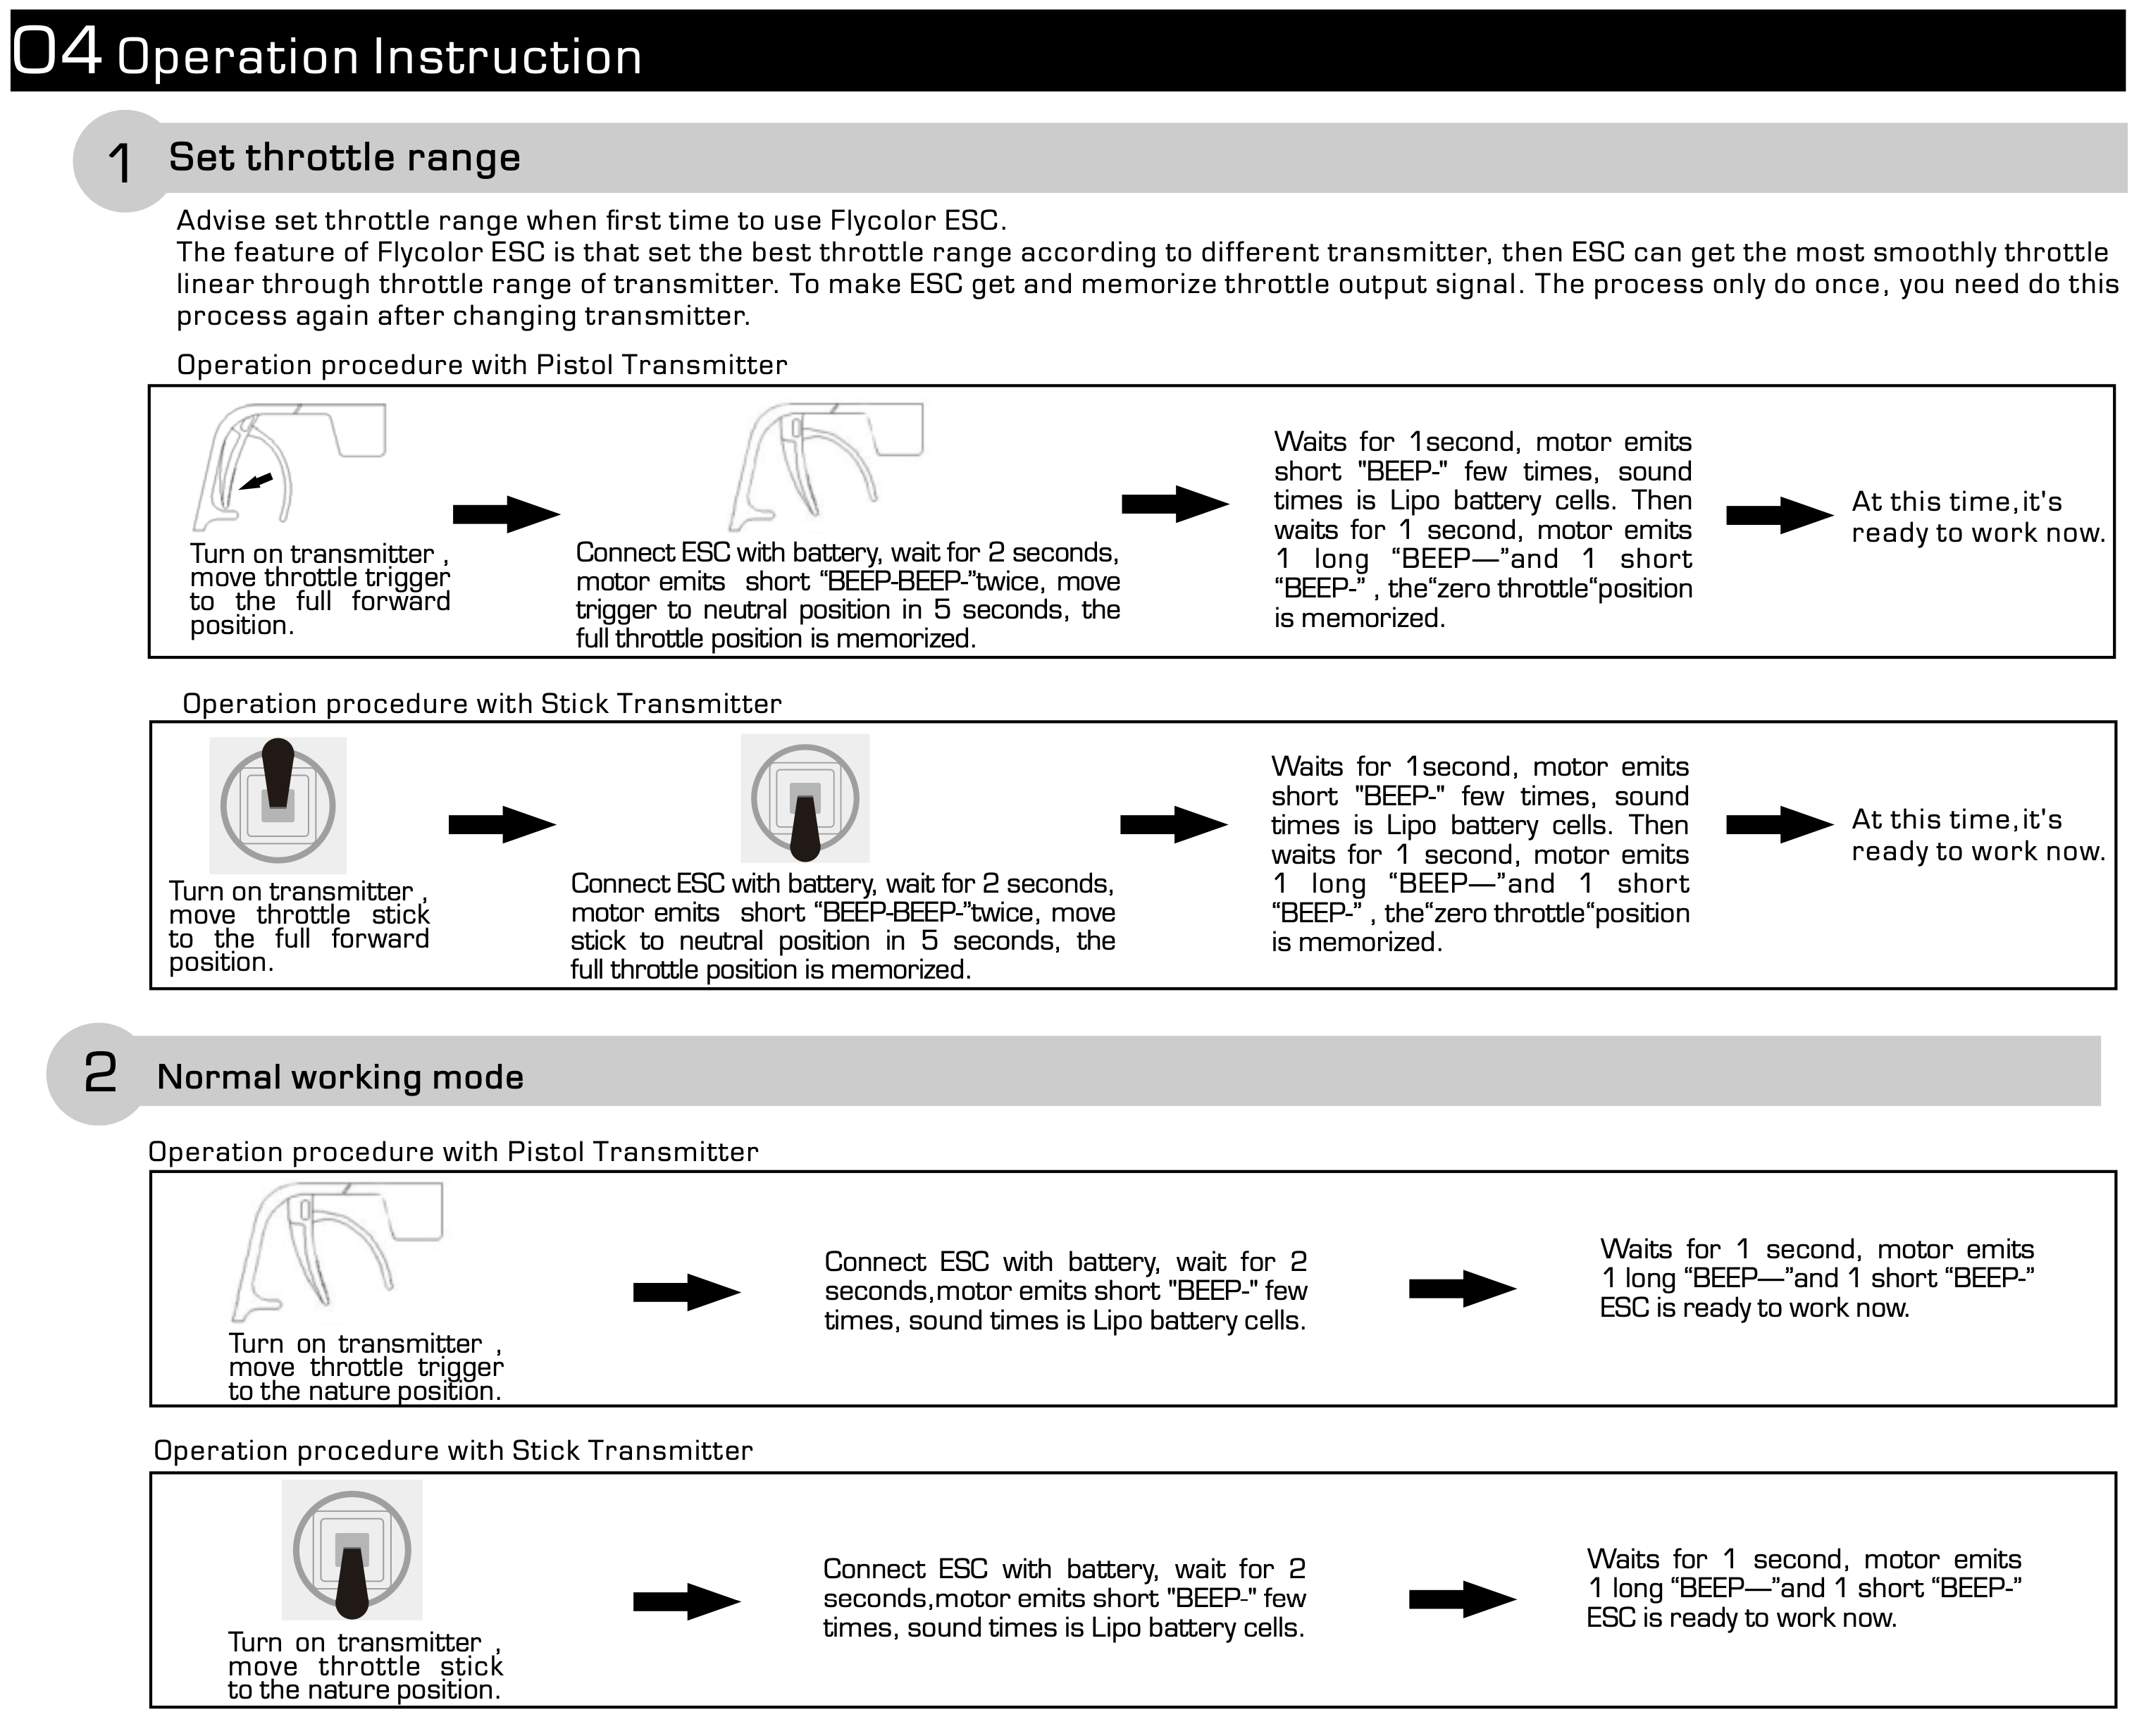
I recommend reading the Flycolor ESC manual in it's entirety, but here are some excerpts that are useful.
- When you first power on the boat, and connect the transmitter, you may find that the ESC just keeps beeping. This is because it has not yet been calibrated for your transmitter. Here's how to calibrate it.
- After assembly, I found that my impeller was spinning the wrong direction. So I used a programming card to change the motor to spin the opposite direction.
I recommend printing a stand for your boat. This comes in handy when working on the boat internals, as well as if you want to put it on display.