paint.setColor(int color)
paint.setARGB(int a, int r, int g, int b)
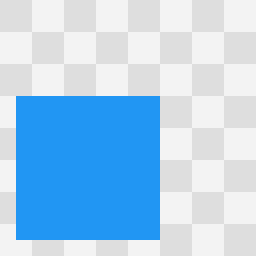
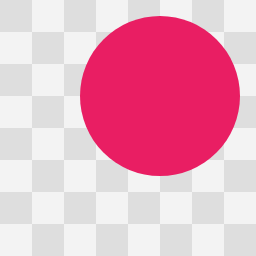
然后使用Paint 来绘制基本图形, 如 canvas.drawRect() , canvas.drawLine() , canvas.drawText() .
paint.setColor(Color.parseColor("#009688"));
canvas.drawRect(30, 30, 230, 180, paint);

paint.setColor(Color.parseColor("#FF9800"));
canvas.drawLine(300, 30, 450, 180, paint);

paint.setColor(Color.parseColor("#E91E63"));
canvas.drawText("HenCoder", 500, 130, paint);
抗锯齿默认是关闭的,如果需要抗锯齿,需要显式地打开: setAntiAlias (boolean aa)
setStyle(Paint.Style style) 用来设置图形是线条风格还是填充风格的(也可以二者并用):
paint.setStyle(Paint.Style.FILL); // FILL 模式,填充
canvas.drawCircle(300, 300, 200, paint);

paint.setStyle(Paint.Style.FILL); // FILL 模式,填充
canvas.drawCircle(300, 300, 200, paint);

paint.setStyle(Paint.Style.FILL_AND_STROKE); // FILL_AND_STROKE 模式,填充 + 画线
canvas.drawCircle(300, 300, 200, paint);

设置线条形状的通常有这几个方法:setStrokeWidth(float width), setStrokeCap(Paint.Cap cap), setStrokeJoin(Paint.Join join) 。
setStrokeWidth(float width) 设置线条宽度。单位为像素,默认值是 0。
paint.setStyle(Paint.Style.STROKE);
paint.setStrokeWidth(1);
canvas.drawCircle(150, 125, 100, paint);
paint.setStrokeWidth(5);
canvas.drawCircle(400, 125, 100, paint);
paint.setStrokeWidth(40);
canvas.drawCircle(650, 125, 100, paint);

setStrokeCap(Paint.Cap cap) 设置线头的形状。线头形状有三种:BUTT 平头、ROUND 圆头、SQUARE 方头。默认为 BUTT。当线条的宽度是 1 像素时,这三种线头的表现是完全一致的,全是 1 个像素的点;而当线条变粗的时候,它们就会表现出不同的样子:

setStrokeJoin(Paint.Join join) 设置拐角的形状。有三个值可以选择:MITER 尖角、 BEVEL 平角和 ROUND 圆角。默认为 MITER。

绘制文字是使用 Canvas 的一组 drawText(..., paint) 方法. 但文字的属性是通过最后一个参数 paint 来进行设置的. 常用的方法是:
void setTextSize(float textSize) //设置字体大小
Typeface setTypeface(Typeface typeface) //设置字体类型
void setUnderlineText(boolean underlineText) //是否下划线
色彩优化作用都是让画面颜色过度时变得更加平滑, 不会显变化太快而太突兀.
设置图像抖动更多的作用是在图像降低色彩深度绘制时,避免出现大片的色带与色块。一句代码就可以了: paint.setDither(true) . 实际效果如下:

图像在放大绘制的时候,默认使用的是最近邻插值过滤,这种算法简单,但会出现马赛克现象;而如果开启了双线性过滤,就可以让结果图像显得更加平滑。同样, 一句代码就行: paint.setFilterBitmap(true) . 实际效果如下:

着色器(Shader) 是计算机图形中的一个术语, 它是绘制颜色时, 使用什么颜色的一套方案, 一套规则, 一种算法. 给 Paint 设置着色器使用以下方法.
public Shader setShader(Shader shader)
设置 Shader 后, 除了绘制 bitmap , 绘制其他元素时使用的颜色都从此 Shader 中获取. 至于如何获取, 那是系统实现的. 我们只需要指定使用哪种 Shader . 这里不能直接使用 Shader 类, 它是一个没有实现具体效果的基类, 只能使用它的子类, Android 中 Shader 类有 5 个子类, 分别为: LinearGradient , RadialGradient , SweepGradient , BitmapShader , ComposeShader . 下面分别介绍.
设置两个点和两种颜色,以这两个点作为端点,使用两种颜色的渐变来绘制颜色。就像这样:
Shader shader = new LinearGradient(100, 100, 500, 500, Color.parseColor("#E91E63"),
        Color.parseColor("#2196F3"), Shader.TileMode.CLAMP);
paint.setShader(shader);
...
//调用绘制图元方法或文字
canvas.drawCircle(300, 300, 200, paint);

注意:在设置了 Shader 的情况下, Paint.setColor/ARGB() 所设置的颜色就不再起作用。
LinearGradient 的构造方法如下:
LinearGradient(float x0, float y0, float x1, float y1, int color0, int color1, Shader.TileMode tile)

参数说明:
x0 y0 x1 y1:渐变的两个端点的位置
color0 color1: 端点的颜色
tile:端点范围之外的颜色铺开方式,它是枚举类型, 有3个可选值: CLAMP, MIRROR, REPEAT
CLAMP: 固定模式, 它会在端点之外延续时固定使用端点的颜色, 如下图所示:

MIRROR: 镜像模式, 如下图所示:

REPEAT: 重复模式, 如下图所示:

辐射渐变很好理解,就是从中心向周围辐射状的渐变。大概像这样:
Shader shader = new RadialGradient(300, 300, 200, Color.parseColor("#E91E63"),
        Color.parseColor("#2196F3"), Shader.TileMode.CLAMP);
paint.setShader(shader);
...
canvas.drawCircle(300, 300, 200, paint);

构造方法:
RadialGradient(float centerX, float centerY, float radius, int centerColor, int edgeColor, TileMode tileMode)

参数说明:
centerX centerY:辐射中心的坐标
radius:辐射半径
centerColor:辐射中心的颜色
edgeColor:辐射边缘的颜色
tileMode:辐射范围之外的着色模式
CLAMP: 固定模式, 它会在端点之外延续时固定使用端点的颜色, 如下图所示:

MIRROR: 镜像模式, 如下图所示:

REPEAT: 重复模式, 如下图所示:

Shader shader = new SweepGradient(300, 300, Color.parseColor("#E91E63"),
        Color.parseColor("#2196F3"));
paint.setShader(shader);
...
canvas.drawCircle(300, 300, 200, paint);

构造方法:
SweepGradient(float cx, float cy, int color0, int color1)

参数:
cx cy :扫描的中心
color0:扫描的起始颜色
color1:扫描的终止颜色
使用 Bitmap 中的颜色来着色. 也即使用 Bitmap 来填充所要绘制的区域.
Bitmap bitmap = BitmapFactory.decodeResource(getResources(), R.drawable.batman);
Shader shader = new BitmapShader(bitmap, Shader.TileMode.CLAMP, Shader.TileMode.CLAMP);
paint.setShader(shader);
...
canvas.drawCircle(300, 300, 200, paint);

构造方法:
BitmapShader(Bitmap bitmap, Shader.TileMode tileX, Shader.TileMode tileY)

参数:
bitmap:用来做模板的 Bitmap 对象
tileX:横向的 TileMode
tileY:纵向的 TileMode。
CLAMP: 固定模式, 它会在端点之外延续时固定使用端点的颜色, 如下图所示:

MIRROR: 镜像模式, 如下图所示:

REPEAT: 重复模式, 如下图所示:

叠加两个 Shader 的着色器, 叠加方式有多种.
// 第一个 Shader:头像的 Bitmap
Bitmap bitmap1 = BitmapFactory.decodeResource(getResources(), R.drawable.batman);
Shader shader1 = new BitmapShader(bitmap1, Shader.TileMode.CLAMP, Shader.TileMode.CLAMP);

// 第二个 Shader:从上到下的线性渐变(由透明到黑色)
Bitmap bitmap2 = BitmapFactory.decodeResource(getResources(), R.drawable.batman_logo);
Shader shader2 = new BitmapShader(bitmap2, Shader.TileMode.CLAMP, Shader.TileMode.CLAMP);

// ComposeShader:结合两个 Shader
Shader shader = new ComposeShader(shader1, shader2, PorterDuff.Mode.SRC_OVER);
paint.setShader(shader);
...
canvas.drawCircle(300, 300, 300, paint); //注意: 关闭硬件加速才能看到效果

构造方法:ComposeShader(Shader shaderA, Shader shaderB, PorterDuff.Mode mode)

参数:
shaderA, shaderB:两个相继使用的 Shader
mode: 两个 Shader 的叠加模式,即 shaderA 和 shaderB 应该怎样共同绘制。它的类型是 PorterDuff.Mode 。
PorterDuff.Mode 是用来指定两个图像共同绘制时的颜色策略的。它是一个 enum,不同的 Mode 可以指定不同的策略。颜色策略的意思,就是说把源图像绘制到目标图像处时应该怎样确定二者结合后的颜色,而对于 ComposeShader(shaderA, shaderB, mode) 这个具体的方法,就是指应该怎样把 shaderB 绘制在 shaderA 上来得到一个结合后的 Shader。
PorterDuff.Mode 一共有 17 种,参考官方文档, 可以分为两类:
- Alpha 合成 (Alpha Compositing)
- 混合 (Blending)
第一类,Alpha 合成,其实就是 PorterDuff 这个词所指代的算法。 PorterDuff 并不是一个具有实际意义的词组,而是两个人的名字(准确讲是姓)。这两个人当年共同发表了一篇论文,描述了 12 种将两个图像共同绘制的操作(即算法)。而这篇论文所论述的操作,都是关于 Alpha 通道(也就是我们通俗理解的透明度)的计算的,后来人们就把这类计算称为 Alpha 合成 ( Alpha Compositing ) 。
Alpha 合成 (Alpha Compositing) 种类

第二类,混合,也就是 Photoshop 等制图软件里都有的那些混合模式(multiply darken lighten 之类的, 共有 5 种)。这一类操作的是颜色本身而不是 Alpha 通道, 至于颜色具体合成算法, 可以参考官方文档.
混合 (Blending) 种类

使用 Paint.setColorFilter(ColorFilter filter) 方法为 Paint 绘制设置颜色过滤。颜色过滤的意思,就是为绘制的内容设置一个统一的过滤策略,然后 Canvas.drawXXX() 方法会对每个像素都进行过滤后再绘制出来。
无法直接使用 ColorFilter 类本身, 只能使用它的子类, 系统为我们提供了 3 个子类供选择: LightingColorFilter , PorterDuffColorFilter , ColorMatrixColorFilter.
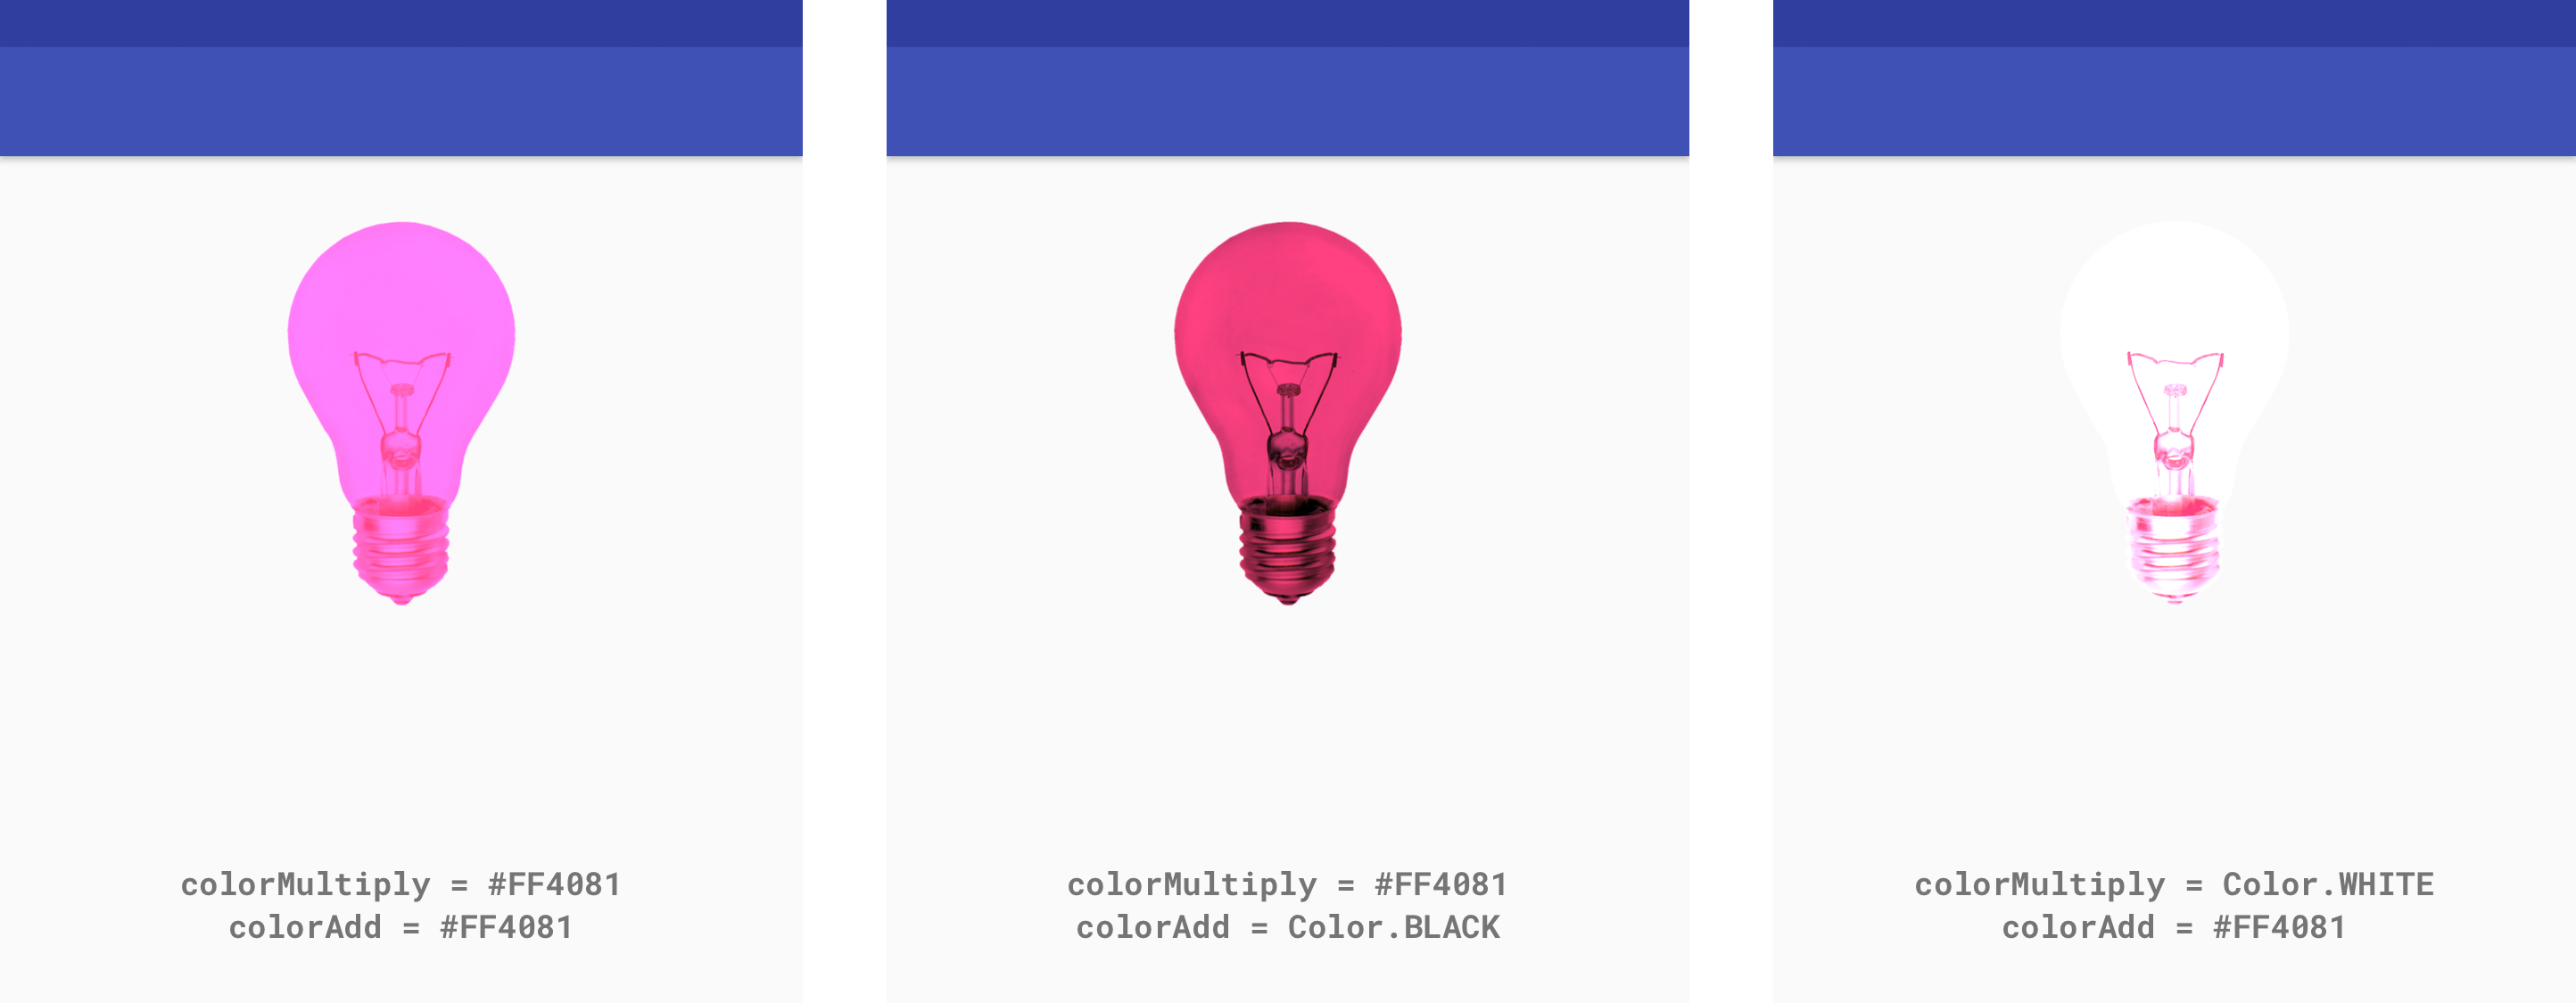
LightingColorFilter 是用来模拟简单的光照效果的.
public LightingColorFilter(int colorMultiply, int colorAdd)
参数:
colorMultiply 和 colorAdd 都是和颜色值格式相同的 int 值,
其中 colorMultiply 用来和目标像素相乘,colorAdd 用来和目标像素相加
新颜色值的计算公式如下, 注意 alpha 通道的值没有参与运算, 它是不变的.
// colorMultiply.red 和 colorAdd.red 表示颜色的 red 通道分量
newRed = color.red * colorMultiply.red + colorAdd.red
newGreen = color.green * colorMultiply.green + colorAdd.green
newBlue = color.blue * colorMultiply.blue + colorAdd.blue

思考: 通过以上公式, 可知如何去掉原图的某通道的颜色, 或者增强某通道的颜色效果.
比如使原图去掉红色, 或者使原图中的红色更红.
对于原画如下的图片:
使用了如图中相应参数后的效果如下:
这个 PorterDuffColorFilter 的作用是使用一个指定的颜色和一种指定的 PorterDuff.Mode 来与绘制对象进行合成。它的构造方法是 PorterDuffColorFilter(int color, PorterDuff.Mode mode) 其中的 color 参数是指定的颜色, mode 参数是指定的 Mode。同样也是 PorterDuff.Mode ,不过和 ComposeShader 不同的是,PorterDuffColorFilter 作为一个 ColorFilter,只能指定一种颜色作为源,而不是一个 Bitmap。PorterDuffColorFilter 的使用与前面的 ComposeShader 一节中的使用类似, 这里不再演示.
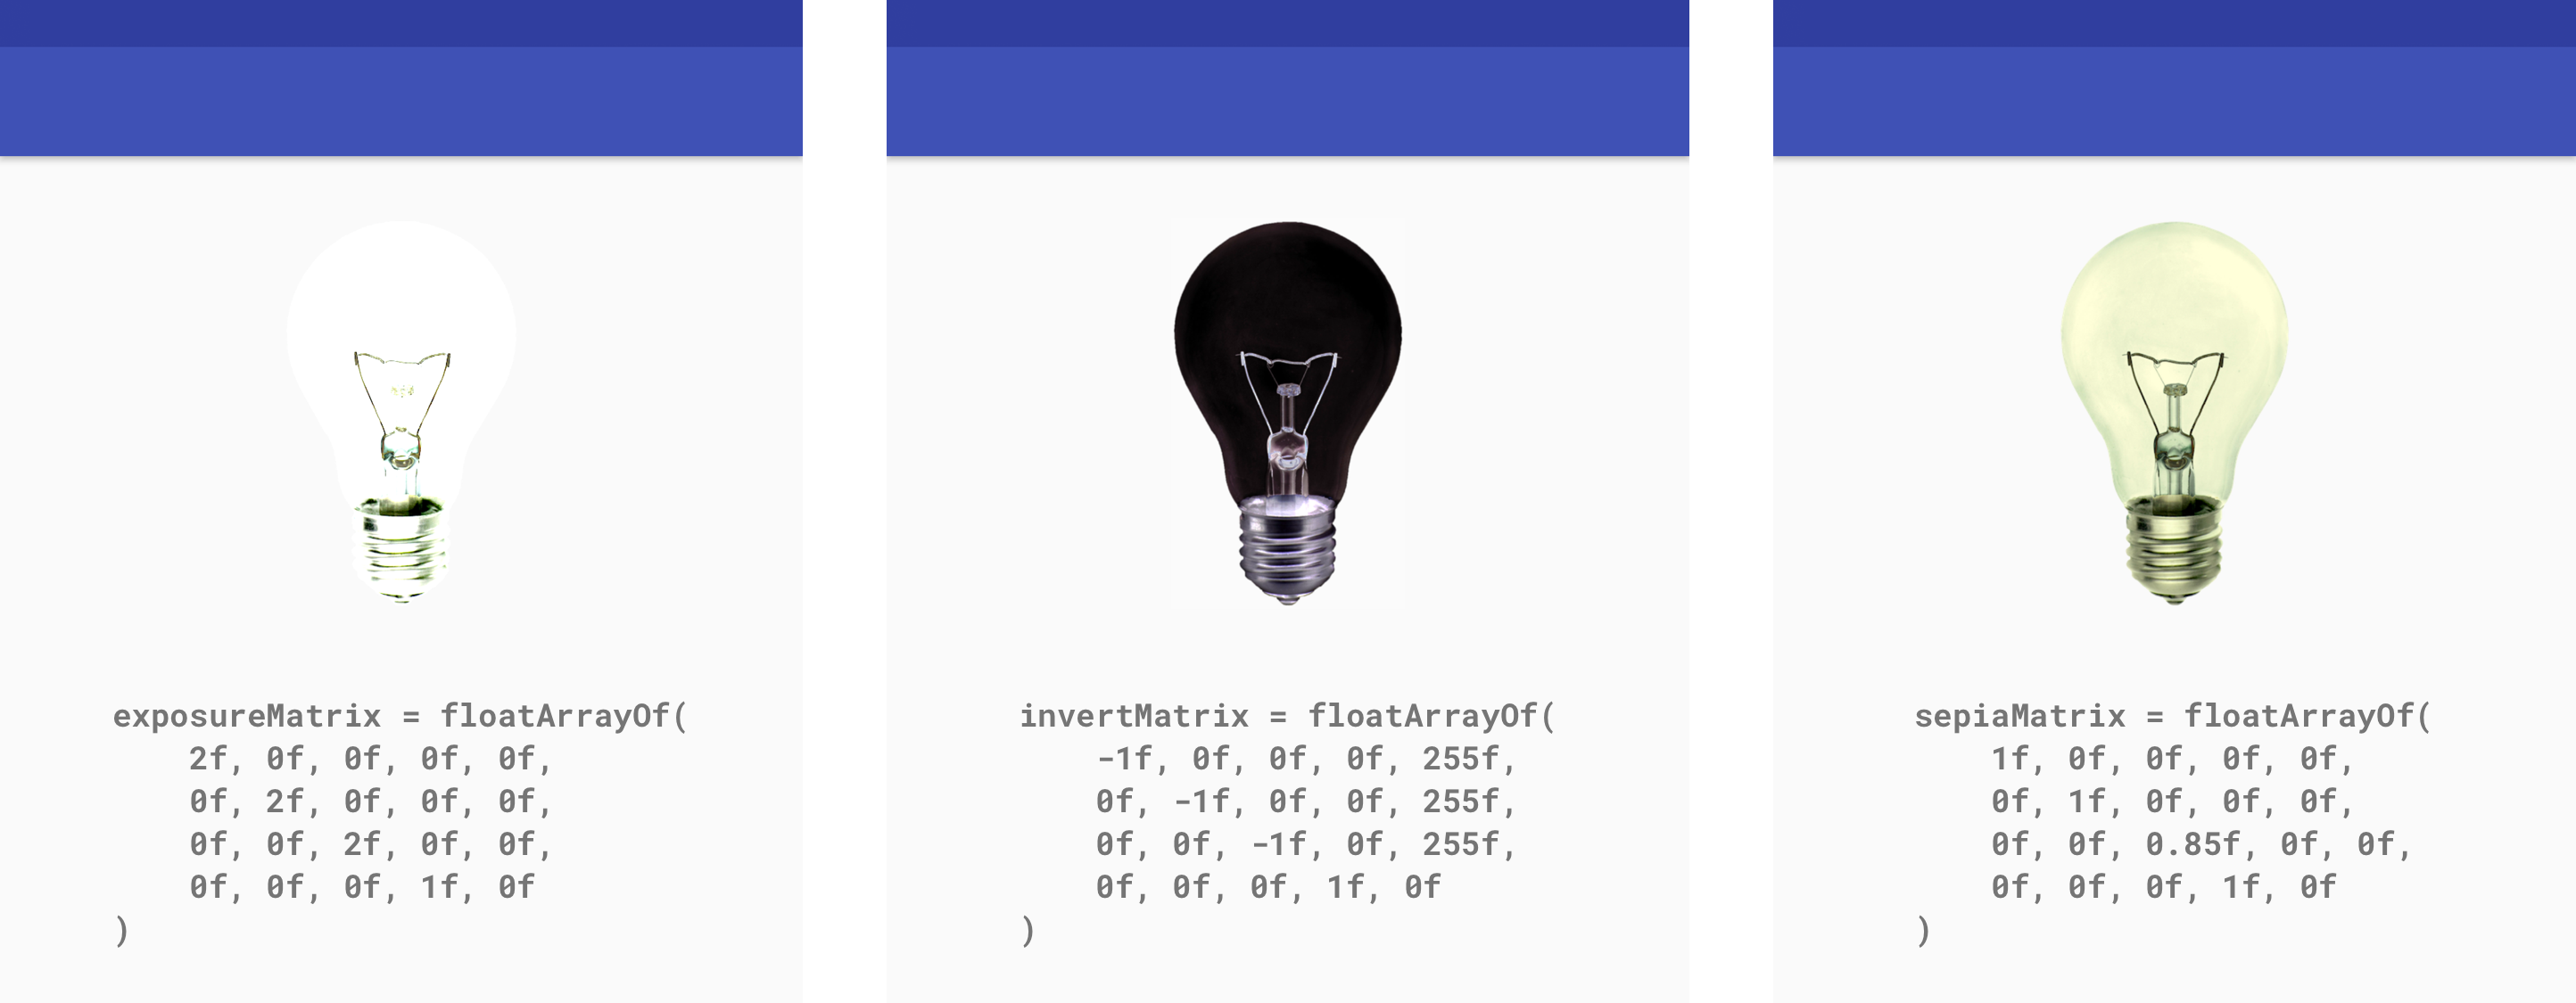
ColorMatrixColorFilter 使用一个 ColorMatrix 来对颜色进行处理。 ColorMatrix 这个类,内部是一个 4x5 的矩阵:
[ a, b, c, d, e,
  f, g, h, i, j,
  k, l, m, n, o,
  p, q, r, s, t ]
通过计算, ColorMatrix 可以把要绘制的像素进行转换。对于颜色 [R, G, B, A] ,转换算法是这样的:
R’ = a*R + b*G + c*B + d*A + e;
G’ = f*R + g*G + h*B + i*A + j;
B’ = k*R + l*G + m*B + n*A + o;
A’ = p*R + q*G + r*B + s*A + t;
ColorMatrix 有一些自带的方法可以做简单的转换,例如可以使用 setSaturation(float sat) 来设置饱和度;另外你也可以自己去设置它的每一个元素来对转换效果做精细调整。下面的示例显示了使用指定的 ColorMatrix 对图片作了处理后的效果.
更多使用 ColorFilter 的示例, 可以参考这个库: https://github.com/chengdazhi/StyleImageView
Xfermode 指的是你要绘制的内容和 Canvas 的目标位置的内容应该怎样结合计算出最终的颜色。但通俗地说,其实就是要你以绘制的内容作为源图像,以 View 中已有的内容作为目标图像,选取一个 PorterDuff.Mode 作为绘制内容的颜色处理方案。
源图(将绘制的图)
目标图(已绘制到载体的图)
按以下绘制顺序生成最终图:
Paint paint = new Paint();
canvas.drawBitmap(destinationImage, 0, 0, paint);

PorterDuff.Mode mode = // choose a mode
paint.setXfermode(new PorterDuffXfermode(mode));

canvas.drawBitmap(sourceImage, 0, 0, paint);
最终的叠加效果就是 ComposeShader 混合着色器 一节中展示的 17 种效果图.
PorterDuff.Mode 总结
PorterDuff.Mode 在 Paint 一共有三处 API ,它们的工作原理都一样,只是用途不同:
| API | 用途 |
|---|---|
| ComposeShader | 混合两个 shader |
| PorterDuffColorFilter | 增加一个单色的 ColorFilter |
| Xfermode | 设置绘制内容和 View 中已有内容的混合计算方式 |
setPathEffect(PathEffect effect) 使用 PathEffect 来给图形的轮廓设置效果。对 Canvas 所有的图形绘制有效,也就是 drawLine() drawCircle() drawPath() 这些方法。大概像这样:
PathEffect pathEffect = new DashPathEffect(new float[]{10, 5}, 10);
paint.setPathEffect(pathEffect);
...
canvas.drawCircle(300, 300, 200, paint);

Android 中共有 6 种 PathEffect。PathEffect 分为两类,单一效果的 CornerPathEffect, DiscretePathEffect, DashPathEffect, PathDashPathEffect ,和组合效果的 SumPathEffect, ComposePathEffect。
CornerPathEffect 把所有拐角变成圆角
PathEffect pathEffect = new CornerPathEffect(20) //参数 radius 是圆角的半径

DiscretePathEffect 把线条进行随机的偏离,让轮廓变得乱七八糟。乱七八糟的方式和程度由参数决定。
PathEffect pathEffect = new DiscretePathEffect(20, 5)
DiscretePathEffect 具体的做法是,把绘制改为使用定长的线段来拼接,并且在拼接的时候对路径进行随机偏离。它的构造方法 DiscretePathEffect(float segmentLength, float deviation) 的两个参数中, segmentLength 是用来拼接的每个线段的长度, deviation 是偏离量。

DashPathEffect 使用虚线来绘制线条。
PathEffect pathEffect = new DashPathEffect(new float[]{20, 10, 5, 10}, 0);
它的构造方法 DashPathEffect(float[] intervals, float phase) 中, 第一个参数 intervals 是一个数组,它指定了虚线的格式:数组中元素必须为偶数(最少是 2 个),按照画线长度、空白长度、画线长度、空白长度……的顺序排列,例如上面代码中的 20, 5, 10, 5 就表示虚线是按照画 20 像素、空 5 像素、画 10 像素、空 5 像素的模式来绘制;第二个参数 phase 是虚线的偏移量。

PathDashPathEffect 比 DashPathEffect 多一个前缀 Path ,所以顾名思义,它是使用一个 Path 来绘制虚线
Path dashPath = ...; // 使用一个三角形来做 dash
PathEffect pathEffect = new PathDashPathEffect(dashPath, 40, 0,
                            PathDashPathEffectStyle.TRANSLATE);
paint.setPathEffect(pathEffect);
...
canvas.drawPath(path, paint);

构造方法 PathDashPathEffect(Path shape, float advance, float phase, PathDashPathEffect.Style style) 中, shape 参数是用来绘制的 Path ; advance 是两个相邻的 shape 段之间的间隔,不过注意,这个间隔是两个 shape 段的起点的间隔,而不是前一个的终点和后一个的起点的距离; phase 和 DashPathEffect 中一样,是虚线的偏移;最后一个参数 style,是用来指定拐弯改变的时候 shape 的转换方式。style 的类型为 PathDashPathEffect.Style ,是一个 enum ,具体有三个值:TRANSLATE:位移; ROTATE:旋转; MORPH:变体.

这是一个组合效果类的 PathEffect 。它的行为特别简单,就是分别按照两种 PathEffect 分别对目标进行绘制。
PathEffect dashEffect = new DashPathEffect(new float[]{20, 10}, 0);
PathEffect discreteEffect = new DiscretePathEffect(20, 5);
pathEffect = new SumPathEffect(dashEffect, discreteEffect);
canvas.drawPath(path, paint);

这也是一个组合效果类的 PathEffect 。不过它是先对目标 Path 使用一个 PathEffect,然后再对这个改变后的 Path 使用另一个 PathEffect。
PathEffect dashEffect = new DashPathEffect(new float[]{20, 10}, 0);
PathEffect discreteEffect = new DiscretePathEffect(20, 5);
pathEffect = new ComposePathEffect(dashEffect, discreteEffect);
...
canvas.drawPath(path, paint);

ComposePathEffect(PathEffect outerpe, PathEffect innerpe) 中的两个 PathEffect 参数, innerpe 是先应用的, outerpe 是后应用的。所以上面的代码就是先偏离,再变虚线。
setShadowLayer(float radius, float dx, float dy, int shadowColor) 在之后的绘制内容下面加一层阴影。方法的参数里, radius 是阴影的模糊范围; dx dy 是阴影的偏移量; shadowColor 是阴影的颜色。如果要清除阴影层,使用 clearShadowLayer() 。
paint.setShadowLayer(10, 0, 0, Color.RED);
canvas.drawText(text, 80, 300, paint);

注意: 在硬件加速开启的情况下, setShadowLayer() 只支持文字的绘制,文字之外的绘制必须关闭硬件加速才能正常绘制阴影。如果 shadowColor 是半透明的,阴影的透明度就使用 shadowColor 自己的透明度;而如果 shadowColor 是不透明的,阴影的透明度就使用 paint 的透明度。
setMaskFilter(MaskFilter maskfilter) 在绘制层上方的附加效果, 上一个方法 setShadowLayer() 是设置的在绘制层下方的附加效果相反. Android 系统内置了两种 MaskFilter : BlurMaskFilter 和 EmbossMaskFilter。
BlurMaskFilter 的构造方法为: BlurMaskFilter(float radius, Blur style), 参数 radius 指模糊的半径, style 是枚举, 有4种可选:
NORMAL: 内外都模糊绘制;
SOLID: 内部正常绘制,外部模糊;
OUTER: 内部不绘制,外部模糊;
INNER: 内部模糊,外部不绘制;
//关闭硬件加速
setLayerType(View.LAYER_TYPE_SOFTWARE,null);
//红色的画笔
Paint paint = new Paint(Paint.ANTI_ALIAS_FLAG);
paint.setColor(Color.RED);
//NORMAL: 内外都模糊绘制
paint.setMaskFilter(new BlurMaskFilter(50, BlurMaskFilter.Blur.NORMAL));
canvas.drawRect(200,100,400,300,paint);
//SOLID: 内部正常绘制,外部模糊
paint.setMaskFilter(new BlurMaskFilter(50, BlurMaskFilter.Blur.SOLID));
canvas.drawRect(600,100,800,300,paint);
//INNER: 内部模糊,外部不绘制
paint.setMaskFilter(new BlurMaskFilter(50, BlurMaskFilter.Blur.OUTER));
canvas.drawRect(200,500,400,700,paint);
//OUTER: 内部不绘制,外部模糊
paint.setMaskFilter(new BlurMaskFilter(50, BlurMaskFilter.Blur.INNER));
canvas.drawRect(600,500,800,700,paint);

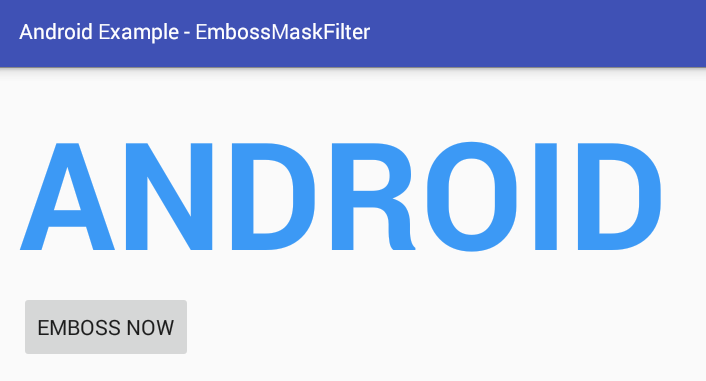
浮雕效果的 MaskFilter。构造方法:
EmbossMaskFilter(float[] direction, float ambient, float specular, float blurRadius)
direction 是一个 3 个元素的数组,指定了光源的方向;
ambient 是环境光的强度,数值范围是 0 到 1;
specular 是炫光的系数;
blurRadius 是应用光线的范围。
EmbossMaskFilter filter = new EmbossMaskFilter(
                        new float[]{1,5,1}, // direction of the light source
                        0.5f, // ambient light between 0 to 1
                        10, // specular highlights
                        7.5f // blur before applying lighting
                );

textView.setLayerType(View.LAYER_TYPE_SOFTWARE,null);
textView.getPaint().setMaskFilter(filter);
应用浮雕效果前后的对比: