While hillshading a DEM/DTM in QGIS is fairly straightforward, the result is often not what you want to use in a map. Fortunately, achieving a neat, smooth result is not so tough. My aim for this procedure was to create a visually pleasing hillshade for use as a base layer for other mapping products (somewhat like OpenTopoMap). We 're gonna need
- QGIS 3.18 (any version >= 3.10)
- SAGA 2.3.2
- the amazing Terrain Shading plugin
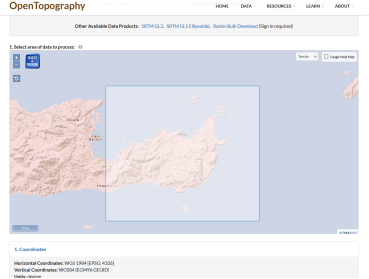
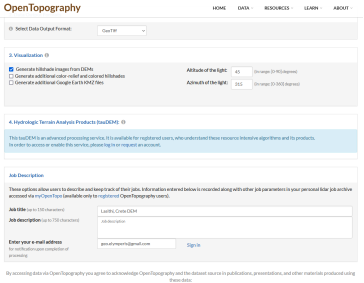
First, we need some data. I easily obtained the DEM for the area of Lasithi in Creta island, from OpenTopography
I used the web interface, but the easiest way to do it is to use the OpenTopography DEM Downloader plugin.
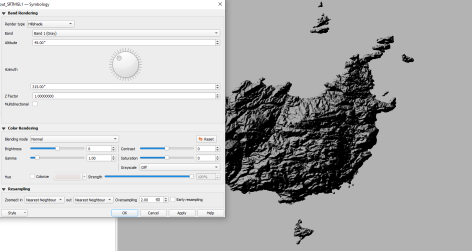
Load it into QGIS and hillshade it using the default settings. Altough it is nice, there is much room for improvement (at least for our current purpose)
Open the processing toolbox, and search for SAGA's Gaussian filter.

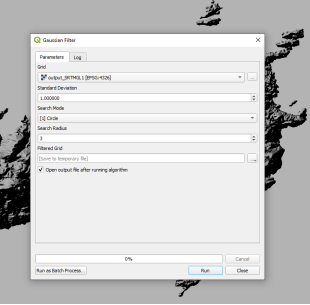
I found that for the SRTM product, the following parameters work nicely:
| Std Dev | Search Mode | Search Radius |
|---|---|---|
| 2.00 | Circle | 3 |
The Gaussian filter smooths the original data by transforming each pixel according to the value of a Gaussian function. You can read about the theory of Gaussian filtering here. In practice, it is one of the most common blurring/smoothing techniques.
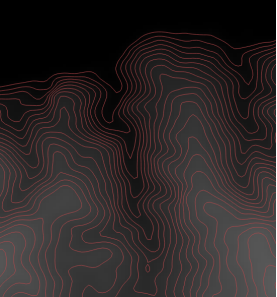
We can easily demonstrate the visual implications of the filter by comparing the contour lines of the DEM before & after applying it. Note that while the visual result may be more appealing, topographic accuracy & precision will usually decrease.
| Raw | Filtered |
|---|---|
 |
 |
Open the Hillshade tool form the Terrain Shading toolbox, and apply it to the filtered layer. I used Bidirectional hillshade, with the sun at 70 degrees, and a lateral exaggeration factor of 3. Also make sure to check Denoise for some extra denoising/smoothing. Depending of the topography of your area, you may want to increase the lateral exaggeration substantially. Later on I figured that for the area I chose, a factor of 5 worked even better
Note that you have to reproject the DEM to a metric system (one that uses meters instead of degrees). The plugin will warn you, and usually it will circumvent any problems, but in case it fails you know what to do!

This is optional, but recommended in most cases. Apply the Gaussian Filter again to the Hillshade layer. This will smooth out any rough/square-ish areas. You can use the same settings as before (thought I like to to go with Std. Dev.: 2.00)
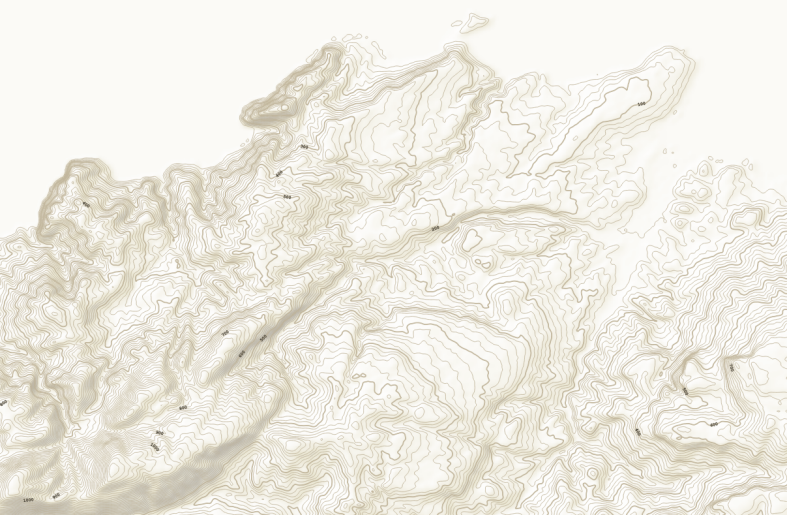
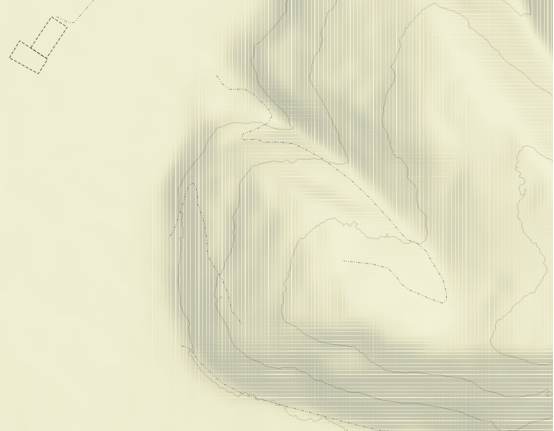
This is where the magic happens. Set the transparency of the created hillshade layer to 35% (or adjust it to your liking), and apply a light colorisation. I like to go with light yellow tones, like #fff3bf

This type of hillshade particularly complements our contour lines
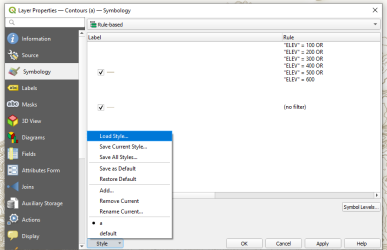
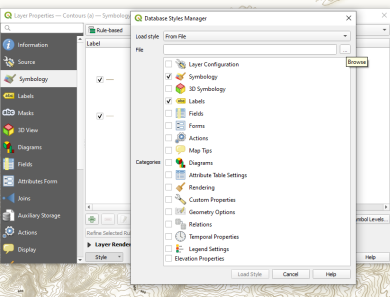
You can save this gist and load it to style your contours
If you are using Very High Resolution elevation data (<5m), you might notice some linear artifacts in the rendering that QGIS performs.
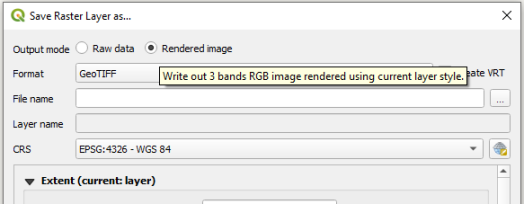
These persist even when applying the Gaussian filter. One way to remove them, is to export our final hillshade, and select Output mode: Rendered image. This way QGIS propely renders the elevation model, and removes these artifacts. This is not the case if you keep the DEM as-is, and try to export a map via the Layout editor.
And....

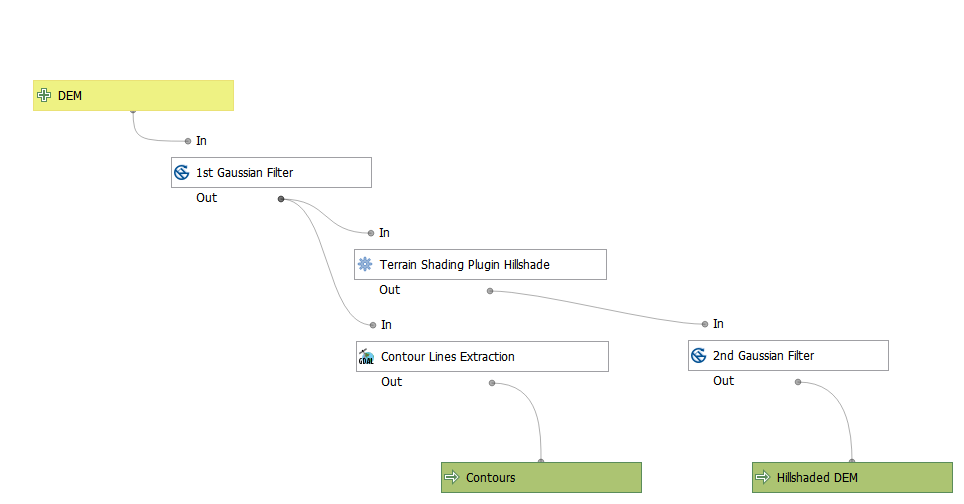
The procedure we followed is illustrated below.
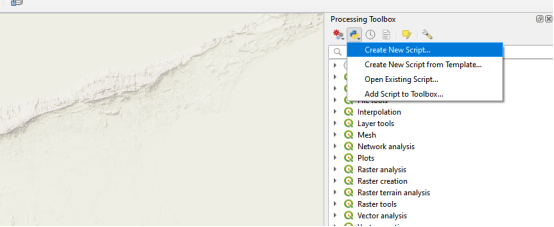
You can download this code and import it as a Processing Script to use it directly, and avoid the middle steps. Open the code editor window as demonstrated below, paste the code and run it. You can also save it, and always have it available in the processing toolbox.
Now finally, let's add a nice sea surface for contrast....And voila!
(NOTE: I know the sea surface intersects the contour....Yes, this should not happen. I was just too lazy to extract the sea surface from the DEM, of find a better source)

I hope this was useful, happy mapping !