Original post from my Blog.
Cloudflare now offers free Transform Rules, so BackBlaze B2 users can use URL Rewrite rules to hide bucket name and provide access to private bucket.
TLDR: Create a URL Rewrite Rule and hide your bucket name. If your bucket is private, you also need to create a Cloudflare Worker, copy the code and fill in the config.
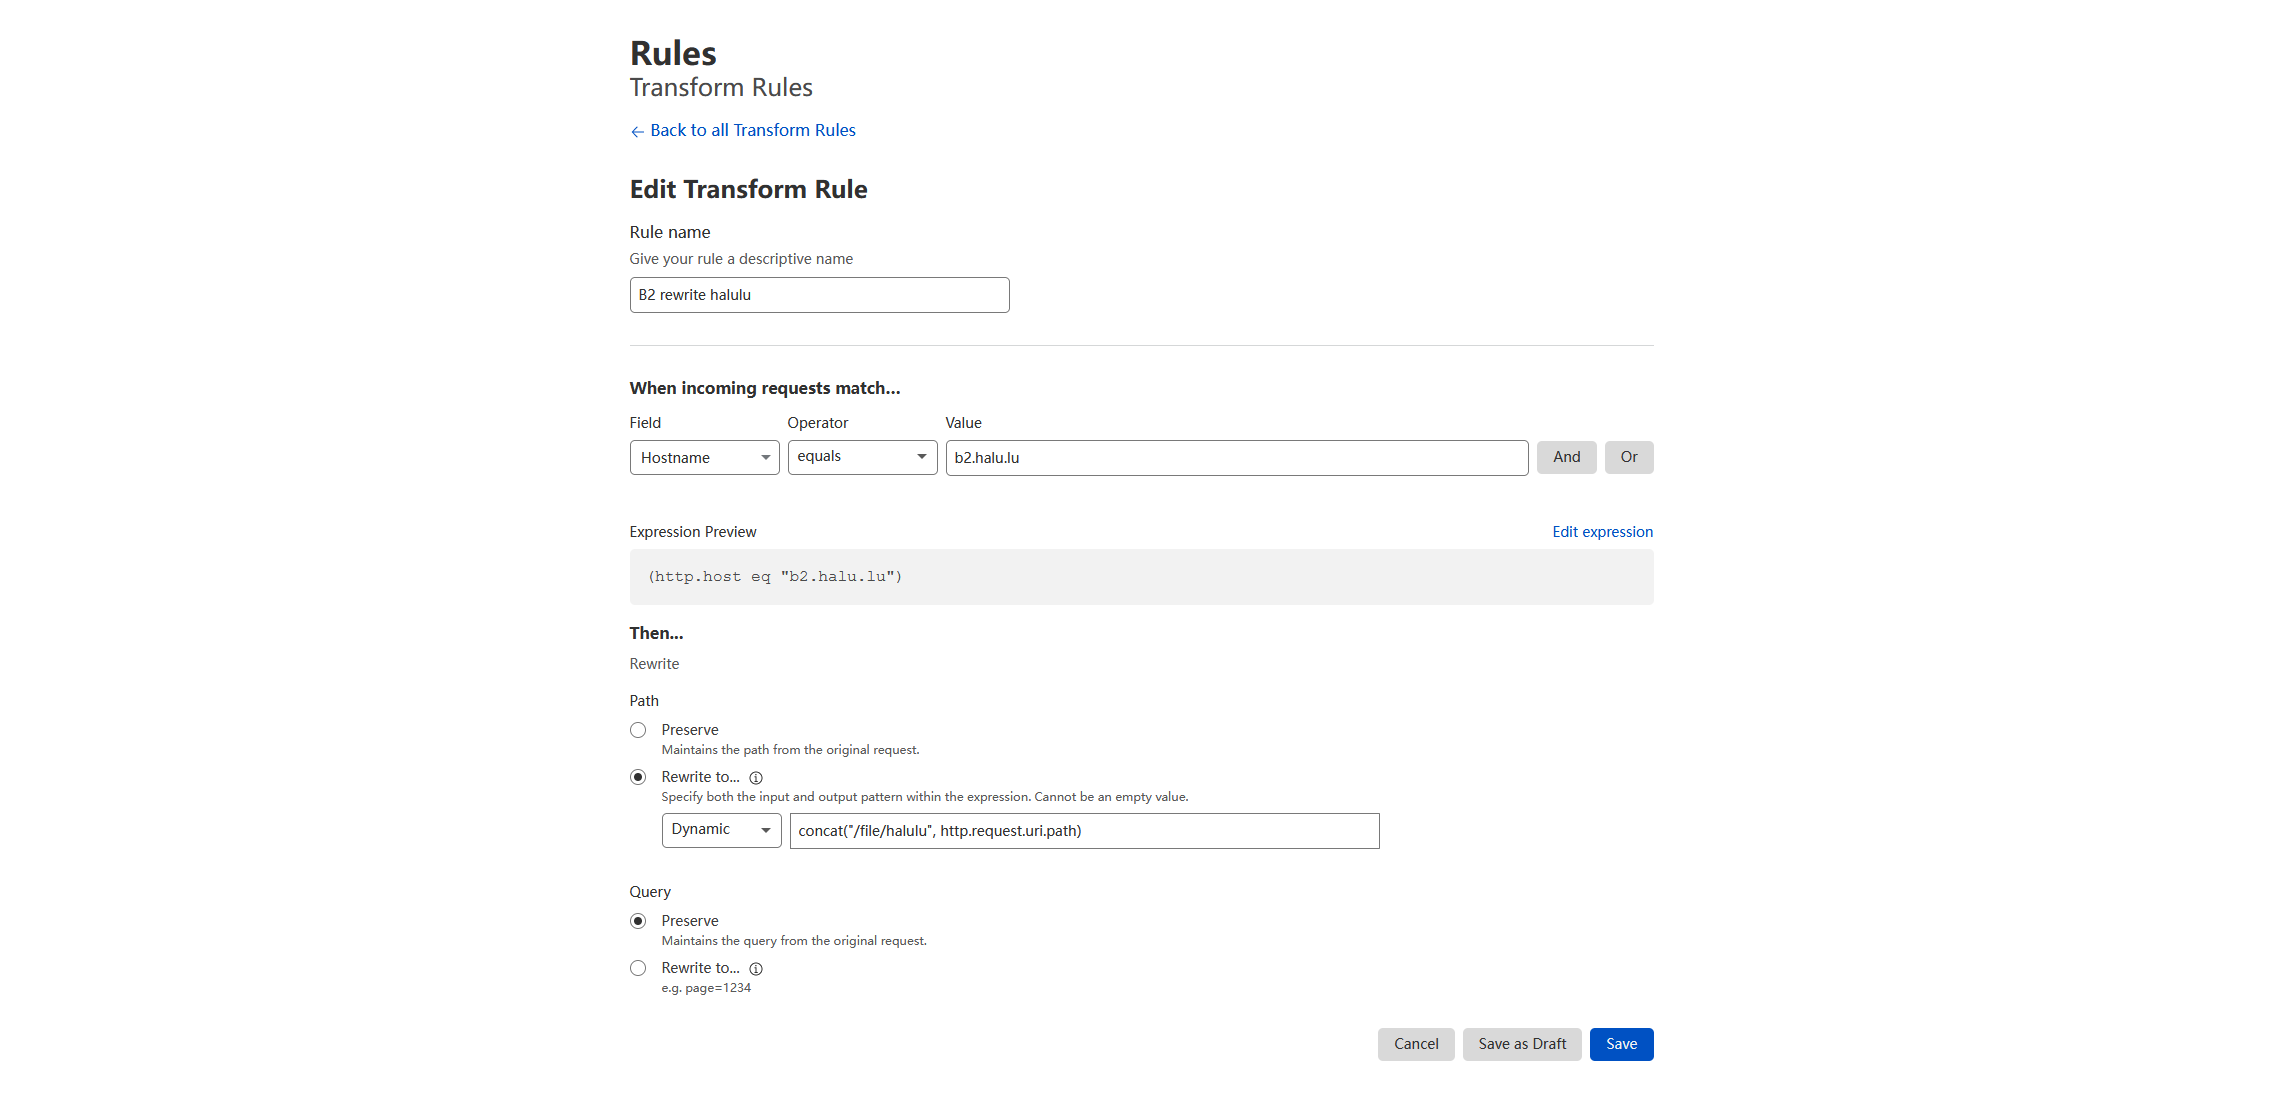
URL Rewrite is quite simple. In Cloudflare dashboard, choose your domain -> Rules -> Transform Rules. Create a new Rewrite URL rule. It simply matches the domain, and dynamically rewrites to concat("/file/<YOUR_BUCKET_ID>", http.request.uri.path).
If you want to access your private bucket from Cloudflare. You first need to create a BackBlaze Application Key. You need the keyID and applicationKey to generate a token, which is used to access files from the private bucket.
You can read the B2 documentation about how to generate the token. We can use the token to download files from private buckets in two ways: add Authorization in request header or add Authorization param in request query. The first header option needs additional "Request Header Modification rule" and the response cannot be cached by Cloudflare, so we use the second method.
Edit the URL Rewrite rule we created to hide bucket name, in Query choose "Rewrite to", select Static and enter Authorization=<Token>.
The problem is that the token is only at most 24 hours. So I write this script to automatically create token and update the rule. You can create a Cloudflare worker to do the job and set Triggers to run every 30 minutes.
Create a Cloudflare worker. The name does not matter since we use the Trigger of the worker. Open the quick editor. Copy and paste the code.
The configs you need to fill in:
-
B2KeyIDandB2AppKeyby create a BackBlaze Application Key. -
B2BucketID: Your BackBlaze B2 bucket ID. -
cfDomain: The domain you want to access b2 from. -
cfAuthEmail: Your Cloudflare email. -
cfAuthKey: Your Global API Key from API Tokens. -
cfZoneID: Your domain zone ID from the overview dashboard of your domain. -
cfRulesetID: You need first create the URL Rewrite rule. Then use the following curl command to view all the rulesets you have. Find the ruleset with phasehttp_request_transform. Itsidis thecfRulesetIDwe want.curl -X GET \ -H "X-Auth-Email: <cfAuthEmail>" \ -H "X-Auth-Key: <cfAuthKey>" \ "https://api.cloudflare.com/client/v4/zones/<cfZoneID>/rulesets"
-
cfRuleID: Once you have thecfRulesetID, use the following curl command to view the rules you have in the rule set. Find the rule you created in Cloudflare dashboard, itsidis thecfRuleIDwe want.curl -X GET \ -H "X-Auth-Email: <cfAuthEmail>" \ -H "X-Auth-Key: <cfAuthKey>" \ "https://api.cloudflare.com/client/v4/zones/<cfZoneID>/rulesets/<cfRulesetID>"
Once you fill in the constants, you can by Save and Deploy and then Run.
What about using a key from the b2_get_download_authorization-Api call?
It can last up to one week and allows custom override of Headers like CacheControl