This gist describes two processes allowing us to access the Google API and to register some webhooks. At the end of both processes we will obtain all variable needed to start using their API and we will have whitelisted all necessary URL to get started. We will be using the Google Calendar API and the Google Plus API to access the email address of the user.
This gist has been created as an Appendix to this article (part 1) and this article (part 3).
Note that, I will be using a randomly generated ngrok domain during this presentation. Simply replace b3093b51.ngrok.io with your domain name

⚡ Start by accessing the Google developers console here and create a new project if you don't already have one.


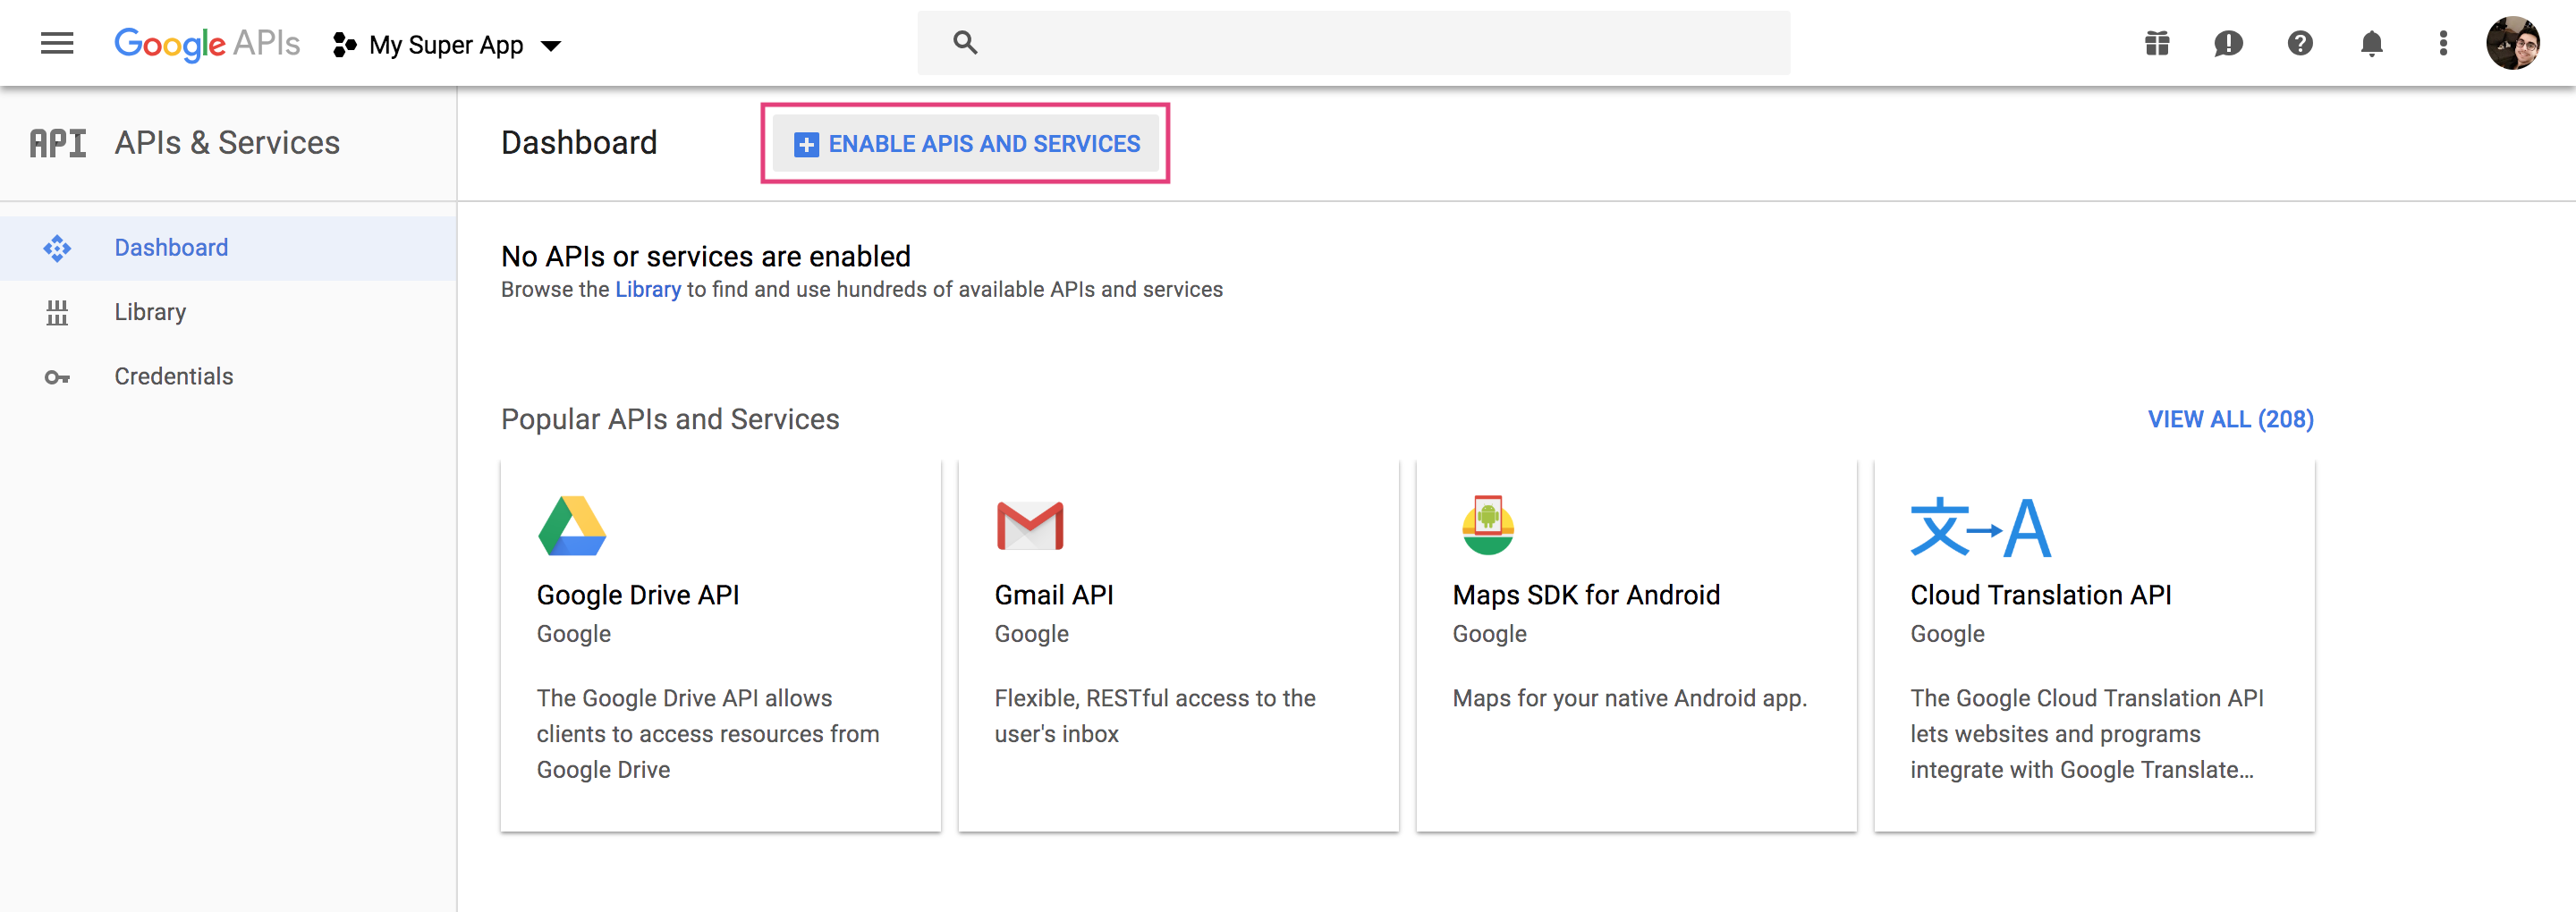
Now, within that project, you will need to enable APIs and services.
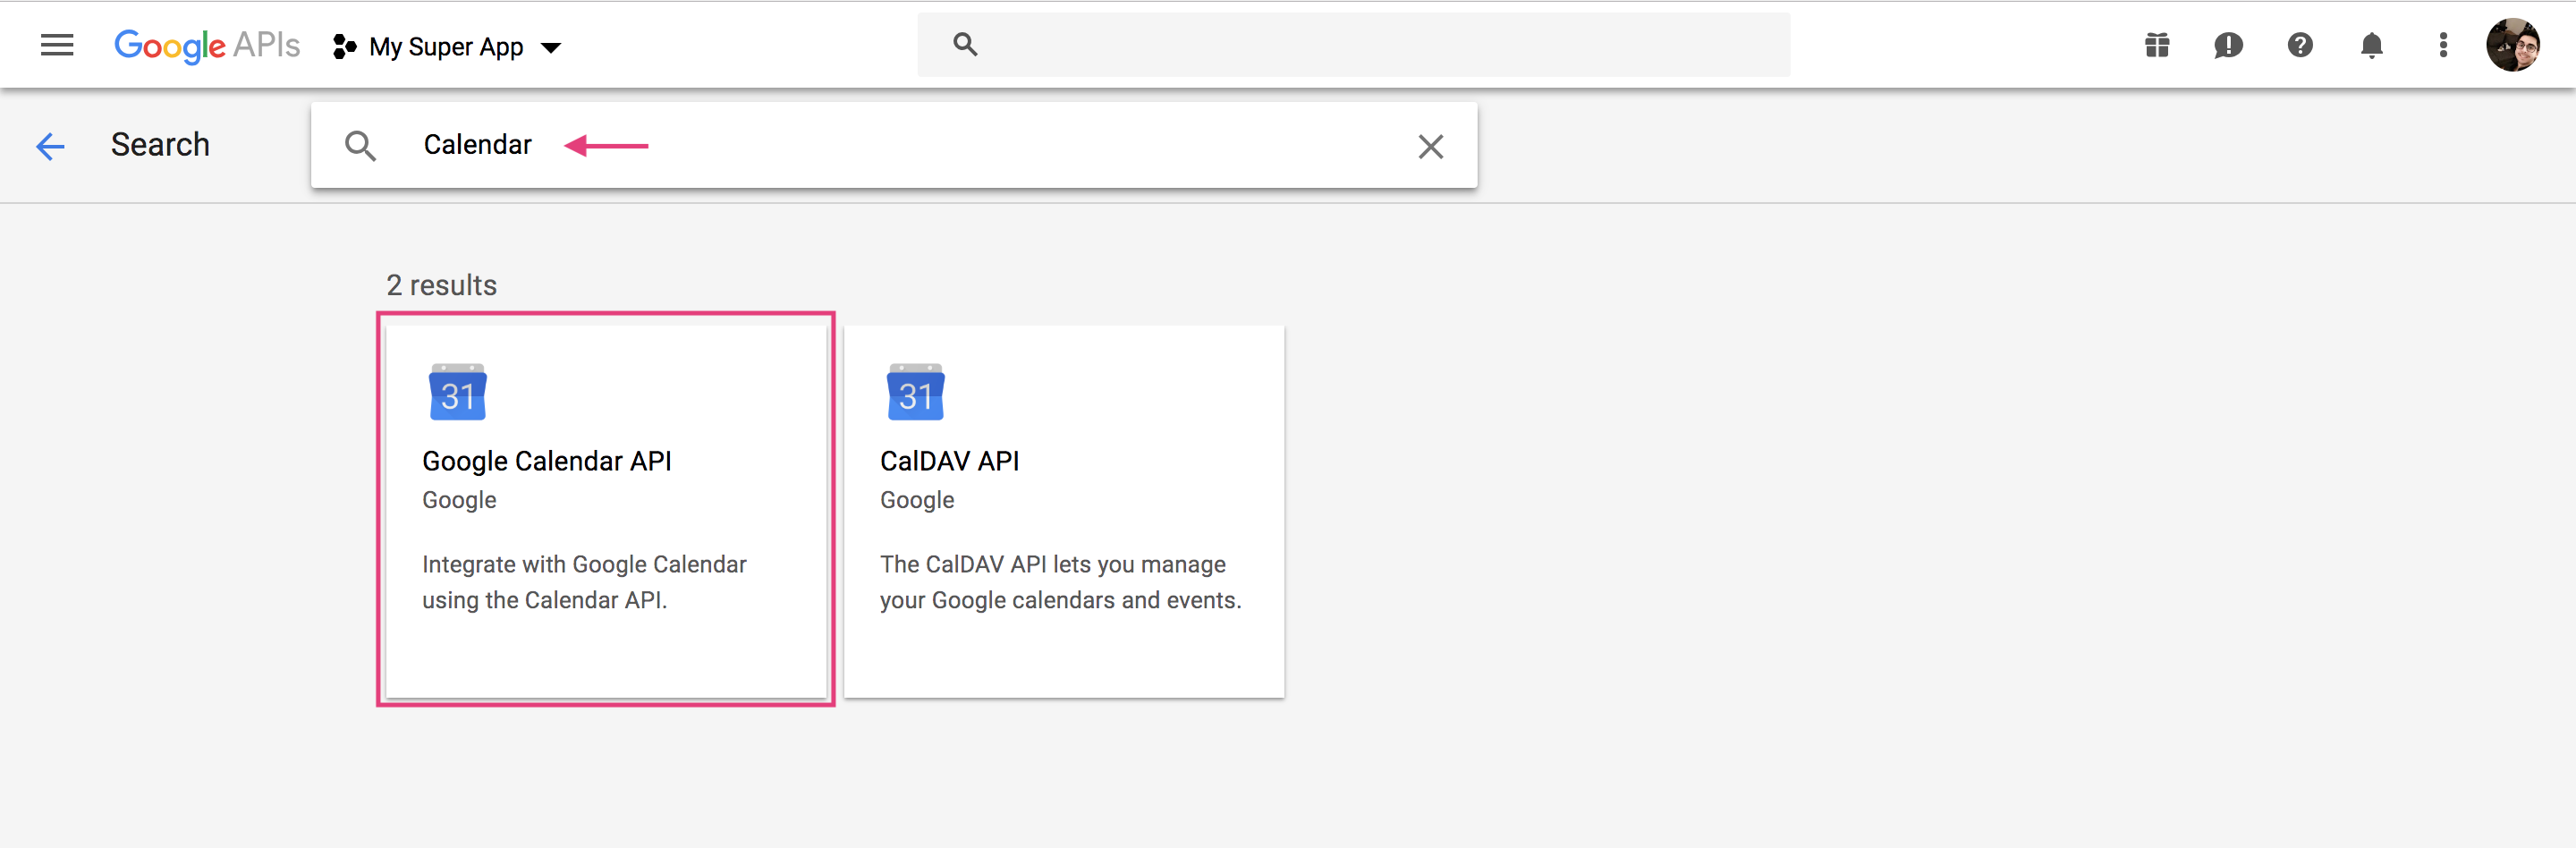
This will take your to their API Library. Simply search for "Calendar" and choose the Google Calendar API.

Whilst we've enable the Google Calendar API, we now need to obtain a client ID and a client secret to add to our application.

The important thing here is to ask for user data since we will be asking our user to connect to their Google Account through OAuth authentication.

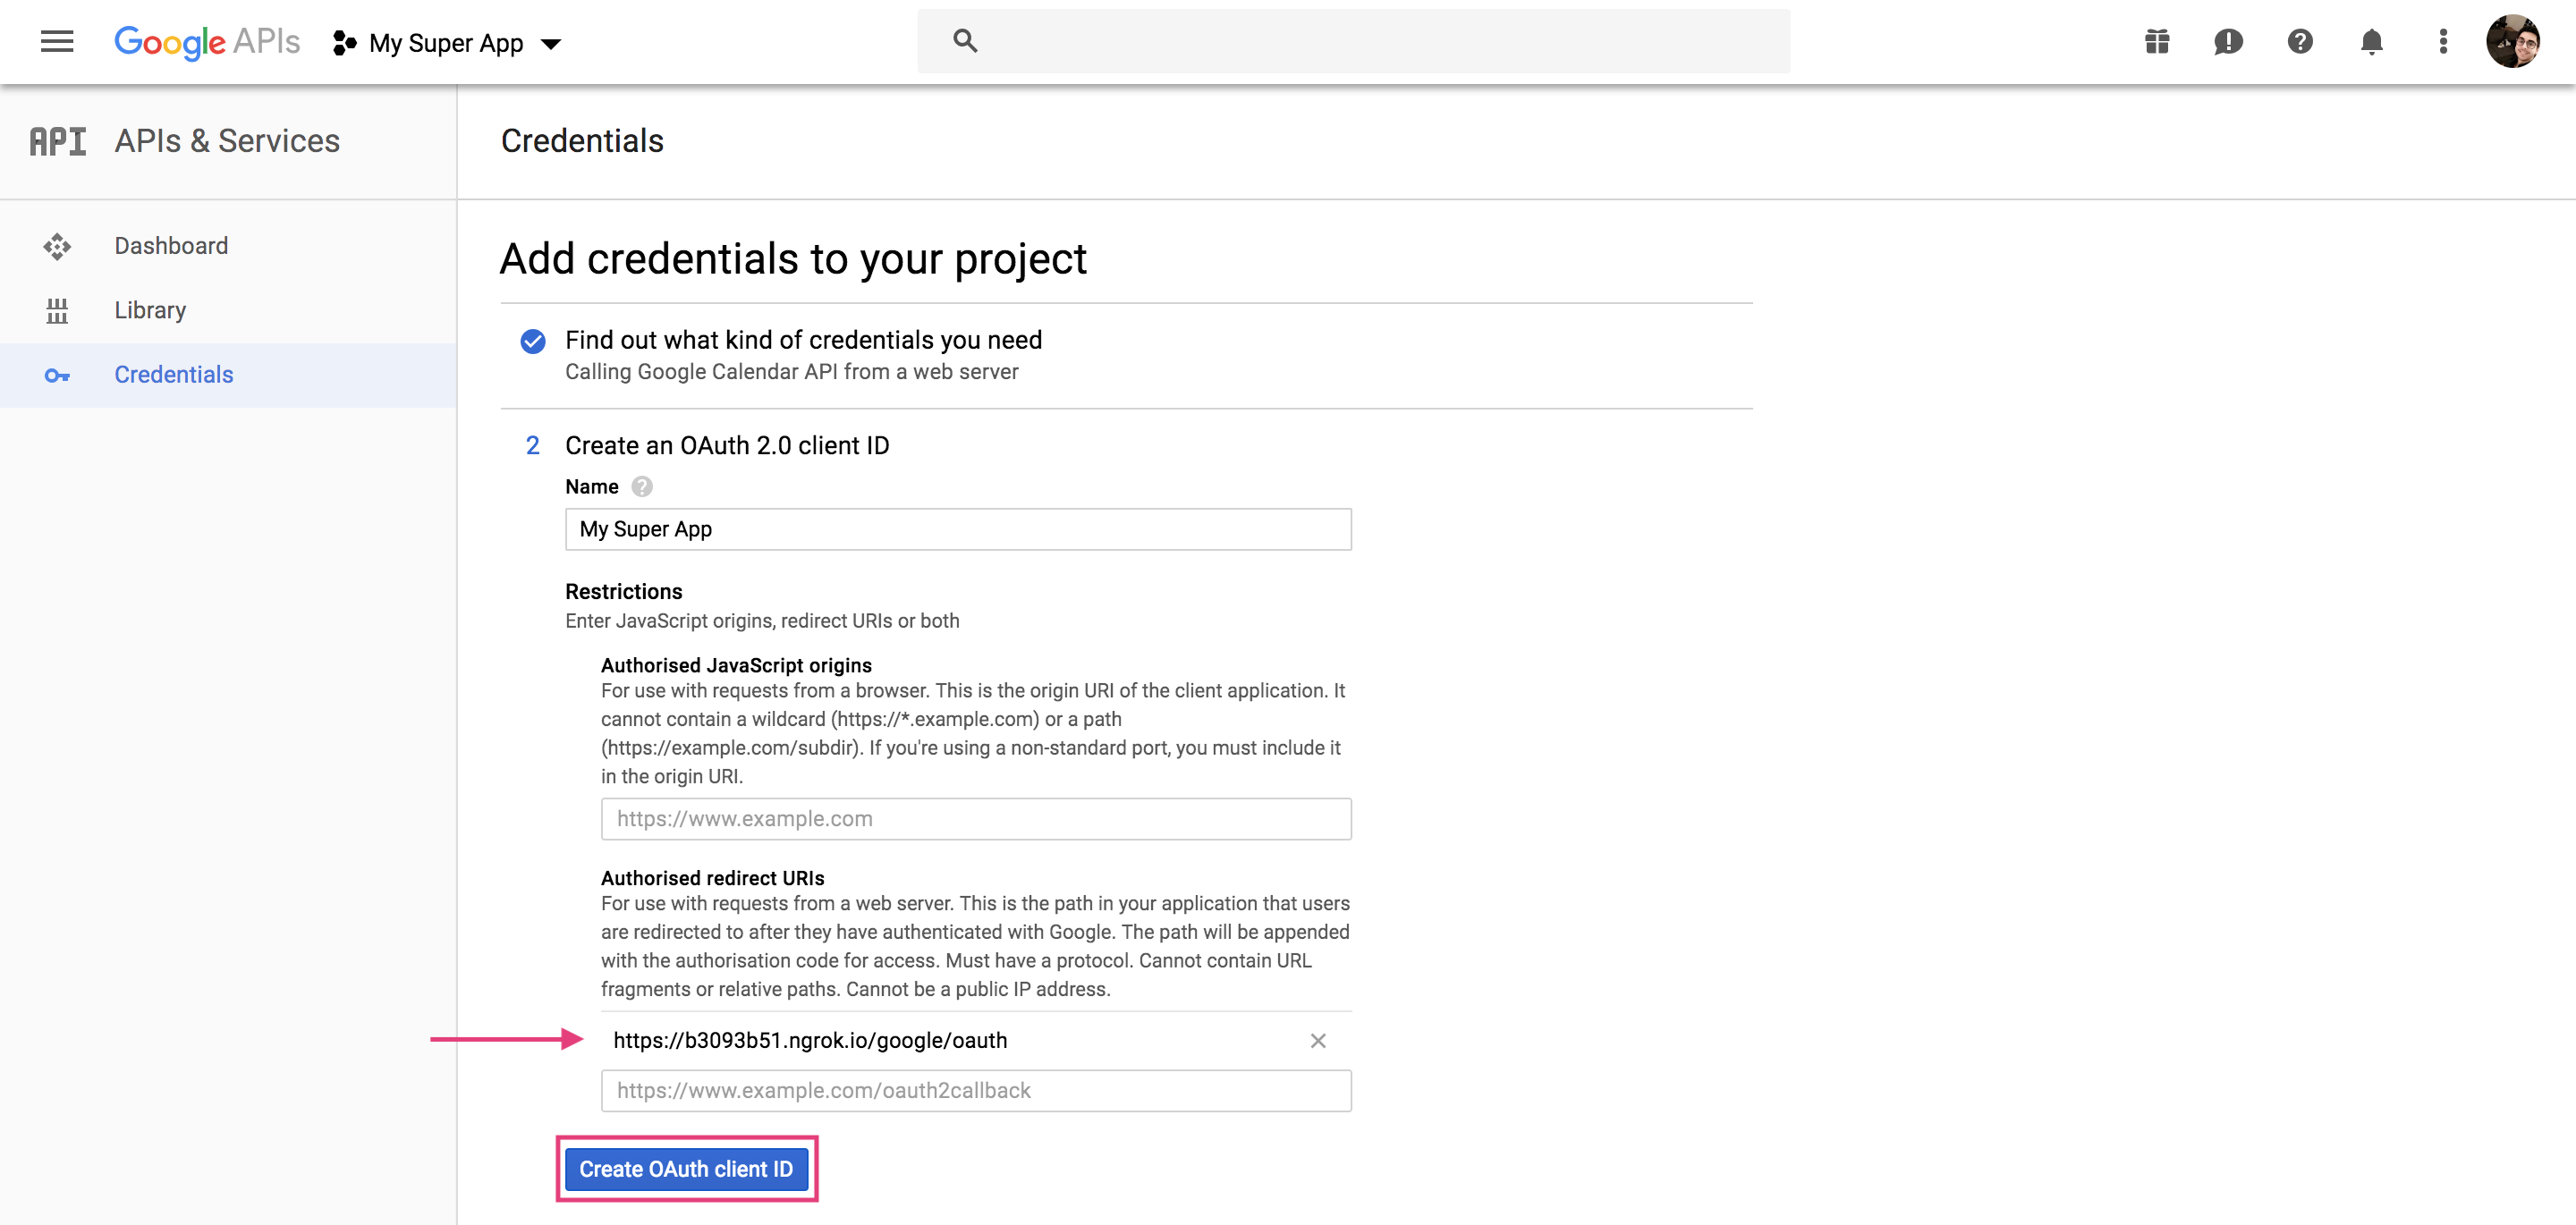
Now we need to give the name of our application but most importantly, we need to whitelist the redirect URI that we want the user to be redirected to after the OAuth process.

In my case, I'm simply going to run valet share to get a random ngrok URL. Note that, if you sign up for a free account, you will not be automatically disconnected after a few hours (which can be handy if you do not want to go through this process every day).

Needless to say, if you are using the Google API on a live server, use its real domain instead.
Now that we have our domain, we just need to decide the route that we will use for our OAuth callback. In the blog article, we will be using /oauth/google. Therefore the full URL is https://b3093b51.ngrok.io/oauth/google.
Enter the name of your app as it will appear on the OAuth screen and play with the customization settings (you can always change them later).

Ignore and click Done.

Click on you app name.

And TADA 🎉, here are your GOOGLE_CLIENT_ID and GOOGLE_CLIENT_SECRET environment variables.
As you can see we've also successfully whitelisted our GOOGLE_REDIRECT_URI environment variables which, in our case, is https://b3093b51.ngrok.io/oauth/google. You can always come back to this page later to update the redirect URI in case your domain name changes.

Don't worry, you can keep the same credentials for multiple APIs. We just need to tell Google that we also went to access to the Google Plus API (in order to get the user's email address).
In the search box, enter and choose "Google+ API".

Click Enable. And that's it 🍺.

An extra step to take when we want to receive notifications from Google via webhooks is to verify that you are the owner of your domain. This is simply done by uploading an HTML page into your application so that Google can check if it can reach it.
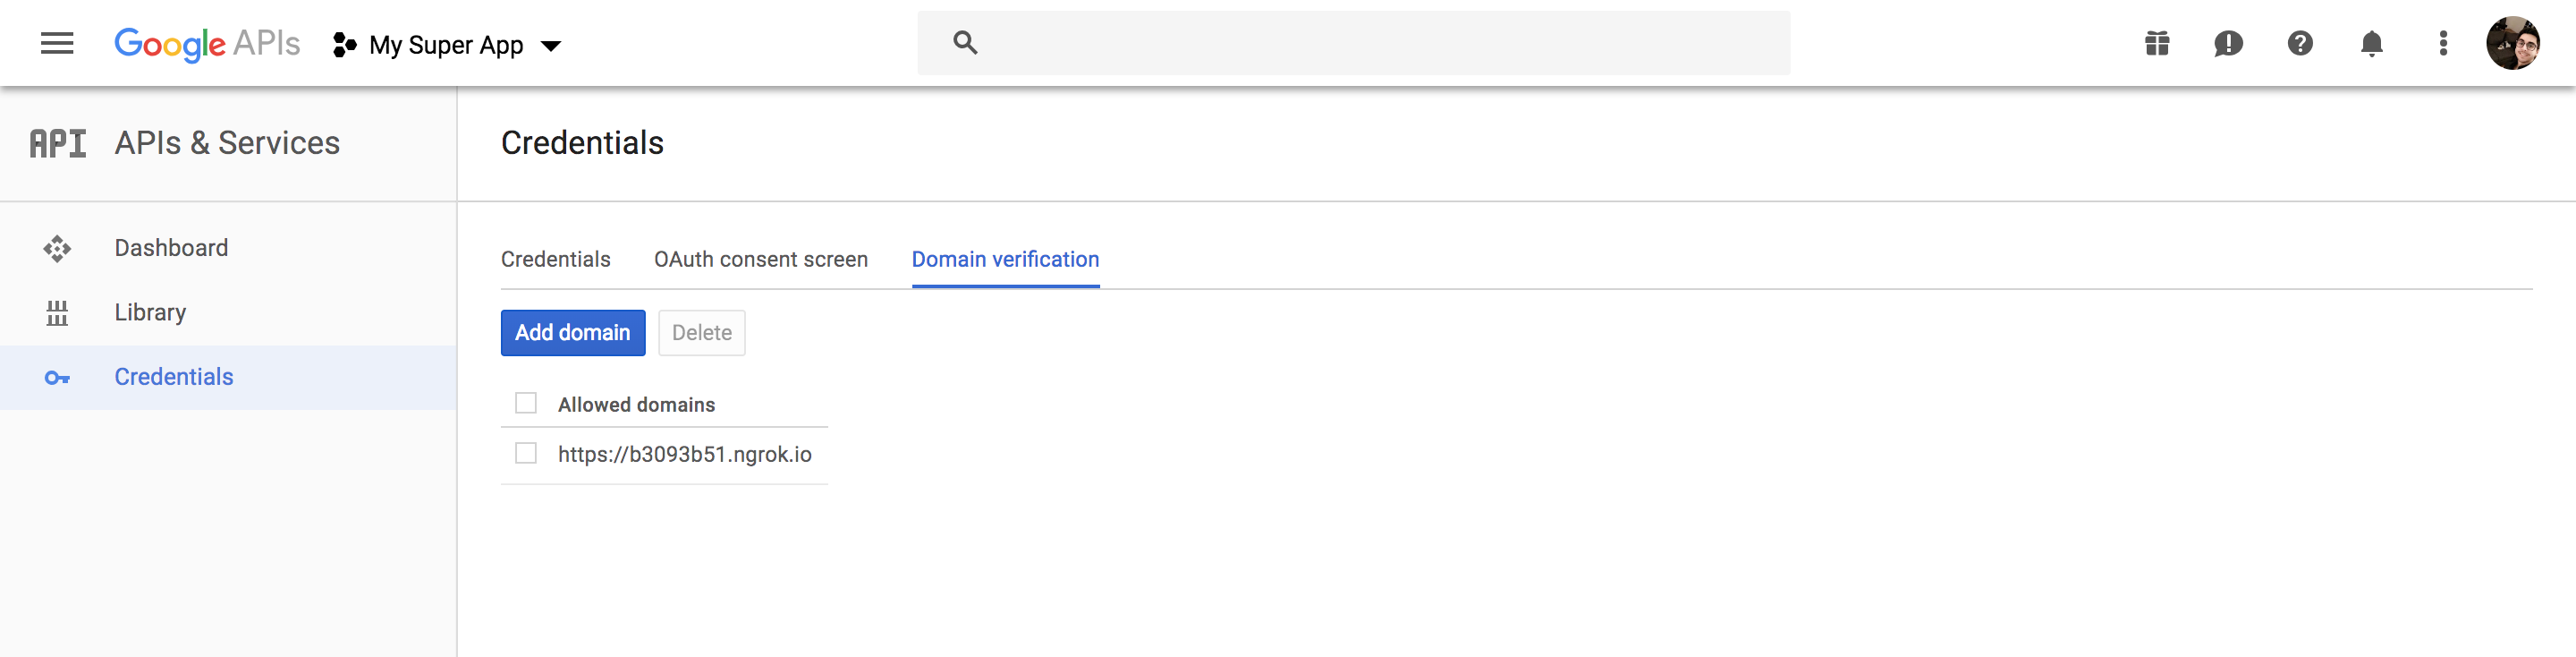
Start by heading to the Credentials page.

Click on the Domain verification tab.


Enter your full domain name. Note that you need to use the secure version of your URL, i.e. https://, for Google to send you webhook notifications.


It's not very intuitive but yes, the domain verification itself is done an other website. Simply click Add property and enter your domain's URL again (with https).

Now download the HTML file provided by Google and add it add the root of your public/ folder in a Laravel application. If you are using ngrok locally it will be live immediately, otherwise you will need to deploy this file onto your server.
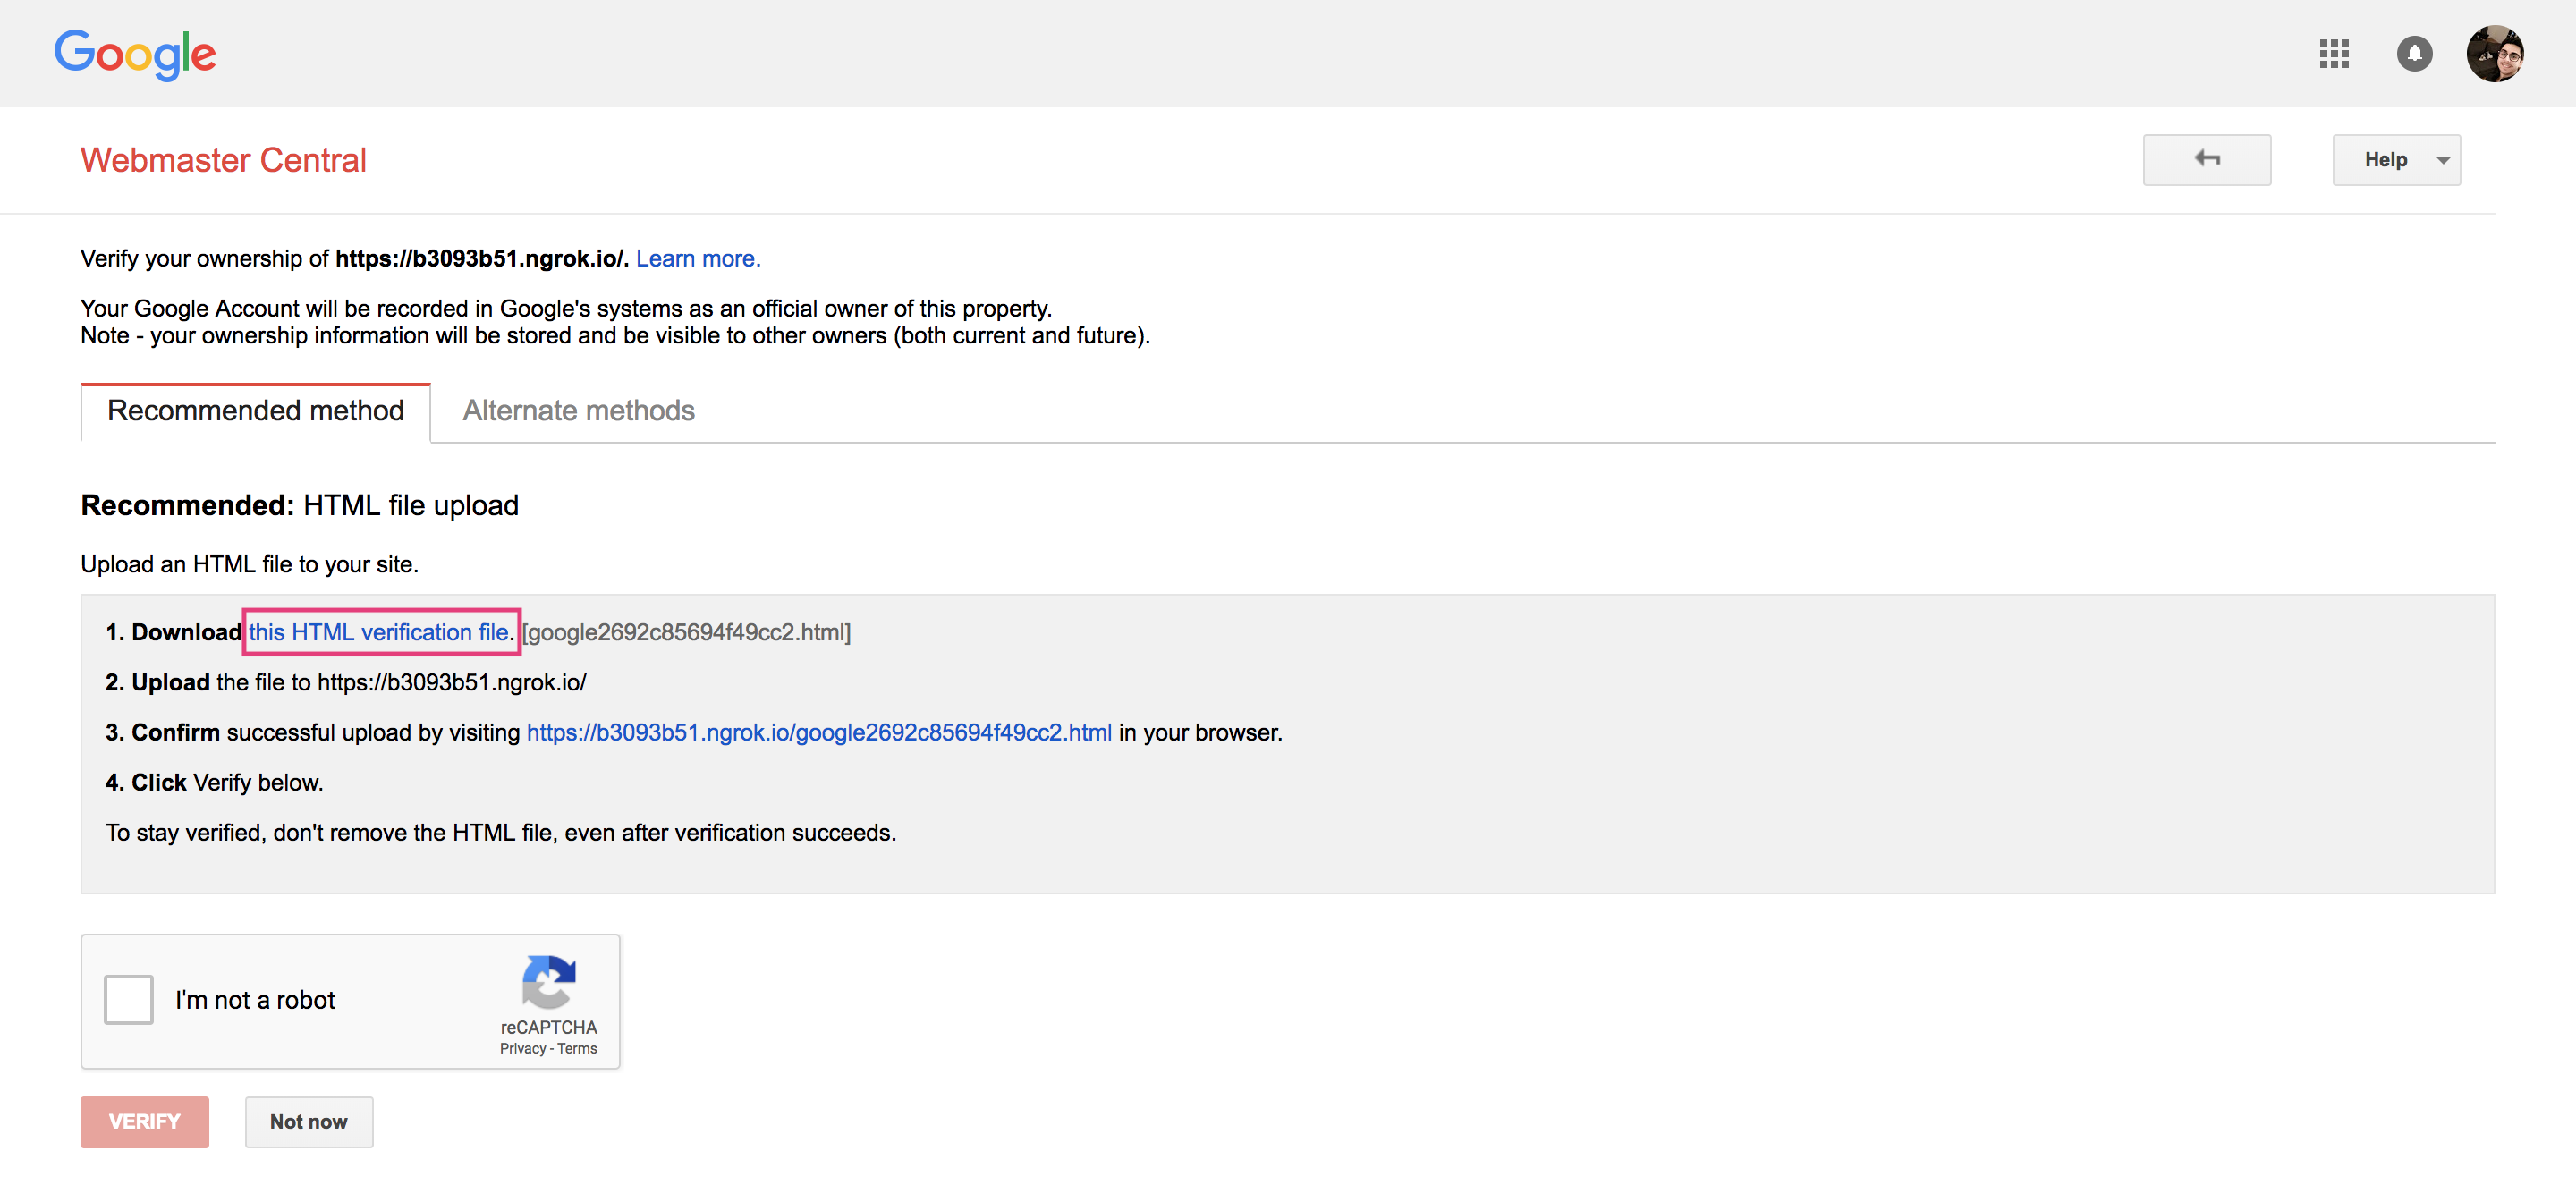
When its done, click Verify.

Now close this tab and come back to the Google developers console.

You should see the same form as earlier. Basically, now that we've added our domain on the other website, it should now work on here too. 🙄

And that's finally it! Your domain has now been verified and any webhooks that belongs to this domain will be accepted by Google.
In the case of our article, we will listen for Google notification on the google/webhook route. Therefore, our final environment variable GOOGLE_WEBHOOK_URI is https://b3093b51.ngrok.io/google/webhook.