The Workbench 7.13.0.Final was released in the last Tuesday, October 16th, and this version brings a lot of interesting features and important fixes. One of them is the brand new DMN Editor Preview which is disabled by the default, but you already can try it and take advantage of all power of this new tool.
In this article you'll learn how to enable the DMN Editor Preview, create a simple DMN model and execute it by calling a REST API.
Let's get started :-)
First of all, you'll need to enable the editor, since it was provided as an early access, it's hidden by a specific permission. To enable it, go to Settings -> Roles and remove "DMN Designer" exception in the "Permissions" section for the role you're logged in. See the step by step:

With DMN Editor enabled, go to Projects, create a new project, click on "Add asset" and finally open the "DMN Preview". Here you can explore the editor and create your DMN file with your own rules or you can follow the steps provided by this video:
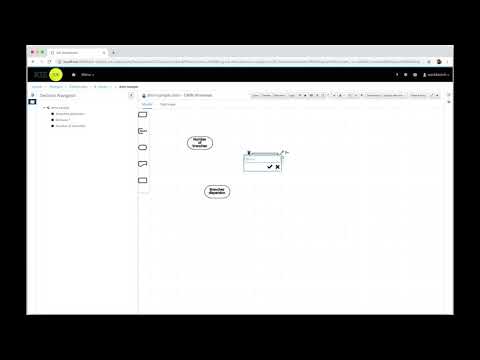
Notice that in the video, we've inserted two input nodes ("Number of branches" and "Branches dispersion") and one decision node ("Branches distribution") which makes decisions supported by a Decision Table.
The DMN file created in the video can be downloaded here
With the DMN file created and saved, it's time to deploy those rules. Go to Projects -> Your project and click on "Deploy" to deploy your project in a KIE Server. Now, access your instance with the "/dmn" suffix, in my case the URL is:
http://localhost:8080/kie-server/services/rest/server/containers/DMNSample_1.0.0/dmn.
If you follow the steps above correctly, you'll see something like this:

Notice the model-namespace and the model-name values, they will be useful in the next step.
Now, we can make requests to execute rules in our KIE Server instance. See the example below:
curl -u kieserver:kieserver1\! \
     -H "content-type: application/json" \
     -H "accept: application/json" \
     -X POST "http://localhost:8080/kie-server/services/rest/server/containers/DMNSample_1.0.0/dmn" \
     -d "{ \
           \"model-namespace\" : \"https://github.com/kiegroup/drools/kie-dmn\", \
           \"model-name\" : \"dmn-sample\", \
           \"decision-name\" : [ ], \
           \"decision-id\" : [ ], \
           \"dmn-context\" : { \"Branches dispersion\" : \"Province\", \"Number of branches\" : 10 }}"
Replace the URI, the model-namespace and the model-name with your own information, and try it locally. The rules will be executed by the KIE Server with the DMN model you created, and the response will be something like this:
{
  "type" : "SUCCESS",
  "msg" : "OK from container 'DMNSample_1.0.0'",
  "result" : {
    "dmn-evaluation-result" : {
      "messages" : [ ],
      "model-namespace" : "https://github.com/kiegroup/drools/kie-dmn",
      "model-name" : "dmn-sample",
      "decision-name" : [ ],
      "dmn-context" : {
        "" : "Medium",
        "Branches dispersion" : "Province",
        "Number of branches" : 10
      },
      "decision-results" : {
        "_76E55A36-755D-44B4-95A9-A247A05D6D7C" : {
          "messages" : [ ],
          "decision-id" : "_76E55A36-755D-44B4-95A9-A247A05D6D7C",
          "decision-name" : "Branches distribution",
          "result" : "Medium",
          "status" : "SUCCEEDED"
        }
      }
    }
  }
This article is just a small picture of all power that DMN Editor has, you can write even more complex rules by applying different structures. If you want to read more about the DMN standard, check this article.
The DMN Editor is still under development. New features and enhancements are to come, stay tuned ;-)