ในการใช้งาน Ansible หลักๆ จะมีอยู่ Command-line ให้ใช้งานอยู่สองแบบ คือ
/usr/bin/ansible/usr/bin/ansible-playbook
ซึ่งใน Ep. นี้เรามาโฟกัสกันที่ /usr/bin/ansible กันก่อน ส่วน /usr/bin/ansible-playbook คืออะไรเดี๋ยวจะมาว่ากันใน Ep. ถัดไป
Ad-hoc command คือ การรัน command /usr/bin/ansible แบบ command-line ทั่วไป รันแบบบรรทัดเดียว ครั้งเดียวจบ (one-Liner) โดยไม่มีการบันทึกคำสั่งนั้นลงไฟล์
ansible หรือ /usr/bin/ansible นั้นจะเหมาะสำหรับทำความเข้าใจการทำงานของ Ansible หรือ สำหรับทดสอบการทำงานของ Module ต่างๆ ในแลบซะมากกว่าการนำไปรัน Prod.
ก่อนจะไปเริ่ม Ad-hoc command ก็แวะทบทวน และทำความเข้าใจถึงการทำงานของ Ansible กันก่อน...
ใน Ep.01-What's Ansible ได้เกริ่นไปคร่าวๆ แล้วว่า Ansible คือ agent-less IT automation tool ทำงานผ่าน SSH Protocol ฉะนั้นสิ่งที่เราต้องทำก่อนใช้งาน Ansible คือ ควรไปจัดการหรือคอนฟิก SSH Keys ให้เรียบร้อยซะ จะได้ไม่ต้องลำบากทีหลัง
การทำงานของลึกๆ นั้นไม่ได้ทำแค่ SSH เข้าไปแล้ว Execute Command แบบปกติอย่างที่ Admin หลายๆ คนคุ้นเคย แต่... Ansible จะทำการ SSH เข้าไปที่ Target host และส่ง Module ที่เราเรียกใช้เข้าไปไว้ก่อน หลังจากนั้นก็จะทำการ Execute พอทำงานเสร็จแล้วก็จะส่งผลกลับมาที่ Control host จบปิ๊ง!
ใช้ Inventory file และรายละเอียด Server ตามนี้:
[db-servers]
db-01  ansible_host=192.168.124.37 ansible_user=root
db-02  ansible_host=192.168.124.176 ansible_user=root

[web-servers]
web-01  ansible_host=192.168.124.86 ansible_user=root
web-02  ansible_host=192.168.124.84 ansible_user=root
web-03  ansible_host=192.168.124.26 ansible_user=root
ansible <host-pattern> -i <inventory-file> -m <module-name>
ansibleor/usr/bin/ansibleคือ การเรียกใช้งาน ansible แบบ ad-hoc command<host-pattern>คือ Pattern ที่จะใช้เรียก Alias name หรือ Pattern ที่เรากำหนดไว้ใน inventory file-i <inventory-file>คือ ระบุ inventory file-m <module-name>คือ ระบุ module ที่ต้องการเรียกใช้งาน
- เรียกใช้งาน
ansibleหรือ/usr/bin/ansible - สั่งให้ Ansible ทำงานกับ Host ไหนบ้าง (ชื่อ หรือ pattern ต้องตรงกับ inventory file)
- ระบุที่อยู่ของ inventory file
- ระบุชื่อ module ที่ต้องการ
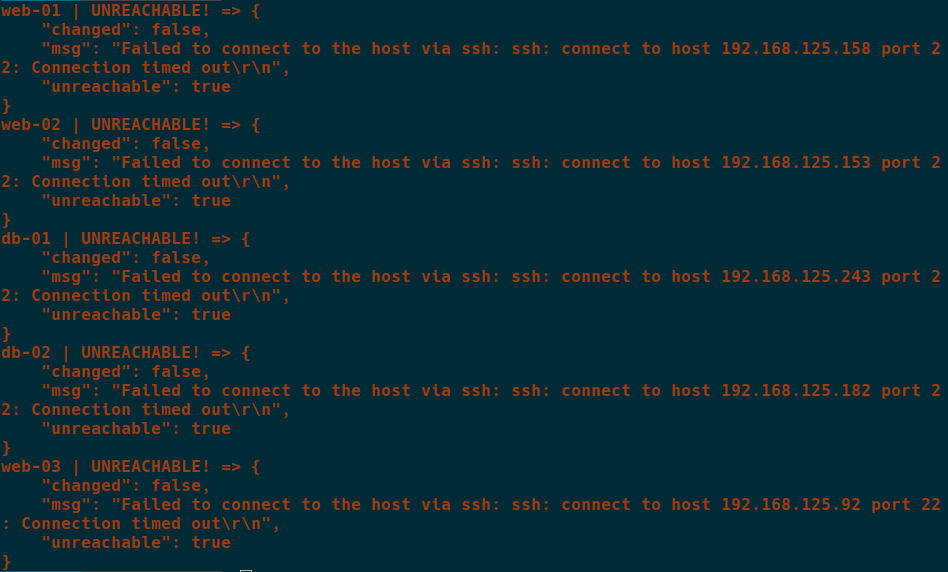
ใช้สำหรับทดสอบว่า Control host สามารถ connect กับ Remote host ได้หรือไม่
ansible -i inventories all -m ping
-
Output - UNREACHABLE:
-
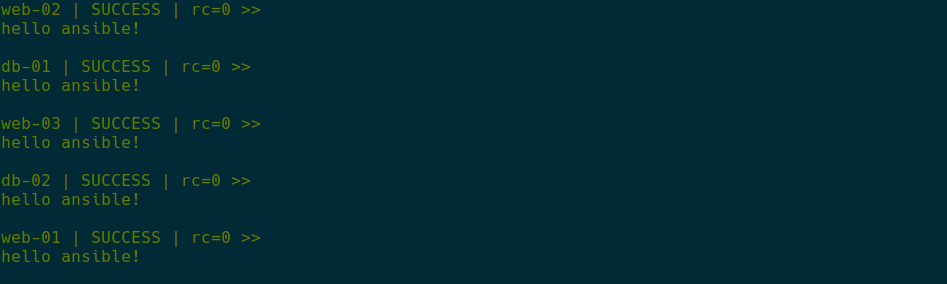
Output - SUCCESS:

Note:
สีเขียว หมายถึง connected remote host ได้ และ execute command แล้วไม่มีการเปลี่ยนแปลงค่าใดๆ (ปริ้นท์ค่าออกมาเฉยๆ)
สีส้ม หมายถึง ไม่สามารถ connect remote host ได้
ใช้สำหรับการรัน command บน remote host เฉพาะใน /bin/sh เท่านั้น
ansible -i inventories all -m shell -a '/bin/echo hello ansible!'
เทียบได้กับการรัน command:
/bin/echo hello ansible!
-
-a คือ arguments เราสามารถระบบุ command ที่เราเคยรันบน UNIX/Linux ได้เหมือนกัน ถ้าหาก command ที่เรียกใช้จำเป็นต้องป้อน arguments จะต้องใส่ '' (quote) หรือ "" (double-quote) ครอบด้วยไม่งั้นจะเอ๋อ..เหร๋อ
-
Output:
Options อื่นๆ และตัวอย่างการใช้งานศึกษาเพิ่มเติมได้ ที่นี่
ใช้สำหรับการรัน command บน remote host
ansible -i inventories all -m command -a hostname
เทียบได้กับการรัน command:
hostname
- Output:

Note:
สำหรับ module command และ shell นั้นมีการใช้งานที่คล้ายกันมาก แต่ก็จะมีข้อจำกัด ข้อแตกต่างในบางเรื่อง ซึ่งจะต้องศึกษาใน document ให้ดีก่อนใช้งาน
Options อื่นๆ และตัวอย่างการใช้งานศึกษาเพิ่มเติมได้ ที่นี่
จะมีทั้งส่วนที่จัดการ Package ทั้ง ภาษา (Languages) เช่น bower, composer, npm เป็นต้น และระบบปฏิบัติการ (OS) เช่น yum, apt, dnf, homebrew, pacman, zypper เป็นต้น
- ในที่นี้จะยกตัวอย่างแค่ฝั่ง OS (Language นั้น อาตมาไม่คล่อง 555+)
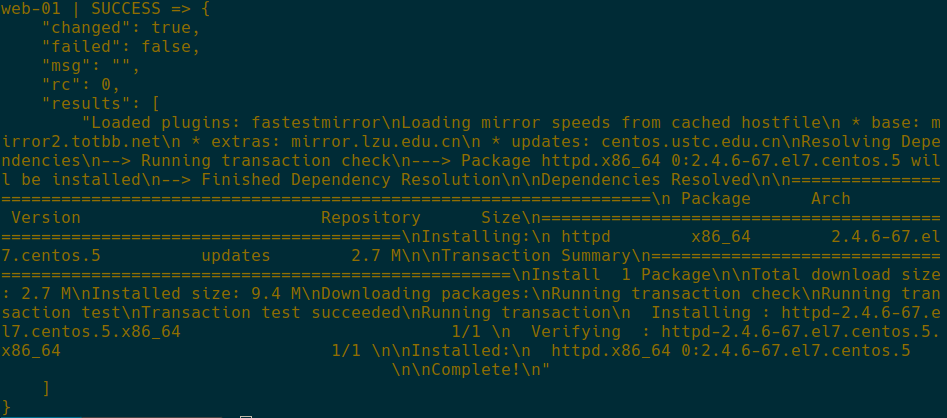
ansible -i inventories web-01 -m yum -a "name=httpd state=latest"
เทียบได้กับการรัน command:
yum install httpd
- Output :
Note:
สีเหลือง หมายถึง execute command แล้วมีการเปลี่ยนแปลงเกิดขึ้น
ที่เคยบอกไปใน Ep.03-Modules ว่ามันทำงานแบบ idempotent คืออะไรที่ไม่อยู่ใน desired state มันก็จะไม่ทำงานให้ เช่นถ้าเราสั่งติดตั้ง httpd อีกรอบ:
ansible -i inventories web-01 -m yum -a "name=httpd state=latest"
- Output:

Note:
ใครที่ใช้ OS อื่นๆ ก็ให้แวะเข้าไปอ่าน Official Documents นะครับอ่านง่าย แถมมีตัวอย่างการใช้งานให้ด้วย
Options อื่นๆ และตัวอย่างการใช้งานศึกษาเพิ่มเติมได้ ที่นี่
ใช้สำหรับจัดการกับ Services บน OS ของเรานั่นเอง
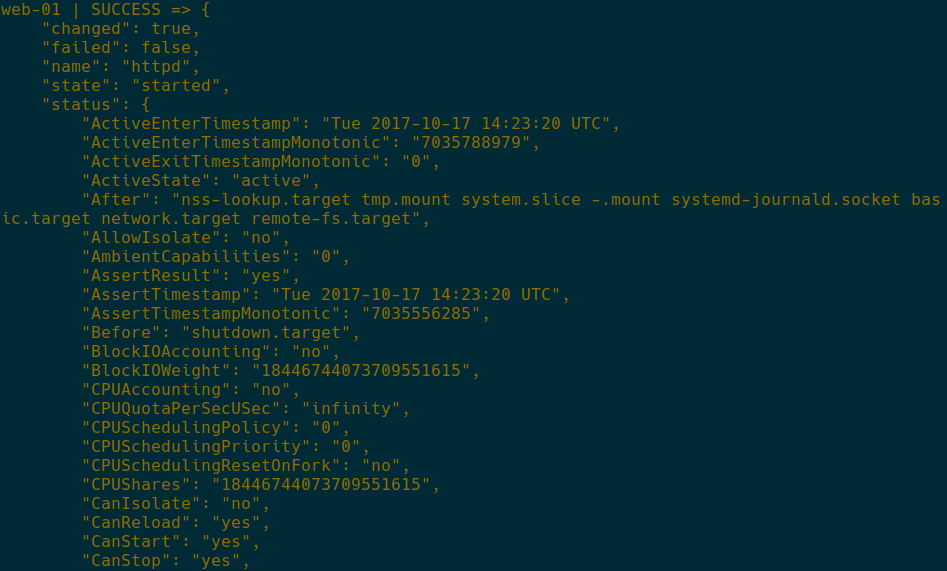
ansible -i inventories web-01 -m service -a "name=httpd state=restarted"
เทียบได้กับการรัน command:
service httpd restartหรือsystemctl restart httpd
- Output:
Note:
state=restarted หมายถึง สั่งให้ service นั้นๆ restart
state=reloaded หมายถึง สั่งให้ service นั้นๆ reloaded
state=started หมายถึง สั่งให้ service นั้นๆ start ถ้า service นั้นๆ ยังไม่ถูก start
state=stopped หมายถึง สั่งให้ service นั้นๆ stop ถ้า service นั้นๆ ยังไม่ถูก stop
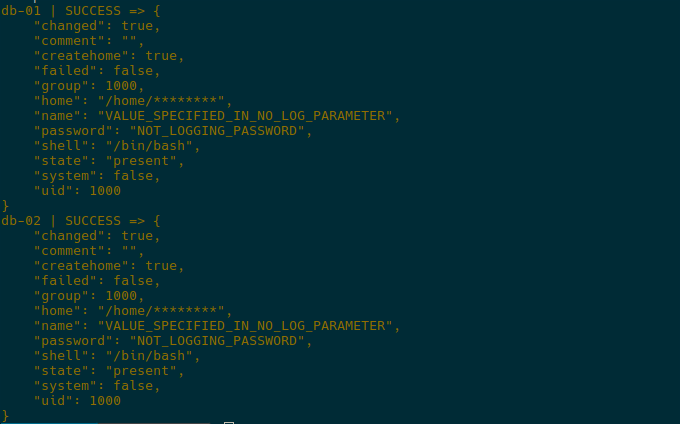
ใช้สำหรับจัดการ user account (ตามชื่อ module นั่นแหละ)
ansible -i inventories db-servers -m user -a "name=ansible password=ansible"
เทียบได้กับการรัน command:
useradd ansibleและpasswd ansible
- Output:
Options อื่นๆ และตัวอย่างการใช้งานศึกษาเพิ่มเติมได้ ที่นี่
ใช้สำหรับ copy ไฟล์เข้าไปใน romote host นั่นเอง
ansible -i inventories web-01 -m copy -a "src=/etc/hosts dest=/tmp/hosts owner=ansible group=wheel mode=0644"
เทียบได้กับการรัน command:
cp /etc/hosts /tmp/hostsและchown ansible:wheel /tmp/hostsและchmod 644 /tmp/hosts
- Output:

Options อื่นๆ และตัวอย่างการใช้งานศึกษาเพิ่มเติมได้ ที่นี่
จะเห็นว่าการใช้งาน Ansible นั้นไม่ยากเลย ส่วนหนึ่งเพราะมี modules ให้เรียกใช้งานอยู่แล้ว (ที่รันให้ดูเนี่ยแค่จิ๊บๆ ยัง modules อีกเป็นร้อย) แต่ได้บอกไปแล้วว่าการรัน Ansible แบบ Ad-hoc Command นั้นเหมาะสำหรับการทดสอบ เล็กๆ น้อยๆ เท่านั้น สังเกตว่าถ้ามันมี arguments ที่ต้องป้อนแบบยาวเหยียด เราก็คงไม่มานั่งพิมพ์อะไรเยอะๆ แบบนี้หรอกใช่ม่ะ? อีกเหตุผลนึงคือมันไม่ตรงคอนเซ็ปของ configuration management (ถึงแม้ว่าทุกๆ module สามารถรันแบบ ad-hoc ได้ก็ตาม) การใช้งานบน Production จริงๆ เขานิยมใช้ ansible-playbook กันนะจ๊ะ ถือว่าเป็นไฮไลท์เลยทีเดียว เดี๋ยวมาว่ากันใน Ep. ถัดไป บัยยยส์ ^.^