last updated: 2 May 2024
Note: Replace all following instances of
<project-name>with the name of your current project
Ref: https://tutorial.djangogirls.org/en/django_installation/
- Create your project directory and change into it:
mkdir <directory-name> cd <directory-name> - Create a
virtualenv:python -m venv <venv-name>- It's a good idea to keep the
venvname short, as you'll be referencing it a lot
- It's a good idea to keep the
- Start your virtual environment by running:
source <venv-name>/bin/activate- You will know you have
virtualenvstarted when you see the propmp in your console is prefixed with(myvenv) - When working within a virtual environment,
pythonwill authomatically refer to the correct version, so you can usepythoninstead ofpython3
- You will know you have
- Make sure you have the latest version of
pip, the software used to install Django:python -m pip install --upgrade pip - Create a
requirements.txtfile in the root project directory and add the following text "Django~=3.2.10" - Install Django:
pip install -r requirements.txt
Ref: https://tutorial.djangogirls.org/en/django_start_project/
- Run the following command:
django-admin startproject <project-name> . - You should now have a directory structure that looks like this:
<directory-name> ├── manage.py ├── <project-name> │ ├── __init__.py │ ├── asgi.py │ ├── settings.py │ ├── urls.py │ └── wsgi.py ├── <venv-name> │ └── ... └── requirements.txtmanage.pyserves as your project management script. It is used to create applications, work with databases, and start the development web server.settings.pycontains all the website settings, including registering any applications we create, the location of our static files, database configuration details, etc.urls.pydefines the site URL-to-view mappings. While this could contain all the URL mapping code, it is more common to delegate some of the mappings to particular applications, as you'll see later.wsgi.pyis used to help your Django application communicate with the web server. You can treat this as boilerplate.asgi.pyis a standard for Python asynchronous web apps and servers to communicate with each other. Asynchronous Server Gateway Interface (ASGI) is the asynchronous successor to Web Server Gateway Interface (WSGI). ASGI provides a standard for both asynchronous and synchronous Python apps, whereas WSGI provided a standard for synchronous apps only. ASGI is backward-compatible with WSGI and supports multiple servers and application frameworks.
Ref: https://tutorial.djangogirls.org/en/django_start_project/#changing-settings
- Configure your timezone: open
<my-project>/mysite/settings.py, find the line that containsTIME_ZONEand modify it with your own timezone. For example:TIME_ZONE = 'America/New_York'
- Add a path for static files: go to the end of
<my-project>/mysite/settings.pyand, just underneathSTATIC_URL, add a new entry calledSTATIC_ROOT:STATIC_URL = '/static/' STATIC_ROOT = BASE_DIR / 'static'
- When
DEBUGisTrueandALLOWED_HOSTSis empty, the host is validated against['localhost', '127.0.0.1', '[::1]']. This won't match the hostname once you deploy your application, so change the following setting:ALLOWED_HOSTS = ['127.0.0.1', '<host-name>']
Ref: https://tutorial.djangogirls.org/en/django_start_project/#set-up-a-database
sqlite3is the default database software. Reference<project-name>/settings.py:DATABASES = { 'default': { 'ENGINE': 'django.db.backends.sqlite3', 'NAME': BASE_DIR / 'db.sqlite3', } }
- Create a database:
python manage.py migrate - If the previous command goes well, you should see something like this:
(myvenv) ~/djangogirls$ python manage.py migrate
Operations to perform:
  Apply all migrations: admin, auth, contenttypes, sessions
Running migrations:
  Applying contenttypes.0001_initial... OK
  Applying auth.0001_initial... OK
  Applying admin.0001_initial... OK
  Applying admin.0002_logentry_remove_auto_add... OK
  Applying admin.0003_logentry_add_action_flag_choices... OK
  Applying contenttypes.0002_remove_content_type_name... OK
  Applying auth.0002_alter_permission_name_max_length... OK
  Applying auth.0003_alter_user_email_max_length... OK
  Applying auth.0004_alter_user_username_opts... OK
  Applying auth.0005_alter_user_last_login_null... OK
  Applying auth.0006_require_contenttypes_0002... OK
  Applying auth.0007_alter_validators_add_error_messages... OK
  Applying auth.0008_alter_user_username_max_length... OK
  Applying auth.0009_alter_user_last_name_max_length... OK
  Applying auth.0010_alter_group_name_max_length... OK
  Applying auth.0011_update_proxy_permissions... OK
  Applying auth.0012_alter_user_first_name_max_length... OK
  Applying sessions.0001_initial... OK
Ref: https://tutorial.djangogirls.org/en/django_start_project/#starting-the-web-server
- From the root directory (the one that contains
manage.py), start the web server:python manage.py runserver - The web server is live now at
http://127.0.0.1:8000/
- Create an application:
python manage.py startapp <app-name> - Notice a new
<app-name>directory has been created and contains a number of files. The project file structure should now look like this:<directory-name> ├── <app-name> │ ├── admin.py │ ├── apps.py │ ├── __init__.py │ ├── migrations │ │ └── __init__.py │ ├── models.py │ ├── tests.py │ └── views.py ├── db.sqlite3 ├── manage.py ├── <project-name> │ ├── asgi.py │ ├── __init__.py │ ├── settings.py │ ├── urls.py │ └── wsgi.py ├── <venv-name> │ └── ... └── requirements.txt- The tool creates a new folder and populates it with files for the different parts of the application (shown in the following example). Most of the files are named after their purpose (e.g. views should be stored in
views.py, models inmodels.py, tests intests.py, administration site configuration inadmin.py, application registration inapps.py) and contain some minimal boilerplate code for working with the associated objects. migrationsfolder stores "migrations" – files that allow you to automatically update your database as you modify your models.__init__.pyis an empty file created here so that Django/Python will recognize the folder as a Python Package and allow you to use its objects within other parts of the project.
- The tool creates a new folder and populates it with files for the different parts of the application (shown in the following example). Most of the files are named after their purpose (e.g. views should be stored in
- Register the application with the project so that it will be included when any tools are run (like adding models to the database, for exmple). In
mysite/settings/py, findINSTALLED_APPSand add a line containing<app-name>,to the end of the list.INSTALLED_APPS = [ 'django.contrib.admin', 'django.contrib.auth', 'django.contrib.contenttypes', 'django.contrib.sessions', 'django.contrib.messages', 'django.contrib.staticfiles', '<app-name>', ]
- Create your model files in
<app-name>/models.py - Add your new models to the database:
python manage.py makemigrations <app-name> python manage.py migrate <app-name>- The
makemigrationscommand creates (but does not apply) the migrations for all applications installed in your project. You can specify the application name as well to just run a migration for a single app. - The
migratecommand is what applies the migrations to your database. Django tracks which ones have been added to the current database. - You should re-run migrations whenever you make significant changes.
- The
- In order to make your models visible on the admin page, open
blog/admin.pyand replace its contents with the following:from django.contrib import admin from .models import <Model-Name> admin.site.register(<Model-Name>)
- Create a superuser – a user account that has control over everything on the site:
python manage.py createsuperuser - Follow the prompts to enter your username (lowercase, no spaces), email address, and password. For example:
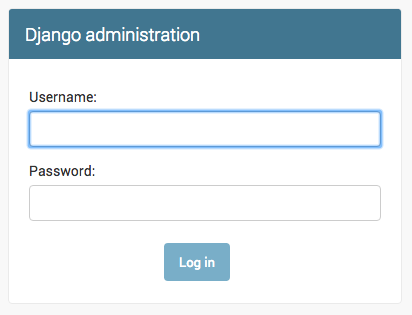
Username: matt Email address: matt@example.com Password: Password (again): Superuser created successfully. - Make sure the web server is running (
python manage.py runserver) and go tohttp://127.0.0.1:8000/admin/in the browser, and enter your login information.