- Is this guide for you?
- What you'll need
- Notable theme features
- Download, install, activate
- Sites library
- Plugins
- Frontpage sections
- Translations with WPML
- Conclusion
This will give you steps to install the free version of Hestia WordPress theme, cover its most interesting features, and show how to quickly set up basic translations with the WPML plugin.
- Basic familiarity with WordPress
- A web site with access to the WordPress admin dashboard
- Access to the WMPL WordPress premium plugin
- One-page responsive theme - the entire site can live on one page
- Includes "sites library" frontpage demos for various use cases (e-commerce, travel agency, gym, etc.)
- WooCommerce compatible: many shop settings can be modified right in the customizer
- Sticky header - called Very Top Bar - with plenty of configurations
- Uses Google Material design - helps promote consistent UX across web sites
- First, log in to your WordPress dashboard (WP-admin). On the left side click on
Appearance > Themes.
2. Click on the Add New button at the top of the screen:

- At the top right in the
Search themes...box type in "Hestia"
4. Mouse over the one search result and click on `Install`
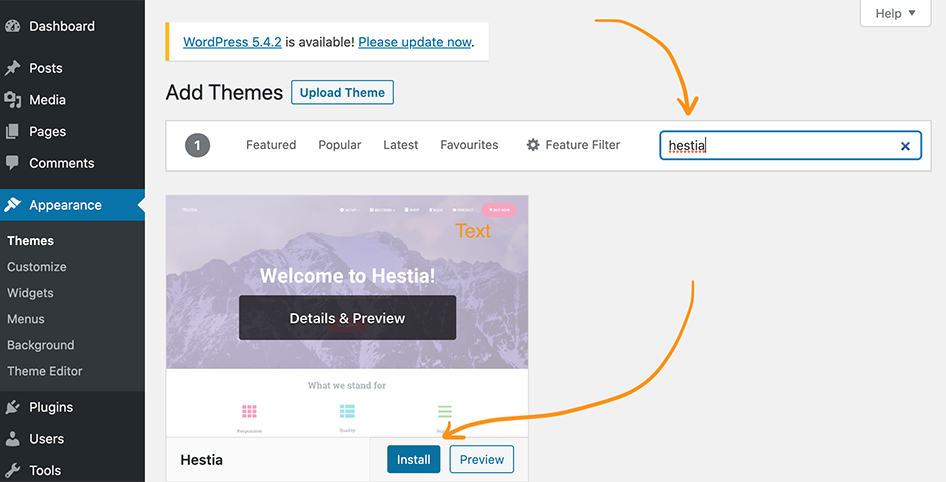
- Once the theme files finish downloading the same button will change to
Activate- click on it. After this, the theme is installed!
These are a great starting point if a new blank theme leaves you wondering what to do next.
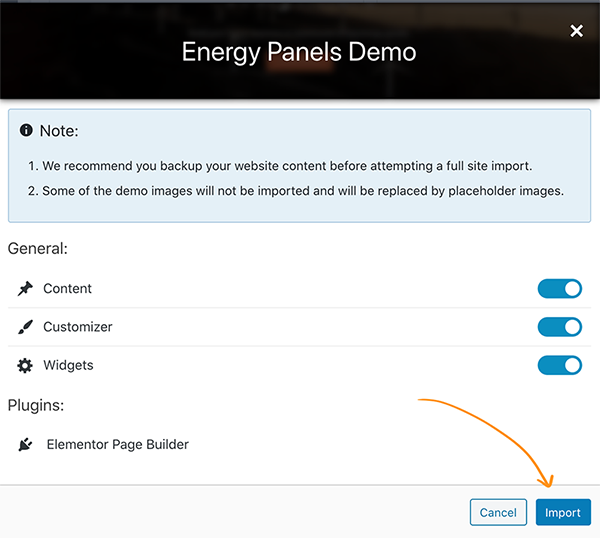
Here we will import the Energy Panels Demo to play with:

After clicking on Import you'll see a modal dialogue:
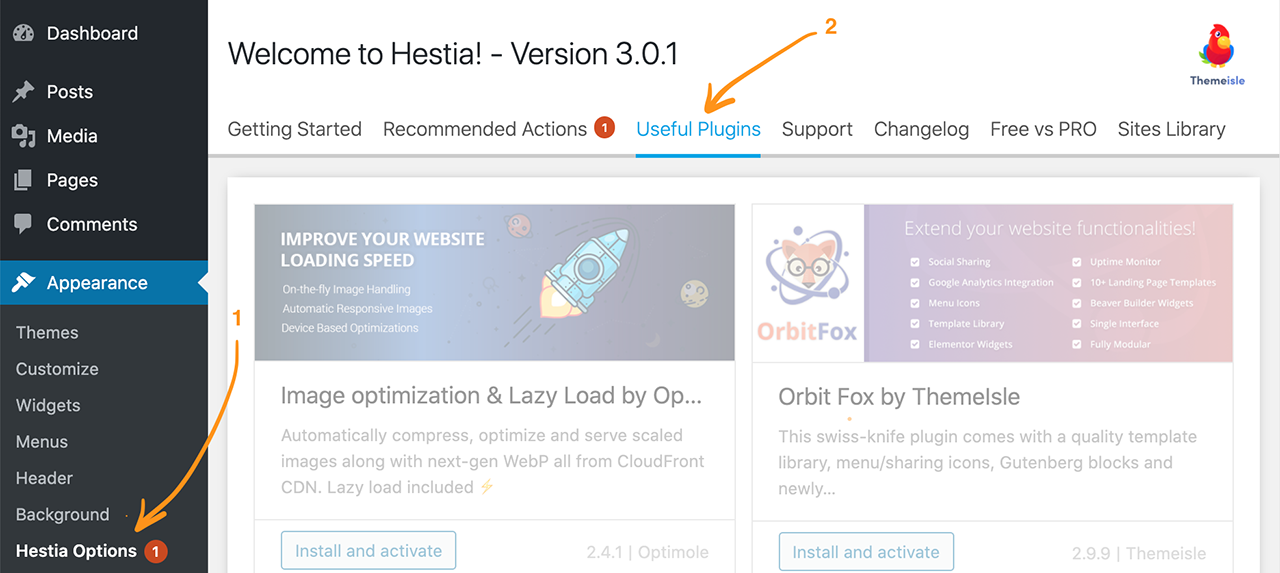
Hestia theme developers recommend these plugins:
- *️⃣ WPForms Lite - contact forms that easily integrate with the theme
- *️⃣ Orbit Fox Companion - needed to enable some sections on the homepage (Team, Testimonials, Features, Ribbon, and Clients Bar)
- WooCommerce - can have an e-commerce store right on the site's homepage
- SendinBlue - allows you to send out email and newsletters
*️⃣ Note: you can install these plugins right from theme options:
The frontpage has 11 highly customizable sections. In the admin dashboard, they live under Appearance > Customize > Frontpage Sections.
If you pull in one of the demo sites as we did above, some of the sections will be disabled. You can click on a section and uncheck Deactivate to add it back.
Note: Orbit Fox plugin needs to be active for these sections: Team, Testimonials, Features, Ribbon and Clients Bar (maybe integrate it into the main list with an asterisk or a table)
If you want to reorder the sections you can buy the Pro version of Hestia theme.
Click here to see the unique features of each section.
Here's how to set up a multilingual site with Hestia and WPML plugin.
Note: If WPML is already active and configured, skip to Translate frontpage content.
- At a minimum, you want to install and activate these plugins:
WPML Multilingual CMS,WPML String Translation, andWPML Translation Management.
Please click here for detailed steps.
2. Once plugins are activated, `Configure WPML` button will appear at the top:

- At step 1, set the current content language (primary language for the site)
4. Step 2: choose additional languages. For example, French and Brazilian Portuguese
5. You can leave the other settings as is or tweak as needed. Just make sure you go through all the setup steps till the end and click `Finish`.
You are now ready to start translating your content.
We will focus on translating the static frontpage here. The other scenario is having the latest posts show up on the homepage: click here for instructions.
- Go to
Dashboard -> Pagesand add a new page for your language:

- In the menu on the right click
Copy content from English- you can replace English strings with French translations later.

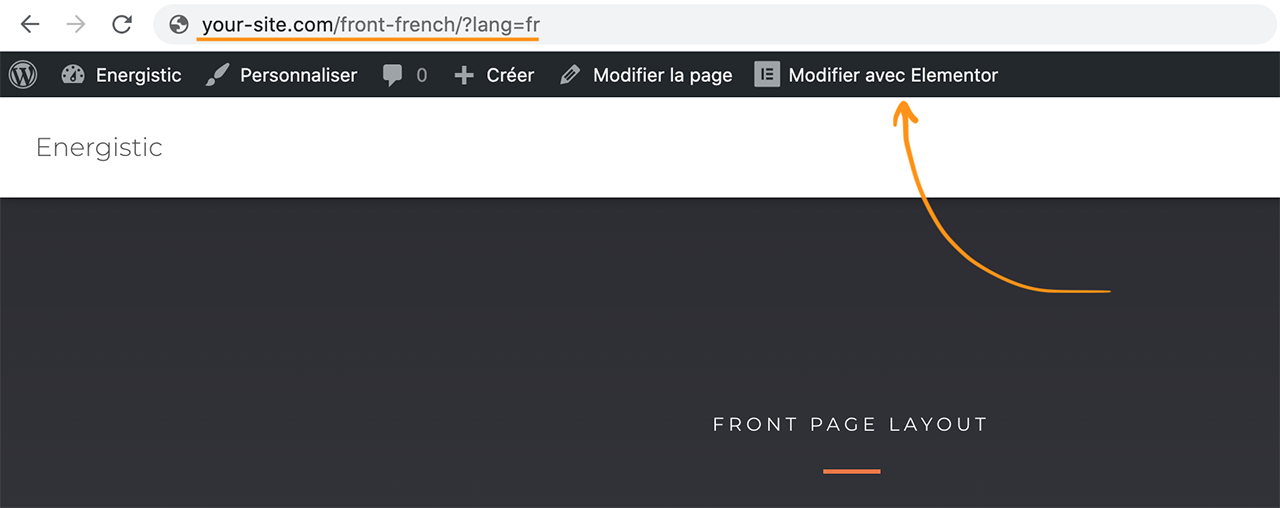
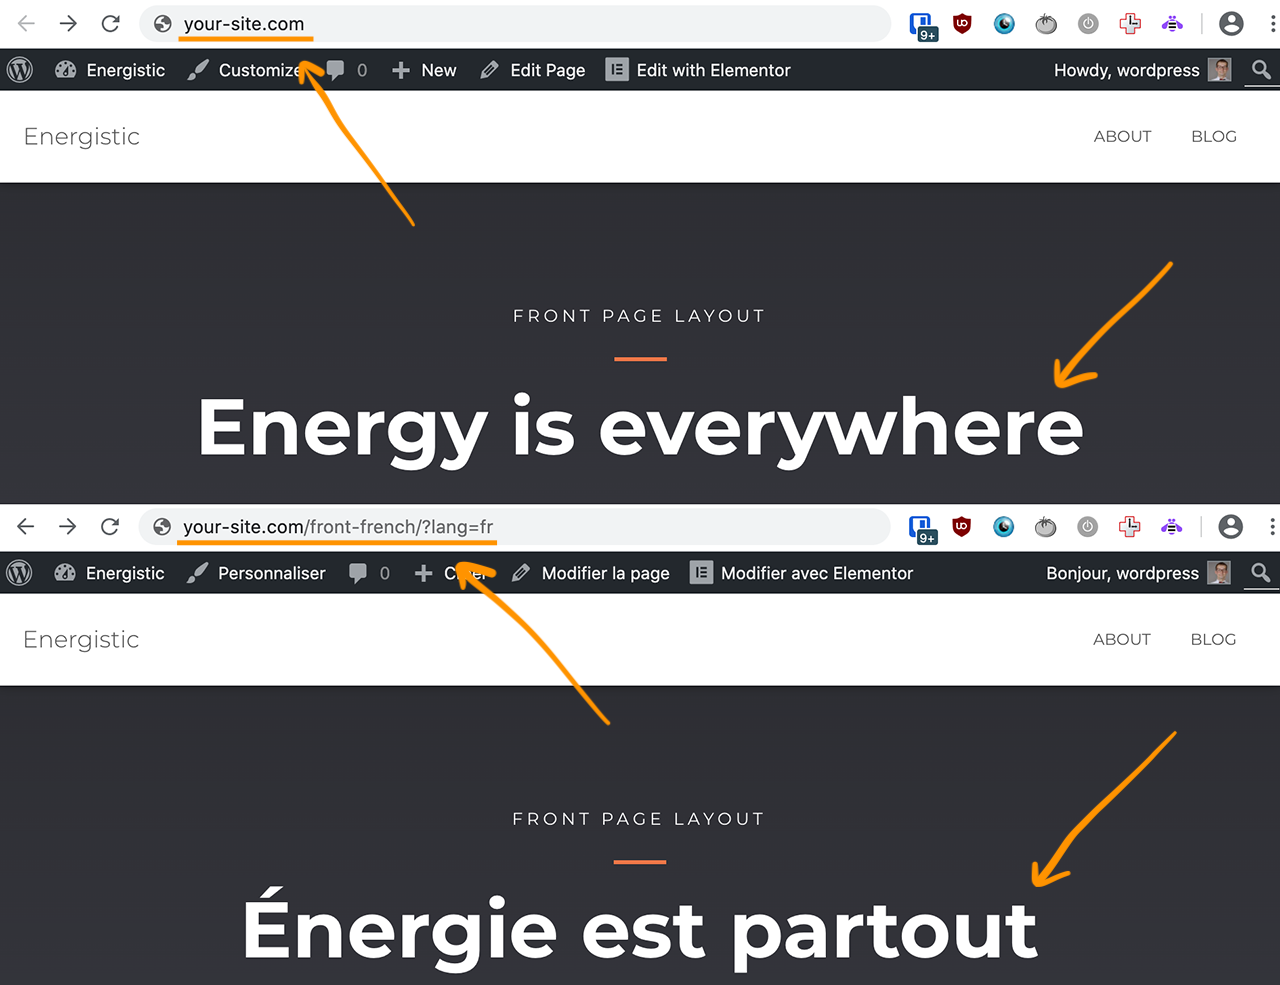
- Change the page title to something different, such as
Front - French, then clickPublish...at the top right, thenPublishagain. Done - you can clickView pageto get to the French version. Notice the URL in the address bar will be something likesite.com/front-french/?lang=fr
4. It's time to translate some text. We are using Elementor - one of the recommended page builders for Hestia. The theme is compatible with most popular page builders, so this step will be similar. We can click on `Edit with Elementor` (or `Modifier avec Elementor` in French) at the top and update each section with translated text.
We now have our home page in 2 languages:
Note: this assumes we have set the Permalink settings to "Day and name" beforehand.
If we want to be able to navigate between our translated pages, we need to translate the main menu.
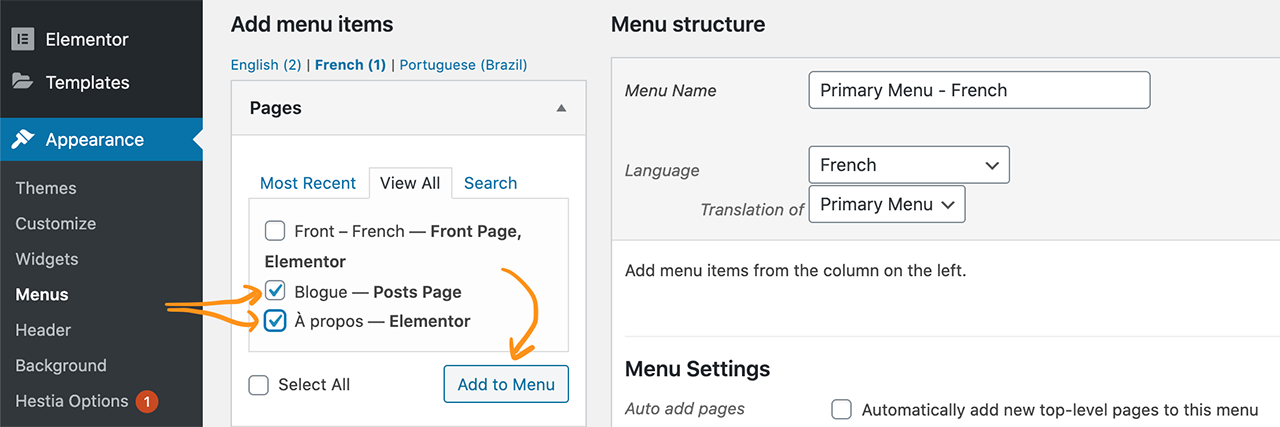
- First, make sure you have translated all the pages that you want on your translated menu.
2. On the left side, find `Appearance -> Menus`.
3. Now you can click on either link to create a new menu translation:

- Give the menu a clear name - for example,
Primary Menu - French. Then add pages to it:
Note: creating menu links to sections of the home page is a bit more involved, please click here for instructions.
One more step. Let's say we want a link to the translation for the current page to show in the main menu, next to the other items.
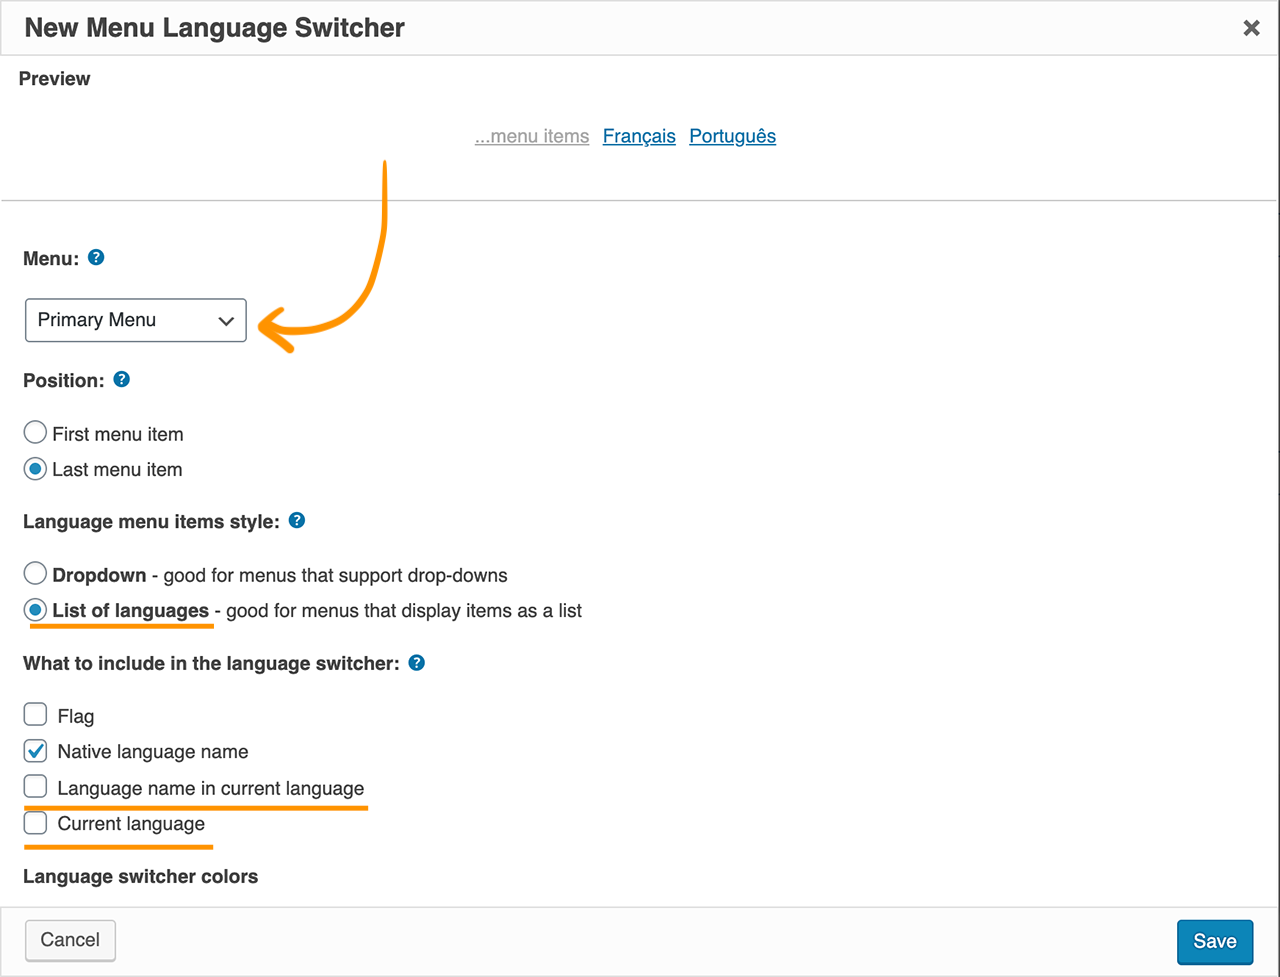
- In the left menu click on WPML at the bottom and find
Menu language switchersection. Click onAdd a new language switcher to a menu.
6. Pick `Primary menu` in the drop-down and customize the look:
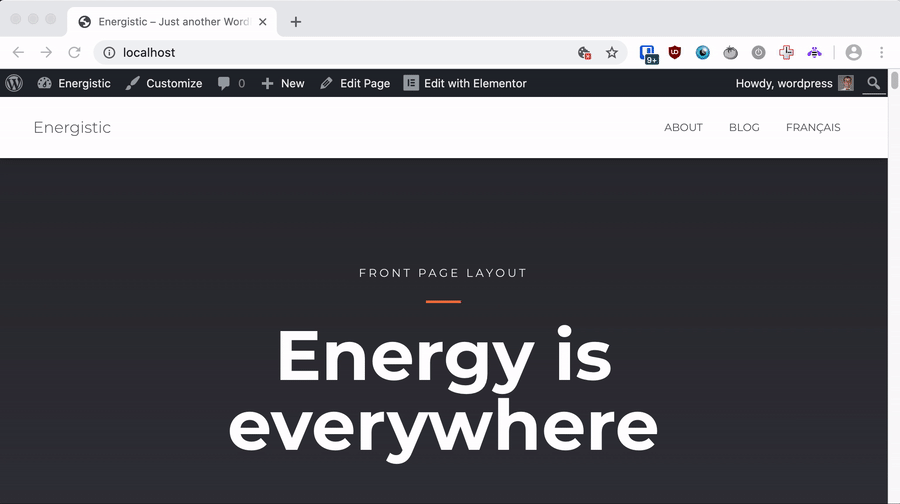
Once you save you should be able to click between your translations:
Overall Hestia WordPress theme is a clean, functional, and flexible single-page theme that plays well with major page builders. It integrates well with WooCommerce and is simple to get started with. It's also straightforward to set up for a multilingual web site.